Installing Accessories on an RV

How to add an accessory to your RV

Wires are just like water pipes in that you can only pump so much stuff through a given size pipe without losing pressure. If you try to send too many amps through too small of a wire the voltage will drop, the wire will get hot, your device won’t run properly, and you’ll probably blow the fuse for that circuit. The chart below will give you a good idea as to what wire gauge you will need to use if you want to add an accessory to your RV.

Wire Gauge (AWG) Wire Diameter, in Inches Current Capacity, in Amps
0000 .4600 600
000 .4096 500
00 .3648 400
0 .3249 320
1 .2893 250
2 .2576 200
4 .2043 125
5 .1819 100
6 .1620 65-80
8 .1285 40-50
10 .1019 30-33
12 .0808 20-23
14 .0641 15-17
16 .0508 7.5-10
18 .0403 5
20 .0320 3.3
24 .0201 1.3
28 .0126 0.5

For example, if you want to add a small fan to your RV that has a motor rated at a 4 amp draw you will need to go with a #18. The 20 gauge wire is only rated for 3.3 amps while the #18 can safely handle up to 5 amps so you always round up. If you want to install a water pump that pulls 20 amps, you’ll need to use a #12 wire. If you want to add an inverter and its DC battery draw is 400 amps you will need a #00 wire. Keep in mind that you can always go to a larger wire gauge without any bad results but you can never go smaller. Also, the length of wire will also affect its ability to carry current. If you are running long runs of wire you may need to increase the wire gauge to allow for the extra resistance incurred by the extra lengths. In this case, use the above wire gauge chart conservatively when choosing which wire gauge to use. Going larger is always a safe bet.


RV Inverters and Chargers

Inverter/chargers do have on/off buttons to disable either or both functions but they are not normally needed because the inverter/charger will automatically switch back and forth as needed. However, when the coach is stored it’s not enough to switch off your output circuits. An inverter will have a slight idle current even while not in use if it is allowed to be powered up. When storing your coach without shore power be sure to switch off your inverter and charger at the inverter itself to eliminate the idle current from slowly draining your batteries.

A Xantrex inverter/charger

A Xantrex 2,000-watt true sine wave inverter/charger

RV Inverter Installation

If your RV doesn’t have an inverter, but you would like to install one, be sure to download a copy of the manufacturer’s installation manual from their website and read it first before buying your inverter. Inverters do need the proper environment. True sine wave inverters can create a fair amount of heat. If you place them in a large basement pass-through storage area you’ll be fine but if you place them in a small enclosed compartment they will overheat. In that case you’ll need to provide some intake air as well as a place to exhaust the heat, preferably with a fan.


Automatic Generator Starting:

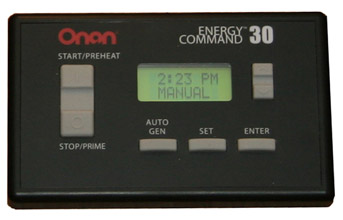
Automatic Generator Start (AGS) systems do just what you think they might do – they start your generator set automatically, even if you are not near the coach. These systems vary in complexity and design. Some systems are standalone systems and are simply a module that connects to your generator set to start it if your batteries get low. Some systems, such as the Onan EC-30, are an all-in-one system that builds the circuitry into its remote display and control panel. This system design also includes a thermostat interface so that it can start your generator in response to a request for cooling from the air conditioner’s thermostat. Other systems, such as the Xantrex and Magnum AGS modules, are designed to network with an inverter and use the same remote display panel as the inverter to control both the inverter and AGS module via menu driven software. So there are a number of options and choices available when selecting an AGS module.

Onan EC-30 Automatic Generator Start (AGS) module

The Onan EC-30 Automatic Generator Start module.

Selecting an AGS System for your RV

The first thing to do is determine just why you want an AGS system in the first place. If you are only going to run your generator to power air conditioning when driving you probably don’t need one. If you will be dry camping quite often you will need to run your generator every now and then to recharge your batteries. If your batteries drop below a given voltage your AGS can start the generator set for you automatically while you are off sightseeing so that you don’t return to a dead coach. This is the basic feature of any AGS system. You can also recharge your batteries while you sleep if they drop down during the night without having to worry about setting your alarm clock. Many campgrounds do have a quiet time posted where no generators may be run during the evening but more advanced AGS models include a quiet time setting that can be set. In that case the AGS module will not start your generator during those quiet time hours and will wait until morning to auto-start. Some models, like the Onan EC-30, include predictive scheduling. The AGS will monitor your battery voltage level and if it determines that it will need to recharge them during quiet time, it will start the generator earlier and then shut off so that they will be recharged when your quiet time begins. 

The next level includes a thermostat interface. Your AGS system will be connected to your air conditioning system’s thermostat. If a request for cooling occurs, the AGS will start your generator and power the air conditioning system to prevent your coach from overheating. Some systems also include a shore power connection so that the AGS will only start the generator if there is no shore power present. This is a great feature for RV owners who have pets and normally camp in full service campgrounds. The shore power will power your coach’s air conditioners to keep your pets from overheating. But, what happens if the shore power was to go out or the pedestal breaker tripped while you were away from the coach? Your air conditioners would stop working and you might be returning to a coach with pets that suffered heat stroke.

If you have an AGS that does not have a shore power sense, but does have a thermostat connection, you’ll find that the generator will start up every time the thermostat calls for cooling – even when the shore power is functioning. This is not desirable so you will have to install a relay that is fired by the shore power side of the transfer switch and then intercept the low voltage wires that connect the thermostat to the AGS module. This will break the circuit whenever shore power is present so that the AGS never sees the input signal from the thermostat. When the shore power fails the relay will allow that connection to take place. With an AGS that has shore power sense you won’t have to worry about that. All of the logic is handled within the AGS electronics and it won’t start the generator if shore power is present. If shore power fails and cooling is desired it’ll start the generator and your pets will be safe.

If you have a Silverleaf or Firefly networked whole coach system that controls most coach functions via a multiplexed network you most likely have a bridge, which is a device that bridges the communication with the inverter/charger and the Vegatouch control system. This allows complete control of the generator and AGS module via the master control touch screen in the coach.

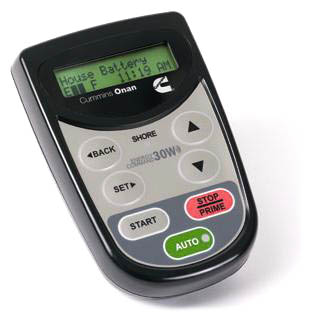
wireless controller for the Onan EC-30W AGS module

The Onan EC-30W AGS unit uses a wireless controller

Installing an Automatic Generator Start

Installing an AGS module requires a bit of work. You need to run wiring connections to the transfer switch mounted transformer as well as the batteries, generator start-stop switch, remote control panel and HVAC thermostat. Fishing all of those wires can be tedious and sometimes difficult. 

Wireless units will save you some time by allowing those connections to be performed under the floor in the chassis area, using wireless operation to the remote display panel in the RV. The Onan EC30W is the premier wireless system. The remote unit communicates wirelessly to the main harness and even contains a temperature sensor so that you don’t have to tap into the existing HVAC thermostat.

You do have to be careful of where you place the remote though. If you set it in a hot spot it’ll be triggering the generator prematurely. You also run the risk of communications failure, which can happen with any wireless electronic device, particularly when you consider that the signal needs to pass through the motorhome’s steel firewall.

Winnebago RV’s Accessibility Enhanced (AE) Units

Winnebago Offers Accessibility Enhanced Class A and Class B RVs

The Winnebago brand has always been known for enabling its customers to live the life they want to live. Whether for grand outdoor adventures, daily commutes or weekend play, Winnebago offers an RV for everybody, innovating year after year and raising the bar for industry standards. 

Now, the company with more than 60 years of RV experience adds to its legacy by offering two unique Accessibility Enhanced (AE) vehicles: the easy-driving Winnebago Roam and the tactfully luxurious Winnebago Inspire.

Winnebago Roam, Class B RV

The Winnebago Roam is a Class B RV that offers conveniences for both daily driving and epic expeditions. Built on a Ram ProMaster® chassis, a 280-hp 3.6L V6 gas engine powers the Roam while 4-wheel ABS brakes safely bring it to a halt. The model comes in three floorplans, each at 19’9” in length and featuring a Braun UVL wheelchair lift with wireless remote for easy in/out access. 

National Indoor RV Centers blog Winnebago Accessibility Enhanced (AE) Units Class B motorhome Winnebago Roam

The Winnebago Roam is a Class B Accessibility Enhanced (AE) RV

Roam U59RAC floorplan

The entry level Roam, the U59RAC floorplan sleeps two (2) and features a motorized sofa bed, wet-bath, refrigerator, microwave and sink, facilitating full-time living on-the-go. Specially-designed storage, lowered countertops and pull-down cabinets offer access while seated, and integrated tie-downs offer a secure ride during travel. 

National Indoor RV Centers blog Winnebago Accessibility Enhanced (AE) motorhome Class B Roam rear interior

The Roam’s powered reclining sofa/bed sleeps two and leaves extra room for storage.

Roam U59RPT floorplan

The U59RPT builds upon the design of the U59RAC, expanding upon available space through its pop-top roof. This, along with the powered reclining sofa/bed, increase the sleeping accommodation to four (4) persons.

Roam U59RX floorplan

The all new RX is coming soon – and we can’t wait to see what it has to offer!

Winnebago Inspire, Class A RV

The Winnebago Inspire is a Class A RV that brings customized comfort to the [world] of luxury coach travel. Coming in at 35’9” in length, the Inspire rides on a Freightliner® XCS 26,000-lb. chassis, easily capable of supporting the impressive 340-hp Cummins® ISB 6.7L diesel engine.

National Indoor RV Centers blog Winnebago Accessibility Enhanced (AE) Units Class A Inspire motorhome

The 800-pound lifting capacity, coupled with powered swinging door, make entering and exiting the Class A coach simple, while a wall-mount and key-fob remote offer independent use. 

Independent passage into and out from the coach is simple thanks to an 800-lb. capacity platform wheelchair lift that features wall-mounted and key fob remote controls. Once inside, you’ll notice the spaciousness of the interior, facilitating everyday living. An extendable dinette offers convenient wheelchair access but retracts for added space when not in use. An enlarged hallway allows for easy movement throughout the coach and a larger bathroom with roll-in shower offers simple accessibility. 

All of the coach’s controls have been thoughtfully designed and carefully placed within reach, including system monitors, generator, light-switches and remote-controlled roof vents. As with all Winnebago diesel pushers, the Inspire comes with a 3-year/100,000 mile warranty. 

National Indoor RV Centers blog Winnebago Accessibility Enhanced (AE) Units Class A Inspire motorhome interior galley
National Indoor RV Centers blog Winnebago Accessibility Enhanced (AE) Units Class A Inspire motorhome interior bedroom

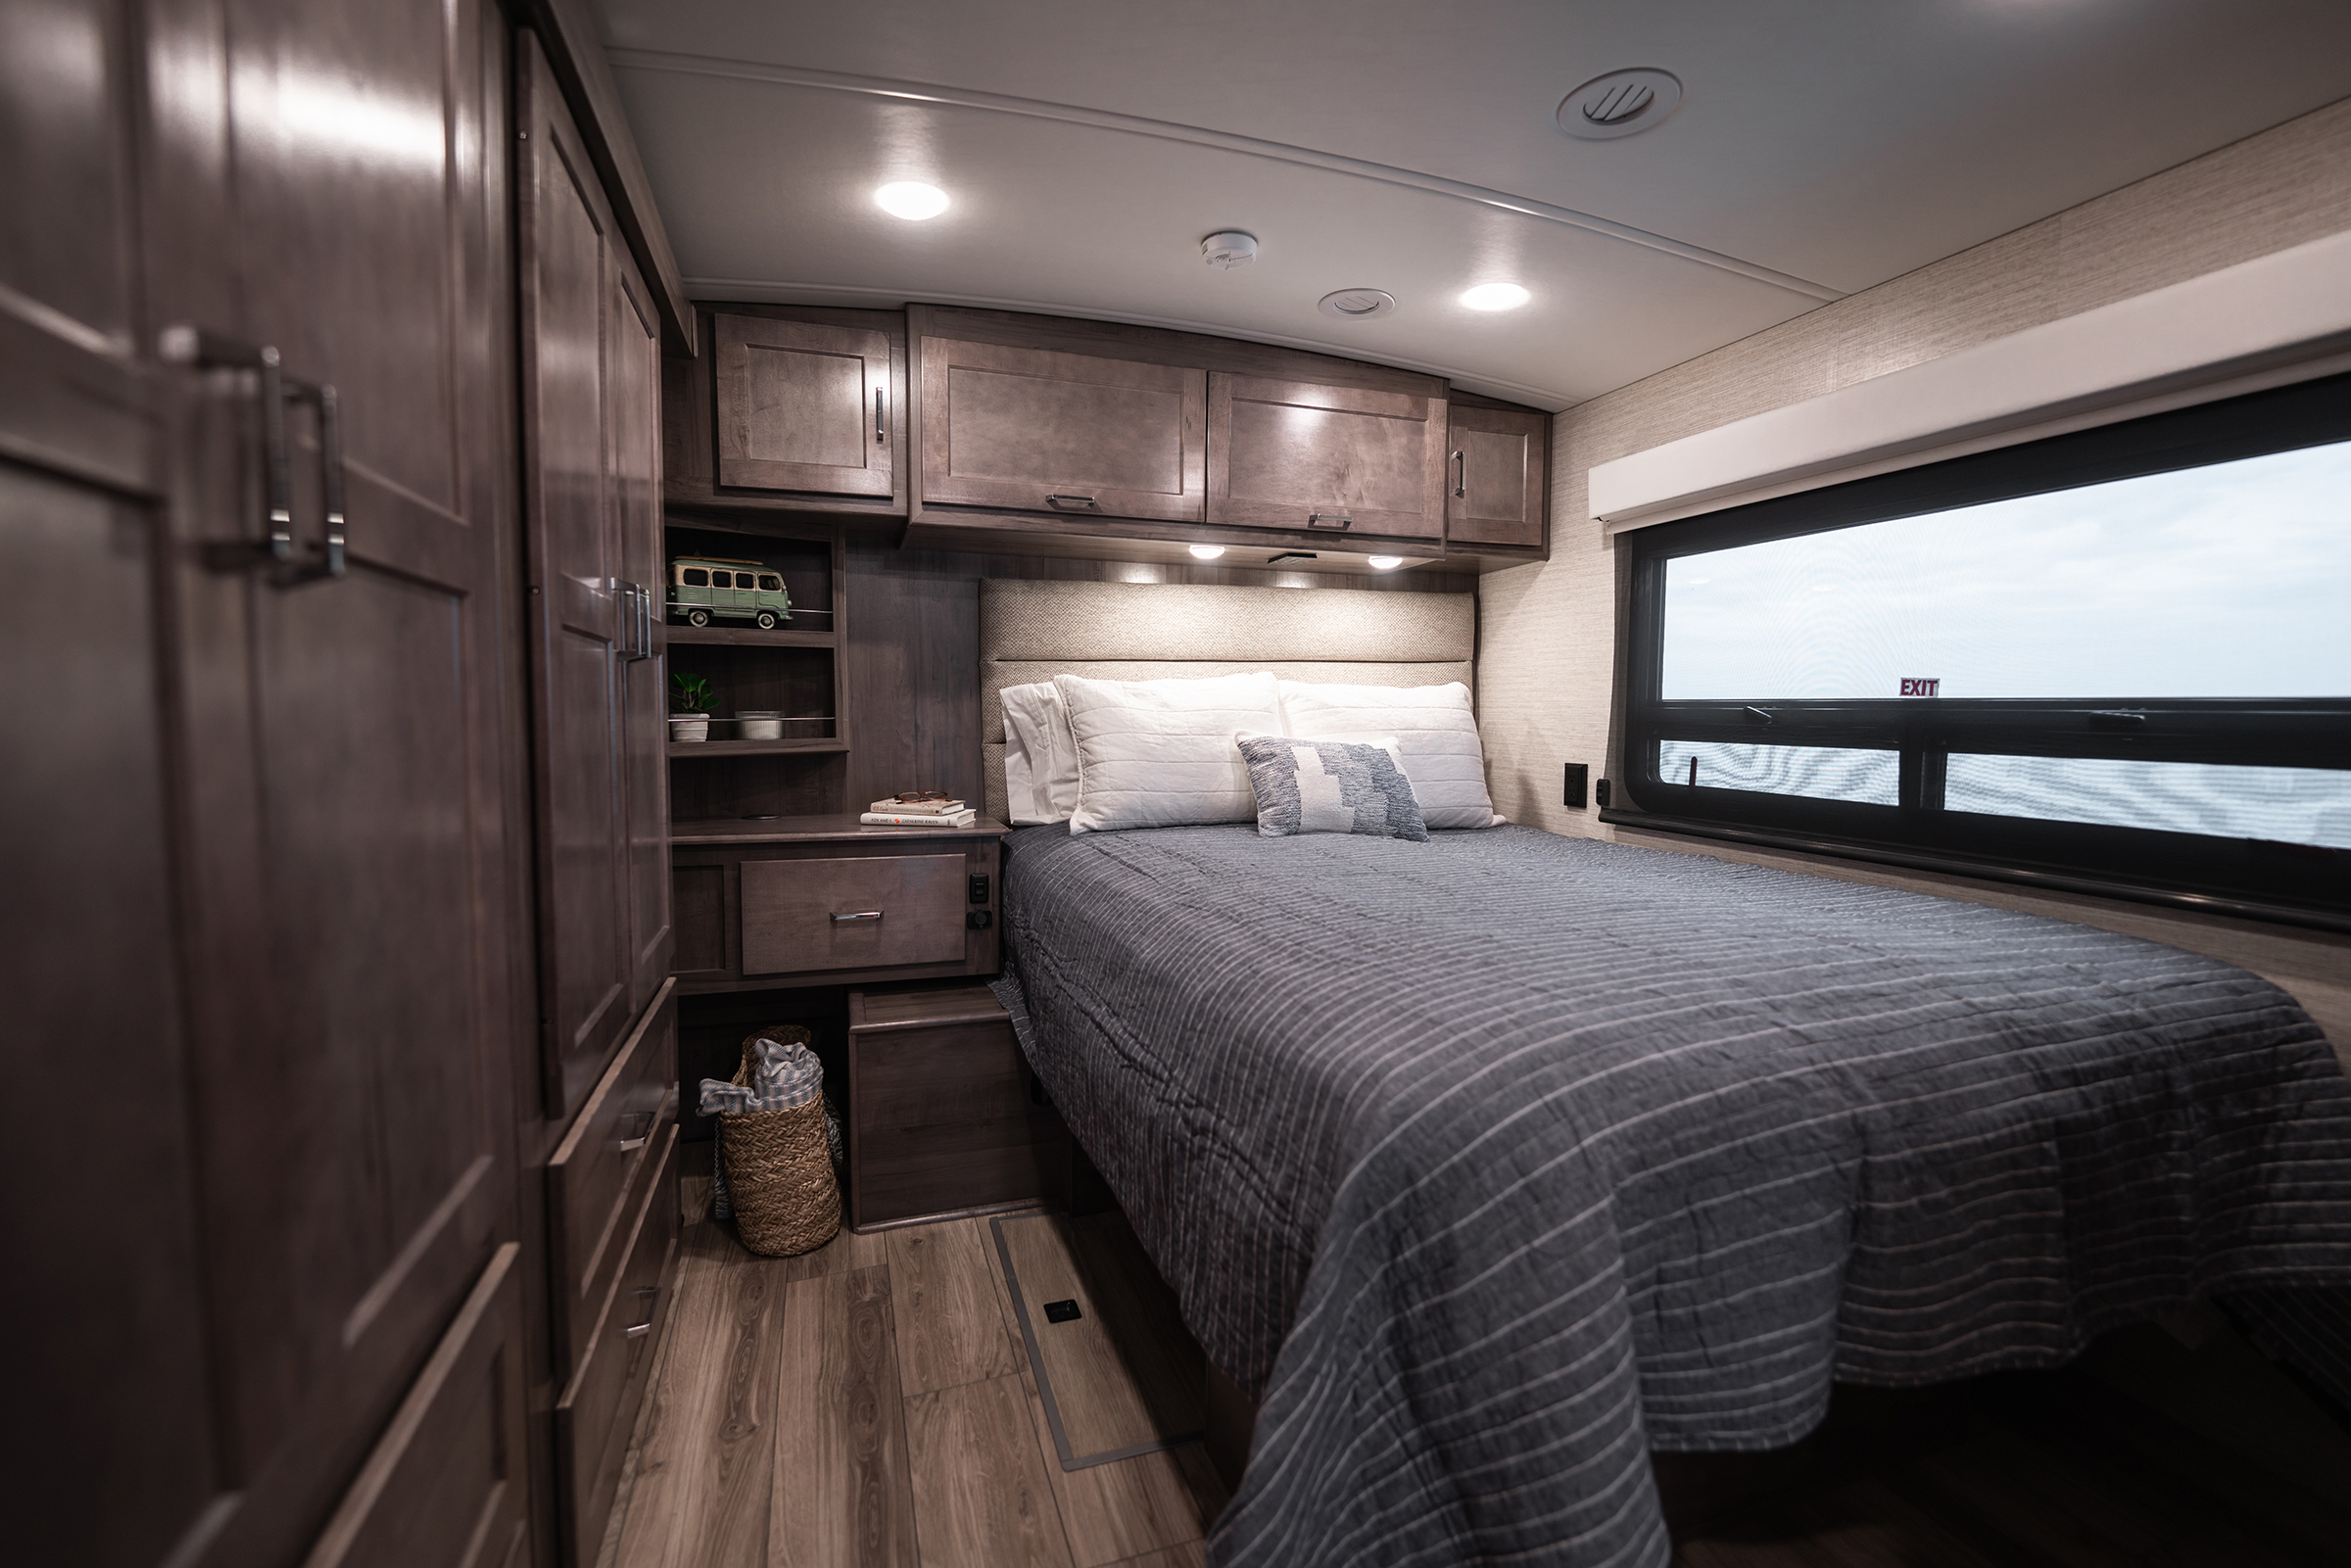
The interior of the Winnebago Inspire is enlarged to accommodate easy mobility.

Winnebago’s AE units add to an impressive and influential legacy. NIRVC is proud to work with the esteemed brand and have been recognized as a top Winnebago dealer. We currently offer the Roam camper van at our Las Vegas and Washington D.C. locations, with more coming elsewhere, soon. Be sure to check our current inventory for up-to-date listings.

Concierge Motorhome Storage with National Indoor RV Centers

Concierge Storage at National Indoor RV Centers

Storing your coach should be easy, convenient and safe. It’s the principle that NIRVC was founded upon and what we strive for each and every day. 

Concierge indoor storage and service are offered at five convenient NIRVC locations:

Atlanta – (770) 979-4051
Dallas – (469) 277-1330
Las Vegas – (702) 766-7770
Phoenix – (520) 442-2500
Nashville – (615) 527-8960 

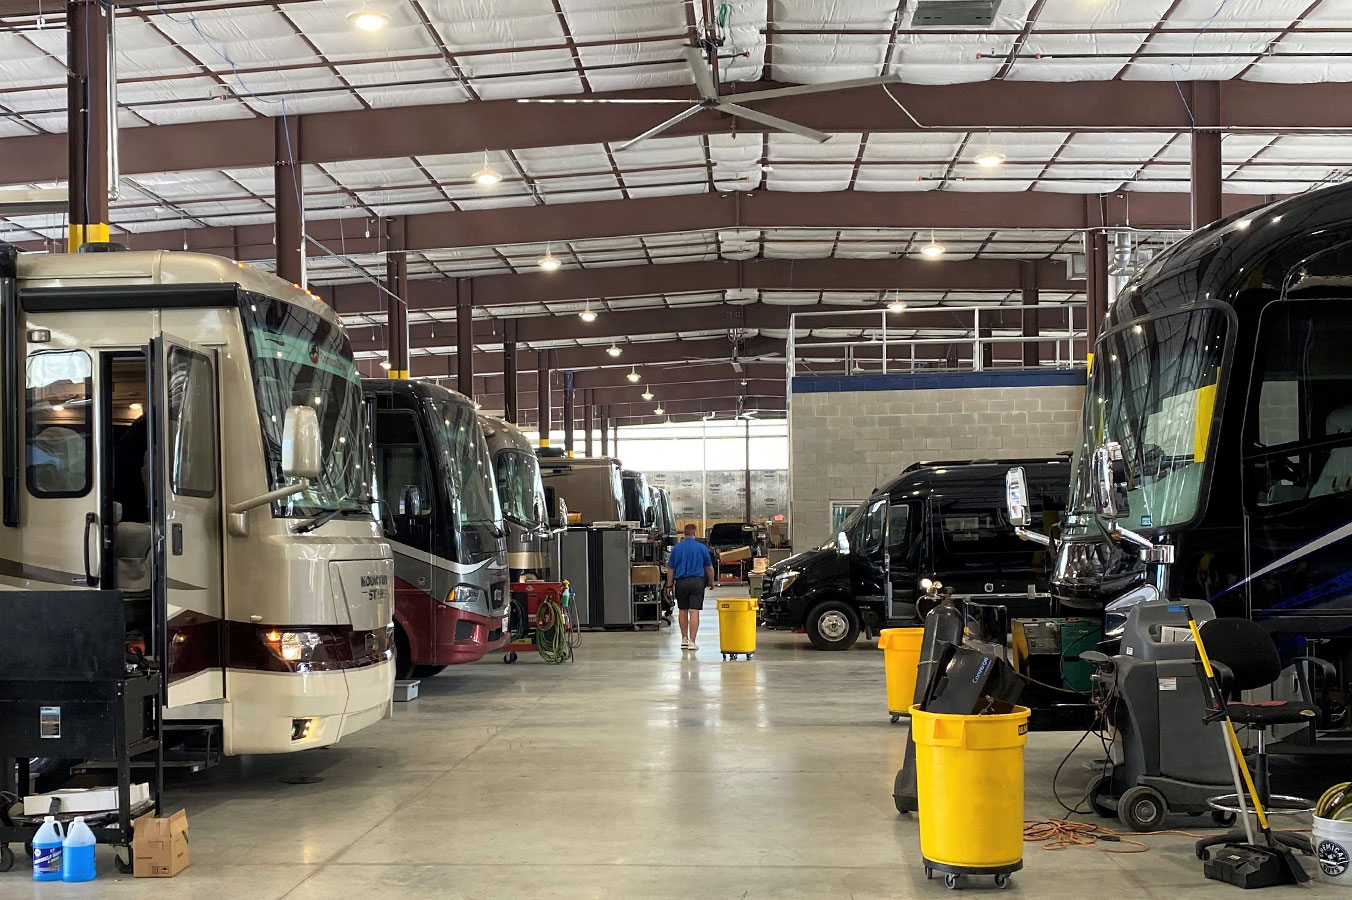
From the moment you arrive, we want you to feel cared for – so you’ll receive valet car service at drop-off and pick-up. While your coach is with us, there’s no need to winterize. Your motorhome will get periodic engine starts to ensure the engine is properly lubricated. Tire position will be changed to prevent flat spots and routine chassis & motorhome maintenance can be performed upon request. This care comes in addition to a secure, indoor environment that eliminates exposure to intense summer sun and harsh winter conditions alike. 

New RV Models getting cleaned up for show

Security is a priority at NIRVC. We utilize a state-of-the-art security system complete with individualized entry codes. We absolutely insist on well-lit exteriors and deploy both exterior and interior video cameras, adding signage to note that the facility is under continuous surveillance. 

But it doesn’t stop there! To get your coach ready for travel, we check and adjust tire pressure, fill the fresh water tank, turn on your refrigerator and adjust the water level for lead acid batteries. 

When you arrive back at our storage facility to return your rig, you can conveniently dump your tanks onsite, or we’ll dump them for you for a modest fee. Then, simply leave your coach along with any special storage or maintenance instructions you may have, and we’ll follow them to a tee. Your (freshly detailed) car will then be ready to carry you home. 

Our approach to one-stop storage, service and repair makes RV ownership easy. While your motorhome is stored, we can perform any and all warranty service for the chassis and indeed, the entire motorhome. We work with all manufacturer warranties and extended service plans. Collision repairs, as well as Paint & Body upkeep, are performed onsite in our body shops. We work with all insurance companies to make things easy on you, and your wallet. And to preserve your coach’s beauty and functionality, we provide external and/or internal washing and detailing, upon request.

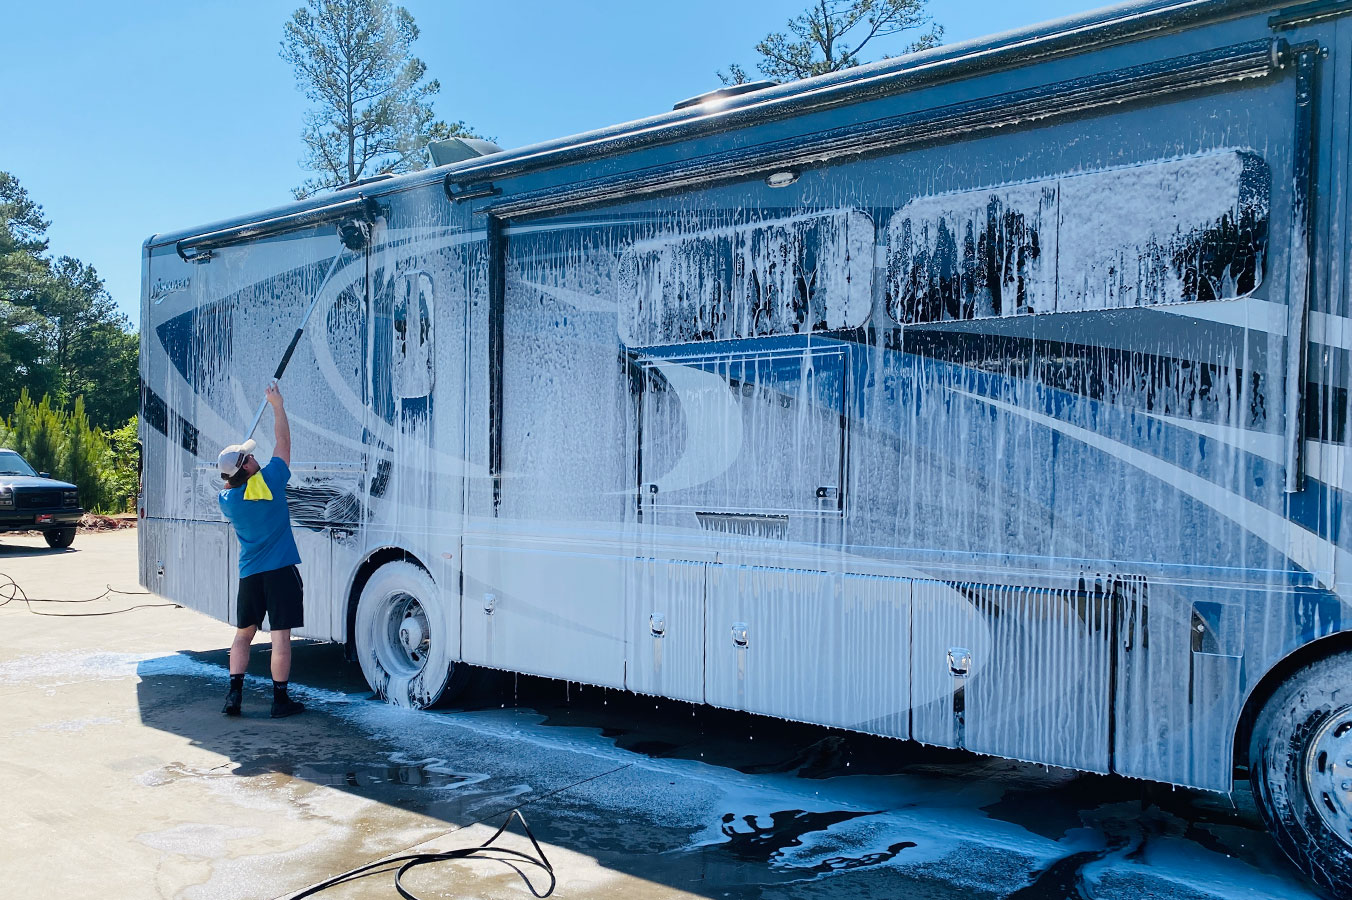
Tips Tricks - Washing your RV

Don’t entrust your RV to just anyone – put your coach into the hands of people who know the industry and the lifestyle best. Learn more about our concierge indoor storage by visiting our locations page and, when you’re ready for the best storage available, give us a call!

Surprise! New Storage Facility for Hundreds of RVs

Book storage at NIRVC Phoenix for just $11/ft per month! In addition to your RV, we’ll also store your boat and towable! Inquire about availability today.
New storage customers only. 

National Indoor RV Centers is erecting a brand new, state-of-the-art, 130,000-square-foot facility that’s dedicated to safely and securely storing RVs. The building, which is expected to be completed in June, will have capacity for more than 200 motorhomes and is located across the street from our RV Lifestyle Center at 11280 N. Solar Canyon Way in Surprise, AZ.

NIRVC to Expand Offerings

Upon completion of the storage facility, we’re expanding our service capacity by adding more than a dozen new bays and upgrading our lot to accommodate more inventory. Upon completion, the Phoenix location will have 600-700 units onsite between storage, sales and service.

From Pick Up to Drop Off

Our concierge storage makes beginning and ending an RV trip easy and convenient. 

When coach owners are ready to hit the road, our technicians prep your coach for travel. They’ll check and adjust tire pressure, fill the fresh-water tank, adjust or fill the water level for lead acid house batteries, turn on the refrigerator and store the owner’s car – we’ll even detail it, upon request!

When returning from travel, simply place your motorhome in our expert hands and hop into your waiting car. NIRVC has on-site dump tanks for owners’ use or, for those who prefer to avoid that task, we can handle it. 

While in storage, our technicians conduct periodic engine starts to lubricate the engine and change tire position to prevent flat spots. Additionally, routine chassis and motorhome maintenance, collision repairs and paint and body work can be performed upon request. Finally, owners can give their motorhome some TLC with a professional wash and detailing while the unit is in storage.

Security a Priority

To ensure your RV is stored safely, NIRVC has a state-of-the-art security system, exterior and interior video cameras, exterior signage noting the facility is under video surveillance, a well-lit exterior and individualized entry codes. 

NIRVC Phoenix Location Details

Address: 11280 N. Solar Canyon Way, Surprise
Sales Hours: Weekdays 9 a.m. to 6 p.m. and Saturday 9 a.m. to 5 p.m.
Service Hours: Monday – Saturday 8 a.m. to 5:30 p.m.

NIRVC’s Brett Davis Featured On KRLD Radio

Our very own CEO Brett Davis was recently featured on CEO Spotlight with David Johnson on Dallas-Fort Worth’s KRLD News Radio. During the roughly ten-minute segment, Brett touched on the RV industry – from the boost in popularity during the pandemic to the upward trend of working full-time from one’s motorhome.

Transcript from the Interview

David Johnson:

The recreational vehicle businesses, is-it’s an interesting business. They’re all classes of recreational vehicles. On the one hand, they’re are the ones that you’re on Brett, to go see the Grand Canyon, and then there’s the ones that Dolly Parton drives around in. Brett Davis is the Founder, President and CEO of National Indoor RV Centers. And he handles all of them. He buys them, he sells them, he repairs them, he shelters them, and he joins us right now. It’s good to have you with us. 

Brett Davis:

Thank you, David. Great to be here. 

David:

Yeah, the more I get into your business, it really is a very business. I mean, it goes all the way for these little, little Winnebagos, I guess, to these gigantic coaches, that must cost a million dollars apiece.


Brett:

That’s correct, for us. It’s, our lowest is probably somewhere in the mid 60s. And it goes all the way to a million and a half. 


David:

Wow. Your business is, I would guess that it got a real boost, or the RV business in general, must have gotten a real boost during COVID.


Brett:

It certainly did. I mean, the industry peaked last March or April let’s say, and from trough to peak, it’s a 48% increase, the largest increase in the history of the industry, and now we’re starting to retrace some of that. 


David:

Which is, I mean it’s sort of a cyclical business anyway. 


Brett:

Yes it is.


David:

But let’s talk about National Indoor RV Centers. Because I guess one of the things is, it’s appealing to buy one of these, especially retirees, and empty nesters, but when you take it home, I mean, it’s not the kind of thing you could park in the driveway, and certainly not on the street? 


Brett:

No, no. Storage is one issue. And I would say as important or more important than the name on the side of the coach, is the dealer you purchased it from for after the sale service. Remember, this is a house that’s bouncing down the road in earthquake conditions, and gale force winds, and there are always repairs. And it takes a lot of fun out of it if it takes you eight, nine months to get into a service and…


David:

What is it? Is it kind of like buying a boat?


Brett:

Very much, not quite as expensive as a boat. Gas mileage is a little better. But yes, everything else is similar. 


David:

But that’s part of the cyclicality too, as I think about it as gasoline prices, and in particular, I would guess a lot of these run on diesel, 


Brett:

Correct.


David:

and fuel prices went up, and diesel went up along with it. Never seem to come back down again. Did that cut into the market?


Brett:

No, I seen that a few times and it just never does. But the average coach on rural drive on coach is 9,000 miles a year. If you go back on what you have done and you look at the lowest cost of diesel in the last 15 years and the highest cost, and do the math. The delta there is only $4,300 a year, with an average sales price of $423,000, the $4,300 a year swing in fuel doesn’t make or break that decision by any means.


David:

Right I mean if you can afford that then you can probably afford the fuel bill. What about EVs? If Elon Musk can put out a semi truck trailer, that truck and trailer that runs on electricity, I would guess you could do the same thing with an RV, is anybody working on that?


Brett:

Not that I’m aware of, and I’ll confess right up front I drive a Tesla, so I am an EV user, it follows my footprint out with a Class A diesel coach I guess you’d say. But, no, that will be interesting to see because the amount of storage that would be required for a battery, to run not only the chassis, but the entire house. It’ll be interesting to see what kind of space is left over to store as you travel the country.


David:

So tell me about the market for these vehicles right now, is this as I said, is it sort of empty nesters, retirees?


Brett:

Our customers are across the board. We have those that have saved their lifetime, this is how they were going to retire, they were going to turn the country into their backyard. We have others who buy them for tailgating, going to NASCAR, going to see grandma on the weekends. It really is across the board. The most interesting thing I find though is, right now 38% of our sales are the first time full time buyers. Now that I have found very interesting.


David:

First time I understand. Full-time buyers, what do you mean?


Brett:

They’re buying their first coach, and they’re buying it to live in full-time.


David:

Really?!


Brett:

Yes. They work from the road. 


David:

That’s fascinating. So tell me about the growth of the business. So you’re based in Lewisville. But I know you and I are speaking today, we are in Las Vegas. Now you’ve got operations, you’re Nashville, and in Washington DC. What’s the rationale for the locations you pick?


Brett:

Yes, we have facilities in Las Vegas, Phoenix, Dallas, Nashville, Atlanta, and DC, Virginia. And we’re continuing to build what I call a network of service centers in the travel patterns of coach owners. That’s really what we’re building out, that National Indoor RV Centers. 


David:

So the idea is that you can, I guess you want to store and have maintenance on your coach somewhere close to where you live. So you got to be near population centers?


Brett:

Well, when it comes to storage 91% of our customers that store with us come from within a 20 mile radius, 93% of them are 10 years old and newer and above 30,000 pounds. So we use that criteria for our demographics of where to put our facilities, or storage. When it comes to service, you know, you need service. You buy these things, to travel in, to turn the country into your backyard. And I have never been fortunate enough to break down in my own backyard. So you need service pretty much everywhere you go. And the objective is to build out a network where no one is more than 500 miles from us. The roadside assistance companies all tow unlimited, up to 500 miles. That’s the rationale there, and they tow into us, or people limp into us every day.


David:

So do you buy existing units and convert them to ownership? Or are you building from the ground up?


Brett:

As far as our facilities?


David:

Right.


Brett:

Well, we’ve built from the ground up, we’ve only been fortunate enough to buy an existing building that fit our requirements one time. There’s a lot that goes into these, that we have to build from the ground up. 


David:

So you got to have massive, I mean some of these, million dollar, million and a half dollar units are just gigantic. Your facilities must be enormous.


Brett:

Well, they are by law. There is no coach over 45 feet in length, which is what most of these classes are. And at all of our facilities, the one I’m out here in Vegas stores 400 indoors. Four of the facilities are between 350 to 360. Then our Phoenix facility with the addition that will be completed in April, that facility will house 900 units under roof. 


David:

Woah. And you know what you’re talking about. You’ve been an RV owner for a good while, right?


Brett:

Yeah, so I purchased my first coach in 1985. 


David:

Wow. Did you live? Did you live in it? Do you live in yours?


Brett:

I sold the house in 2013, and I’ve lived full-time in my coach since 2013. 


David:

Where do you park it? To live in I mean, if you’re in, you know, in Lewisville, in the Dallas area, do you have, do you go to one of your facilities?


Brett:

Our first three facilities, I used to drive amongst them but now at six facilities, and travel demands, now I pretty much live on Southwest air. So when I’m in town, my coach is parked in the back corner of our lot, that is my home, and where all my belongings are.


David:

And that’s where the mail, Do you get mail delivery there?


Brett:

I do. I do. 


David:

Sounds like a fun life to me. You know, I guess if it’s good enough for Dolly Parton, it’s good enough for me. Brett Davis is the founder, President, and CEO of National Indoor RV Centers. It’s good to spend some time with you, sir. Thank you very much. 


Brett:

Thank you, David. I appreciate it. 


David:

Thanks a lot. For more of our conversation, go to krld.com/ceo. I’m David Johnson, NewsRadio 1080 KRLD.

THIA by Proteng: An RV Fire Story

Fire One of Leading Causes of RV Loss

Each year, thousands of motorhome fires uproot individuals, leaving feelings of helplessness and uncertainty. With so little time to react, even the best-prepared RV owners cannot safeguard against these devastating occurrences – until now.

One such instance happened to Courtney and Jeremy Thompson when they experienced a fire on the very first day of their new life as full-time RVers. Thankfully, the Thompsons (and their dog) escaped safely, but their coach was a total loss.

Although Jeremy had spent 37 years as a first responder, his knowledge and skills were no match for the conflagration. After the fire, the couple was forced to ponder their future and maybe even reconsider their hopes for retirement. “Should we even do this?” they thought. 

After some serious soul searching. Courtney and Jeremy decided to continue as full-time RVers, but were adamant about installing a fire suppression system before they did.

The Thompsons Came to NIRVC to Install THIA by Proteng

THIA by Proteng is a revolutionary fire suppression system designed to eliminate heat at the source, extinguishing fires before they have a chance to spread. 

The system is fully customized to each RV and consists of multiple self-contained THIA devices that wind through areas of the motorhome that can be prone to fire, including the engine, inverter and generator, to name a few. In the event of a fire, the THIA device disperses FM-200, an extinguishing agent that covers the heat source and can suppress and extinguish fires.

Proteng fire protection installation

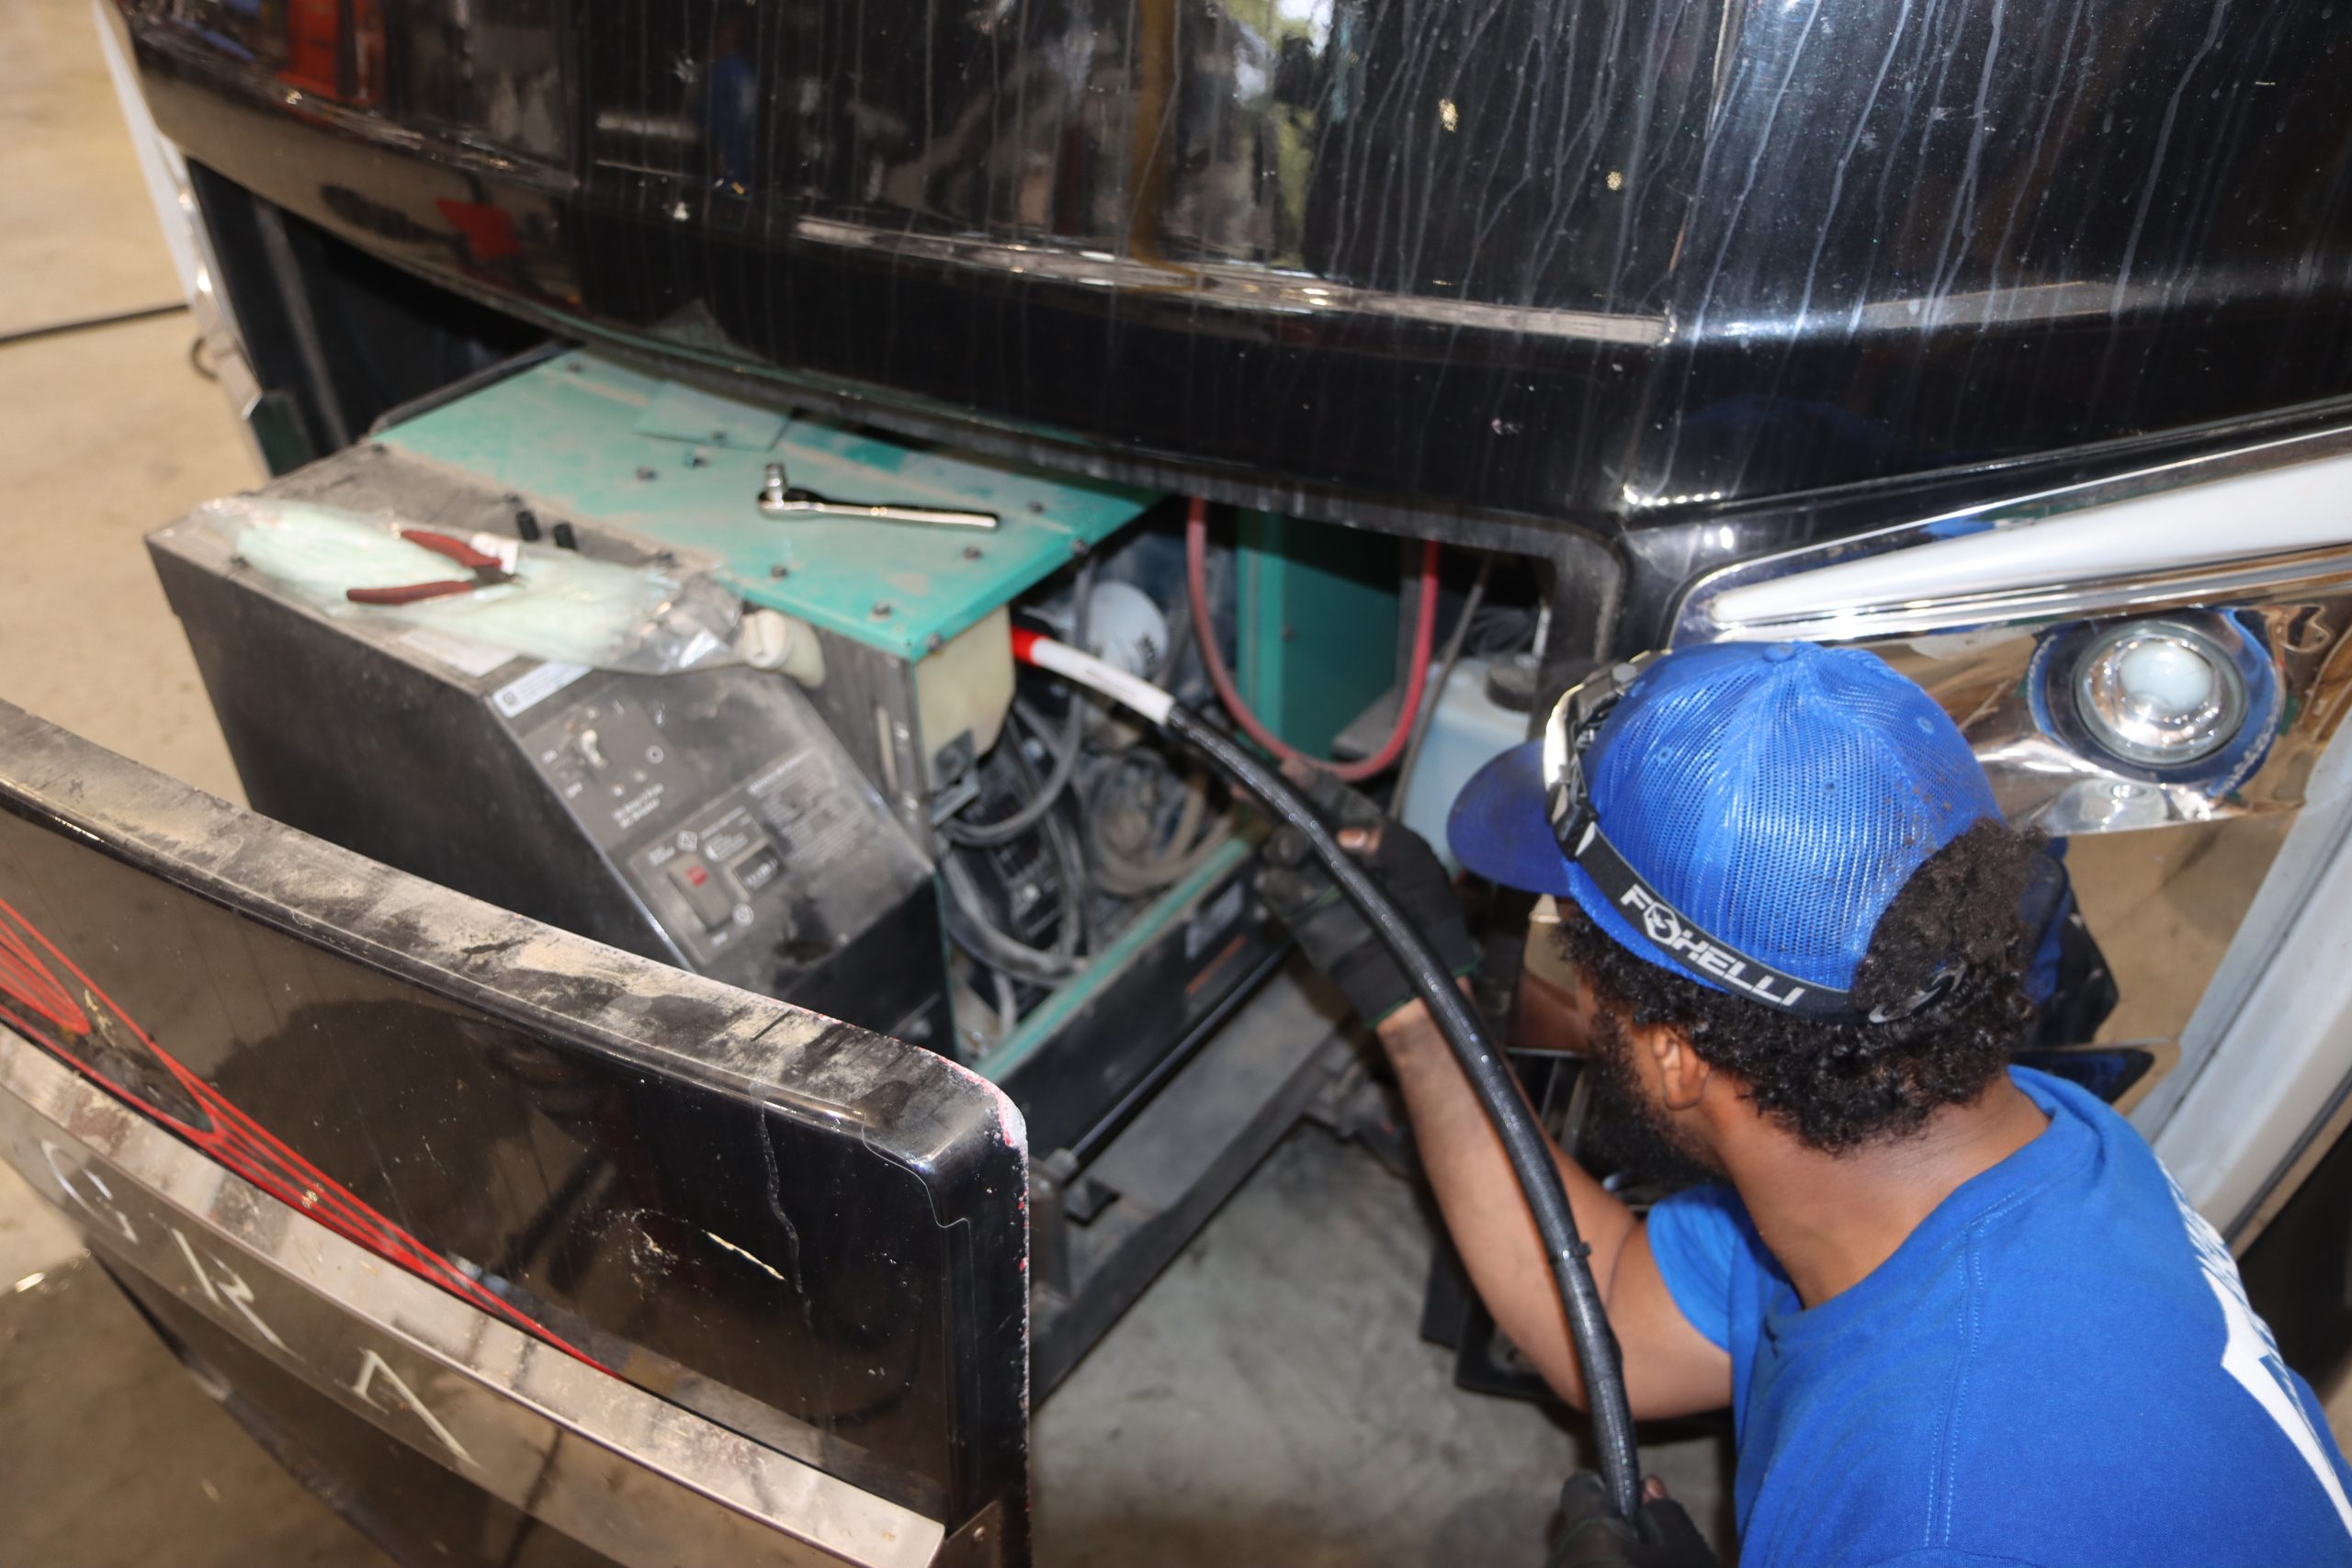
NIRVC tech installing 3′ THIA device into Onan 12.5 KW generator

Made for the entire coach, each device is completely self-contained and heat-activated, meaning there are no buttons to push, no pins to pull and no batteries required to engage. Once installed, you’ve got instant fire defense for your coach and for your life. 

RV fires are serious business, so turn to serious experts for peace of mind protection. Discover more at proteng.com or click here for information on installation.

The Allure Of The Road – Pt. 1

Allure: The quality of being powerfully and mysteriously attractive or fascinating.

Road: A wide way leading from one place to another.

Hi All – Larry Beckner here. For those who don’t know me, my wife Amy & I have been active part-time RVers since mid-1998 when we bought our first motorhome. I’ll cover our RV ownership history in a future post, but for now let’s talk about the allure of the road!

For me it started early. I was born in San Antonio, Texas. My father had an interesting job with a company called Western Good Roads Service Company, which was involved in the placement of advertising signs on roads and highways. My dad’s primary role was to travel around Texas and parts of Louisiana looking for viable locations to erect signs, followed by preliminary discussions with the relevant landowners.

Before I started elementary school and during summer vacations thereafter, I was able to accompany my dad on some of those trips. San Antonio was a smaller city in those days, so we didn’t have to go very far to be “out in the country.” For me it was big-time adventure – the open road ahead, looking forward to what might be around the next curve, over the next hill, or behind the fence surrounding a farmer’s or rancher’s property.

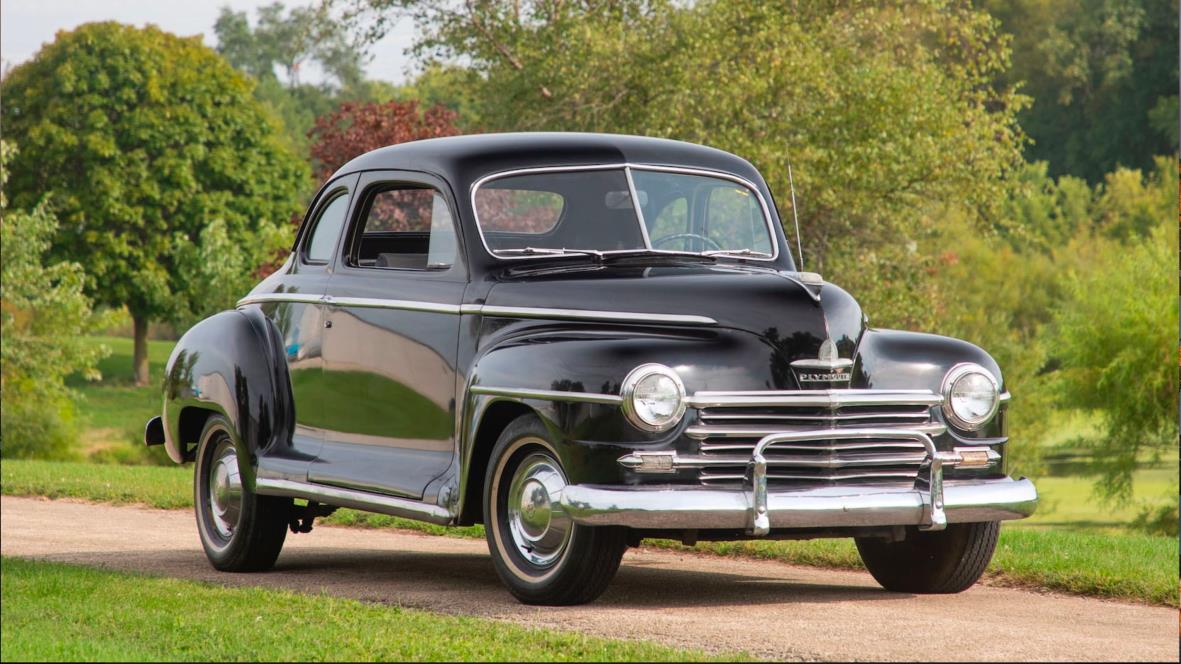
These trips were also the genesis of my enduring fascination with motor vehicles in all their various forms. My dad had a very cool black Plymouth Coupe, similar to the one in the following photo:

National Indoor RV Centers blog Allure Of The Road-01

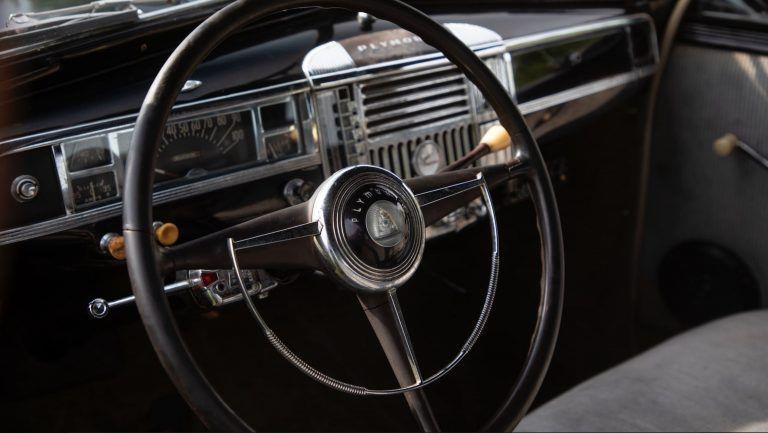
Like many cars back then, the Plymouth had a three-speed manual transmission with a column mounted shifter. And my dominant memory is that it had a speedometer that went all the way up to one hundred miles per hour. I actually got to see that speedometer touch 100 MPH one time (with my mother driving!), but that’s a story for another day.

National Indoor RV Centers blog Allure Of The Road-02

Another major reason for my fascination with motor vehicles was that my dad was friends with a man named Bob Hoffman who ran an auto repair business in downtown San Antonio. After working on customer cars all day in his shop, Bob would build race cars at night and on the weekends. Bob had driven race cars in his younger days, but got banged up sufficiently to shift his focus to building them.

My dad liked racing and often took me to the Saturday night events at our local track, where Bob and his driver competed. I was hooked and have been a racing fan (and occasional competitor) ever since. So for me, the allure of the road includes not just back roads and highways but race tracks and drag strips as well. Here’s a photo from 2007, taken at the legendary Auto Club Raceway in Pomona, California when I was enrolled in Frank Hawley’s two-day drag racing class to obtain a National Hot Rod Association competition license. (Yes, I realize my hair was SLIGHTLY darker at that time, but it was 15 years ago so cut me some slack…)

National Indoor RV Centers blog Allure Of The Road-03

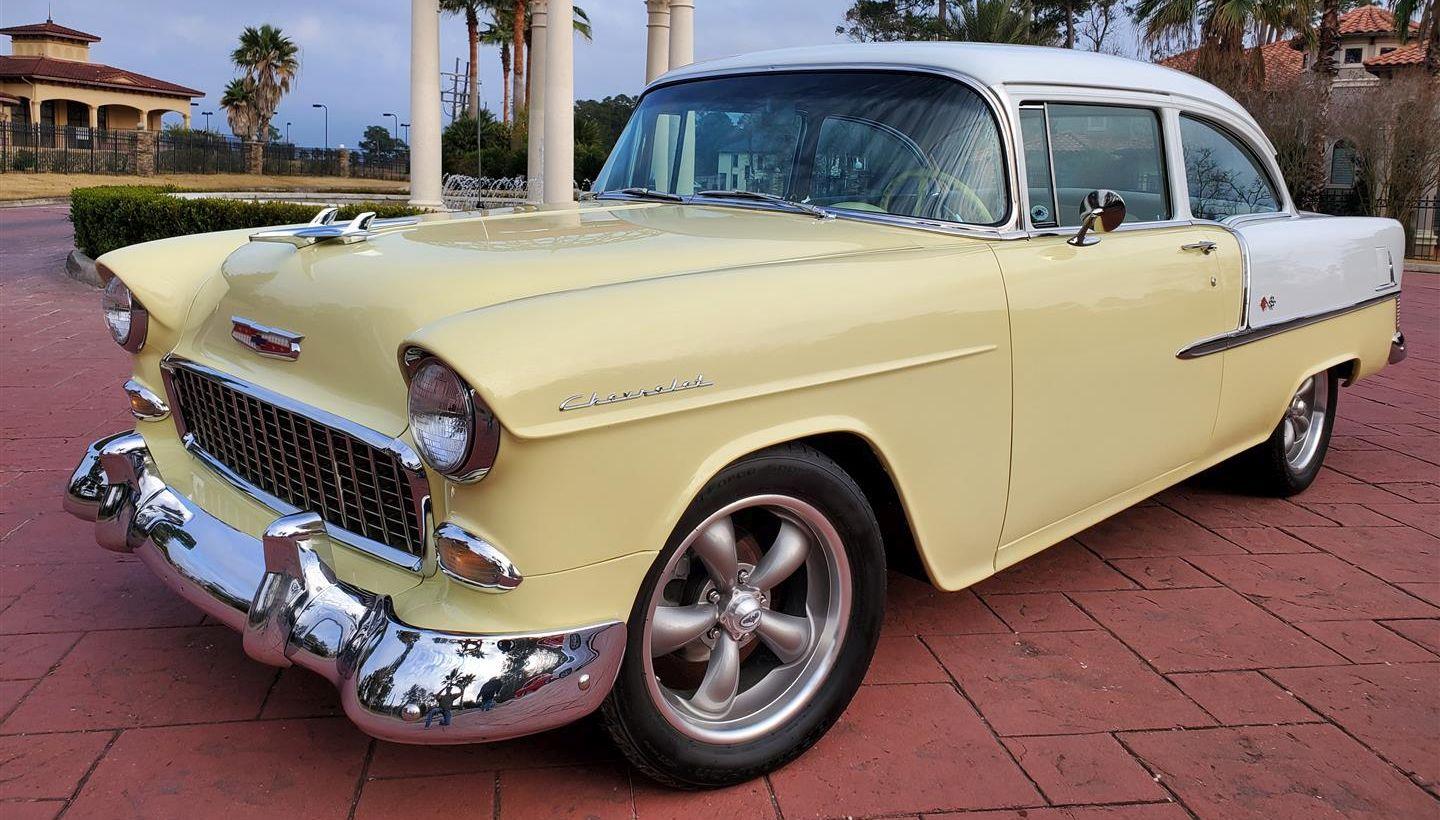
My first car was a 1955 Chevy, similar to the one in the following photo, except the only white on mine was the roof. I bought it from a guy who had swapped the original 265 cubic inch engine for a 327 cubic inch Corvette engine. Paid him $600 for the car, put $2,000 or so into it over the following year, then sold it back to the same guy for $650 when I got a non-optional invitation from the government to become part of the U.S. Army. Yes, it was a very good lesson in how to NOT make money spiffing up cars.

National Indoor RV Centers blog Allure Of The Road-04

Another good lesson I learned with that car was to plan a long trip before making one. After receiving my draft notice, I decided to make a trip from southern California to San Antonio, Texas to visit my mother – you know, just in case being in the Army cut my life a bit shorter than I had in mind. Left southern California early one morning and made it to El Paso. Figured I was close to San Antonio so I might as well stop, enjoy a nice meal, and get a good night’s sleep.

Slept in a bit the next morning, had a breakfast fit for a king, filled the car up with gas and hit the road. Not far out of El Paso I saw a sign saying, “San Antonio – 565 Miles.” My reaction was along the lines of “No way that can be right!” About 30 miles later I saw another sign saying “San Antonio – 535 Miles.” Did some mental math on how long that was going to take at 65 MPH and promptly applied more pressure to the gas pedal. Yep, Texas is a BIG state!

After completing Basic Training at the not-especially blissful Fort Bliss in El Paso, Texas the Army assigned me to a data center in Atlanta, Georgia. Apparently some aptitude tests the Army administered during Basic Training indicated I was suited for computer programming. When I reported for duty at Fort McPherson in Atlanta the officer in charge of the data center looked at my paperwork and said, “I don’t know why they sent you here – we don’t need any more programmers.” My response was, “Well, that’s good because I don’t know anything about programming.” He took mercy on me and said he’d put me to work doing something or another.

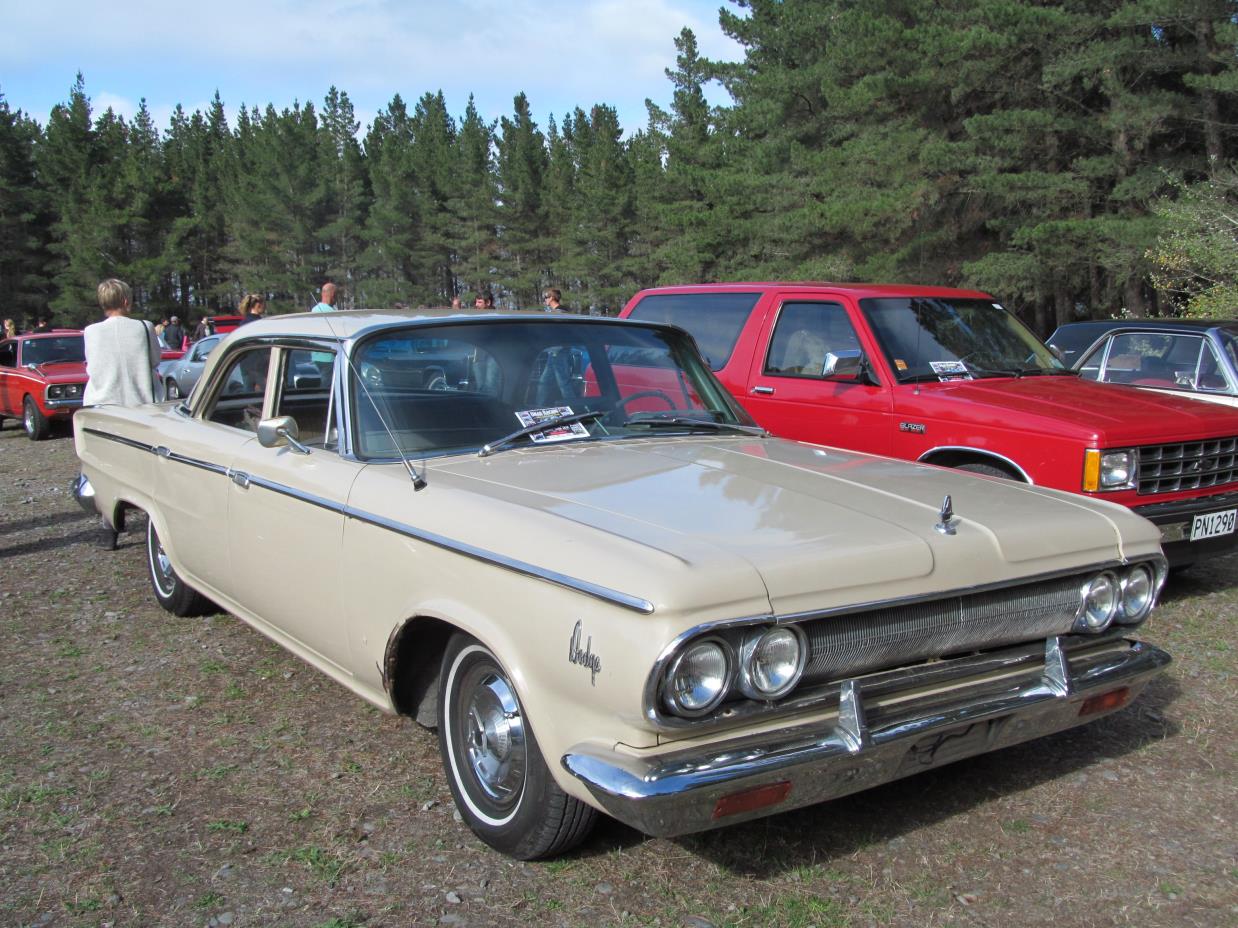
I ended up sharing an apartment with two fellow soldiers, one of whom had a sixty-something Dodge similar to the one in the following photo, though considerably less pristine:

National Indoor RV Centers blog Allure Of The Road-05

It was big, it was ugly, and it gulped gas, but we had our share of fun exploring the highways and byways of Georgia and Tennessee in that car. The southeast is very different from Texas and California and I found it fascinating, especially the backroads.

In May 1967, we took the Dodge to Indiana (the hometown of my roommate Terry) to attend the Indianapolis 500. Got to see all of 18 laps before it started raining. The race was rescheduled for the next day, but we were on short-term passes and had to get back to Atlanta for duty. Seems like we convinced ourselves it was fun anyway.

Thanks, that’s probably enough for one post. Stay tuned for more “Allure of the Road” stories in our next installment!

Roughing It at RV Shows

Roughing It At RV Shows & Rallies – You Can Do It!

In my last article, RV Shows & FMCA Rallies With AIM: What You Need To Know, I mentioned roughing it in the camping areas at these events:

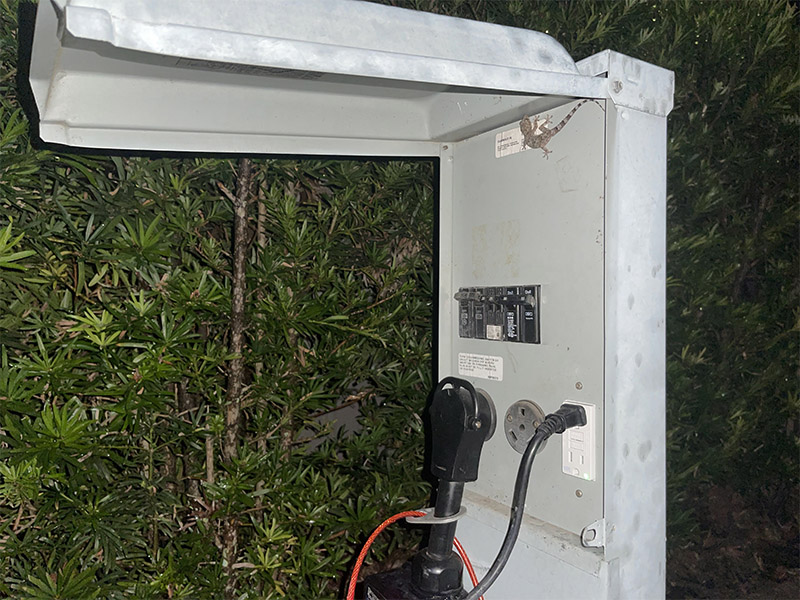
The Tampa RV Show and FMCA Rallies are held at large, regional fairgrounds and outdoor event centers. The camping area is a huge, grassy field with makeshift power systems providing individual electrical hookups. Caravans usually park in the 30amp service area.

There are no individual water or sewer connections, but they do have fresh water and pump-out services you can arrange for a fee…”

Power, Sewer & Water

As a new-ish RV owner, I was not expecting this. Let’s face it, most of us don’t buy these big, beautiful motorhomes – basically fully-equipped luxury condos on wheels – to rough it. Am I right?

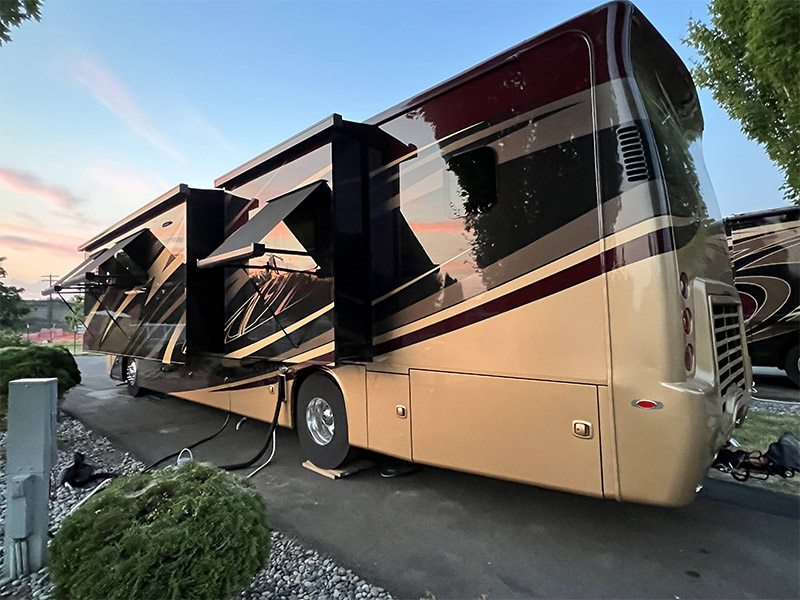
Before we started our full-time living, working and traveling adventure in our 2016 Entegra Aspire, I had never thought about amps or generators, mysterious black or gray tanks, or water pressure regulators. I just flipped the wall switch, flushed the toilet, or turned on the faucet, hot or cold, without another thought.

Amps for RV Beginners

Living full-time in the RV, I gradually learned – actually, sometimes quite abruptly – the difference between 20-, 30-, and 50-amp hookups. We had 20-amp service when Charlie-the-RV was in covered storage before we went full-time (long before we knew about NIRVC storage). 20-amps provided power to the fridge, mini-heaters to keep her from freezing that first winter, and a camera/alarm/monitoring system.

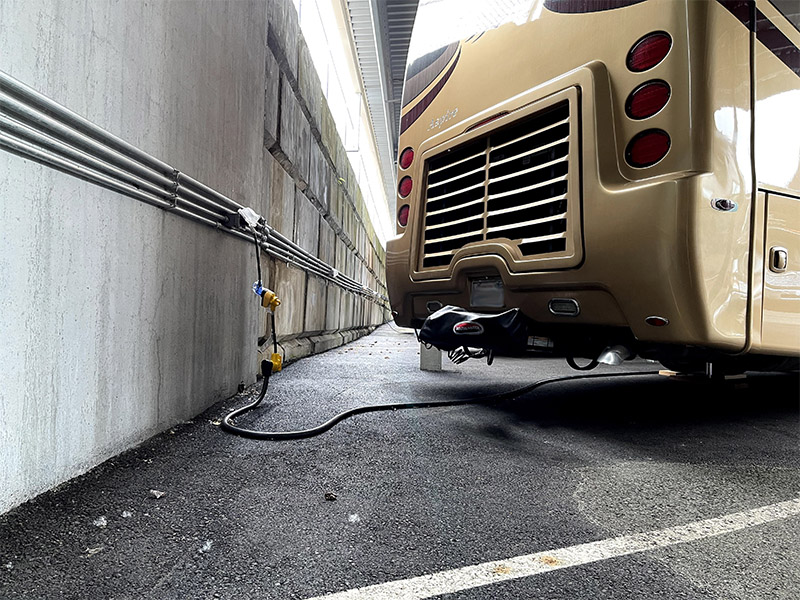
20-amp power in covered RV storage

50-amp service is, of course, the ideal for our multi-zone HVAC, residentially-applianced, teched-out rolling homes. 50-amp powers everything, and you don’t have to think too much about it.

104 degrees at sunset – 50-amp FHU in Walla Walla, WA

30-amp service was a shock – literally – when we first experienced the difference camping at RPI / Thousand Trails in Washington State and across the country. Sometimes 30-amp is all that’s available (although you still have water & sewer hookups, so 30-amp service isn’t really roughing it). 

I quickly learned:

  • You can generally only run one HVAC zone at a time on 30-amp power. (One HVAC unit consumes 13 – 18 amps.)
  • Even that might not work, if any other power drain starts up, for example:

– Stovetop = 11 amps

– Microwave = 15 amps

– Convection Oven on Bake = 18 amps

All the electric things have to add up to less than 30 amps in total, or bad things can happen. (In this specific example, you might end up crawling on your back in the basement to find the breaker for the Inverter, which is hidden underneath the unit in our Entegra, nowhere near any other fuses in the rig, but I digress.)

You can see how that might be a problem if you’re trying to run all three kitchen appliances at once, or even two of three, with anything else running (say, if you’re trying to make an elaborate brunch on a rainy Sunday morning…). 

Note: an automatic coffee maker is also a surprising amp-vampire (5 – 8 amps).

Just sitting quietly in the RV, with only accent lights and living room sconces, both of us working on our computers, with internet and all the various chargers and routers plugged in, consumes about 3 amps.

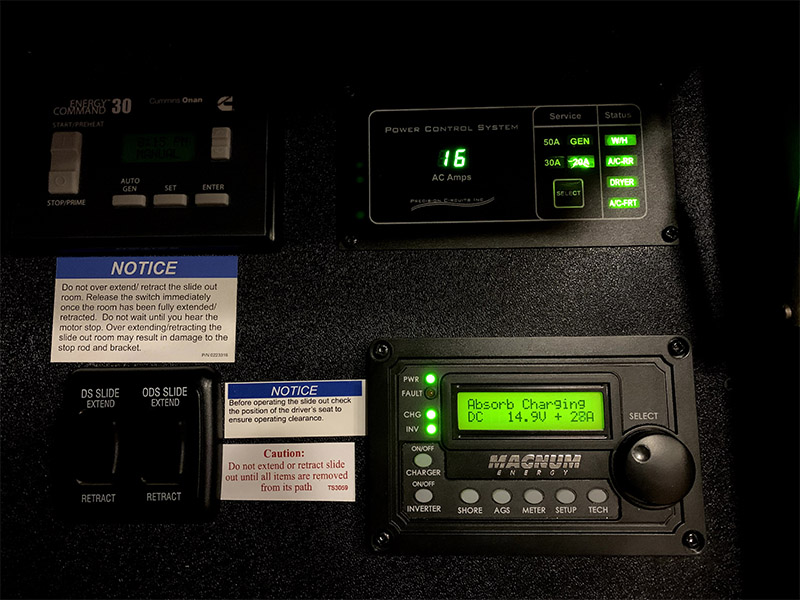
16 amps on 20-amp service – Monitor amp usage on Power Control System display. Ours is located in the front panel over the door in our 2016 Entegra Aspire

Successful Boondocking

Six months into our full-time RVing adventure, we had 30-amp service figured out. We had even boondocked successfully, with NO hook-ups, surviving on battery power and our generator, for a night or two. 

But then, on our way to our first FMCA Rally in Tucson, Arizona, it suddenly occurred to me:

  1. 30-amp service + 5 nights = okay, no problem!
  2. NO fresh water or sewer hookups + 5 nights = ???

I panicked.

Go to the Experts

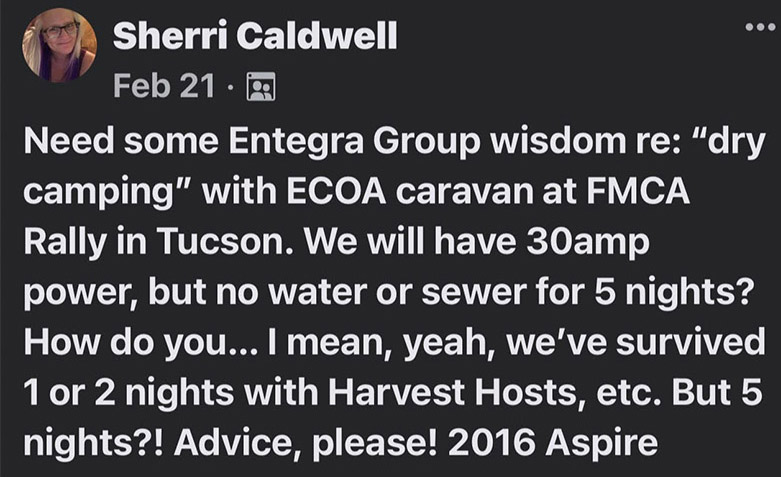
FB post – Entegra Owners Group

Fortunately, fellow Entegra owners, friends and mentors came through for us, once again. They offered great tips and suggestions, some I would consider fairly extreme. But we tested, experimented, and somehow figured it out at that first rally. And then again, six months later, at the FMCA Rally in Lincoln, Nebraska.

We learned how to rough it and survive five nights on 30-amp service without sewer or fresh water hookups. If we can do it, you can too!

Twelve Quick Tips & Tricks for Roughing It at RV Rallies

  1. Arrange FHU (Full Hook Up) camping in a campground nearby the night before: Empty & Flush black and gray tanks.
         – Fill fresh water tank to capacity.
         – Go in with clean laundry and dishes.
         – Plan on NO dishwasher.
         – NO washer & dryer.
  2. Know your holding capacities for fresh water, black and gray tanks.
  3. Monitor tank levels daily: It’s all about the numbers!
  4. Bring extra drinking water. We brought 1 case of bottled water and 2 “suitcases” of fresh water (with the spout) for coffee, drinking, and refilling water bottles. (We drink a lot of water!)
  5. Plan meals to stock up on groceries and to minimize use of appliances, dishes, and clean up.
  6. Reduce, re-use, and recycle! Think paper plates & plastic utensils to minimize dish washing. (Fortunately, garbage cans and recycling containers are usually nearby and plentiful in the camping areas.)
  7. Use the facilities and services at the rally to reduce water usage and tank fill in your RV (i.e. restrooms, showers, dining options).
  8. Minimize use of your fresh water in the RV (and filling up your gray tank) by capturing clean water in a pitcher, bucket, or wash tub in the sink and shower when you’re warming up water for hand washing or showering. Use that water for dish washing or other needs. Use a stick sponge with soap in the handle for easy and quick dish washing.
  9. Embrace your natural state and go dirty, if you can. (Take a good, long shower at the FHU campground the night before.) But that’s just one option. We prefer good old every-other-day Navy Showers: Capture the water while it’s warming up (or go cold shower – it will be quicker!). Turn off water while you’re soaping up. (Another suggestion was using baby wipes for quick body wash instead of showers… but my memories of the true purpose and use of baby wipes are too vivid for that option – even after 20+ years!
  10. Toilet Talk: Avoid using your fancy macerator or electric flush toilet while camping at the rally. Your step-flush gravity toilet (if you have a half bath) uses much less water for a flush – and you can control how much you use. (Or you can even use captured water to flush, instead of fresh water.)
  11. Arrange pump-out & fresh water fill. These services are available at the rally, for a fee, and can easily be arranged with the event organization.
    (We didn’t figure out how to sign up for services before our first rally, so now we take it as a personal challenge to manage our usage with all the tips & tricks we’ve learned. 😉)
  12. Finally, plan your departure to the closest campground with full hookups and 50-amp service:
         – Dump your gray and black tanks.
         – Turn up the HVAC in as many zones as you desire.
         – Catch up on dish washing, laundry, etc.
         – Enjoy a REAL shower.

If you’ve come this far… Congratulate yourself and your partner on roughing it at the RV Rally – YOU DID IT! Safe travels & see you soon!

National Indoor RV Centers blogger Sherri Caldwell profile image

Sherri Caldwell is the founder of BooksAndTravelUSA.com – Full-time RV Travel Blog & Book Club/U.S. Literacy Project. With her husband, Russ, she is currently living, working, and traveling full-time in their 2016 Entegra Aspire: Charlie-The-Unicorn RV.

How to Plan Your RV Trip

Here’s What to Keep in Mind When Planning Your RV Trip

A Little Preparation Goes a LONG Way

Proper planning can make or break your RV adventure. While it’s easy to get lost in all of the luxuries of a modern RV, it’s important to remember how much of a journey RV adventures can be.

Simply put, most RV trips involve driving hundreds of miles or crossing state lines in a large, highly-complex machine. No matter how sophisticated modern motorhomes may be, there’s always a margin for something to go wrong. 

While nobody plans on complications, it’s always a good idea to prepare for them. Here’s what to keep in mind once you start planning for your RV trip.

It’s Better to Have Extra Food and Not Need It …

… than the other way around. Even if you’re one of those RVers who eats at restaurants whenever possible, it’s still a good idea to stock your pantry with enough non-perishables to last a few days. You don’t need to go full doomsday prepper, but it’s a good idea to stock several meals per person of dried or canned food. That’s something you can easily accomplish with a single large bag of rice and a few cans of beans. 

Don’t Just Count on GPS

Over the last decade, GPS apps have become so ubiquitous they’ve essentially replaced all other forms of navigation. While platforms like Google Maps may be incredibly accurate when routing through urban areas, they can lose a lot of their accuracy on more remote roads. In addition, GPS apps might not account for issues like road closures and detours. Plus, a lapse in cell phone coverage (or power) can prevent you from using them entirely. 

There’s no substitute for knowing how to navigate to your destination manually. Print out the driving route you plan to follow, along with any maps that will help you navigate it if your phone stops working. Nobody wants to load up the RV to spend a day driving around lost. That little bit of preparation can save you plenty of frustration. 

Know the Legality of Any Substances You’re Carrying

You should never get behind the wheel if you’re under the influence of ANY intoxicating substances. 

Suppose you’re the sort of person who enjoys sitting in front of your (parked) RV and relaxing with a cold beer. In that case, it’s a good idea to know the laws regarding alcohol (and potentially marijuana) consumption in both your destination and any states you plan on driving through. 

More than 40 US states have open container laws that limit where alcohol can be stored or consumed in a moving vehicle. The vast majority of these laws prohibit any consumption in the vehicle’s passenger seat, although many carve out an exception for any designated living quarters in an RV.

It’s essential to understand these legalities if you live in a state with legalized marijuana use. As states have vastly different laws regarding legalization and decriminalization, a perfectly legal $40 purchase in one state can be a felony if you drive just a few miles into another.

When in Doubt, Get Someone on the Phone

In a post-2020 world, there’s always the risk of disruptions or policy changes during travel, especially if you’re visiting a popular tourist attraction. It’s a good idea to review your itinerary ahead of time along with pre-purchasing passes and tickets whenever possible.

There are plenty of destinations where this won’t be an option. Any experienced RVer can tell you that RV attractions don’t always feature modern websites. If you encounter any confusion when pre-planning your trip, never underestimate the power of getting an actual, talking human being on the phone.

Whether you’re clarifying the check-out policy of an RV campground or trying to book day passes to a local history museum, don’t hesitate to call. After all, the worst-case scenario is that you confirm information you already know.

Of course, more goes into planning an RV trip than just preparing for worst-case scenarios. Figuring out a good trip itinerary can be a journey in itself, and that’s BEFORE you factor in all the long-term considerations that come with RV ownership. Storage, repairs and routine maintenance are all factors that greatly affect your RV experience.

Think of National Indoor RV Centers as your co-pilot in all of your RV adventures. We understand the ins and outs of everything RV, from sales to paint & body to storage. Our expert technicians have everything required to get you on the road – and keep you there.

RV Electricity 101 – Part 2 An RV Owner’s Guide to RV Electrical Systems

Last month we began our tutorial on RV electricity explaining the basics of electricity (the boring part), how the electrical panels are configured and briefly touched on generators. This month is part two of a three-part series and we’ll get a bit more interesting as we help you understand batteries, transfer switches and inverters. Finally, we’ll conclude this series next month with the final installment that will cover more advanced topics such as solar power, surge protection and energy management systems.

Transfer Switches

Sometimes the 120 volt devices in your motorhome need to be powered when you are not plugged into a campground pedestal, frequently referred to as shore power. When shore power is unavailable, the on-board generator set can be used to power these devices. Generators can be used in a number of situations, such as camping in remote areas where access to power is not available. A number of systems, such as lighting, water pumps and fans, are powered by your 12 volt battery. However, there will come a time when these batteries need to be recharged. The on-board generator can be used to power the coach’s battery charging system in the absence of shore power. Another use for generators is to power the rooftop air conditioners to make for a more comfortable motorhome interior in hot weather.

Your RV’s 120 volt electrical system is fed through a central distribution panel where all of the circuit breakers are located. In order to power this panel from two different power sources we can choose one of two methods. The first is the more cost effective and least costly and is commonly used in lower cost travel trailers. That method entails hard wiring a power cord to the breaker panel’s inputs. When not plugged into shore power this cord can be plugged into a generator set outlet to provide power to the RV’s electrical systems. While this method is inexpensive, it’s less convenient because you have to physically switch the plug from the shore power receptacle to the generator receptacle. The second method is to install an automatic transfer switch.

Automatic Transfer Switch

Automatic Transfer Switch

A transfer switch is basically a three way switch that switches between two inputs and connects them to a single common output. An automatic transfer switch mounted in a motorhome is located prior to the breaker panel where it can intercept the shore power cord feed to the breaker panel. The output of the transfer switch then goes to the main breaker of the breaker panel. The shore power cord is connected to one of the inputs in the transfer switch while the output from the generator is hard wired to the transfer switch’s second input. Transfer switches will connect one of these two inputs to the switch’s output. Manual transfer switches need to be manually switched by moving the switch lever on the box and are uncommon in a motorized RV. Automatic transfer switches commonly used in an RV will do this automatically and are logic controlled to switch under a given set of conditions. Generally automatic transfer switches will default to the generator inputs and are mechanically held. Once shore power is present the magnetic coils will pull the switch’s contact relays over to the shore power side. This is why you typically hear that clunk when the switch engages shortly after connecting to shore power. As soon as the shore power is no longer present the switch will revert back to its generator priority position.

Automatic transfer switches contain relays that switch between the two power sources. The magnetic coils that activate the relay contacts are engaged when the circuitry detects the presence of shore power. If you are running as large load the current across these contacts is substantial. When shore power is connected or disconnected, a large arc can occur across the contacts. Eventually this can pit the contacts and cause them to weld shut, rendering the transfer switch inoperative. If you have large loads operating it’s a best practice to switch them off before disconnecting from shore power to prevent this from happening. If your contacts do pit it is possible to file them clean by shutting off all power sources to the transfer switch, removing the cover and filing the contacts with some 120 or 220 grit sandpaper to clean them up. If they are too far gone the switch will need to be replaced or repaired. Another point of maintenance is to inspect the lug connections where the wires connect to the switch. The Allen head screws can loosen up over time, allowing loose wiring connections that can cause arcing in the connectors. It’s a good practice to inspect these connections every year or so and tighten them if necessary.

Generators

A motorhome has wheels, which means it’s mobile and doesn’t have to stay in one place forever. This means that shore power isn’t always available. Fortunately, most motorhomes are equipped with an on-board generator set to provide AC power when you are driving or when camping in a location that has no shore power. On some units you’ll find this generator in a basement compartment designed to provide adequate ventilation, intake air for the engine and a way to get rid of exhaust fumes. If you have a diesel pusher motorhome the odds are that your generator will be mounted in the very front of the coach, usually on a slide-out mechanism for ease of service. Permanently mounted generators are larger, heavier and quieter than their smaller portable cousins.

An Onan gasoline powered generator.

Onan gasoline powered generator

Gasoline powered Class A motorhomes will be equipped with a generator powered by a gasoline engine. The generator shares the same fuel tank as the vehicle engine but uses a separate fuel pickup within that tank. Usually these pickup tubes are cut short so that the generator will not run if the fuel level gets below a ¼ tank but this amount can vary from one manufacturer to the next. The reason for this is so that you can’t totally drain your fuel tank while dry camping. The ¼ tank remainder ensures that you will always be able to start your RV’s engine and drive to a refueling location. These generator sets are designed to slide into a basement compartment that is designed for that purpose so access to the controls and engine service points is done through the removable side cover on the generator, which also serves to contain the cooling airflow and add additional sound deadening capability.

Onan Quiet Power diesel generator

Onan Quiet Power diesel generator

Diesel powered generators can be found on motorhomes that are powered by diesel engines. Some of the entry level class A diesels are really front engine gasoline chassis with a diesel engine in place of a gasoline engine. Also, many smaller B+ and Super C motorhomes are now being made with small diesel engines. In this case the diesel powered generator will be fairly small (in the 4 KW to 7 KW range) and will be mounted in a side compartment in the same fashion as the gasoline powered generators. On a rear engine diesel pusher, the front of the coach is clear of engines and radiators. In this case you’ll find a diesel powered generator that is mounted in the front cap on a set of slide rails. The generator can be slid forward out of the coach to allow better access for servicing the unit. These units generally start at around 7,500 watts and run up to 10,000 or 12,500 watts in size. Some older motorhomes used a propane powered generator that ran off the RV’s on-board LP tank. However, these are rare and less desirable because the limited capacity of the propane tank didn’t give the generator a very long running time before the LP tank was empty. Used coaches with propane powered generators are very hard to sell and their resale value reflects this.

Generators that are rated up through 8,000 watts are usually single pole 120 volt-only generators, referred to as “in-phase” generators because both windings are in the same phase. Larger generators, 10,000 watts and up are two pole split-phase 120/240 volt generators with a center tap neutral. Because motorhomes rarely have any 240 volt appliances you may think that this arrangement isn’t needed. But if you refer back to our split phase 120/240 diagram you’ll recall that each phase has a given amount of amps available. That’s what allows you to balance your load and eliminate the heavy wiring required for a 10KW generator, which would output 83.33 amps if it was an in-phase design. Note that a 50 amp electrical service is equivalent to 12,000 watts, which is the size generator required if you needed to supply a full 50 amps to your RV’s breaker panel.

Frequency and RPM

Earlier we saw a graph of the AC and DC waveforms. The vertical height of the waveform represented voltage. But we also need to control just how fast this electrical pulse occurs. This is plotted horizontally on the graph and is referred to as frequency, which is labeled as Hertz. In North America all electrical power is 60Hz while in Europe and most of the rest of the world electrical power runs at 50 Hz. Hz is basically a counter of how many electrical pulses or waves occur in one second. A small portable generator must run at 3,600 RPM in order to produce 60 Hz of electrical power. When you divide 3,600 revolutions per minute (RPM) by 60 seconds we get 60 revolutions per second. It takes two field coils, a north pole and a south pole, to create the magnetic field necessary to create electricity. There are two field coils in a small portable generator, so it takes one revolution of the generator to create one Hertz. When the generator is turning at 3,600 RPM it will produce 60 Hz. It doesn’t matter what size output the generator makes but the speed at which it turns is important.

Small portable generators tend to be noisy because an engine running at 3,600 RPM isn’t very quiet. They were designed to be light and portable. In a motorhome this isn’t important because the generator doesn’t need to be lifted because it will be mounted into the RV. What is important is the noise level. If we add a second set of field coils to our generator, we will double the frequency to 120 Hz when running at 3,600 RPM, which isn’t good and will burn up our electrical devices. But if we take that same 4 pole generator and slow it down to 1,800 RPM we will still have 60 Hz. It’s just that we are passing twice as many magnets during the same revolution so by reducing the number of revolutions by half we will still maintain 60 Hz. This is the way many RV generators are set up. The 1,800 RPM speed of the engine allows for quieter operation. Because we don’t have to lift this generator we can also add a nice large muffler to it. The big drawback is that we have to use a larger engine. A small 8 HP engine is capable of creating 3,500 watts at 3,600 RPM but when you slow it down to 1,800 RPM it will only put out around 5 HP, which isn’t enough. By going with a 12-14 HP engine, we will still have 8 HP available at 1,800 RPM to then make our 3,500 watts of power. This means that the engine will be physically larger, weigh more, be quieter and more durable, and cost more than a smaller engine that is running higher revs. But the gains are well worth it in an RV application. Large utility power plants carry this even further and can use as many as 24 field coils in their generation systems so that they only have to turn 300 RPM. Less RPMs means greater life but more weight and size, while less magnets means less weight and size but greater speed and wear.

There is one exception to this RPM rule for generators. There is a trend towards inverter generators which use a variable speed engine to produce DC current to an inverter board within the generator. The inverter will convert DC power to AC power electronically. A DC generator is not sensitive to its RPM because the inverter controls the frequency and voltage electronically. These are smaller generators, such as the Onan Quiet Diesel (only up through 8KW) and small portables such as the Honda EU series. The benefit to this is that the generator can run at a lower speed when the demand for power is light, ramping up to higher speeds as the demand increases. This will minimize fuel consumption and supposedly reduce the noise level, although some models can actually be louder at full song compared to a traditional 4-pole generator. The electronic circuitry of the inverter will regulate the output voltage at a steady 120 volts and the frequency at a consistent 60 Hz.

Effects of Altitude

Any engine will produce a given amount of power based upon how much fuel and air it consumes, and higher power loads and RPMs consume more fuel. Because fuel and air are in a somewhat constant ratio, the engine will require more air at higher power outputs. But as we drive our motorhomes up into higher elevations, the air gets thinner and the engine loses its ability to produce its maximum rated power. This results in a corresponding drop in generator output wattage.

high-altitude image of a Suncruiser at 11,000

High-altitude image of a Suncruiser at 11,000 feet

 Different engines will react in varying amounts. For instance, the output wattage of the Onan Marquis Gold series of gasoline powered generators will lose 3.5% for every 1,000′ in altitude gain over 3,000′. The Onan Quiet Power Diesel 10,000 watt will derate 3.5% for every 1,000′ over 500′ and it further derates by 1% for every 10° F increase in temperature over 85° F. A good rule of thumb for most gensets is that you will lose 10% of the rated output every time you gain 3,000′ in altitude. This means that a 7,500 watt generator running at 9,000′ of altitude will only be capable of producing a bit over 5,000 watts at that altitude.

Diesel engines are pretty well able to handle the fuel injection requirements at higher altitudes but carbureted gasoline powered engines do not have that luxury. The Onan Marquis Gold series of generators uses carburetors that have an altitude compensation adjustment on the carburetor. By dialing in a higher altitude you will lean out the mixture to prevent spark plug fouling and excessive smoke. It is very important that you also dial it back when descending to lower altitudes or else the engine will run lean and you can burn the engine’s valves.

Breaker Panels

Breaker panels serve two functions. They provide a central distribution center for all of the various circuits to tie into the incoming power supply, and they also provide overload protection to prevent electrical fires from any short circuits. Fuses are pretty much a thing of the past on high voltage circuits in RVs, so resettable circuit breakers are provided in their place. Breaker panels, also called power distribution centers, are mounted in an accessible location inside the RV so that the circuit breakers can be reset as needed. They are also used to de-energize a given circuit so that circuit can be safely worked upon without endangering the operator.

A 30 amp in-phase circuit breaker panel

A 30 amp in-phase breaker panel

Circuit breaker panels are going to vary quite a bit from one brand to the next as well as between a 30 amp and a 50 amp service. A 30 amp service will be single pole 120 volts so it will have 3 wires feeding it – a black hot wire, a white neutral wire, and a green or bare copper ground wire. Because it’s a single pole service, all of the breakers will be fed by the same common hot wire.

A 50 amp split-phase circuit breaker panel

A 50 amp split-phase breaker panel

A 50 amp service will be different because it’s a two pole split phase service with two hot wires. In this case the black wire will be referred to as L1 while the second hot phase will be a red wire and referred to as L2. In this instance the breaker panel will have two main lug inputs and a divided buss that sends L1 to half of the breakers while sending L2 to the other half. In either situation there will be a main breaker that controls power to the entire distribution panel. It will either be a single pole 30 amp breaker or a two pole 50 amp breaker, depending upon which service your motorhome is equipped with.

In addition to the main breaker there will be a number of output breakers – one for each circuit in the coach. Any given circuit may contain multiple outlets, but that particular breaker will control every outlet on its circuit. So if a device that is plugged into an outlet causes the circuit breaker to trip, that entire circuit will be dead. Some of the panels used in motorhomes are fairly small so that they don’t take up too much room, which is somewhat limited in an RV. However, there may not be enough available slots for the number of circuits that are needed. Split circuit breakers are commonly used in this application to solve this problem. A split breaker places two half width breakers into one common unit that snaps into a single breaker panel slot. This gives you the ability to run twice as many circuits as normal circuit breakers. Of course, you still need to find enough room inside the box to stuff all of that wire so that may be the limiting factor.

Sub-Panels

Normally, all of the circuits can be powered from the one breaker panel. Many motorhomes are now coming with more complex electrical systems and are using inverters to power certain devices. We’ll talk more about inverters in a later chapter, but for now let’s just say that inverters use battery power to produce 120 volt AC power. Inverters are also fed 120 volt AC power from the breaker panel. They have an internal transfer switch that passes the shore power through rather than using the batteries to produce power. It will pass this power through whenever it is available or invert it from the batteries when it is not. This means that any devices that need to be powered from the inverter need to somehow be connected to its output. They still require some sort of overload protection so many of the larger inverters send their output, or the pass through power, to a sub-panel. This sub-panel will act as a distribution point for all of the circuits that are desired to be run off the inverter. It will have a few circuit breakers in it to protect these circuits from any overloads. The inverter itself will receive power from either one or two circuit breakers in the main panel. In this way all of the AC power from the main breaker panel will pass through the inverter and into the sub-panel, where it can be distributed to the desired circuits. Many of the larger inverters also serve as battery chargers, so whenever shore power or generator power is present it will charge the batteries in addition to operating in the pass-through mode.

Iota integrated breaker panel

Iota integrated breaker panel

This requires the installation of a second panel. Adding a sub-panel to an RV does take up valuable space, which isn’t always that easy to do. Some breaker panels, such as the Iota IDP-240B, offer an integral sub-panel. By splitting the buss inside the panel, a portion of that box can be used for sub-panel circuits if the inverter is wired to return power to that portion of the buss bars. This offers a huge advantage when trying to fit a breaker panel into an RV without tying up valuable space. The Iota is a compact breaker panel with an attractive cover with a smoked glass cover over the breakers. If a breaker trips, an LED can be configured to illuminate, which identifies the circuit as tripped without requiring removal of the cover. It can be configured with the split buss design so a separate inverter fed sub-panel is not necessary.

Batteries and Chargers

Batteries are critical to an RV. They start the engine and provide power to run accessories when driving. When parked they provide power to run lighting, water pumps, and various other 12 volt accessories. They can even be used to power an inverter to provide 120 volt AC power. Because of their heavy use they can sometimes be a source of aggravation and maintenance. Let’s take a closer look at batteries, how they work, and how to properly care for them. We’ll also delve into battery chargers and charging methods.

The battery compartment from an Allegro Bus

The battery compartment from an Allegro Bus

A single battery may be fine to operate your passenger car but it’s just not enough power to handle the more advanced requirement of an RV. To do this, multiple batteries are arranged together into a battery bank. There are two types of batteries and each type has a different intended use. Automotive batteries are what you have in your car. They are designed to output a large burst of amperage to start the vehicle, then slowly recharge from the vehicle’s alternator. The key here is that they dump a lot of amperage in a short time, then rest for a while slowly getting recharged. Most diesel motorhomes will have two engine-starting or chassis batteries in order to crank these larger engines.

When camping, your coach electrical systems operate quite differently. They will draw fewer amps than a starter motor but they will do that over a longer period of time. For this application deep cycle batteries are used. Deep cycle batteries are designed for maximum performance by slowly draining amps from them and sustaining this draw over a longer period of time. Most coaches will have four deep cycle batteries in a battery bank to ensure that there is enough capacity to supply adequate power over a longer length of time. This can vary and some smaller coaches may only have two, while larger coaches may have as many as eight batteries in a bank.

RV electrical systems are 12 volt systems. Whenever you connect multiple batteries together you have to make the proper connections in order to maintain 12 volts. If batteries are connected in parallel they will retain their voltage, but if they are connected in series the voltages will add up. So, if you have a bunch of 12 volt batteries that you want to connect into a battery bank, you simply connect all of the positive and negative posts together to give you increased load capacity or amp-hours. But many RVs are using 6 volt batteries for their deep cycler applications, which are commonly used in golf cart applications. They have a heavier plate design and are more durable, plus they output more power than a 12 volt battery of similar dimensions. The only downside is that you need to connect them properly to get a 12 volt output. Basically, you connect a pair of 6 volt batteries together in series to give you a single 12 volt battery. Then you connect the positive posts of this pair together with all of the other pairs and then do the same with the negatives. The following diagrams show a four battery bank of both 12 volt and 6 volt batteries and will help explain this better.

diagram of series versus parallel battery connections

diagram of series versus parallel battery connections

Battery Types

Batteries come in different types. For RV applications the most common are flooded batteries or AGM batteries. Flooded batteries are filled with electrolyte. This electrolyte is a diluted form of sulfuric acid. When a load is placed on the battery, the acid puts a charge on the lead plates and creates electricity. At this time some of the sulfur and oxygen leaves the acid and forms a sulfate on the lead battery plates, leaving water as the remainder. If a battery is totally discharged, the battery plates will be coated with sulfate and the electrolyte will be mostly water, which is why dead batteries can freeze in cold temperatures but fully charged batteries will not freeze. When the battery is recharged, the sulfate falls of the battery plates and recombines with the water to change it back to acid again. If the battery is overcharged (in other words excess voltage is applied to it when it already is charged up), the water can boil out of the battery and acidic vapors can leave via the vented battery caps. This reduces the water level and if it gets below the battery plates it can harm the battery. It also tends to corrode the battery connections because of the acidic vapors. Maintaining the proper water level is critical to good battery performance.

AGM batteries use electrolyte but not in a liquid form like flooded batteries. The acidic electrolyte is absorbed into glass fiber mats that are wrapped around the lead battery plates. With AGM batteries there is no need to ever worry about adding water because there is no water in them so maintenance is greatly reduced. The battery terminals also are not as susceptible to corrosion as flooded batteries because there is only microscopic outgassing, or venting, of electrolyte vapors. The outgassing of flooded batteries means they need to be in a vented compartment and clear of anything that could create a spark. AGM batteries can be located anywhere because they truly are sealed. AGM batteries are typically used in aircraft and they can be used in any orientation, even upside down, with no negative consequences. AGM batteries also offer greater performance over a comparable flooded battery because the voltage drop curve is flatter.

Voltage State of Charge
12.6+ 100%
12.5 90%
12.42 80%
12.32 70%
12.20 60%
12.06 50%
11.9 40%
11.75 30%
11.58 20%
11.31 10%
10.5 0%

Battery Charge Voltages

A fully charged battery will test out at 12.6 volts. This is “at rest” voltage. When a battery is being charged, the alternator or battery charger will put out higher voltage, sometimes as high as 14.5 volts. Immediately after stopping the engine or switching off the battery charger, the battery will have a false surface charge which is meaningless and probably in the mid-13 volt range. Leave it rest for a while (at least 15 minutes or as long as an hour or two) before testing. This will allow the battery to rest and lose its surface charge. A slight load will help shorten that time somewhat. You can continue to draw current from the battery until the at-rest voltage drops below 11.9 volts. At that point only 40% of the battery capacity remains. In other words, you’ve used 60 amps from a 100 amp battery. If you continue to use the battery below this point you can get current from it, but the voltage will be low and that won’t do your electrical equipment any favors. You will also drastically shorten the battery’s life.

Batteries are not really rated in years of life. A battery is typically rated at 50 cycles of discharge and recharge. In other words you can totally discharge the battery, then recharge it. That’s one cycle. Do that 50 times and the battery will be shot. The level at which you discharge isn’t linear, it’s graded on a curve. So, if you only drain the battery halfway and then recharge it you won’t double your life to 100 cycles. It’s more like 200 or more. Similarly, if you only drain your battery to 75% you won’t quadruple your battery’s lifetime to 400 cycles. It’s more like 1,200 cycles. It is to your advantage to keep your battery bank from getting too low by frequently recharging it.

If you were to plot battery voltage vertically on a graph against battery consumption horizontally on that graph, you would see that the voltage doesn’t drop off in a straight line. It falls off on a curve, which drops fairly rapidly at the halfway point. This helps explain why the old rule of thumb is to not discharge your batteries below 50%. So, a 220 amp-hr battery is safely capable of giving up 110 amp-hrs without risking any damage to that battery. AGM batteries have less internal resistance than flooded batteries. This means that they can take a charge faster than flooded batteries but it also means that their voltage drop graph will be much flatter than a flooded battery. By the time you reach that 11.9 volt level you have given up many more amp-hrs than you would with a flooded battery. Typically, an AGM battery can give up 30% more amp-hrs than a flooded battery, so you can get 140 amp-hrs from a 220 amp-hr battery instead of the 110 amp-hrs that you would be able to get from a flooded battery. In effect, you are getting some free usable battery capacity from an equal sized battery bank.

Battery Testing

Battery testing tends to be confusing for some. Part of the reason is that there are three tests that one can perform on batteries and not one of them will give you the total picture. You need to understand what these testing devices will do and how to interpret that information. To do this we’ll look at voltmeters, hydrometers, refractometers, and carbon pile testers.

Array of battery measuring devices

Array of battery measuring devices

The voltmeter is the first thing that anyone goes for. It’ll tell you just how many volts the battery has in it. If this is performed on a battery that has been resting, we can use the above chart to determine if it is fully charged or not. However, it’s not the ultimate tool because it won’t give you any indication as to the ability of the battery to deliver electricity under load. It could just be a surface charge that will fall flat when a load is applied. If your battery has a bad cell the voltmeter won’t give you an accurate reading of how good your battery is. Remember that the electrolyte in each cell changes between acid and water depending on the charge level. To check each cell, we need to take a sample of the battery fluid and test it for specific gravity because acid is heavier than water. If we use a hydrometer we can extract a sample of the electrolyte and test its specific gravity. A fully charged battery cell will have a specific gravity of 1.277 at 80F. As the charge level decreases, so will the specific gravity. The following table shows the various charge levels, at rest voltages, and specific gravity. By testing each cell we can test to see if one bad cell is causing the battery to fail. If one cell is bad, then the battery will need to be replaced. An even better way to test for specific gravity is to use a refractometer. You simply place a drop of fluid onto the refractometer, aim it at a source of light, and look into the eyepiece. The display will show you exactly what the specific gravity is and is temperature compensated, whereas when using a hydrometer you will need to apply temperature correction tables to the float reading. Refractometers also have another benefit in that the same unit can also be used to test antifreeze protection levels.

Percentage of Charge Specific Gravity Corrected to 80o F At Rest Voltage
100 1.277 12.73
90 1.258 12.62
80 1.238 12.5
70 1.217 12.37
60 1.195 12.24
50 1.172 12.1
40 1.148 11.96
30 1.124 11.81
20 1.098 11.66
10 1.073 11.51

All of the above in formation serves to inform you of the battery’s state of charge. It has no bearing whatsoever on the ability of the battery to produce any volume of power, although you first need to know that the battery is charged up before continuing with further testing and it will point out any failed cells within the battery. To determine its output capability, you will need to perform a load test. The best tool for deep cycle batteries is a carbon pile tester. A carbon pile tester consists of a carbon pile rheostat. As you dial the knob in, it increases resistance and simulates a load on the battery. It’s bigger than a light bulb but smaller than a dead short, so think of it as a controlled short that will suck power from your battery. The tester also includes a voltmeter and ammeter. You simply connect the alligator clips to the battery terminals and dial in the knob on the tester. The display on the ammeter will indicate the load increase. For deep cycle batteries, you dial it in until the ammeter reads two times the rated battery current, so a 100 amp-hr battery would get turned down to a 200 amp draw. For chassis batteries you dial it in to 50% of the CCA rating of the battery. You then check the voltmeter to see if the voltage holds in the green zone. If it drops down into the red zone, your battery is not capable of sustaining that output level and will need to be replaced. At the same time, you can inspect the battery cells to check for any boiling or bad cells if you want to know why your battery failed. Voltmeters and hydrometers alone will not give you this information. You need the variable load of the carbon pile tester to accurately test this.

Battery Care and Maintenance

To ensure that your batteries perform their best and last the longest you will need to take care of them. Batteries can’t pass power to the electrical system if their connections are all corroded. The acidic electrolyte in flooded batteries tends to eat away at the copper and lead connections and eventually corrosion will build up and hamper the flow of current. You will need to check and clean these connections regularly as part of a scheduled maintenance cycle. Flooded batteries can lose water over time and it’s important to check your water levels so that they do not get so low as to expose the battery plates. Keeping the batteries away from very hot locations will help in this but the biggest cause of battery water evaporation is due to overcharging. Putting excess voltage into a battery that is nearly charged will boil the electrolyte and the battery will outgas. If you find that you are repeatedly adding water to your batteries, it’s time to check your charger’s float voltage.

Battery Chargers

We all know how easy it is to take power out of a battery. What about recharging them when they are low? Batteries in a motorhome can be charged in a number of ways depending on the current mode of operation and whether they are chassis batteries or coach batteries. First off, we need to understand that there are two separate battery banks on a motorhome – the chassis batteries and the coach batteries. The chassis batteries are for starting the motorhome’s engine and powering the headlights, wipers, and other chassis related accessories. When driving down the road the vehicles alternator will charge the chassis batteries. The “house” portion of the motorhome has a separate bank of batteries called the coach batteries. These are deep cycle batteries that will power the lights, domestic water pump, fans, and any other accessories that are related to living in the coach while parked. These batteries are kept separate from the chassis batteries so, in the event that you run them down too low, you will still be able to start the motorhome’s engine. A Charge Solenoid is installed to connect both the chassis and battery banks together. This solenoid is engaged whenever the ignition key switch is in the “on” position. The engine can then recharge both battery banks when driving down the road. As soon as you are parked the solenoid opens and the two battery banks are divorced once again.

A convertor

Convertor

A Xantrex inverter/charger

Xantrex inverter/charger

But, what about when we are parked at a campsite? We don’t want to have to run the engine all the time to recharge these batteries, so we need other options. The first option is a battery charger that is dedicated to the coach’s electrical system. This charger is a 120 volt device that will be powered whenever we plug into shore power or run our generator set. In addition to charging the batteries we also need to provide clean power with consistent voltage to power the 12 volt electrical components while we are parked rather than use the batteries to power them. This device is called a converter. The converter is hard-wired into the 120 volt electrical system as well as the 12 volt system. It “converts” 120 VAC power to 12 VDC power to run the 12 volt accessories as well as charge the coach battery bank. So, now we have the ability to recharge the coach batteries via the engine alternator when driving or via the converter when parked with shore power or when running the generator. When boondocking we can use the batteries to provide power. When the voltage gets to that magic 50% mark, we can fire up the generator set for an hour or two to power the converter and recharge the batteries. The actual charge time will vary according to the size of the converter as well as the size of the battery bank. If the battery bank is 440 amp-hrs and it is at 50% you’ll need 220 amp-hrs to bring it to its fully charged state. If you have a 60 amp converter you’ll be looking at close to 4 hours to output that much power. Larger converters take less time but cost more.

Another popular device is the inverter. An inverter does just the opposite of a converter. It creates 120 VAC power from 12 VDC. It is used to power 120 volt devices via battery power so that you don’t have to run the generator all the time. Small inverters run from 250 watts up to 1,000 watts and are installed into an electrical circuit. No battery charging capabilities exist on a basic inverter so most diesel pushers use an inverter/charger unit. These units combine the features from both an inverter and a converter. They are generally found in larger sizes, such as 2,000 watt and 3,000 watt. These inverters are connected to a dedicated 120 volt circuit breaker in the main breaker panel and also connect to the coach batteries via large diameter battery cables. They feature an automatic transfer switch that will pass shore power through when present, or switch over to battery fed inverter power whenever shore power is not present. Note that the running the generator is the same thing as shore power in this instance. Whenever 120 VAC power is present the inverter not only passes that power through to the electrical devices fed by it, but it also acts as a converter and provides 12 volt current to power the house accessories and recharge the coach battery bank. Typical inverter/chargers have battery charging capacity in the 100 to 140 amp-hr range so they are larger and faster than a converter. When an inverter/charger is present there is no need for a converter.

Both converters and inverter/chargers feature three battery charging modes. When a battery is low on charge the first mode is the bulk mode. This mode provides full charging output to the batteries. As the battery approaches the full mark the charger will kick into absorption mode. In this mode the voltage is regulated to not be excessive so that the batteries can absorb this charge without boiling. Finally, in order to maintain a charge in a battery that is very close to full the float mode will be engaged. In this mode charger output voltage will be limited to no more than 13.2 volts so that excess outgassing does not occur. You can safely leave your batteries connected to the charger indefinitely if it’s in float mode without fear of boiling out water. Of course, this assumes that your charger’s float mode is functioning properly. If you are adding water frequently it’s time to have your charger’s float voltage checked.

Equalizing Batteries

We talked earlier about how battery electrolyte loses its acid content and turns to water and deposits sulfate on the battery plates as it is discharged during normal operation. We also mentioned how this sulfate “falls off” the battery plates and recombines with the electrolyte as the battery is recharged. But this process isn’t perfect and some of the sulfate will remain on the battery plates. The more we use the battery, the more sulfate remains on the plates. Each time that the sulfate remains on the plates we lose some battery capacity. If it continues we have a sulfated battery that just isn’t capable of giving us the performance that it was originally designed for. If we wait until it’s really serious the battery will need to be replaced. However, it is possible to clean some of this sulfate off of the plates if we don’t wait until it’s too far gone. This can be done by a process called equalization. When we equalize batteries we apply excessive voltage to that battery, or battery bank. This excess voltage will boil the electrolyte and cook the sulfate off so that it can recombine with the electrolyte, restoring both the electrolyte and battery plates to their original condition. This process isn’t 100% perfect either, but it will greatly extend your battery’s life and improve its performance if done regularly. The time frame between equalizing batteries will vary as to how you use your batteries. If you frequently run them low and recharge them, you’ll need to do this more frequently than if you are plugged into shore power most of the time and don’t demand those deep swings in charge level. If you use them hard, equalizing every 6 months would be a good idea, otherwise once a year should be sufficient.

Equalizing requires a period of time where you will put high voltage into your battery bank. Most converters and inverter/chargers have the ability to perform an equalizing procedure on your batteries. Refer to your owner’s manuals for the exact technique used to initiate an equalizing charge with your particular charger. When equalizing the charger will output around 15.5 volts. This is too much for your coach’s electrical devices to handle so it’s important to disconnect any loads in the coach during this time. Operating the battery disconnect solenoid switch will kill most power to the coach, but there may be a few devices that are connected directly to the batteries and are not run through the disconnect solenoid. Check for these and pull fuses or whatever else it takes to disconnect them. Note that it is not necessary to disconnect the chassis system because you will only be equalizing the coach batteries. Chassis batteries do not require equalizing because they are not deep cycle batteries or subject to those conditions. Also, equalizing is only to be done on flooded batteries. If you have AGM batteries equalizing is not needed, nor should it ever be performed on AGMs or they will be damaged by the equalization process.
That’s it for this month. Be sure to check out next month’s final installment that covers low voltage circuits, inverters, automatic generator start systems, solar power, energy management systems, and surge suppression.

National Indoor RV Centers blogger Mark Quasius profile picture

Mark Quasius is the founder of RVtechMag.com, the past Midwest editor of RV Magazine, writes for numerous RV-related publications and a regular Contributor to FMCA’s Family RVing Magazine. Mark and his wife Leann travel in their 2016 Entegra Cornerstone.