Installing Accessories on an RV

How to add an accessory to your RV

Wires are just like water pipes in that you can only pump so much stuff through a given size pipe without losing pressure. If you try to send too many amps through too small of a wire the voltage will drop, the wire will get hot, your device won’t run properly, and you’ll probably blow the fuse for that circuit. The chart below will give you a good idea as to what wire gauge you will need to use if you want to add an accessory to your RV.

Wire Gauge (AWG) Wire Diameter, in Inches Current Capacity, in Amps
0000 .4600 600
000 .4096 500
00 .3648 400
0 .3249 320
1 .2893 250
2 .2576 200
4 .2043 125
5 .1819 100
6 .1620 65-80
8 .1285 40-50
10 .1019 30-33
12 .0808 20-23
14 .0641 15-17
16 .0508 7.5-10
18 .0403 5
20 .0320 3.3
24 .0201 1.3
28 .0126 0.5

For example, if you want to add a small fan to your RV that has a motor rated at a 4 amp draw you will need to go with a #18. The 20 gauge wire is only rated for 3.3 amps while the #18 can safely handle up to 5 amps so you always round up. If you want to install a water pump that pulls 20 amps, you’ll need to use a #12 wire. If you want to add an inverter and its DC battery draw is 400 amps you will need a #00 wire. Keep in mind that you can always go to a larger wire gauge without any bad results but you can never go smaller. Also, the length of wire will also affect its ability to carry current. If you are running long runs of wire you may need to increase the wire gauge to allow for the extra resistance incurred by the extra lengths. In this case, use the above wire gauge chart conservatively when choosing which wire gauge to use. Going larger is always a safe bet.


RV Inverters and Chargers

Inverter/chargers do have on/off buttons to disable either or both functions but they are not normally needed because the inverter/charger will automatically switch back and forth as needed. However, when the coach is stored it’s not enough to switch off your output circuits. An inverter will have a slight idle current even while not in use if it is allowed to be powered up. When storing your coach without shore power be sure to switch off your inverter and charger at the inverter itself to eliminate the idle current from slowly draining your batteries.

A Xantrex inverter/charger

A Xantrex 2,000-watt true sine wave inverter/charger

RV Inverter Installation

If your RV doesn’t have an inverter, but you would like to install one, be sure to download a copy of the manufacturer’s installation manual from their website and read it first before buying your inverter. Inverters do need the proper environment. True sine wave inverters can create a fair amount of heat. If you place them in a large basement pass-through storage area you’ll be fine but if you place them in a small enclosed compartment they will overheat. In that case you’ll need to provide some intake air as well as a place to exhaust the heat, preferably with a fan.


Automatic Generator Starting:

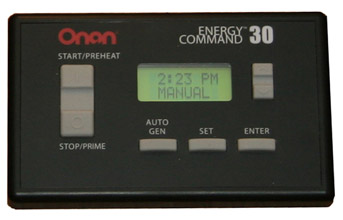
Automatic Generator Start (AGS) systems do just what you think they might do – they start your generator set automatically, even if you are not near the coach. These systems vary in complexity and design. Some systems are standalone systems and are simply a module that connects to your generator set to start it if your batteries get low. Some systems, such as the Onan EC-30, are an all-in-one system that builds the circuitry into its remote display and control panel. This system design also includes a thermostat interface so that it can start your generator in response to a request for cooling from the air conditioner’s thermostat. Other systems, such as the Xantrex and Magnum AGS modules, are designed to network with an inverter and use the same remote display panel as the inverter to control both the inverter and AGS module via menu driven software. So there are a number of options and choices available when selecting an AGS module.

Onan EC-30 Automatic Generator Start (AGS) module

The Onan EC-30 Automatic Generator Start module.

Selecting an AGS System for your RV

The first thing to do is determine just why you want an AGS system in the first place. If you are only going to run your generator to power air conditioning when driving you probably don’t need one. If you will be dry camping quite often you will need to run your generator every now and then to recharge your batteries. If your batteries drop below a given voltage your AGS can start the generator set for you automatically while you are off sightseeing so that you don’t return to a dead coach. This is the basic feature of any AGS system. You can also recharge your batteries while you sleep if they drop down during the night without having to worry about setting your alarm clock. Many campgrounds do have a quiet time posted where no generators may be run during the evening but more advanced AGS models include a quiet time setting that can be set. In that case the AGS module will not start your generator during those quiet time hours and will wait until morning to auto-start. Some models, like the Onan EC-30, include predictive scheduling. The AGS will monitor your battery voltage level and if it determines that it will need to recharge them during quiet time, it will start the generator earlier and then shut off so that they will be recharged when your quiet time begins. 

The next level includes a thermostat interface. Your AGS system will be connected to your air conditioning system’s thermostat. If a request for cooling occurs, the AGS will start your generator and power the air conditioning system to prevent your coach from overheating. Some systems also include a shore power connection so that the AGS will only start the generator if there is no shore power present. This is a great feature for RV owners who have pets and normally camp in full service campgrounds. The shore power will power your coach’s air conditioners to keep your pets from overheating. But, what happens if the shore power was to go out or the pedestal breaker tripped while you were away from the coach? Your air conditioners would stop working and you might be returning to a coach with pets that suffered heat stroke.

If you have an AGS that does not have a shore power sense, but does have a thermostat connection, you’ll find that the generator will start up every time the thermostat calls for cooling – even when the shore power is functioning. This is not desirable so you will have to install a relay that is fired by the shore power side of the transfer switch and then intercept the low voltage wires that connect the thermostat to the AGS module. This will break the circuit whenever shore power is present so that the AGS never sees the input signal from the thermostat. When the shore power fails the relay will allow that connection to take place. With an AGS that has shore power sense you won’t have to worry about that. All of the logic is handled within the AGS electronics and it won’t start the generator if shore power is present. If shore power fails and cooling is desired it’ll start the generator and your pets will be safe.

If you have a Silverleaf or Firefly networked whole coach system that controls most coach functions via a multiplexed network you most likely have a bridge, which is a device that bridges the communication with the inverter/charger and the Vegatouch control system. This allows complete control of the generator and AGS module via the master control touch screen in the coach.

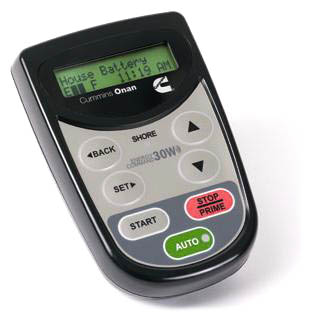
wireless controller for the Onan EC-30W AGS module

The Onan EC-30W AGS unit uses a wireless controller

Installing an Automatic Generator Start

Installing an AGS module requires a bit of work. You need to run wiring connections to the transfer switch mounted transformer as well as the batteries, generator start-stop switch, remote control panel and HVAC thermostat. Fishing all of those wires can be tedious and sometimes difficult. 

Wireless units will save you some time by allowing those connections to be performed under the floor in the chassis area, using wireless operation to the remote display panel in the RV. The Onan EC30W is the premier wireless system. The remote unit communicates wirelessly to the main harness and even contains a temperature sensor so that you don’t have to tap into the existing HVAC thermostat.

You do have to be careful of where you place the remote though. If you set it in a hot spot it’ll be triggering the generator prematurely. You also run the risk of communications failure, which can happen with any wireless electronic device, particularly when you consider that the signal needs to pass through the motorhome’s steel firewall.

Entertainment Systems For RVs

Entertainment systems are key features on an RV

Go through any motorhome on a dealer’s lot and you’ll find advanced systems that rival anything found in a home. But RV entertainment systems have changed over the years…

What began in the early days as a small portable 12 volt television with rabbit ears has now evolved into a sophisticated system featuring numerous digital input sources, such as Blu-ray players, satellite TV, streaming video and large screen LED TVs with surround sound systems. VCRs have been replaced by DVRs, DVDs by Blu-ray, and even 1080P HD signals are being supplemented by 4K UHD. Even over-the-air free broadcast TV has changed. The old analog VHF TV channels have been upgraded to digital UHF channels, with multiple channels with different programming coming from a single TV station. The Internet has made massive strides as technology and bandwidth have improved and streaming services, such as Netflix and Hulu, are quickly becoming the next great thing.

Delivery Methods

The content that you desire to view is meaningless unless you can get it delivered to your RV. While cable TV and Internet may be fine for a sticks-and-bricks home, it’s not going to work in an RV that is mobile.

National Indoor RV Centers blog Mark Quasius Entertainment Systems for Class A Class B and Class RVs and motorhomes

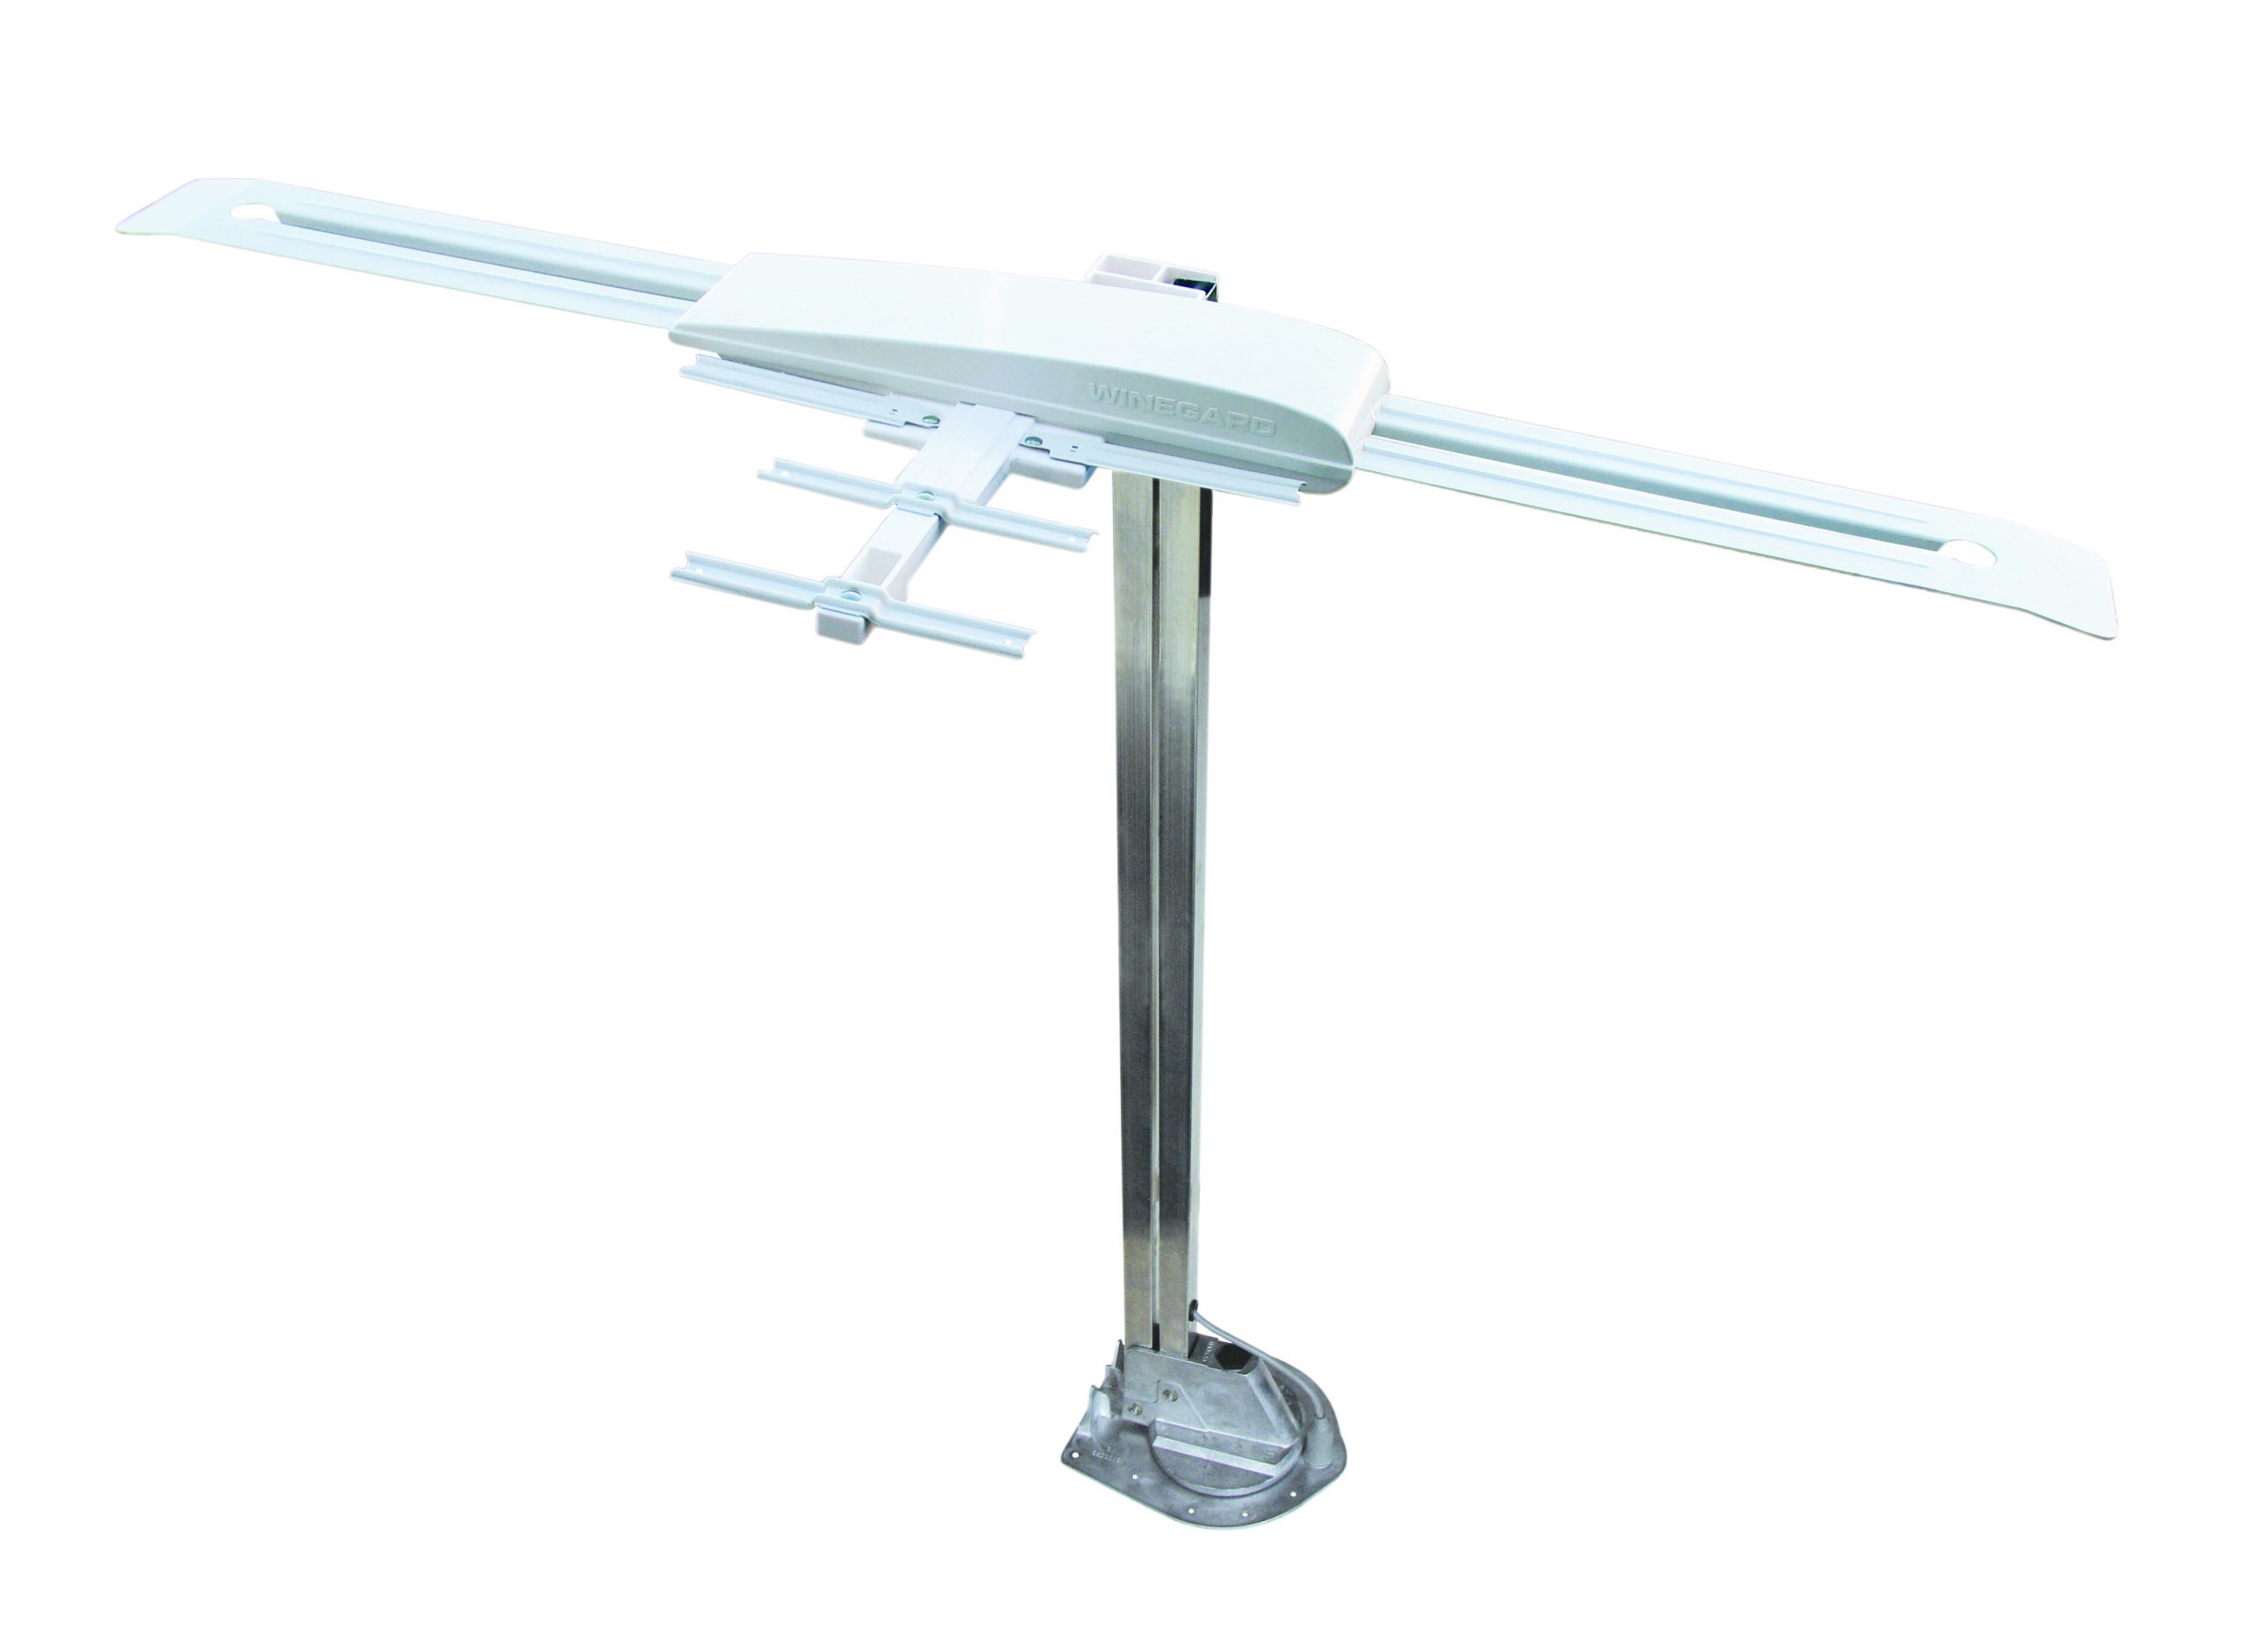
A Winegard Sensar batwing style crank-up antenna.

Over-the-air free broadcast TV is always available as long as you are in range of a broadcast TV station’s tower and the original crank-up batwing TV antenna still works today. You crank it up to raise the antenna and then rotate it to point in the direction of the TV station. Adding a Wingman booster will help pull in stronger UHF signals. The “height is might” analogy applies here. The downside is that you need to manually raise and rotate it and you’ll need to remember to retract it before you move, or else it will be damaged while driving.

National Indoor RV Centers blog Mark Quasius Entertainment Systems for Class A Class B and Class RVs and motorhomes

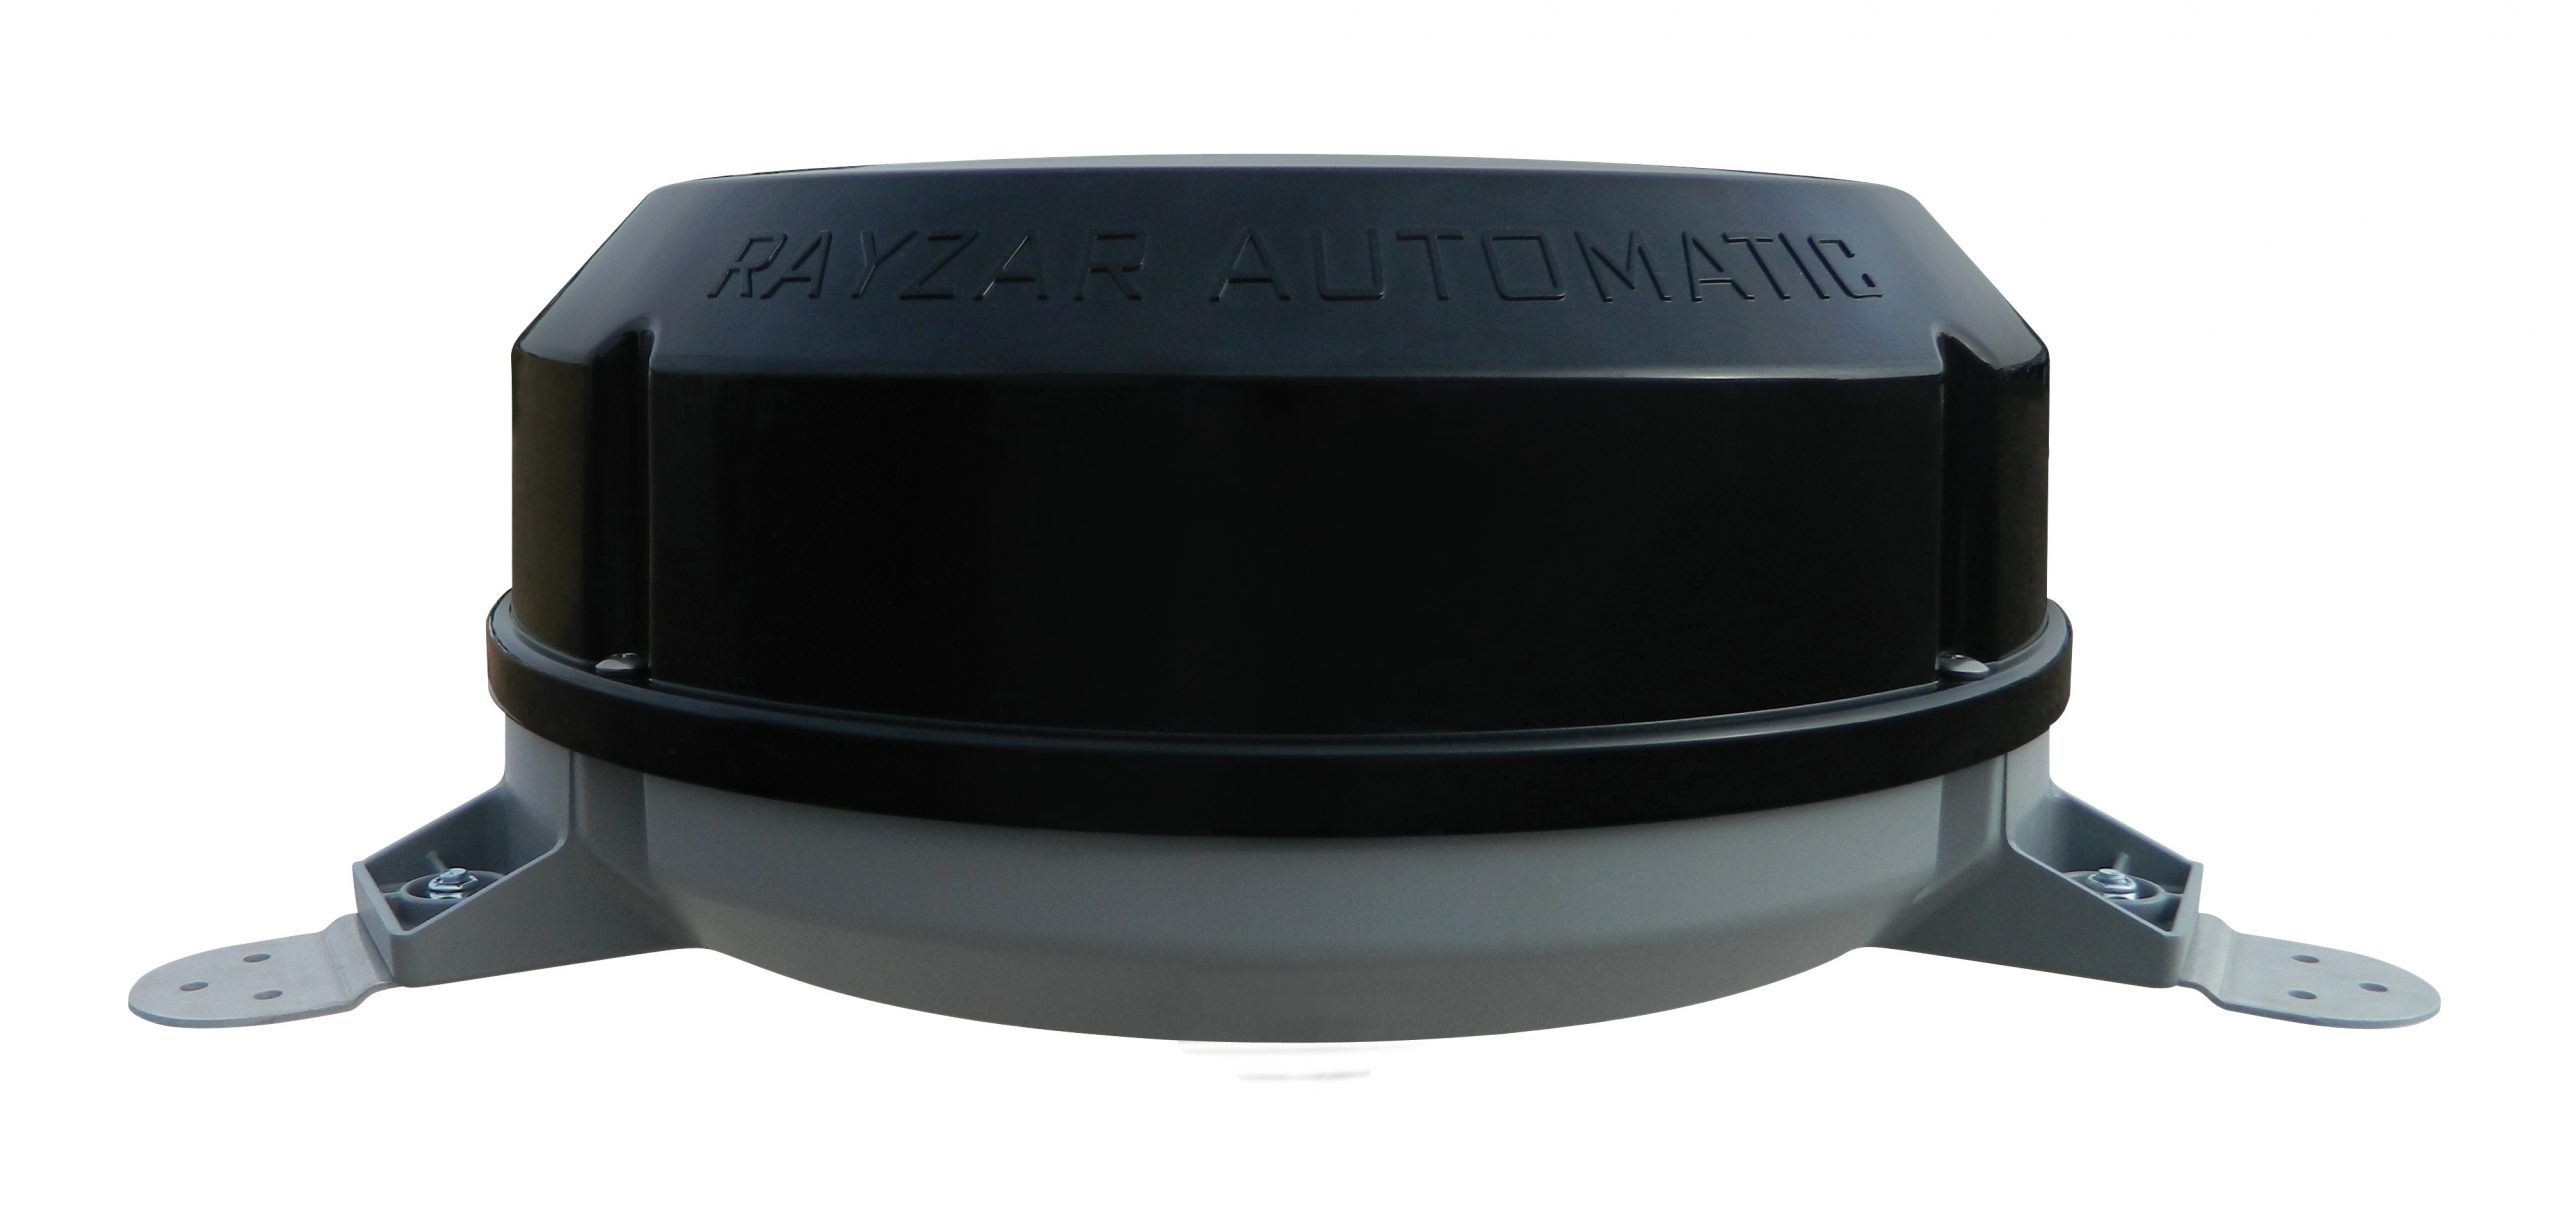
The Winegard Rayzar Automatic is an automatic over-the-air antenna.

A more convenient system is Winegard’s Rayzar Automatic, which is a round enclosure with a digital antenna that rotates automatically to find the stations that are within range – simply by pressing a button. This antenna also includes a built-in amplifier and, while the batwing with Wingman does pull in stronger signals, the Rayzar Automatic isn’t very far behind and you don’t have to worry about having to retract it before traveling.

The next big thing to show up in RVs was satellite TV. With a dish aimed at the southern sky, one can receive paid content from providers such as DirecTV or DISH Network. Different plans are available and the cost rises as the number of channels increases. These units can use a portable tripod-based dish which requires manual aiming, or can be fed through an in-motion dome or via an automatic roof-mounted dish such as the Winegard Trav’ler or RF Mogul’s excellent Eagle dish. Just power up the system and it will search for the satellite and lock on automatically.

National Indoor RV Centers blog Mark Quasius Entertainment Systems for Class A Class B and Class RVs and motorhomes

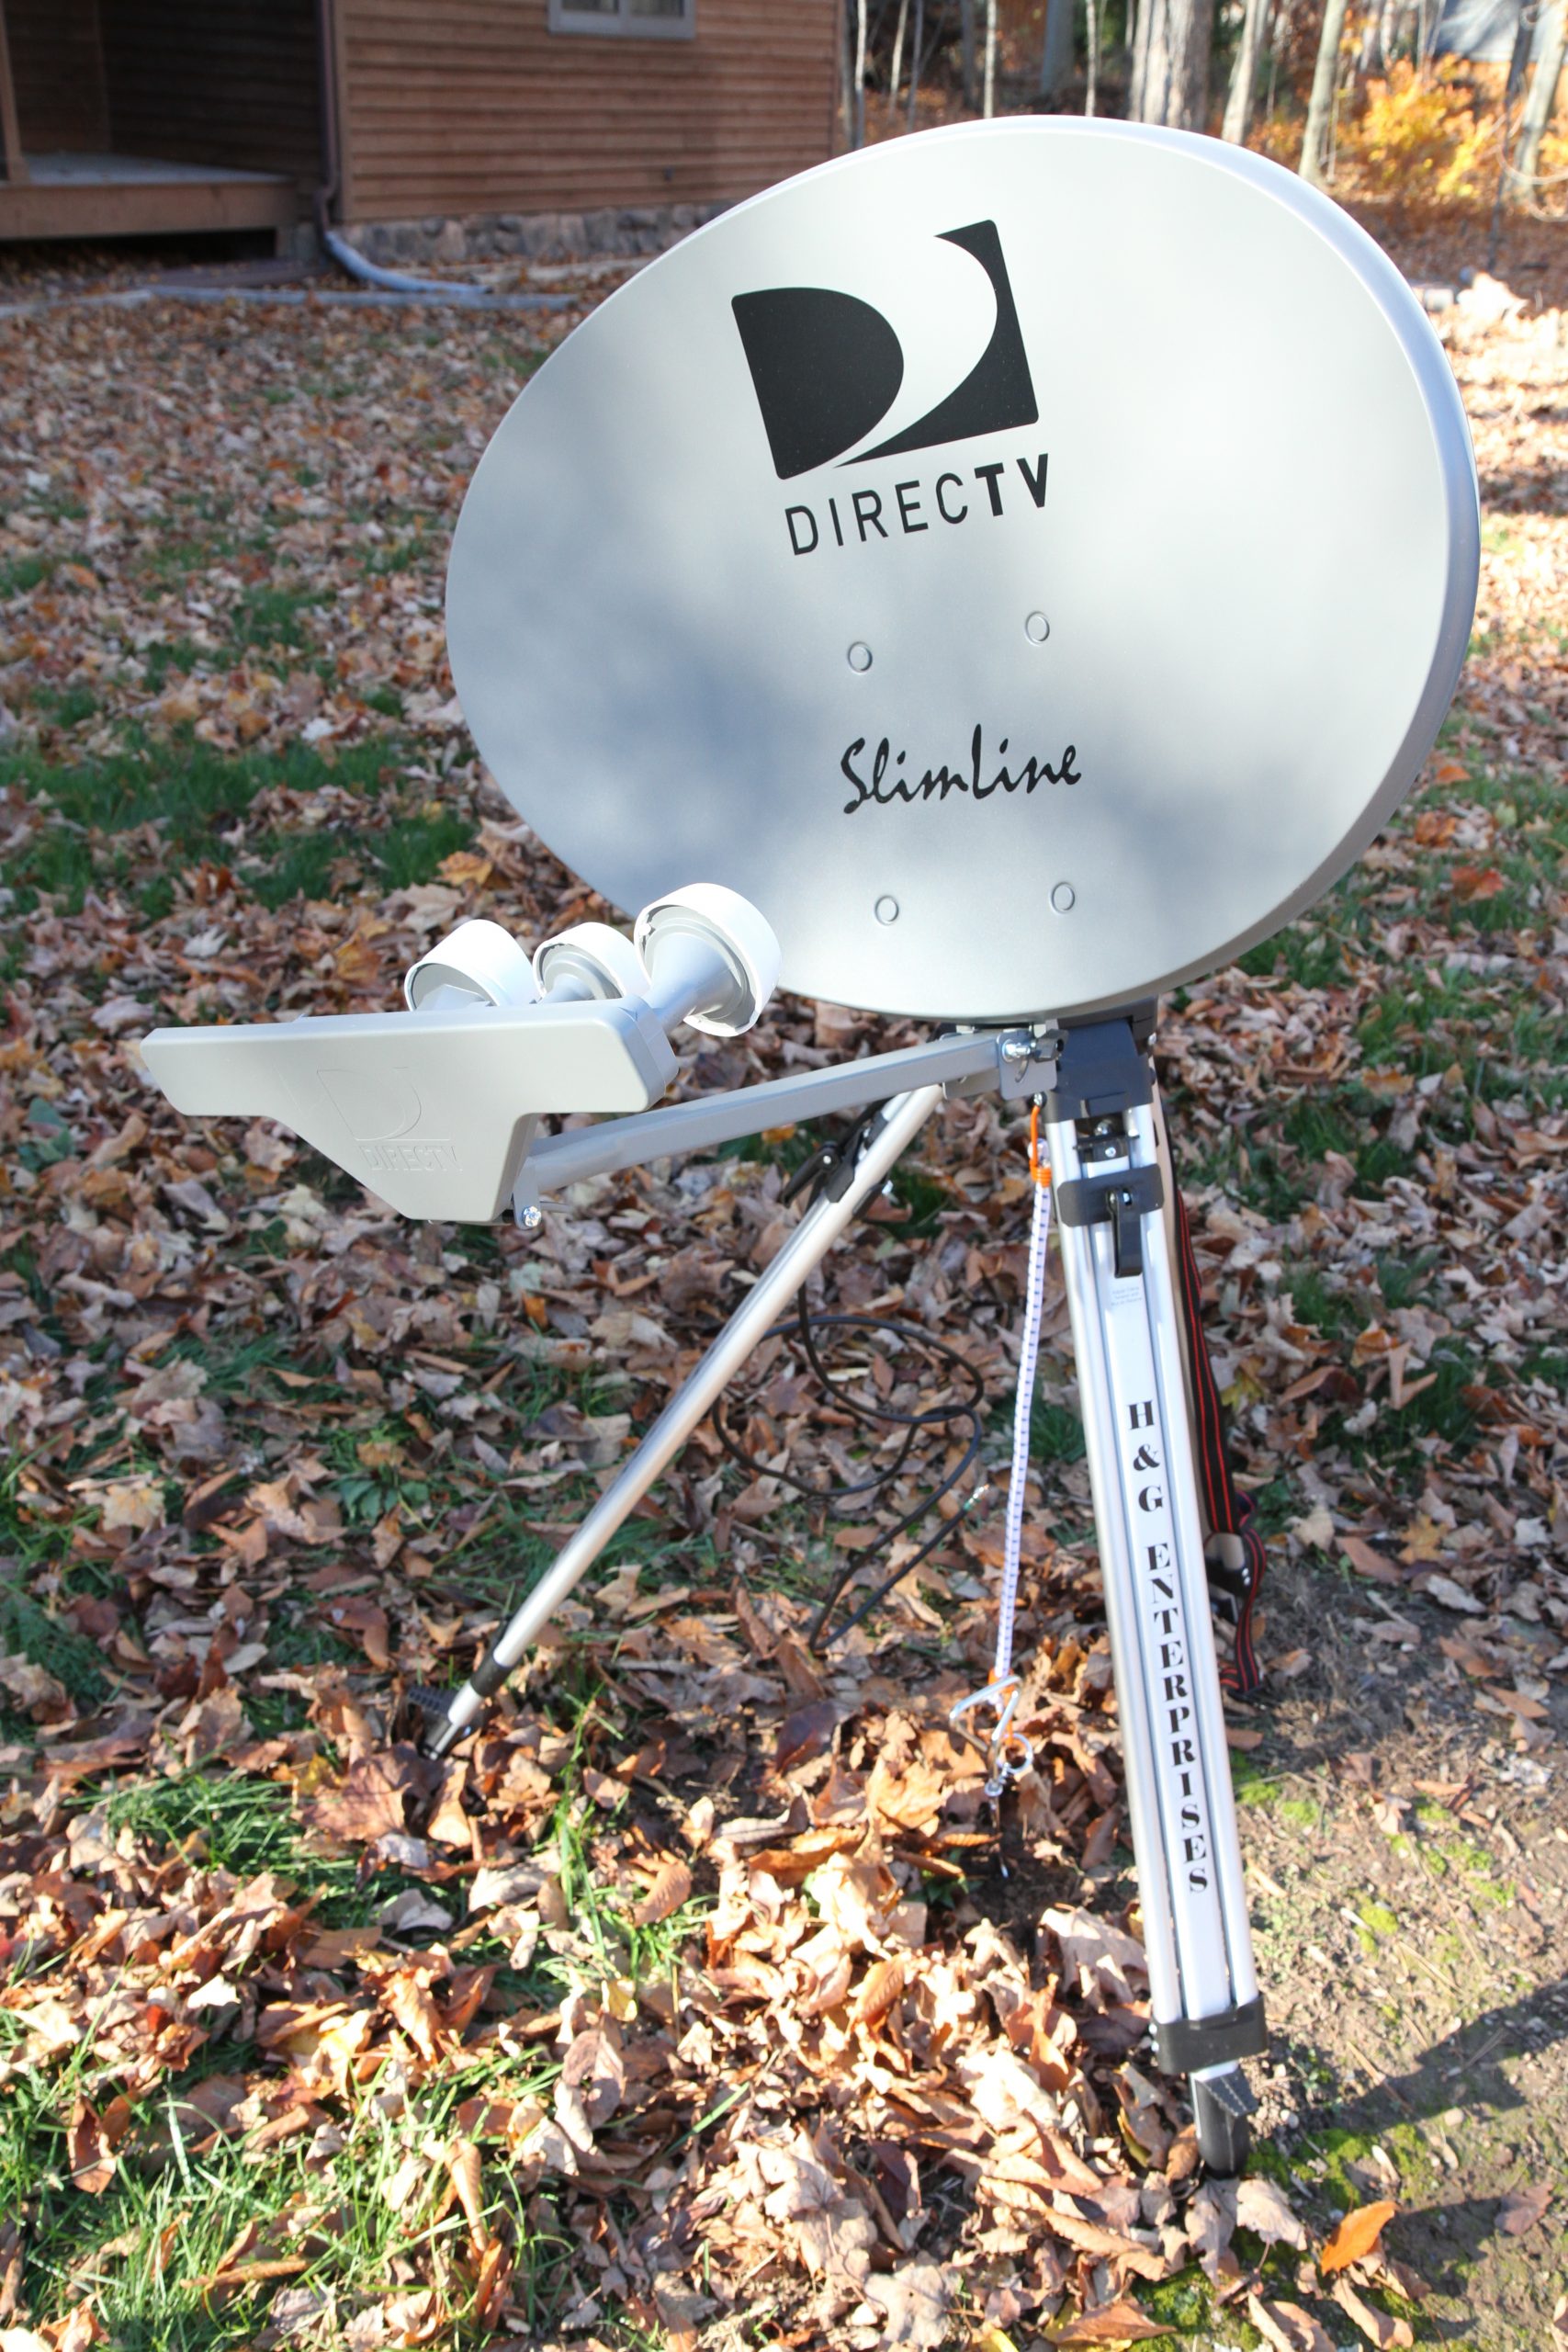
A portable tripod satellite dish may be necessary if tree branches obscure a clear view to the satellite.

The manual dish mounts to a tripod and requires a bit of work to set up and adjust to find the satellite. Various apps exist to show you the correct azimuth, elevation and skew so that you can set the dish to these approximate settings and then use a signal meter to analyze the signal level as you fine tune or dither the dish to achieve the strongest signal. While this takes work, it may be necessary if you plan on staying in one place for a while where the tree coverage prevents a rooftop mounted dish from getting a clear signal from the satellite.

The satellites are located near the equator in a geosynchronous orbit, so your dish needs to be aimed towards the southern sky to find the satellite. Azimuth and elevation will change as you move around the country and anything that blocks the signal, such as trees, will prevent access to the satellite. Even storm clouds will make a difference and rain fade is a common occurrence if storm clouds come rolling in.

National Indoor RV Centers blog Mark Quasius Entertainment Systems for Class A Class B and Class RVs and motorhomes

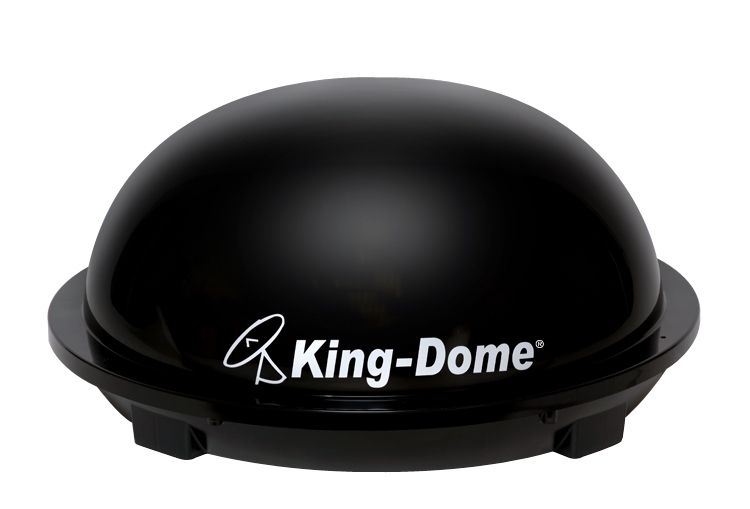
The King-Dome is one example of an in-motion satellite dish.

Automatic domes were available from suppliers such as KVH, Winegard and King Controls that eliminated the manual setup procedures and were popular at first, but by 2000 had fallen in favor for a number of reasons. First, DirecTV began making more HD content available. This necessitated moving HD content from the lower bandwidth KU band to the higher KA band. The in-motion dishes weren’t capable of receiving the KA band, which required a triple LNB oval dish. There just wasn’t enough room inside the dome to place a triple LNB dish. In fact, the dome required a fairly small dish that didn’t equal the signal strength of a large tripod or roof mounted dish. This created a weaker signal which was really susceptible to rain fade, especially if there was any morning dew or snow on the dome.

National Indoor RV Centers blog Mark Quasius Entertainment Systems for Class A Class B and Class RVs and motorhomes

The Winegard Trav’ler automatic satellite dish is an automatic deploying dish.

Fortunately, Winegard introduced the Trav’ler automatic dish. This dish could be set up for DirecTV or DISH Network use. This rooftop-mounted dish automatically deployed with the push of a button, searched for the satellite and locked onto the signal. When ready to travel, a second button push on the controller caused the dish to fold up flat into the storage position for travel. RF Mogul also came out with the Eagle automatic dish which was a superior unit to the Winegard. These units provided satellite TV to any RV and were the number one choice – at least until streaming appeared.

National Indoor RV Centers blog Mark Quasius Entertainment Systems for Class A Class B and Class RVs and motorhomes

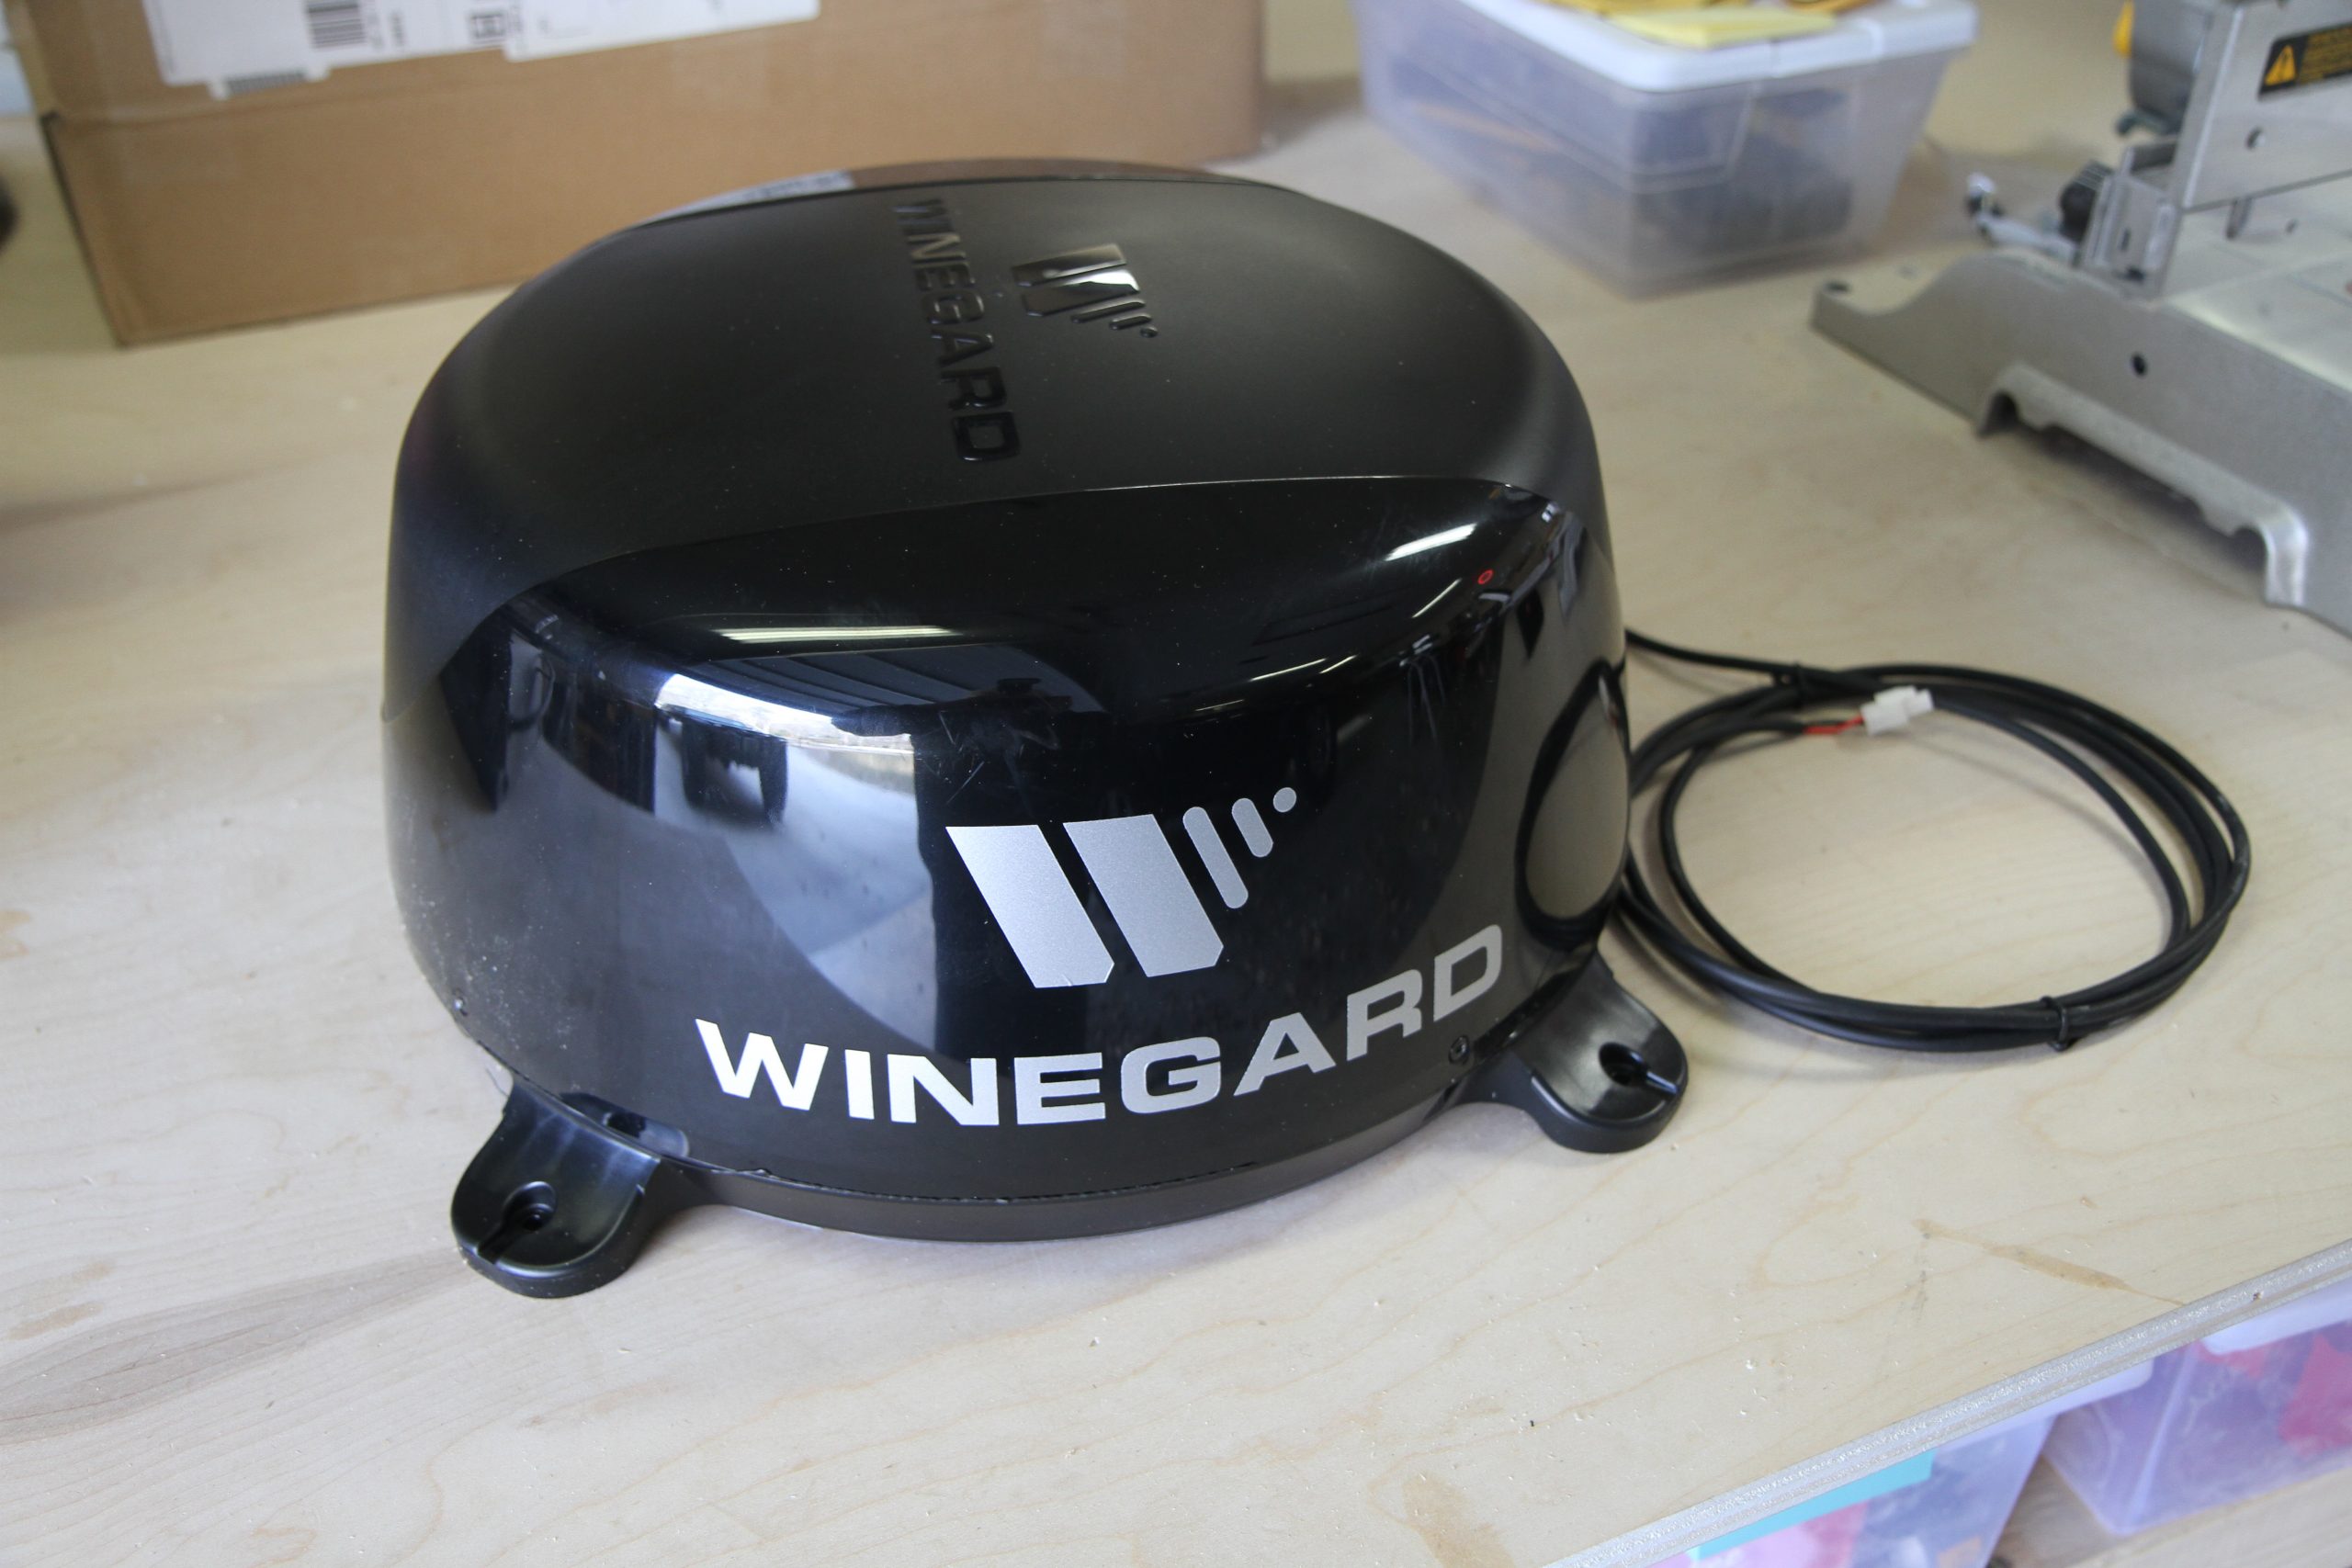
The Winegard ConnecT 2.0 can connect to cellular or campground Wi-Fi sources and will provide internet access via an internal router to any connected device in the RV.

At home, nearly everyone has high speed Internet and, as streaming services first began to offer entertainment content, many of the old standbys started to decline in popularity. Satellite TV subscription costs steadily rose every year, causing its popularity to decline. The RV industry was only a small percentage of the market, so issues such as portability of local channels while traveling also became a hassle. Gradually the entire world began to embrace streaming entertainment rather than cable or satellite TV. It began with services such as Netflix, with movie content that virtually put DVD rental stores out of business. Soon, services such as Hulu began to offer much of what was currently available on satellite and cable TV. Once other content providers jumped in with their own services, the “cut the cable” rush was in full swing. Now it was just up to the RV owner to figure out how to get this streaming content into their motorhome. 

Streaming requires a high speed Internet connection. The early days of dial-up were fine for accessing email or viewing the weather, but too slow for streaming content. Campground Wi-Fi was the next step but as everyone got on the streaming bandwagon, the bandwidth demand exceeded the ability of the campground to supply enough bandwidth. So limitations were imposed by the campgrounds as Wi-Fi service became spotty. 

As cell towers began to appear everywhere, this offered an alternative. And as signals improved to 3G, 4GLTE and now 5G, the ability to handle larger data (such as streaming video) improved. It was now up to the cell companies to provide packages that were capable of handling streaming video. In essence, the cell companies were now getting the monthly premiums that were previously going to the cable and satellite companies. But because the Internet was so popular anyway, the subscribers were at least getting more for their money by not having to pay both a satellite TV bill to one supplier, and a cellular internet service bill to another.

To get a cellular or Wi-Fi feed into your motorhome, you would need a router to set up a personal network as well as an access device such as an air card, Jetpack or SIM card that plugs into a wireless router. One popular device for motorhome owners is the Winegard ConnecT 2.0. This dome mounts on the roof of the RV and can connect to a campground Wi-Fi source or to an AT&T or Verizon cell service via a SIM card. It then creates a personal wireless network within your RV. This lets you log into the wireless router with the same login information every time – on your phones, iPads, laptops or connected coach systems, regardless of where the incoming source is coming from.

One other source for streaming video is satellite Internet, such as Hughes Net. This is a pricey option and has limits on monthly bandwidth usage. It has long latency issues because the signal needs to travel 22,000 miles up to a satellite and back again. This makes it a bad choice for online gaming but isn’t a problem for streaming video such as movies where constant two way upload and download communication isn’t required. It has the same limitations as satellite TV in that rain fade and trees are a concern, but it does have the benefit of being able to be used in the middle of nowhere when cellular communication is spotty (at best) and where Wi-Fi is non-existent.

System Components

An entertainment system is just that – a system. In addition to an antenna, dish or other source, you need to have a distribution system and viewing devices. An over-the-air antenna or cable TV feed will send their output via a RG6 coaxial cable. An OTA antenna needs a bit of help, so an amplifier will utilize 12 VDC power to send a signal up through the coax to the antenna to boost the signal. Cable TV does not need this, so the cable tv coax is typically connected to the antenna booster switch, which actually acts as a 2-way coax switch as well. When the button is pressed it will illuminate, indicating that the amplifier is sending its signal to the OTA antenna. When the button is released, the pilot light will go out and the amplifier will turn off. At the same time, it will switch the coax input from the antenna to the cable TV feed. The output from this switch then goes to a coax splitter that can send the output signal to up to four different TVs via their coaxial input jacks. The internal tuners on each TV will be used to select the channels.

National Indoor RV Centers blog Mark Quasius Entertainment Systems for Class A Class B and Class RVs and motorhomes

Satellite receivers or DVRs require a subscription to a satellite provider.

A satellite dish also uses coax to deliver its signal but it’s not the same frequency as the RF signal sent by the antenna or cable TV. The dish outputs a high band signal that cannot be read by any TV. Instead, it must go directly to a satellite receiver or DVR, which is nothing more than a receiver with recording capability. The receiver will then handle the tuning and selection of channels which will then be sent out via HDMI cabling to an HDMI distribution amplifier, which can then send that information to an HDMI input on any of up to four TVs.

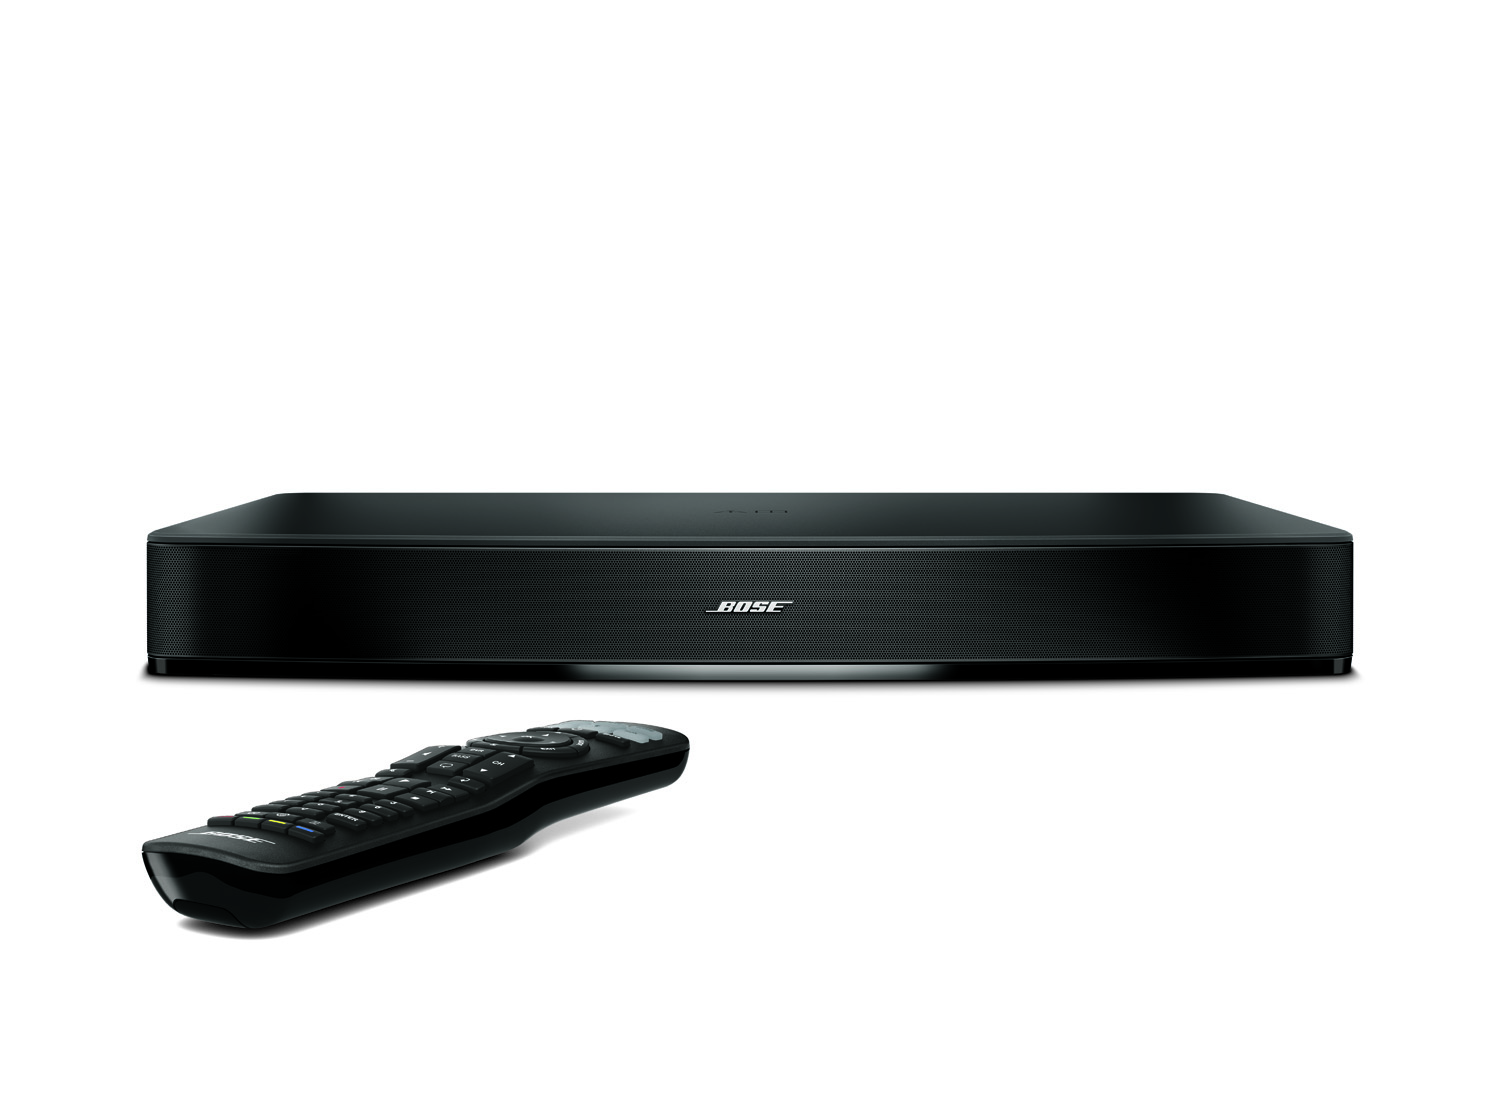
Local content, such as output from a Blu-ray player or laptop computer with an HDMI jack, can also be sent to an HDMI input jack on a TV. Most modern TVs have multiple HDMI jacks and can handle multiple feeds so that DVDs and satellite receivers can be connected at the same time. But most entertainment systems utilize a distribution center that allows switching from all of these inputs via a remote control and sends the output on a single HDMI cable to each TV via a 1×4 HDMI distribution amp. This also connects to a surround sound system or sound bar so that every input gets the same high quality audio. However, there are cases where a second source may still be desired, such as in the bedroom where a second Blu-ray player or satellite receiver may be used.

National Indoor RV Centers blog Mark Quasius Entertainment Systems for Class A Class B and Class RVs and motorhomes

Dongles, like this Roku, connect to a TV’s HDMI input to allow easy access to streaming internet video via a remote control.

In the case of streaming, there is no antenna or dish to provide a hard-wired signal. Streaming content is delivered over the Internet and sent throughout the RV via a Wi-Fi signal. If you want to watch this content on your laptop or iPad, you just access your web browser or smartphone app and log into whatever service you are registered with. If you want to view this content on your TV, it’s a different matter.

Some smart TVs have built-in apps that can log onto certain streaming services, but not every TV has that ability and the service you want might not be available on that TV. Instead, you’ll have to buy a wireless interface device that connects to an HDMI input port on your TV. These devices range from boxes with cables that extend to the TV to dongles that plug directly into an available HDMI port on the TV. These devices vary and include brands such as Roku, Amazon’s Firestick, Fire TV, Apple TV, Xbox and others.

Not every streaming source will work with every device, so you’ll need to match the device with the streaming services that you want to watch. Note that the average household utilizes three streaming services, so plan ahead before you buy. If you install the dongle on your HDMI distribution center, you’ll probably only need one device. But if you want to watch another feed, such as a bedroom TV that isn’t playing the same channel as the main feed, you’ll need a second device for that TV. Most aren’t that expensive and can be less than $50 while some, like the Apple TV, can cost quite a bit more.

Content

Now that you have content available, what do you want to watch? Each service offers their unique selection of programming. Many networks are moving their main programming to streaming networks. So if you want to watch certain shows that used to be on free OTA broadcast TV, you may now find that you’ll have to move to a paid subscription for their streaming services. NBC created their Peacock channel, Disney has Disney Plus, Discovery channel has Discovery Plus and on and on. Most of them offer mostly proprietary programing, so you’ll have to decide whether or not they are worth it to you. Netflix is known for its collection of movies. Hulu, YouTube TV, Sling, Fubo TV and others offer various plans. Some providers, such as Tubi, Pluto and Freecast offer free streaming. 

Basic pay plans include advertising, but most offer extra cost upgrades that can eliminate ads and offer a greater selection of channels. Many offer live TV as well. Some, like Hulu basic, offer certain live network channels but to view those shows you’ll have to wait until the next day and stream them from their library. If you have a live TV option, you can watch them live in real-time, which is particularly helpful for sports. Or you can use their DVR service to record to your PC or their cloud-based service. 

It’s also important to notice that not every service that offers live network channels – such as ABC, NBC, CBS or Fox – will offer all of them. In many cases, one will be missing. The important thing to remember is to research the content providers first to see what you want to watch and what you can live without. Chances are you aren’t going to get it all and will have to give up something. This is one reason why most content consumers have more than one streaming source.

National Indoor RV Centers blog Mark Quasius Entertainment Systems for Class A Class B and Class RVs and motorhomes

TVs mounted on a power lift mechanism, liker in the Newmar London aire, are a popular feature in newer motorhomes.

Final Choices

Once you’ve found the provider or providers of your choice, check to see which devices will work with your content. Not every device will handle every single content provider so, after you’ve chosen your content provider, be sure to compare before purchasing your device. Nobody likes multiple devices hanging out of the back of their TV. 

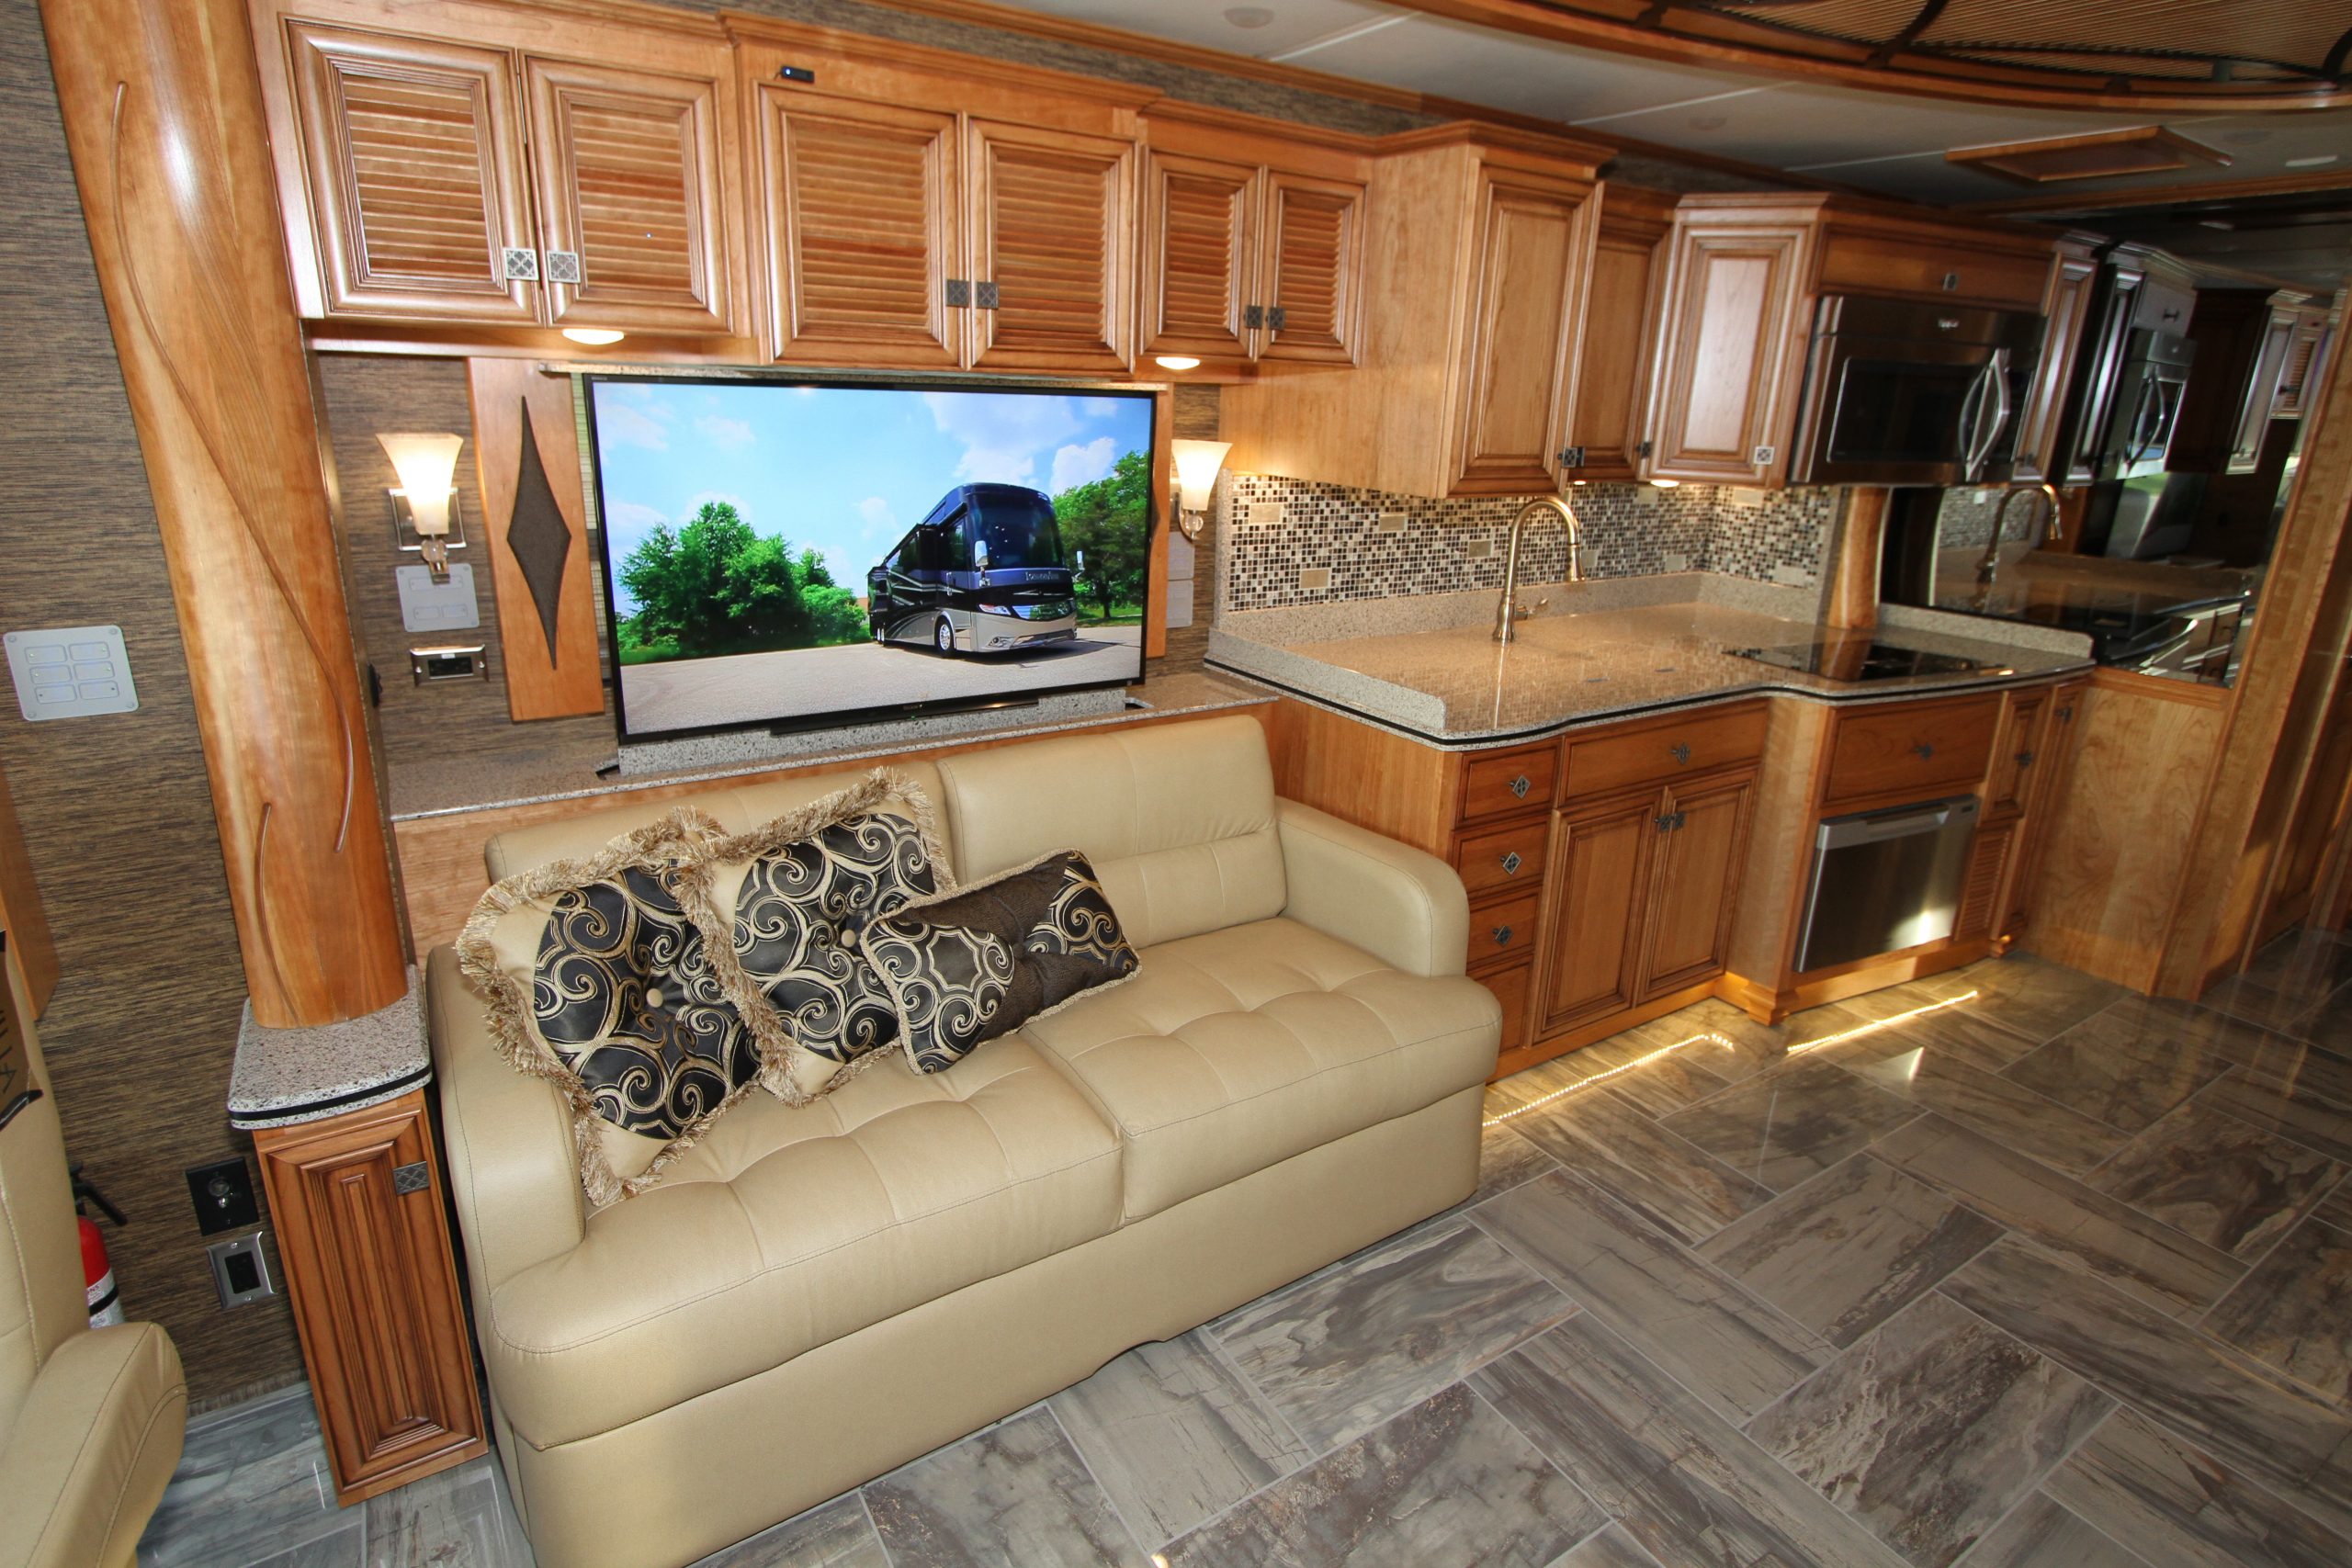
A number of coaches now feature large 50” LED Smart TVs that are mounted on power lifts so they can be raised up for viewing and lowered into the cabinet when you just want to look out the window. Devices such as Roku can be had in a block design with a  cable that extends to the TV’s HDMI port or through a direct HDMI plug-in dongle. The dongle may be a better choice with a TV on a lift because it rides with the TV and you won’t have to worry about cords getting tangled or unplugged. However, this depends on where the TV’s HDMI ports are located. You’ll have to ensure that it doesn’t stick out too far so that it gets knocked off when the TV is raised or lowered.

To ensure safe and proper functioning of these entertainment systems, be sure you’ve got a solid understanding of your RV’s batteries and baseline knowledge of RV electricity too.

National Indoor RV Centers blogger Mark Quasius profile picture

Mark Quasius is the founder of RVtechMag.com, the past Midwest editor of RV Magazine, writes for numerous RV-related publications and a regular Contributor to FMCA’s Family RVing Magazine. Mark and his wife Leann travel in their 2016 Entegra Cornerstone.

THIA by Proteng: An RV Fire Story

Fire One of Leading Causes of RV Loss

Each year, thousands of motorhome fires uproot individuals, leaving feelings of helplessness and uncertainty. With so little time to react, even the best-prepared RV owners cannot safeguard against these devastating occurrences – until now.

One such instance happened to Courtney and Jeremy Thompson when they experienced a fire on the very first day of their new life as full-time RVers. Thankfully, the Thompsons (and their dog) escaped safely, but their coach was a total loss.

Although Jeremy had spent 37 years as a first responder, his knowledge and skills were no match for the conflagration. After the fire, the couple was forced to ponder their future and maybe even reconsider their hopes for retirement. “Should we even do this?” they thought. 

After some serious soul searching. Courtney and Jeremy decided to continue as full-time RVers, but were adamant about installing a fire suppression system before they did.

The Thompsons Came to NIRVC to Install THIA by Proteng

THIA by Proteng is a revolutionary fire suppression system designed to eliminate heat at the source, extinguishing fires before they have a chance to spread. 

The system is fully customized to each RV and consists of multiple self-contained THIA devices that wind through areas of the motorhome that can be prone to fire, including the engine, inverter and generator, to name a few. In the event of a fire, the THIA device disperses FM-200, an extinguishing agent that covers the heat source and can suppress and extinguish fires.

Proteng fire protection installation

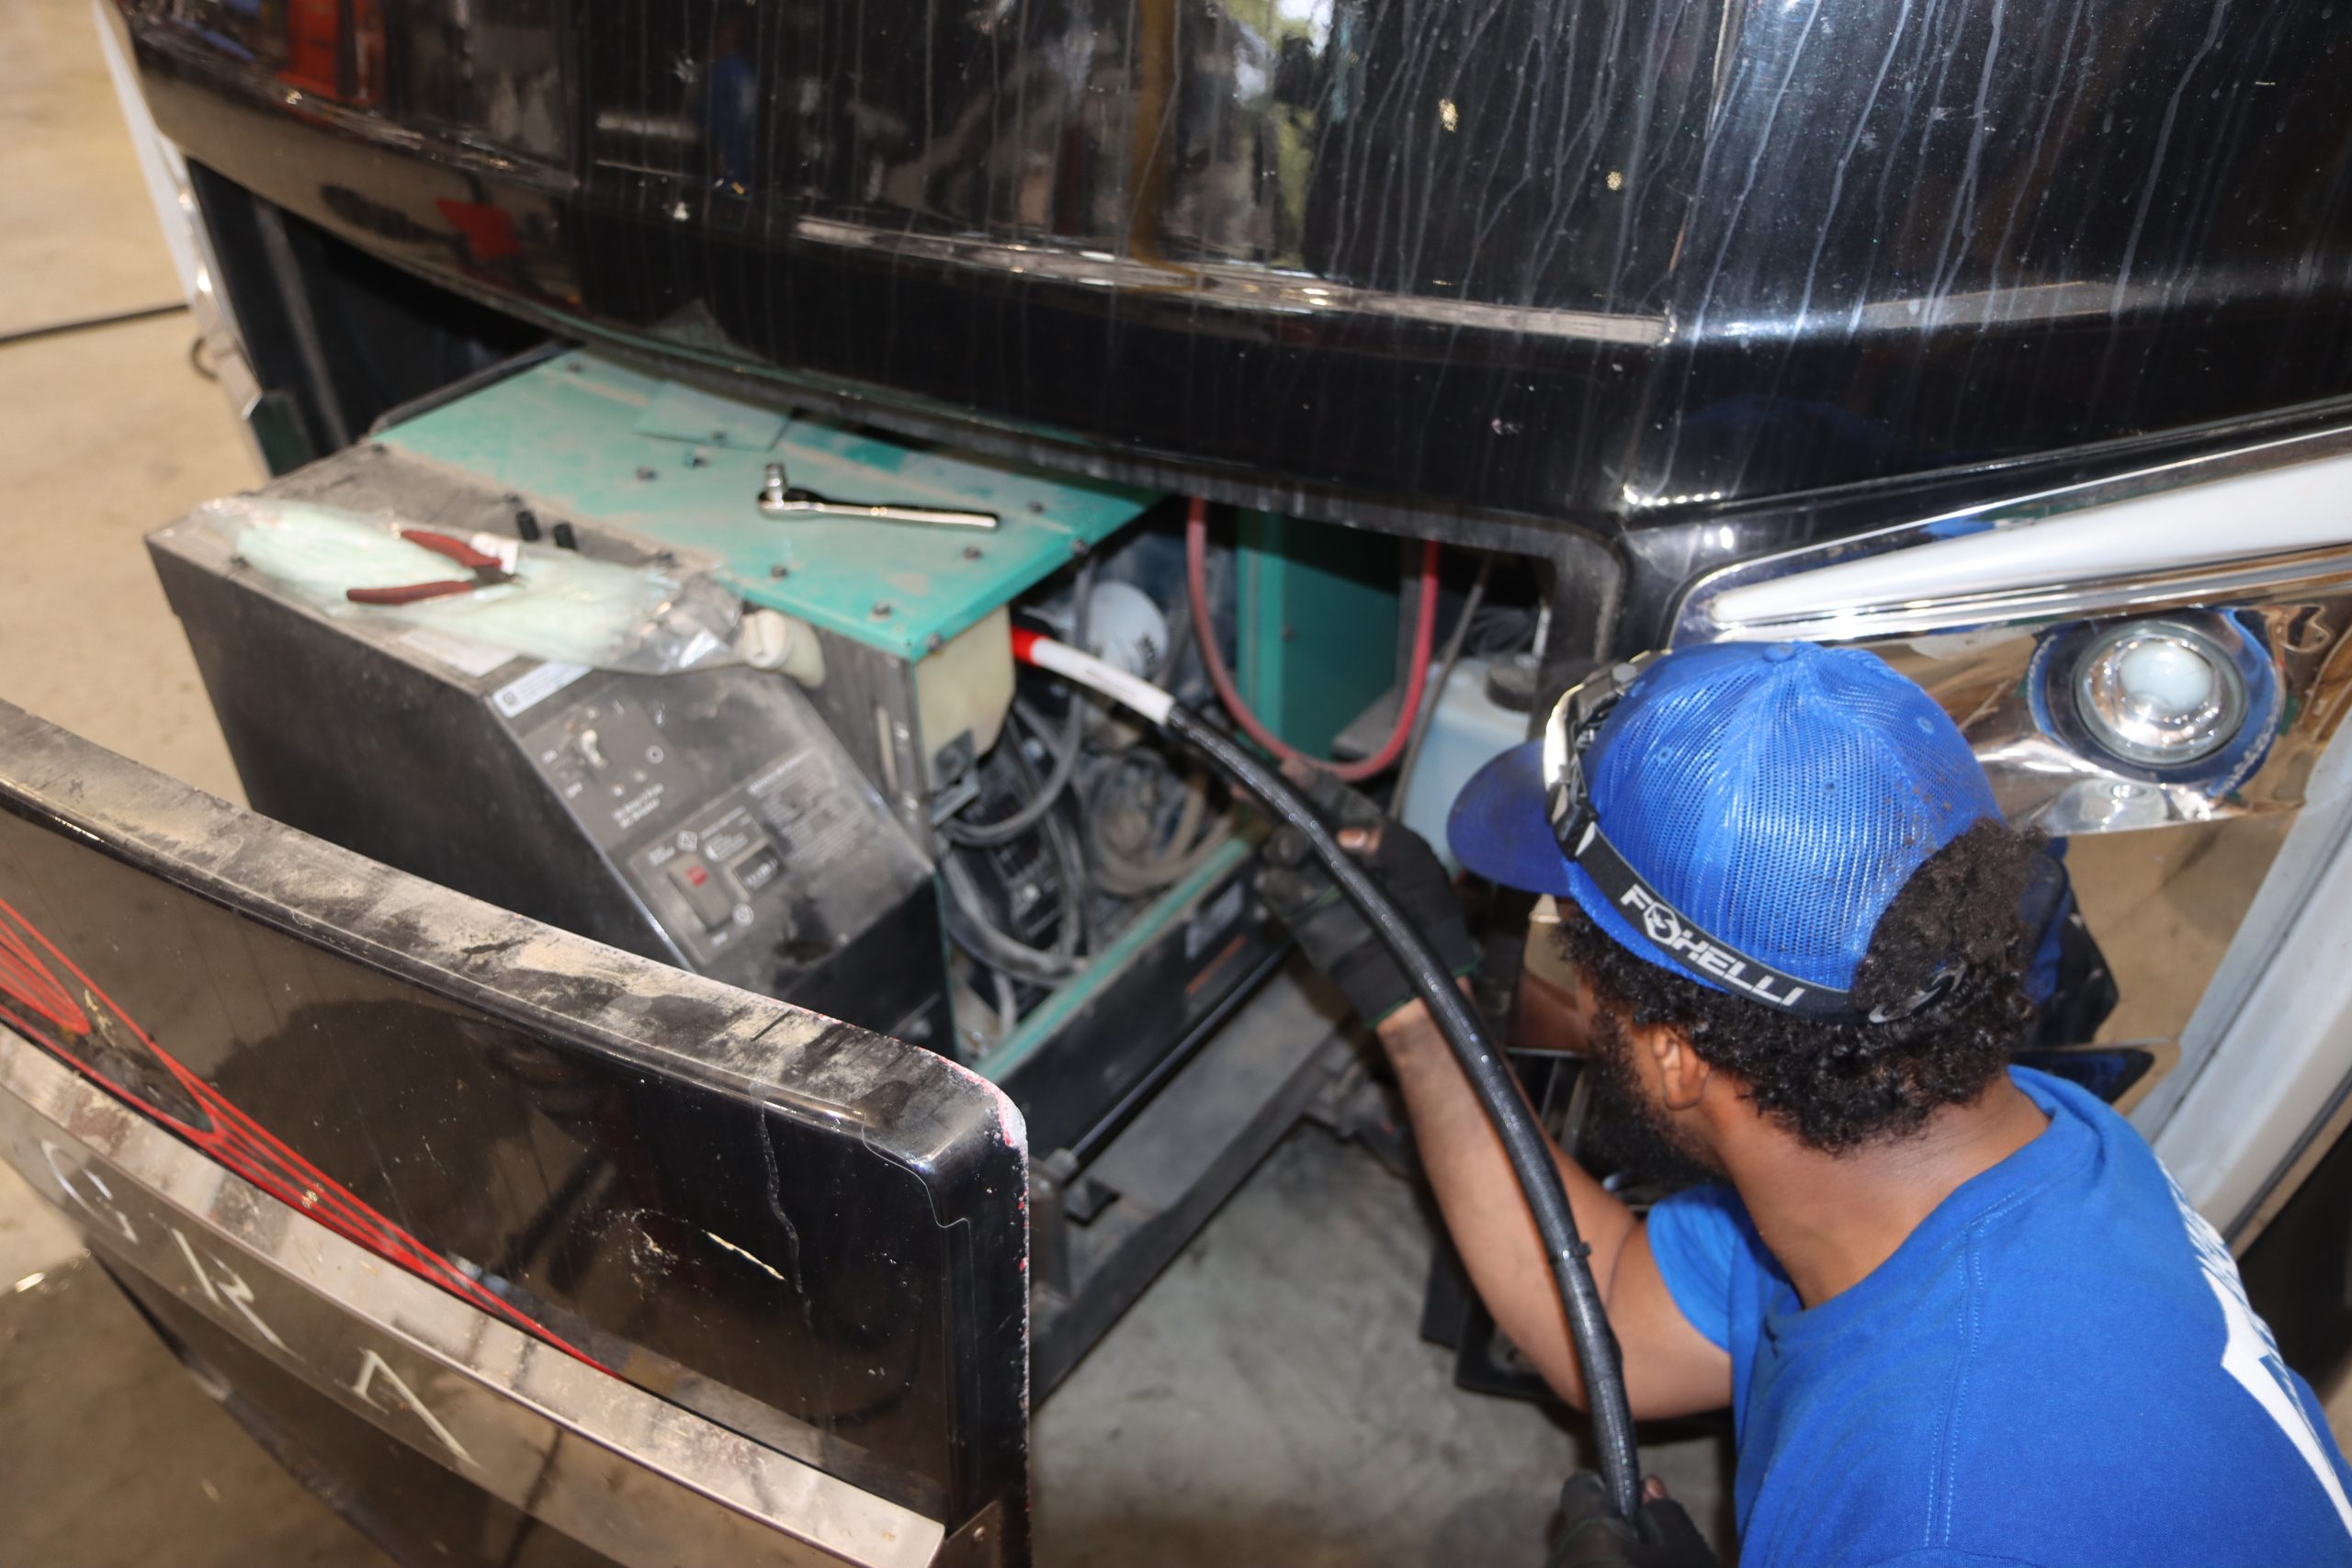
NIRVC tech installing 3′ THIA device into Onan 12.5 KW generator

Made for the entire coach, each device is completely self-contained and heat-activated, meaning there are no buttons to push, no pins to pull and no batteries required to engage. Once installed, you’ve got instant fire defense for your coach and for your life. 

RV fires are serious business, so turn to serious experts for peace of mind protection. Discover more at proteng.com or click here for information on installation.

THIA by Proteng: A Fire Suppression System

RV Fire Suppression: How to Avoid Disaster

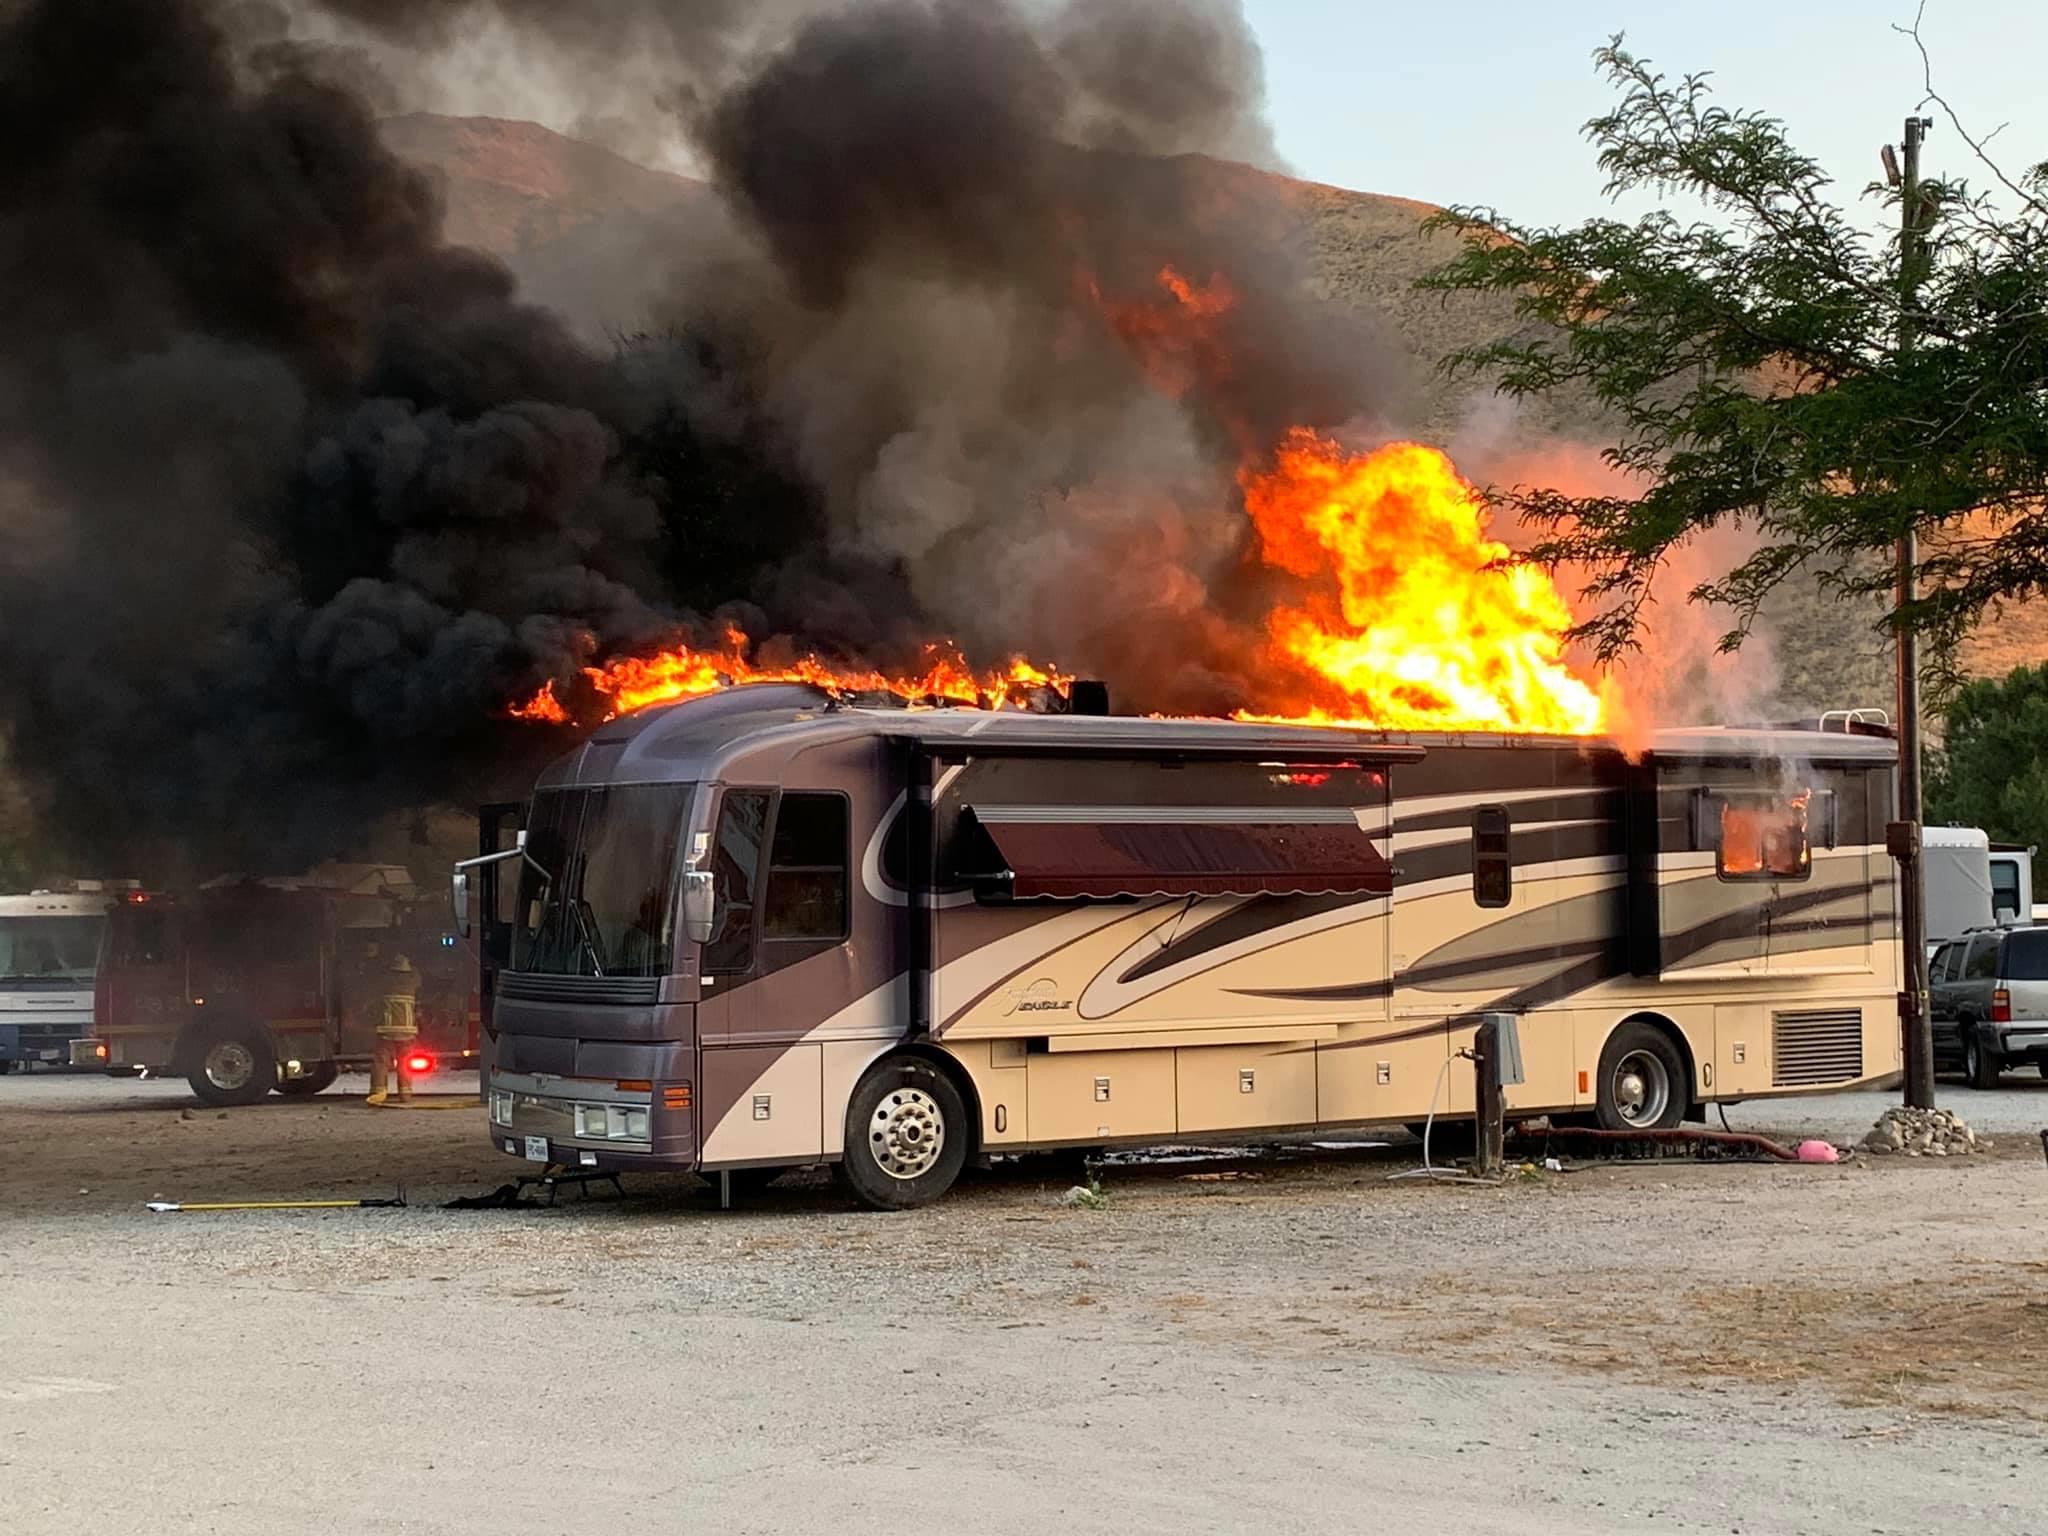
An RV fire is one of the worst things that can happen to an RV. An RV is filled with fiberglass, wood, carpeting, fabrics and almost anything else that can (and will) burn rapidly. Throw in a mess of electrical wiring and once a fire starts, you have very little time to do anything before it gets out of hand and your RV burns to the ground.

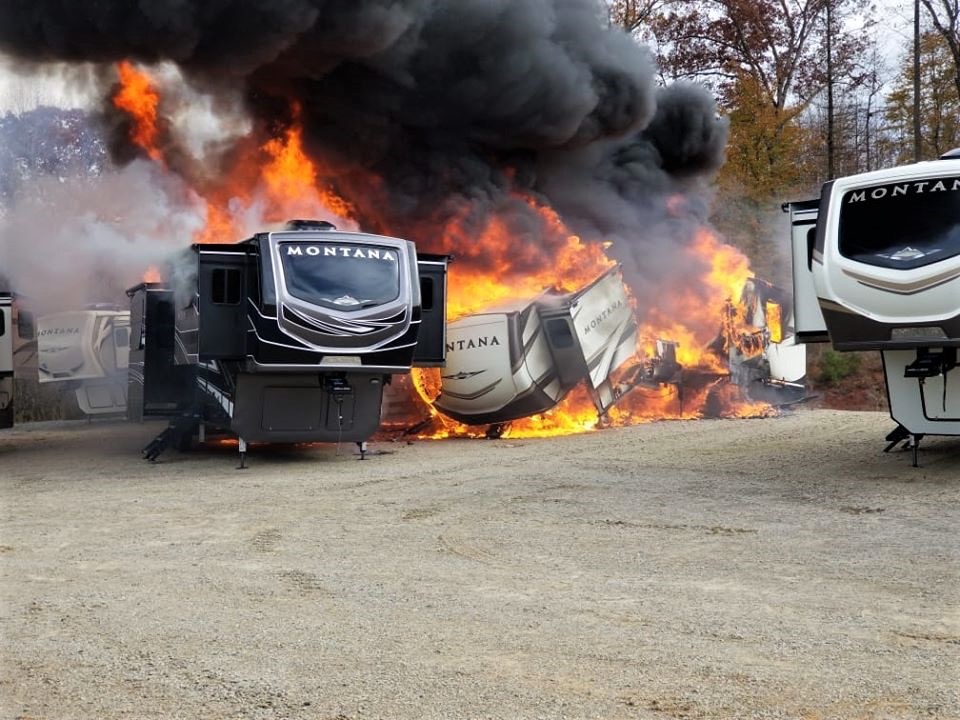
Thousands of RV fires occur every year. 

RV fire

RV Fires: How do RV Fires Start? 

About two thirds of these fires begin as an electrical fire where hot wiring or sparks can easily ignite any of these materials that surround the wiring. RV fires can begin in any number of areas where electrical componets are found. Common places for electrical RV fires to start include:

  • Engine compartments
  • Generators
  • Breaker panels
  • Battery compartments
  • Inveterts
  • Automatic transfer switches
  • A number of other areas

In addition to a fire that begins from an electrical failure, another potential danger area is an absorption style RV refrigerator where a cracked heat exchanger can allow hydrogen gas to escape and be ignited. This danger increases as they age.

rv fire

Manual Fire Extinguishers: Do They Work for RV Fires?

If the fire is not detected and dealt with immediately, it can be too late to remedy the situation and hopefully there’s enough time to bail out before your RV becomes engulfed in flames. If the fire is detected early enough, there is a good chance that it can be extinguished immediately to limit the damage and save the coach. However, this requires an automatic extinguisher system because it’s a rare opportunity that you would detect a fire in time to deal with it with a manual fire extinguisher. Couple that with the fact that most fire extinguishers in an RV are inadequate to handle most fires due to their limited size and technology, and it’s fairly obvious that an automatic fire suppression system is your best chance to save your RV. Before we go any further, let’s take a look at how various fires are categorized, what makes a fire and how to extinguish a fire.

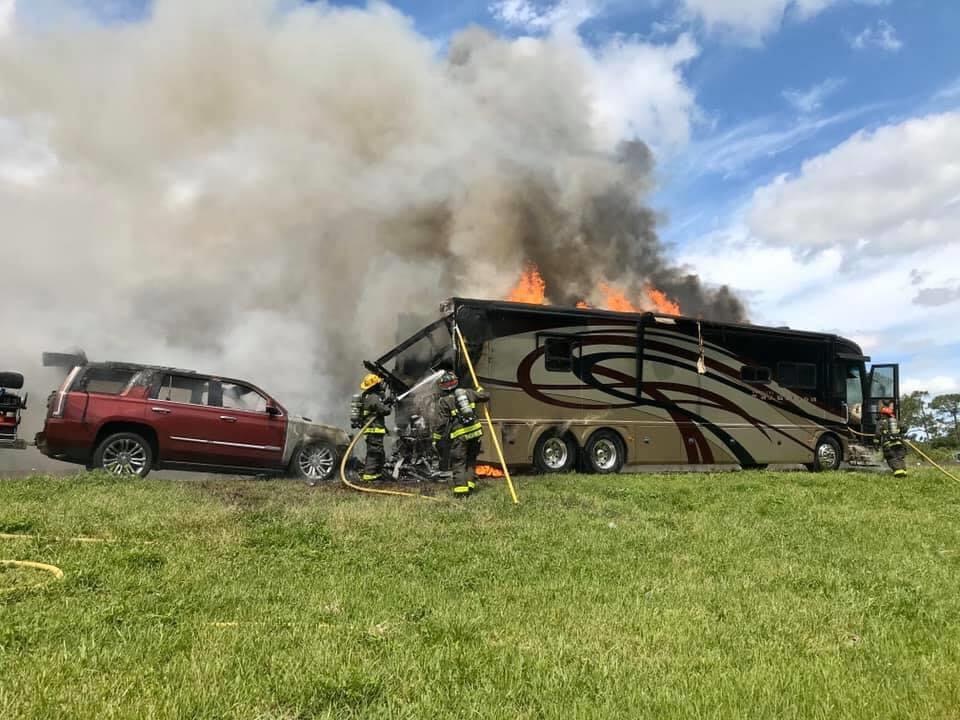
motorhome fire with towed vehicle
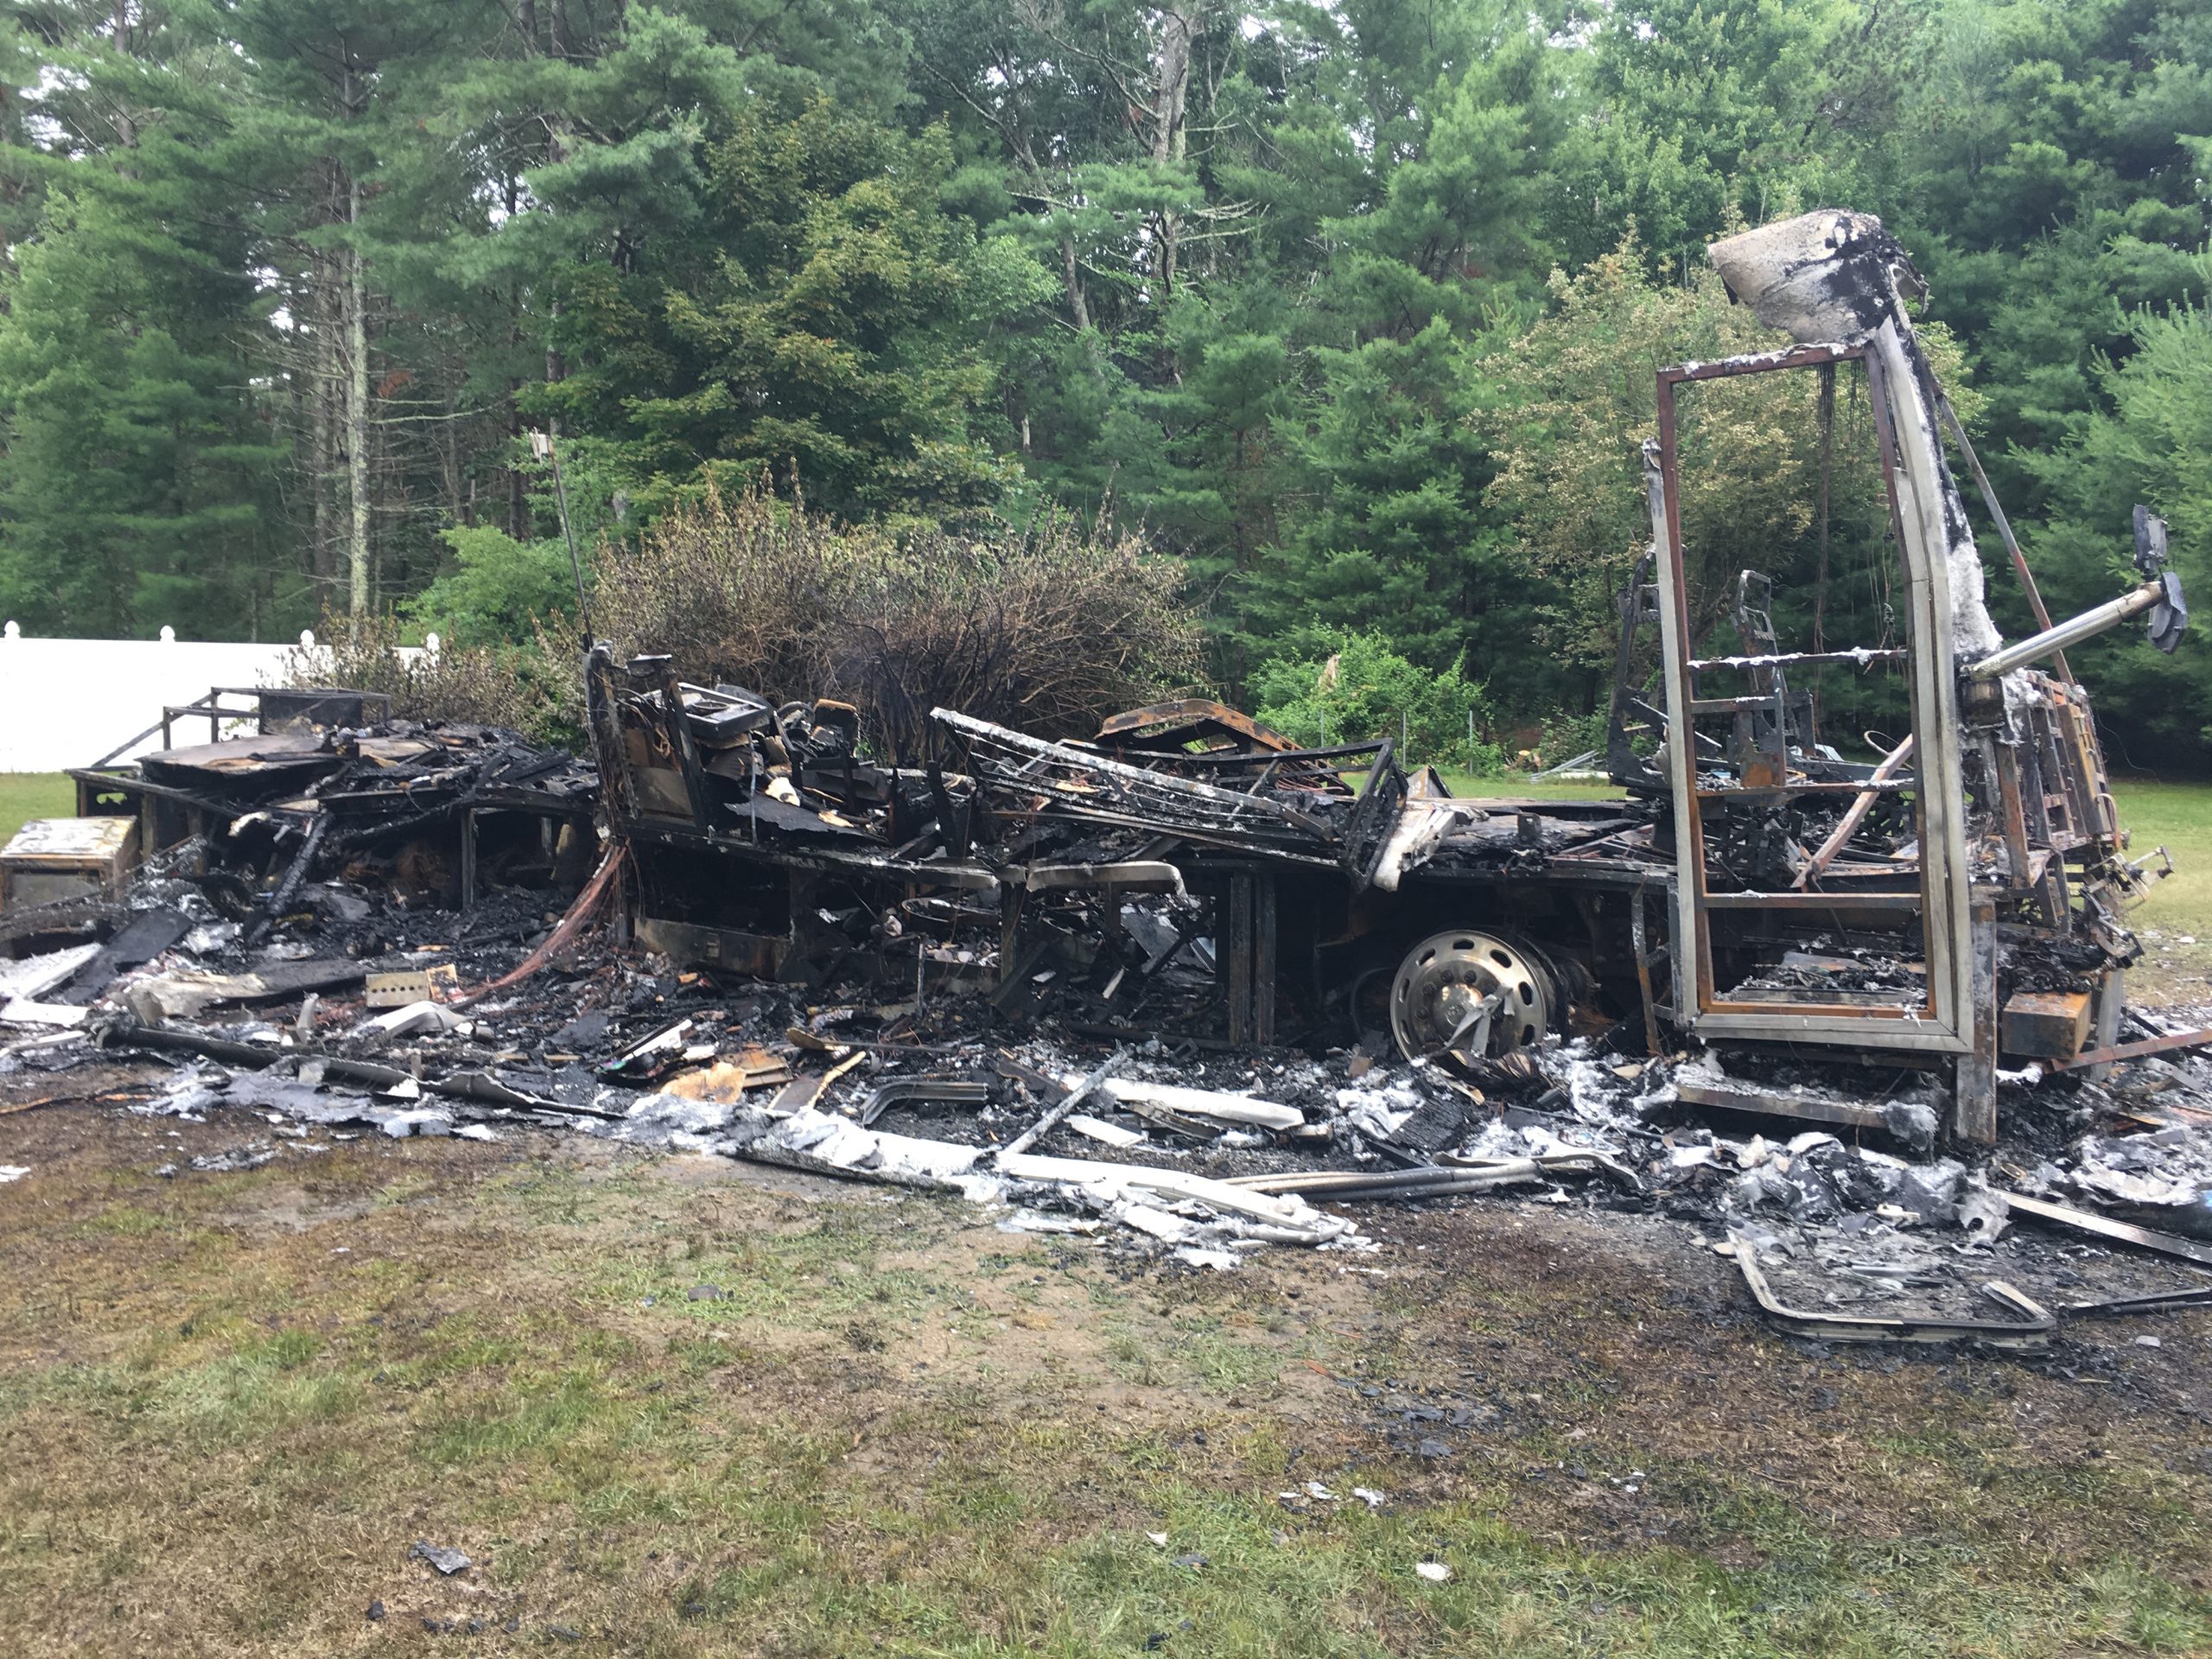
motorhome after fire

Fire Categories:

Fires are categorized by classes which are established by the National Fire Protection Association, or NFPA. Each category describes a fire that uses a specific type of fuel. Fire extinguishers are typically labeled as capable of handling certain classes. Following are some descriptions of fire classes:

  • Class A Fire – These are fires that begin with wood, cloth and paper as their fuel. The key to remembering this is by equating the letter “A” with “ash” which is what these fires leave behind.
  • Class B Fire – These fires occur in flammable liquids, such as gasoline, oil and other combustible fuels. Liquids boil so equate a class “B” fire with the word “boil”.
  • Class C Fire – These fires are electrical fires that occur in energized electrical circuits. Energized circuits pass a current, so equate a class “C” fire with the word “current” and you should be able to remember how to identify these three fire classes.
  • Class D Fire – These fires are from combustible metals such as magnesium or sodium and really don’t apply to RV use, so you won’t have to worry about those here.
RV engine fire

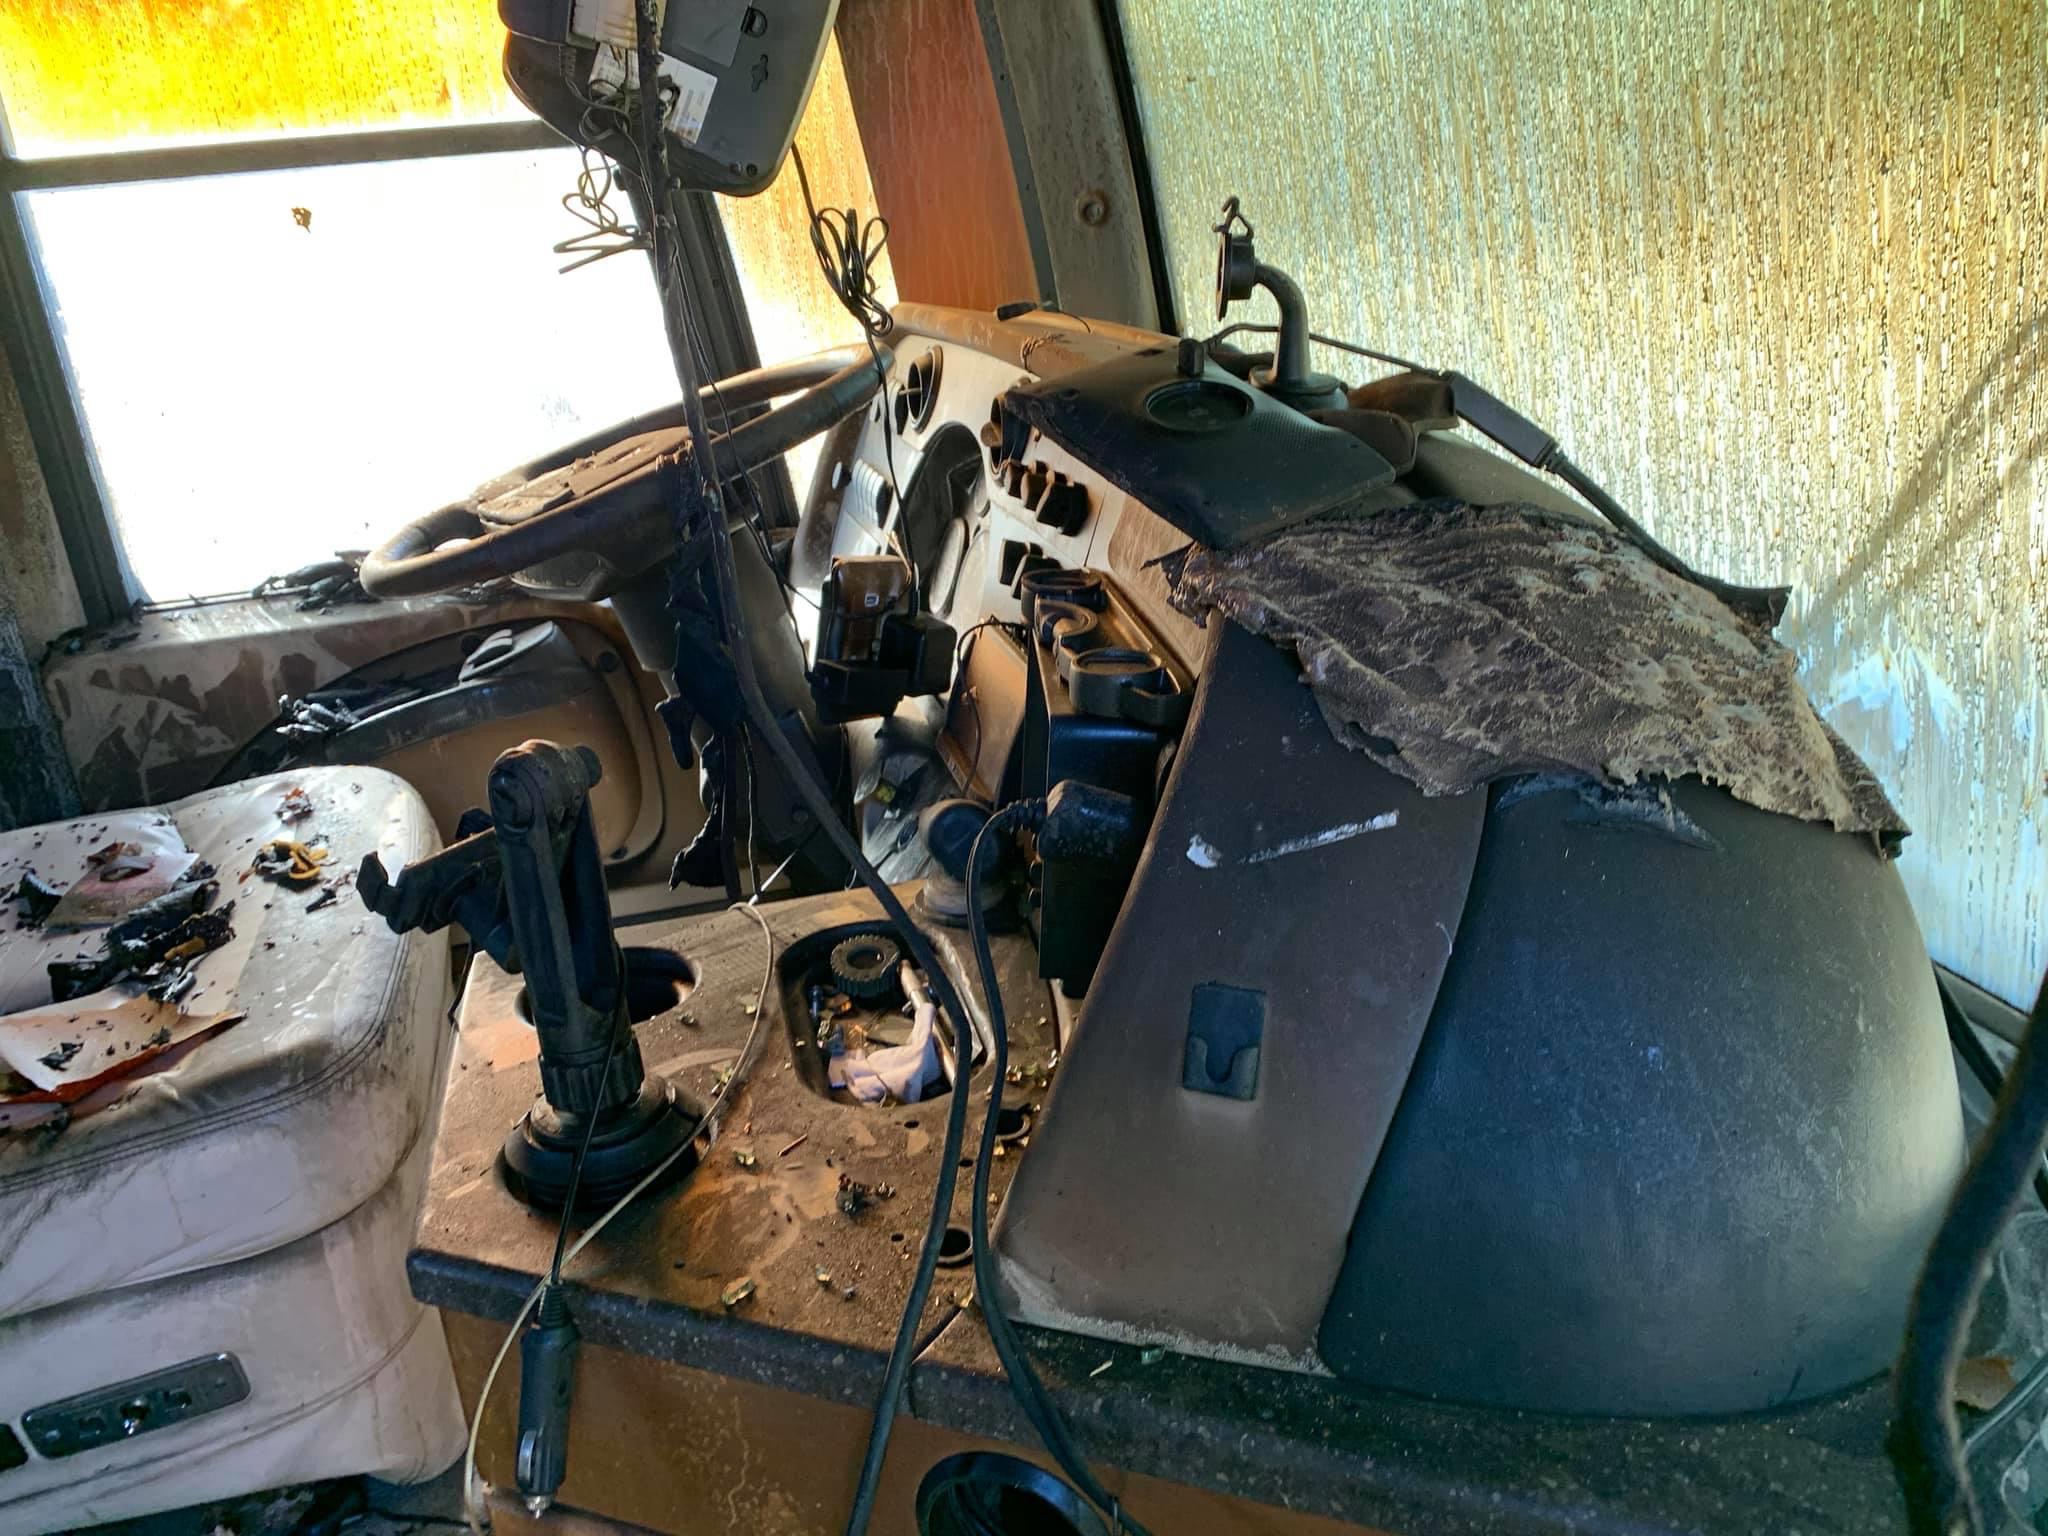
The cockpit of a gas Class A after  an engine fire

The Fire Triangle

In reality, a fire is nothing more than a rapid chemical reaction. Think of the hot sun darkening a piece of newspaper that has been laying around in a store window over several years, fading away until it turns into ashes. A fire is merely that same process only sped up to warp drive speeds, degrading it in seconds rather than years. This speedy process also generates lots of heat in a short period of time and is referred to as combustion.

In order to have combustion, three things must be present – fuel, oxygen and heat of ignition. These three elements are commonly displayed in the fire triangle. Take away any one item from the triangle and the fire will extinguish. The choice of which element to remove depends on the class of fire. Different fuels will have different temperatures that they will ignite at. You will need to heat up campfire logs to a fairly high temperature in order to cause them to ignite whereas paper or cloth can easily be ignited at a much lower temperature with a match or spark.

Class A Fires in an RV

A class A fire uses fuel such as logs in a campfire – or carpet, fabrics or paneling in your RV’s interior. Campfires are easy to extinguish just by dumping water on them so that the wood cools down to a temperature beneath the point of ignition. Dumping water on a class A fire in your motorhome interior isn’t such a great idea, however, due to collateral damage plus the risk of electrical shock. Most RVs come with a small dry chemical extinguisher that is rated for class A, B and C fires and operates by coating the fuel, thereby separating it from oxygen to suffocate it. But the chemical retardant has its own set of concerns. The chemical becomes toxic once heated and is also corrosive to any electrical components. The small size of these extinguishers also makes them inadequate for anything but the smallest fires. Fortunately, the majority of class A fires are the result of an electrical failure elsewhere, so if the source can be dealt with early on, it won’t develop into a major inferno.

Class B Fires in an RV

A class B fire uses liquid fuel such as diesel fuel, gasoline or oils. You should NOT use water to extinguish these fires or else the water will cause the liquid fueld to spread. These fires need to be suffocated with a dry chemical extinguisher or cooled down with CO2, foam or clean agent gas extinguisher.

Class C Fires in a RV

A class C electrical fire will require either dry chemical, CO2 or clean agent gas extinguisher to suffocate or cool the fire. Water and foam cannot be used due to the energized circuits’ shock hazard. However, a class C fire is only when the circuit is energized. Most class C fires quickly become class A fires once the circuit breakers trip to de-energize the circuit and the surrounding material starts to burn.

THIA by Proteng: A Fire Suppression System

The key to extinguishing a fire is a quick response with an extinguishing agent. Manually applied systems fail in many of these instances because the fire is generally established before the occupants notice the fire, assuming they are even present. Automatic extinguishers eliminate that lag but most are AFFF (Aqueous Film Forming Foam)-based systems that are limited to the engine compartment and maybe an absorption style refrigerator.

I decided to do an upgrade of my existing engine bay’s AFFF system after researching a new product available from National Indoor RV Centers that was designed specifically for RVs – THIA by Proteng. This system originated with race cars. Their high output engines created plenty of heat, meaning the potential for fire was high – especially in a crash. Proteng developed the THIA system of extinguishing fires, which has since been very popular with boats, airplanes, buses and other equipment but has just recently been introduced for RVs.

THIA device Proteng Fire Suppression system
Protemg THIA device

A small THIA by Proteng device used for small compartments

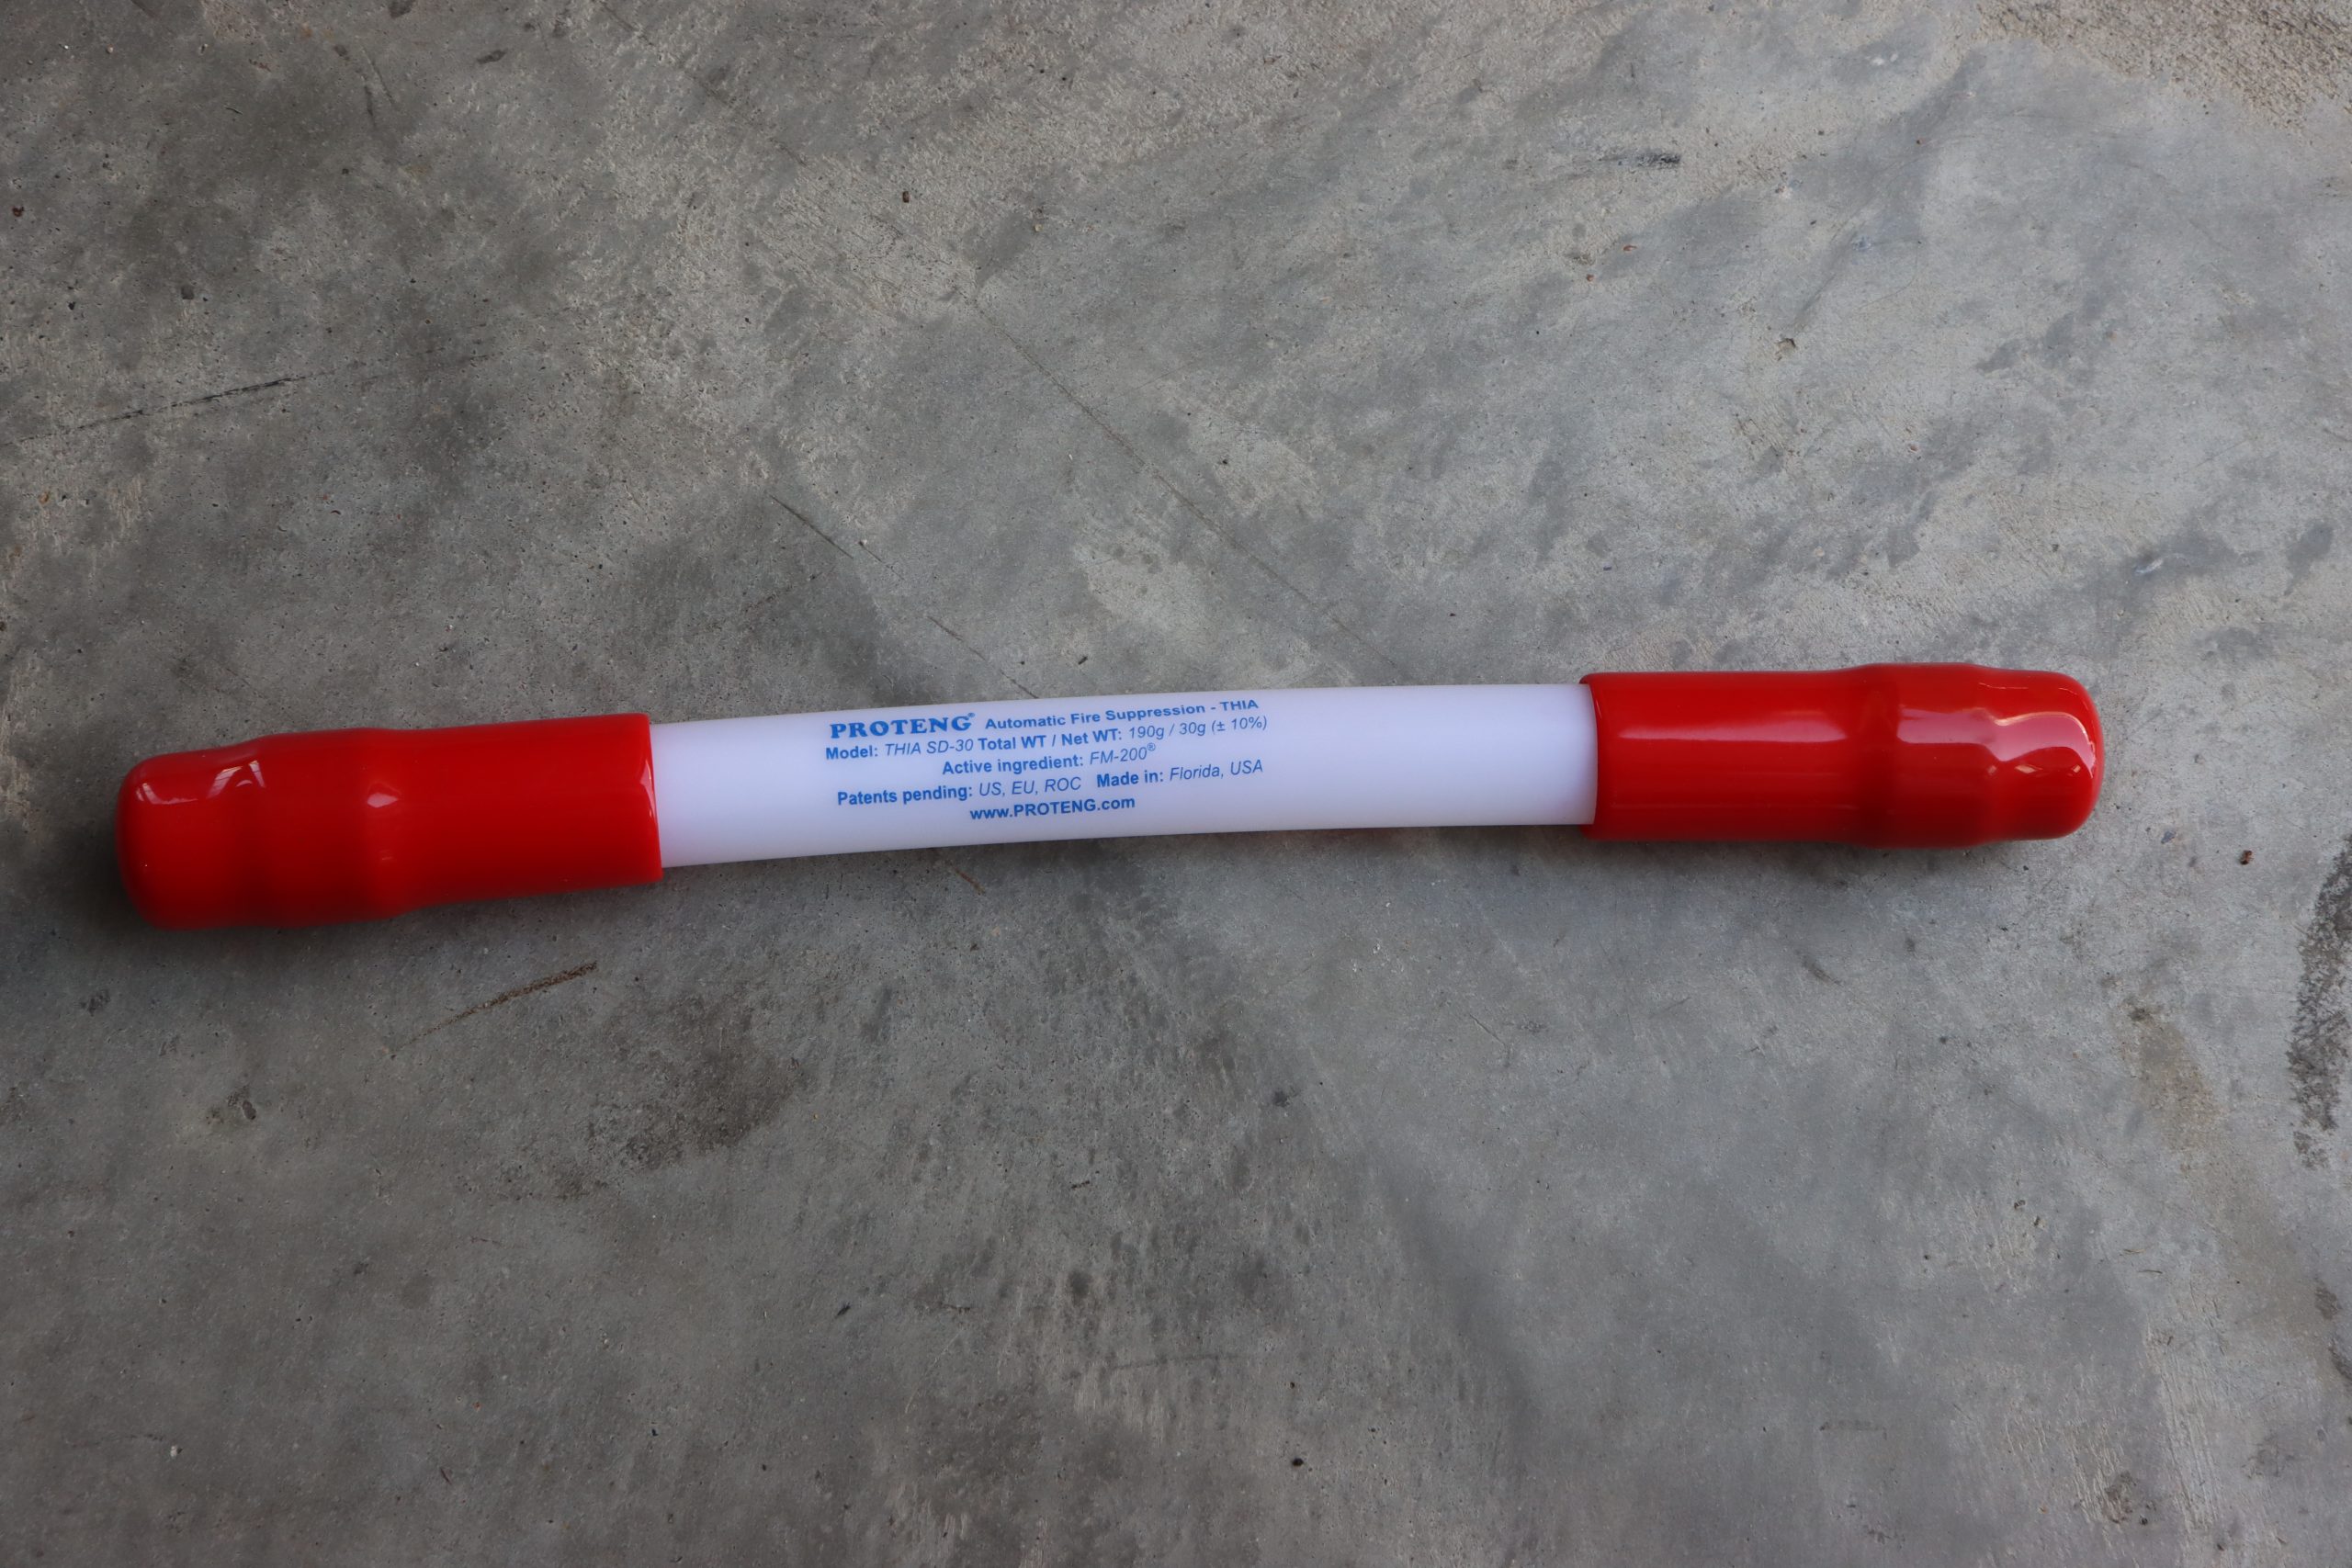
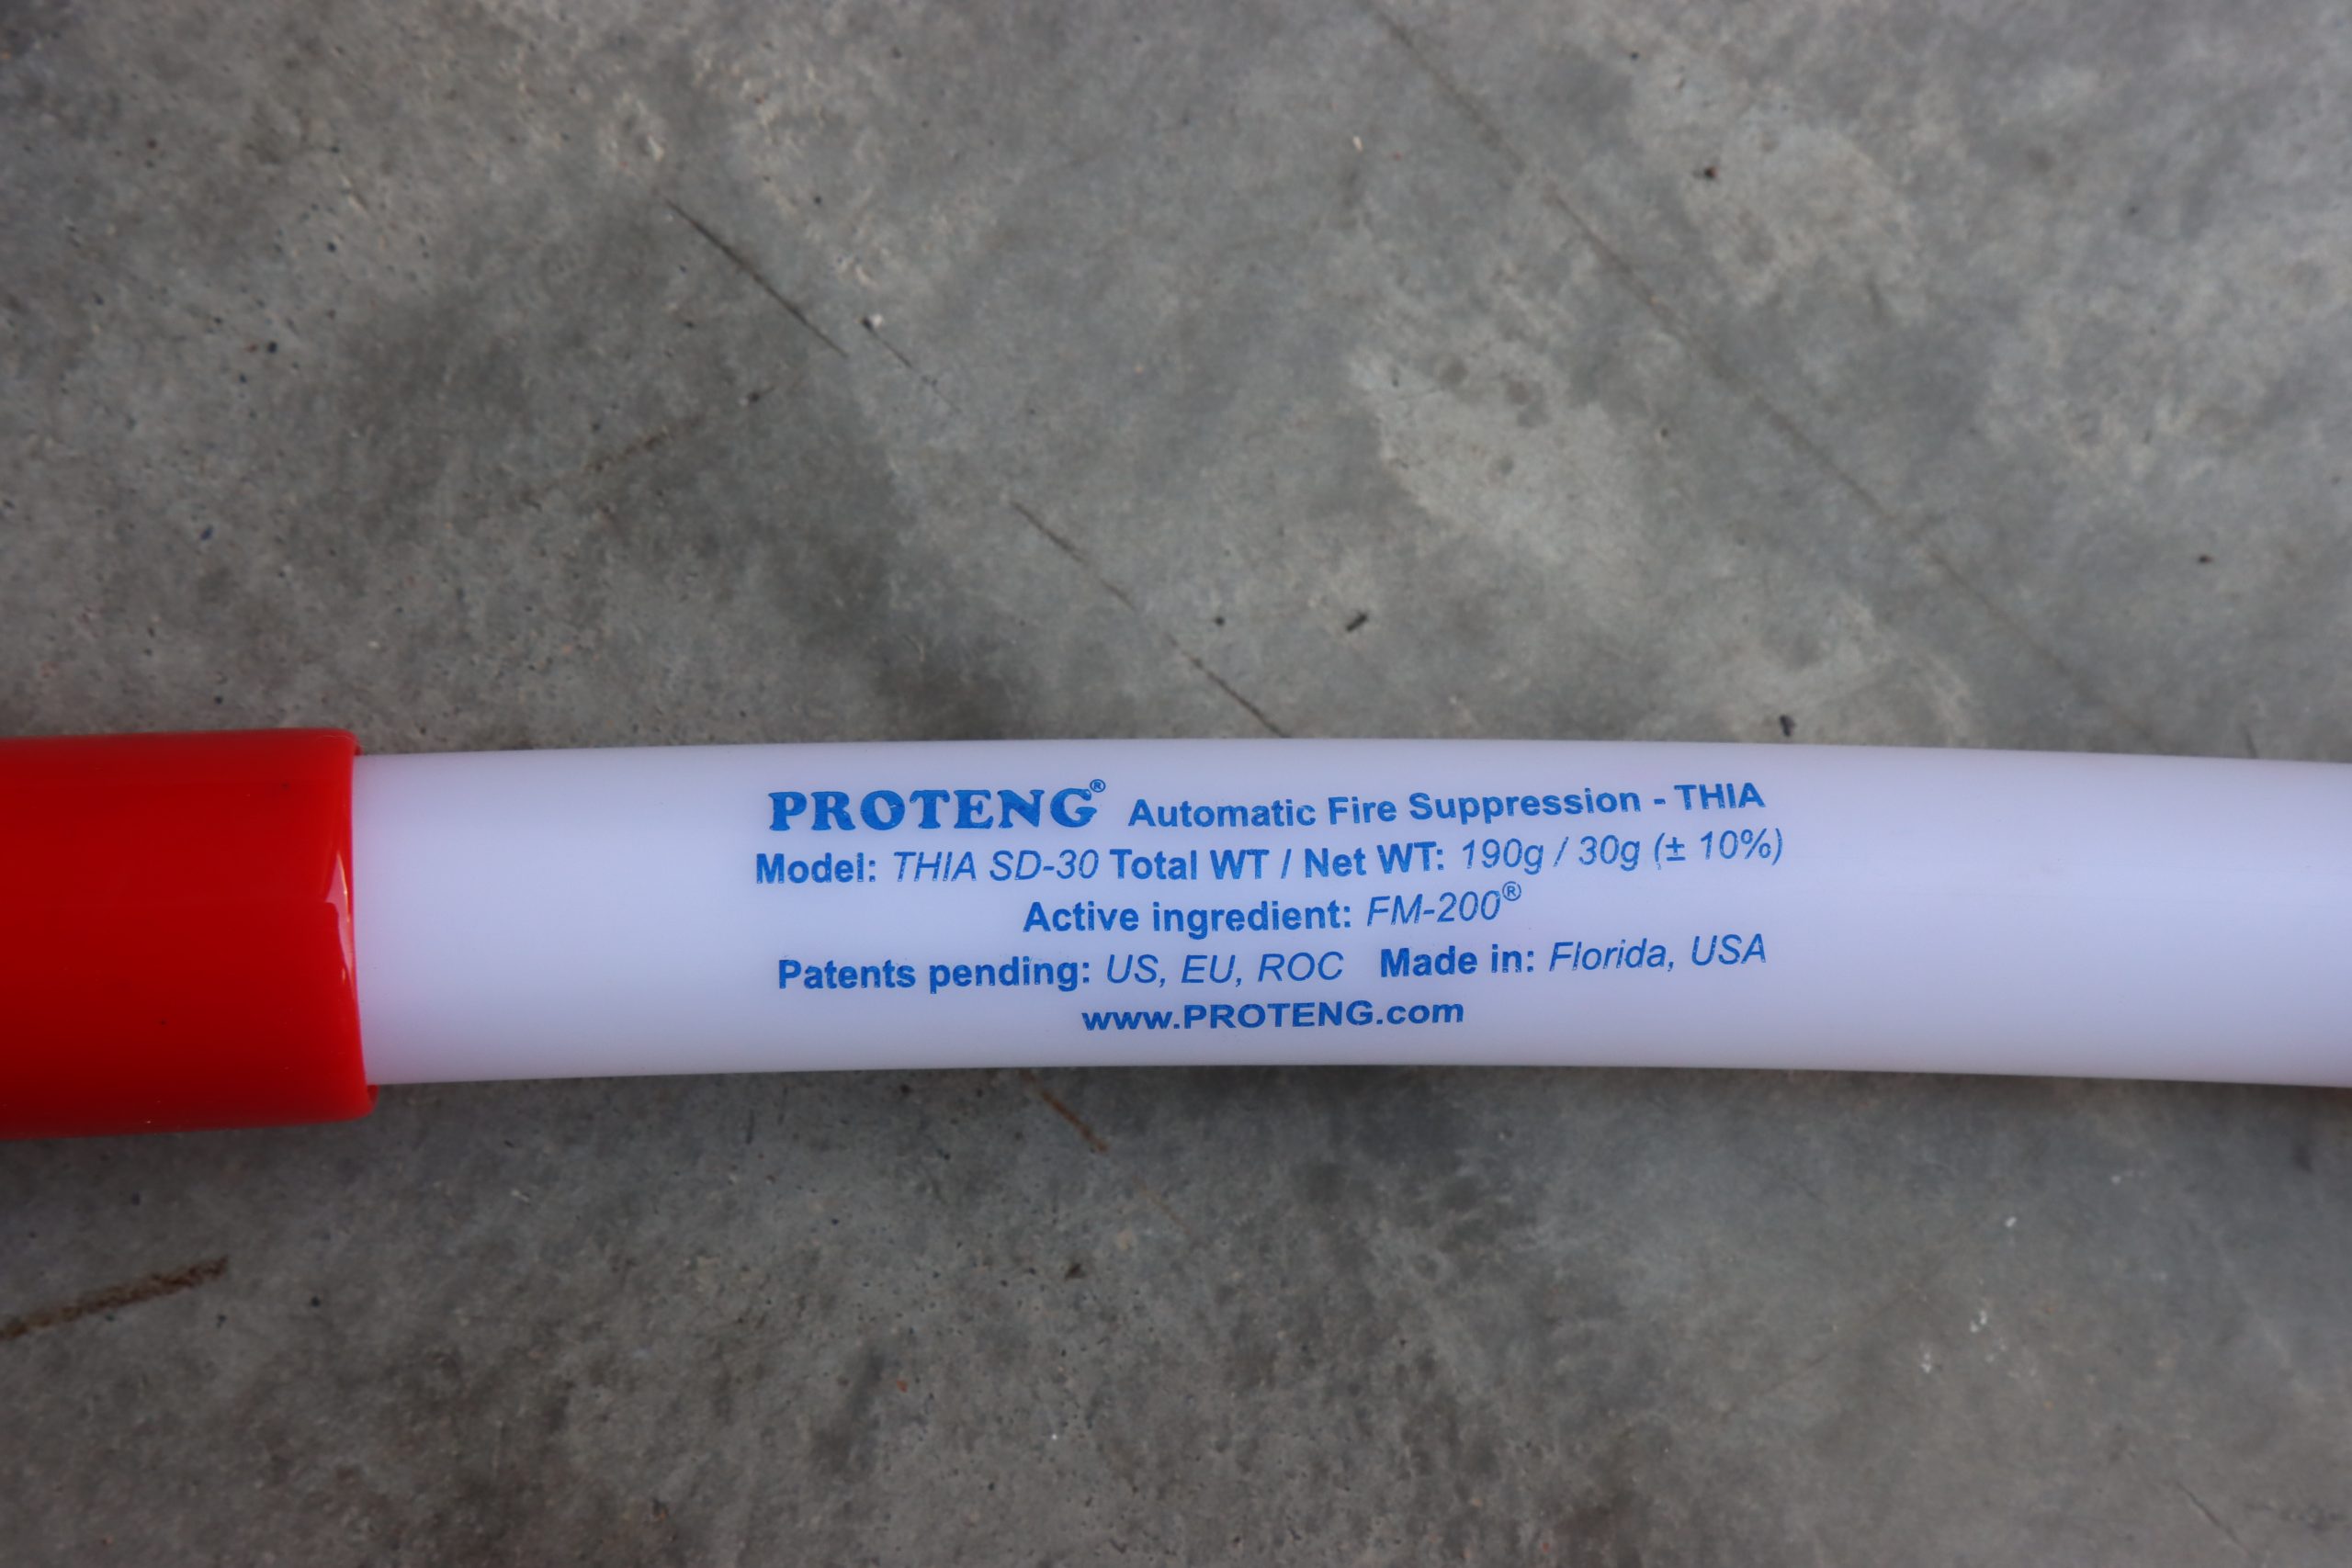
THIA by Proteng devices are labelled to identify each unit

What is THIA by Proteng?

THIA stands for Tube+Heat=Instant Action. The system consists of polyamide (a synthetic polymer) device that is filled with FM-200 fire retardant. FM-200 is a popular state-of-the-art retardant that eliminates many of the drawbacks of other retardants. Unlike dry chemicals or foam, it leaves no residue, is non-toxic and is safe to use on equipment without causing any collateral damage. You may consider it similar to Halon gas but that is not the case. Halon gas displaces oxygen from the air and is toxic. Halon is considered a clean agent gas but has an extremely high potential for ozone depletion, contributing to global warming. As such, production of Halon ceased under the 1994 Clean Air Act and was banned, although it is still legal to use existing Halon extinguishers. FM-200 is also a clean agent gas but is not toxic and functions by cooling down the fire’s fuel to a point lower than its flash point rather than displacing oxygen. Keep in mind that three things are needed to maintain a fire – fuel, oxygen and heat. Removing any one of these items from the fire triangle will stop the fire.

THIA by Proteng is a patent-pending system that uses polyamide devices that are filled with FM-200 and placed in strategic locations throughout the RV. These devices don’t require any bulky valves, hoses or wires which makes them perfect as standalone units requiring minimal installation. Different length devices are available that are custom fit for each area’s potential exposure. The devices are available in two temperature ratings – the standard duty devices are designed to rupture and actuate at 158 degrees Fahrenheit, while the heavy duty devices are designed to actuate at 194 degrees Fahrenheit. The HD devices are also wrapped with protective mesh shield for longevity as they are generally used in engine compartments and generator enclosures.

The devices fill with FM-200 and seals the end up with hydraulically crimped brass end fittings. The FM-200 at rest will have 72 PSI of pressure and will be in liquid form. As the devices heat up, the pressure will form gas at almost 350 PSI just prior to actuation. When the device heats up to the specified external temperature it ruptures, releasing expanding FM-200 in gas form at 1.6 degrees Fahrenheit to rapidly cool down the fire’s fuel, breaking the fire triangle and rapidly extinguishing the fire. 

THIA-50 Proteng Fire Suppression

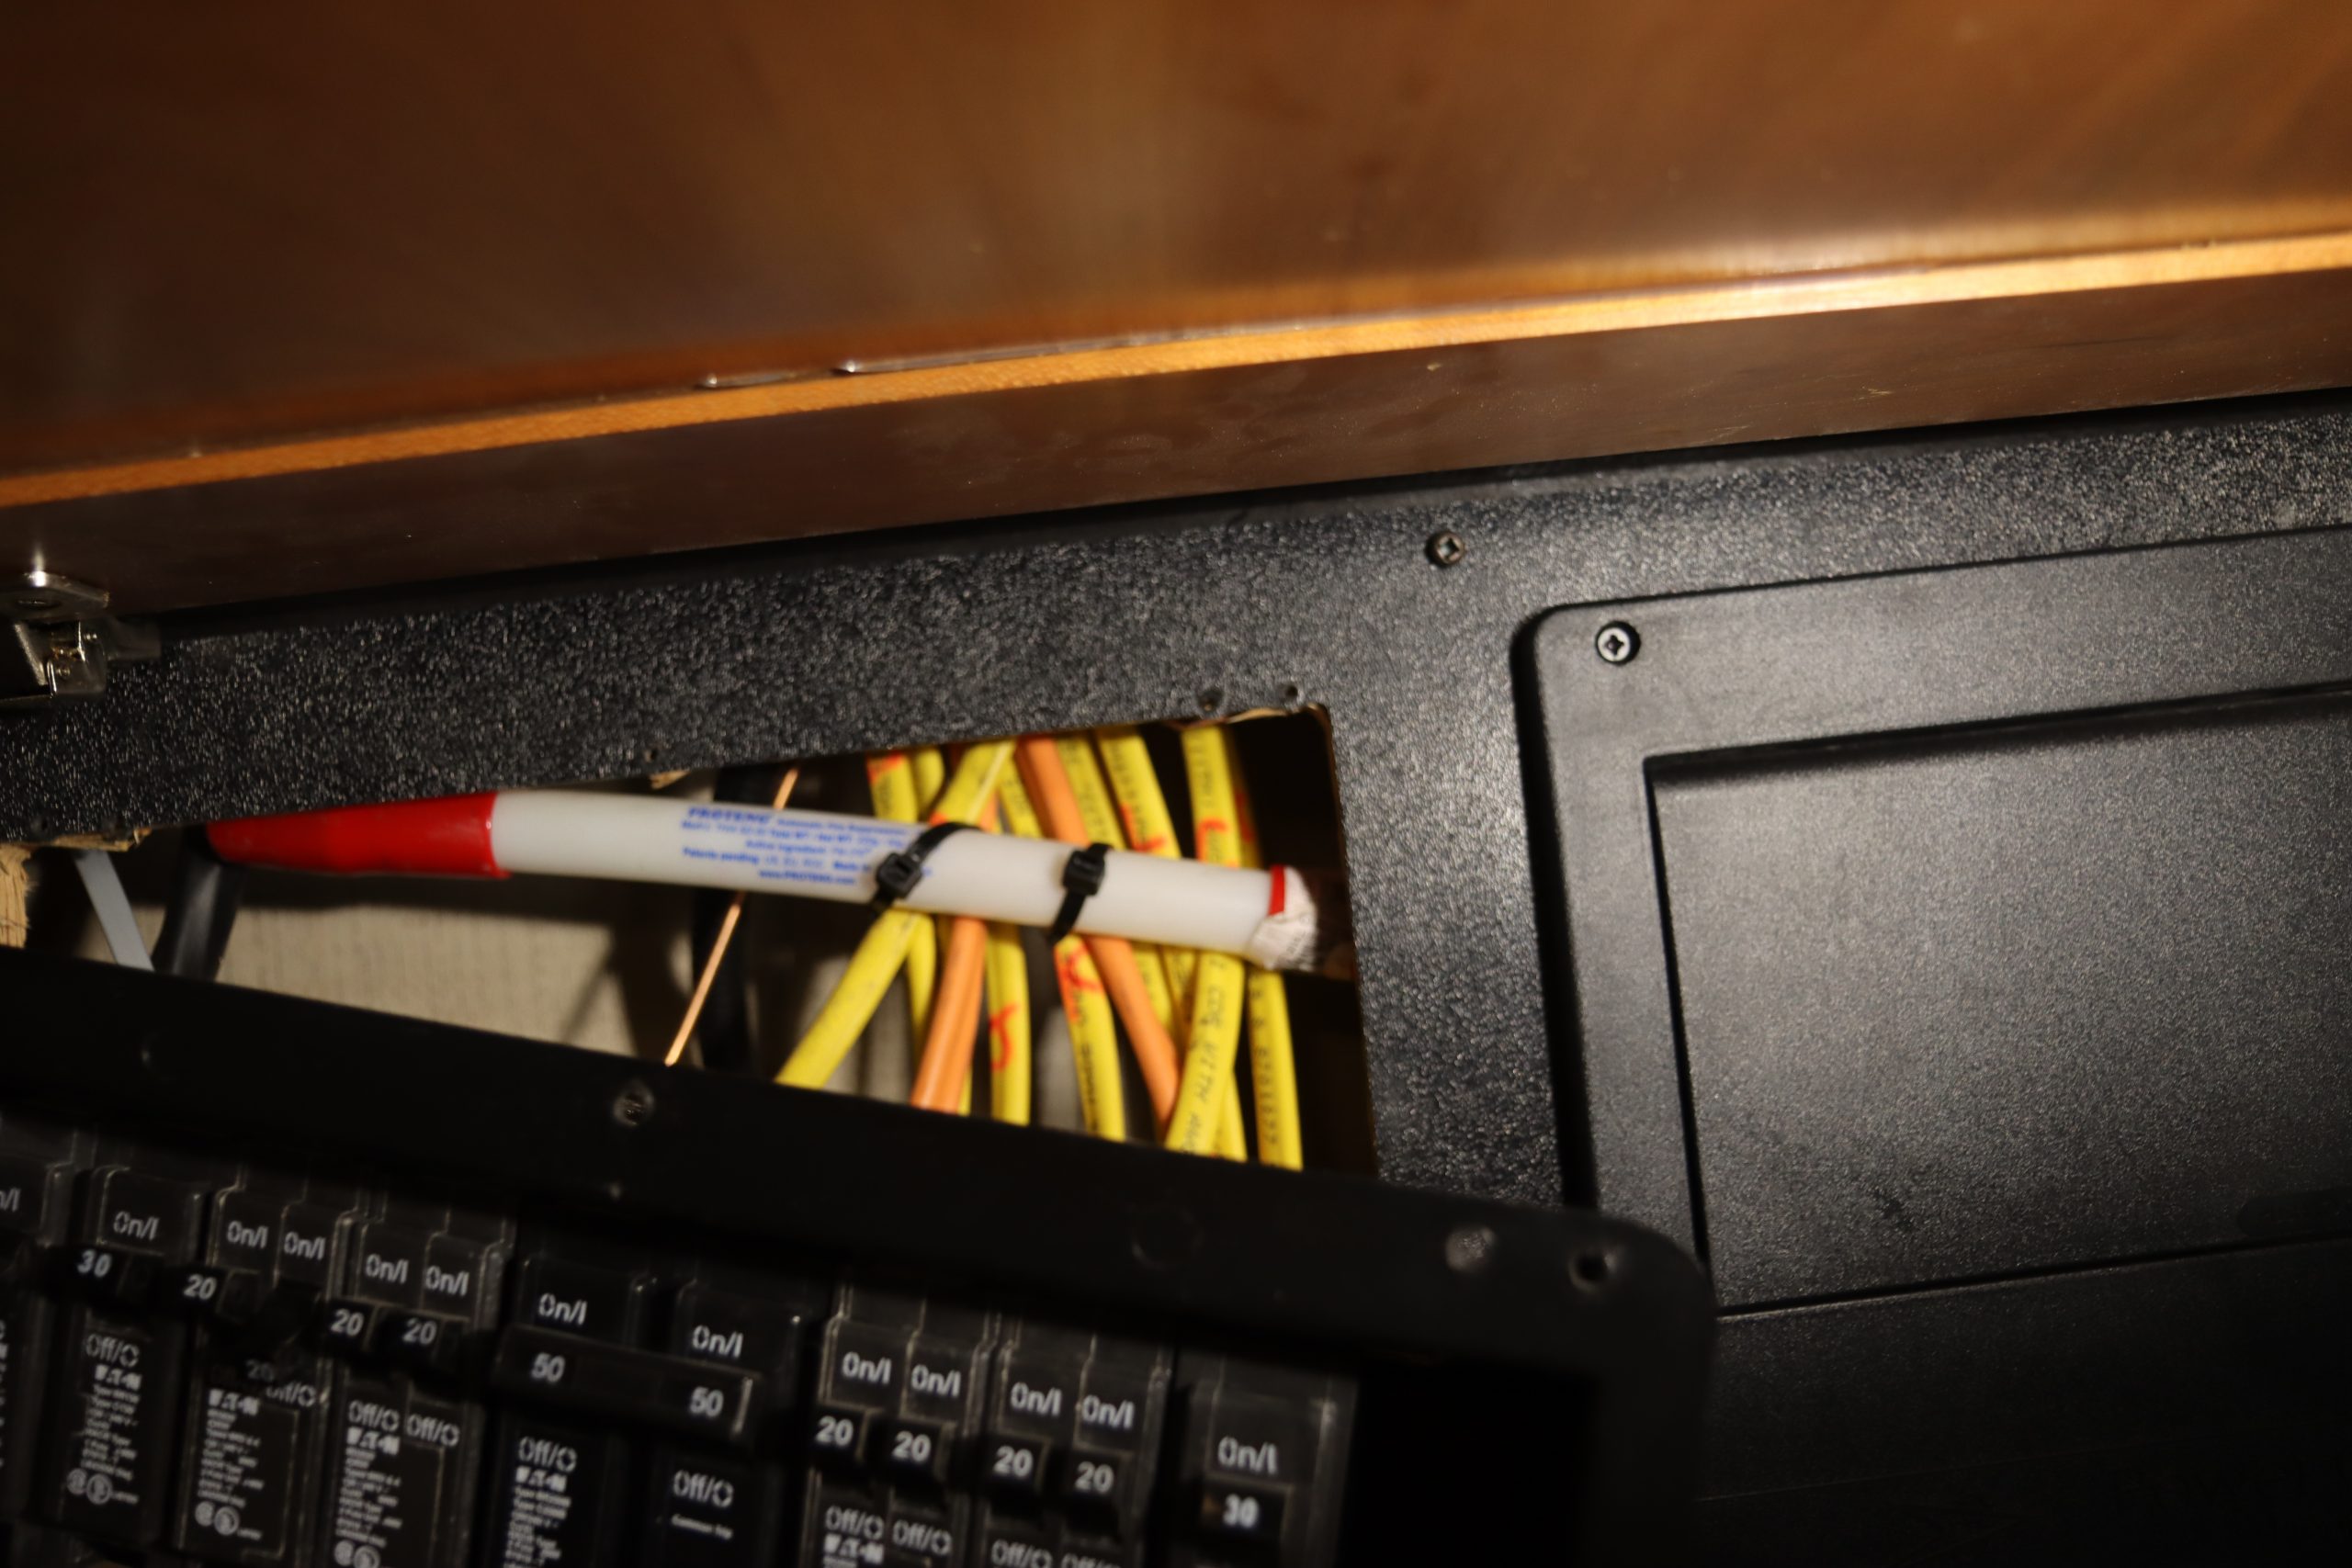
A THIA-50 was installed behind the electrical breaker panels

THIA by Proteng Installation in the Entegra Cornerstone

We took our Entegra Cornerstone to NIRVC’s Lewisville, Texas facility just outside of Dallas for our installation. The installation began with a tech who checked over the RV to find any potential fire risks and measure for the correct THIA by Proteng device to handle that area. 15 minutes later, he returned with a cart full of various device assemblies and began the installation. His first step was to remove the two breaker panels in the overhead cabinet on the left side of the cockpit. A small THIA by Proteng device was placed behind the breaker panels and fastened to the Romex with high heat cable ties. 

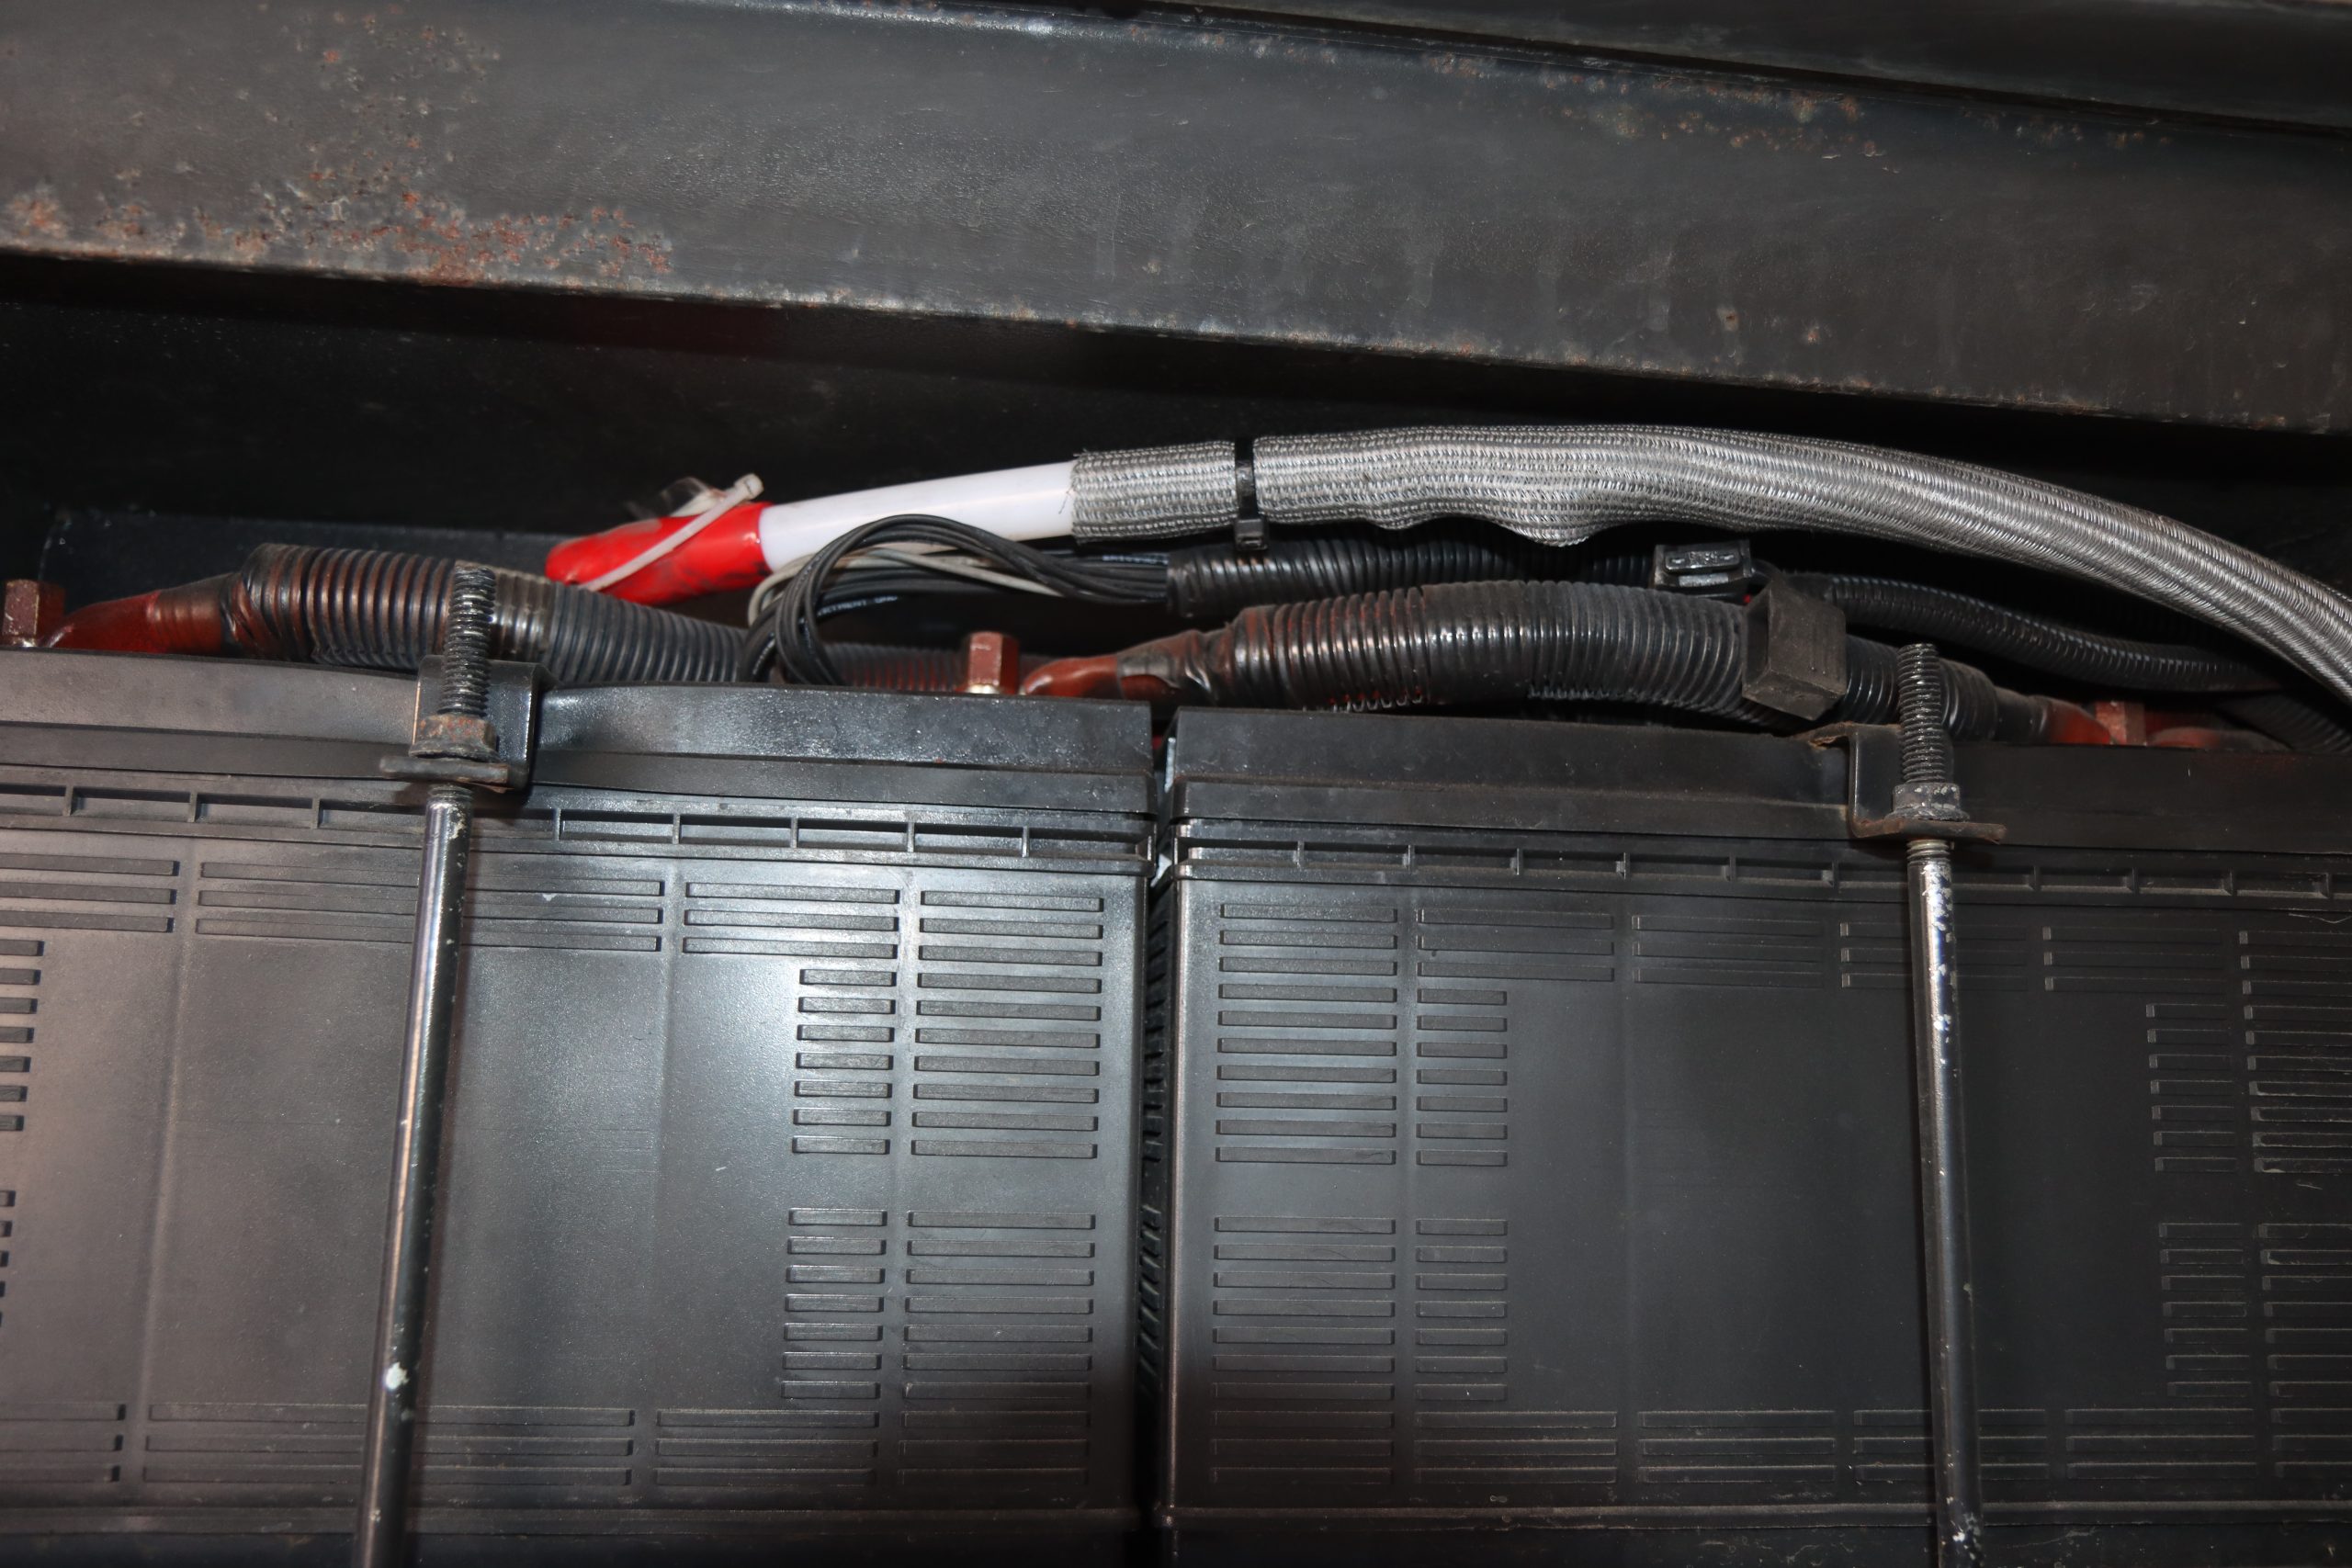
Next, we went to the engine compartment. The device chosen for this coach with its large 600 HP engine compartment was the heavy duty version and was 21’ long and began in the chassis battery area in the curbside compartment so that it could be used to extinguish any fires in that area as well.

Proteng THIA tube installed in RV

A small THIA by Proteng device was also placed in the driver-side front electrical compartment

From there, it passed the DEF tank and crossed the bell housing to the driver’s side before turning back to the rear of the coach. From there it passed back along the curbside of the engine to the starter motor. This large loop passed by every electrical component or potential fire risk. The long length provides a large enough supply of FM-200 to adequately extinguish even the largest fire in that area. One other advantage to the polyamide device is that it will rupture at the hottest point. Unlike a foam system with one or two sprinkler heads, this gives the device an unlimited location to dispense the FM-200 gas right where it is needed  rather than in a general location at the top of the compartment.

Proteng fire suppression

The 21′ HD device used in the engine compartment began at the side compartment by the chassis batteries to include their protection. HD device are covered in mesh protective wrap

Next, a small device was installed at the driver-side front-most compartment where a number of electrical components are located. Another device was fitted to the compartment that houses the eight house batteries.

Proteng THIA tube protecting chassis batteries on RV

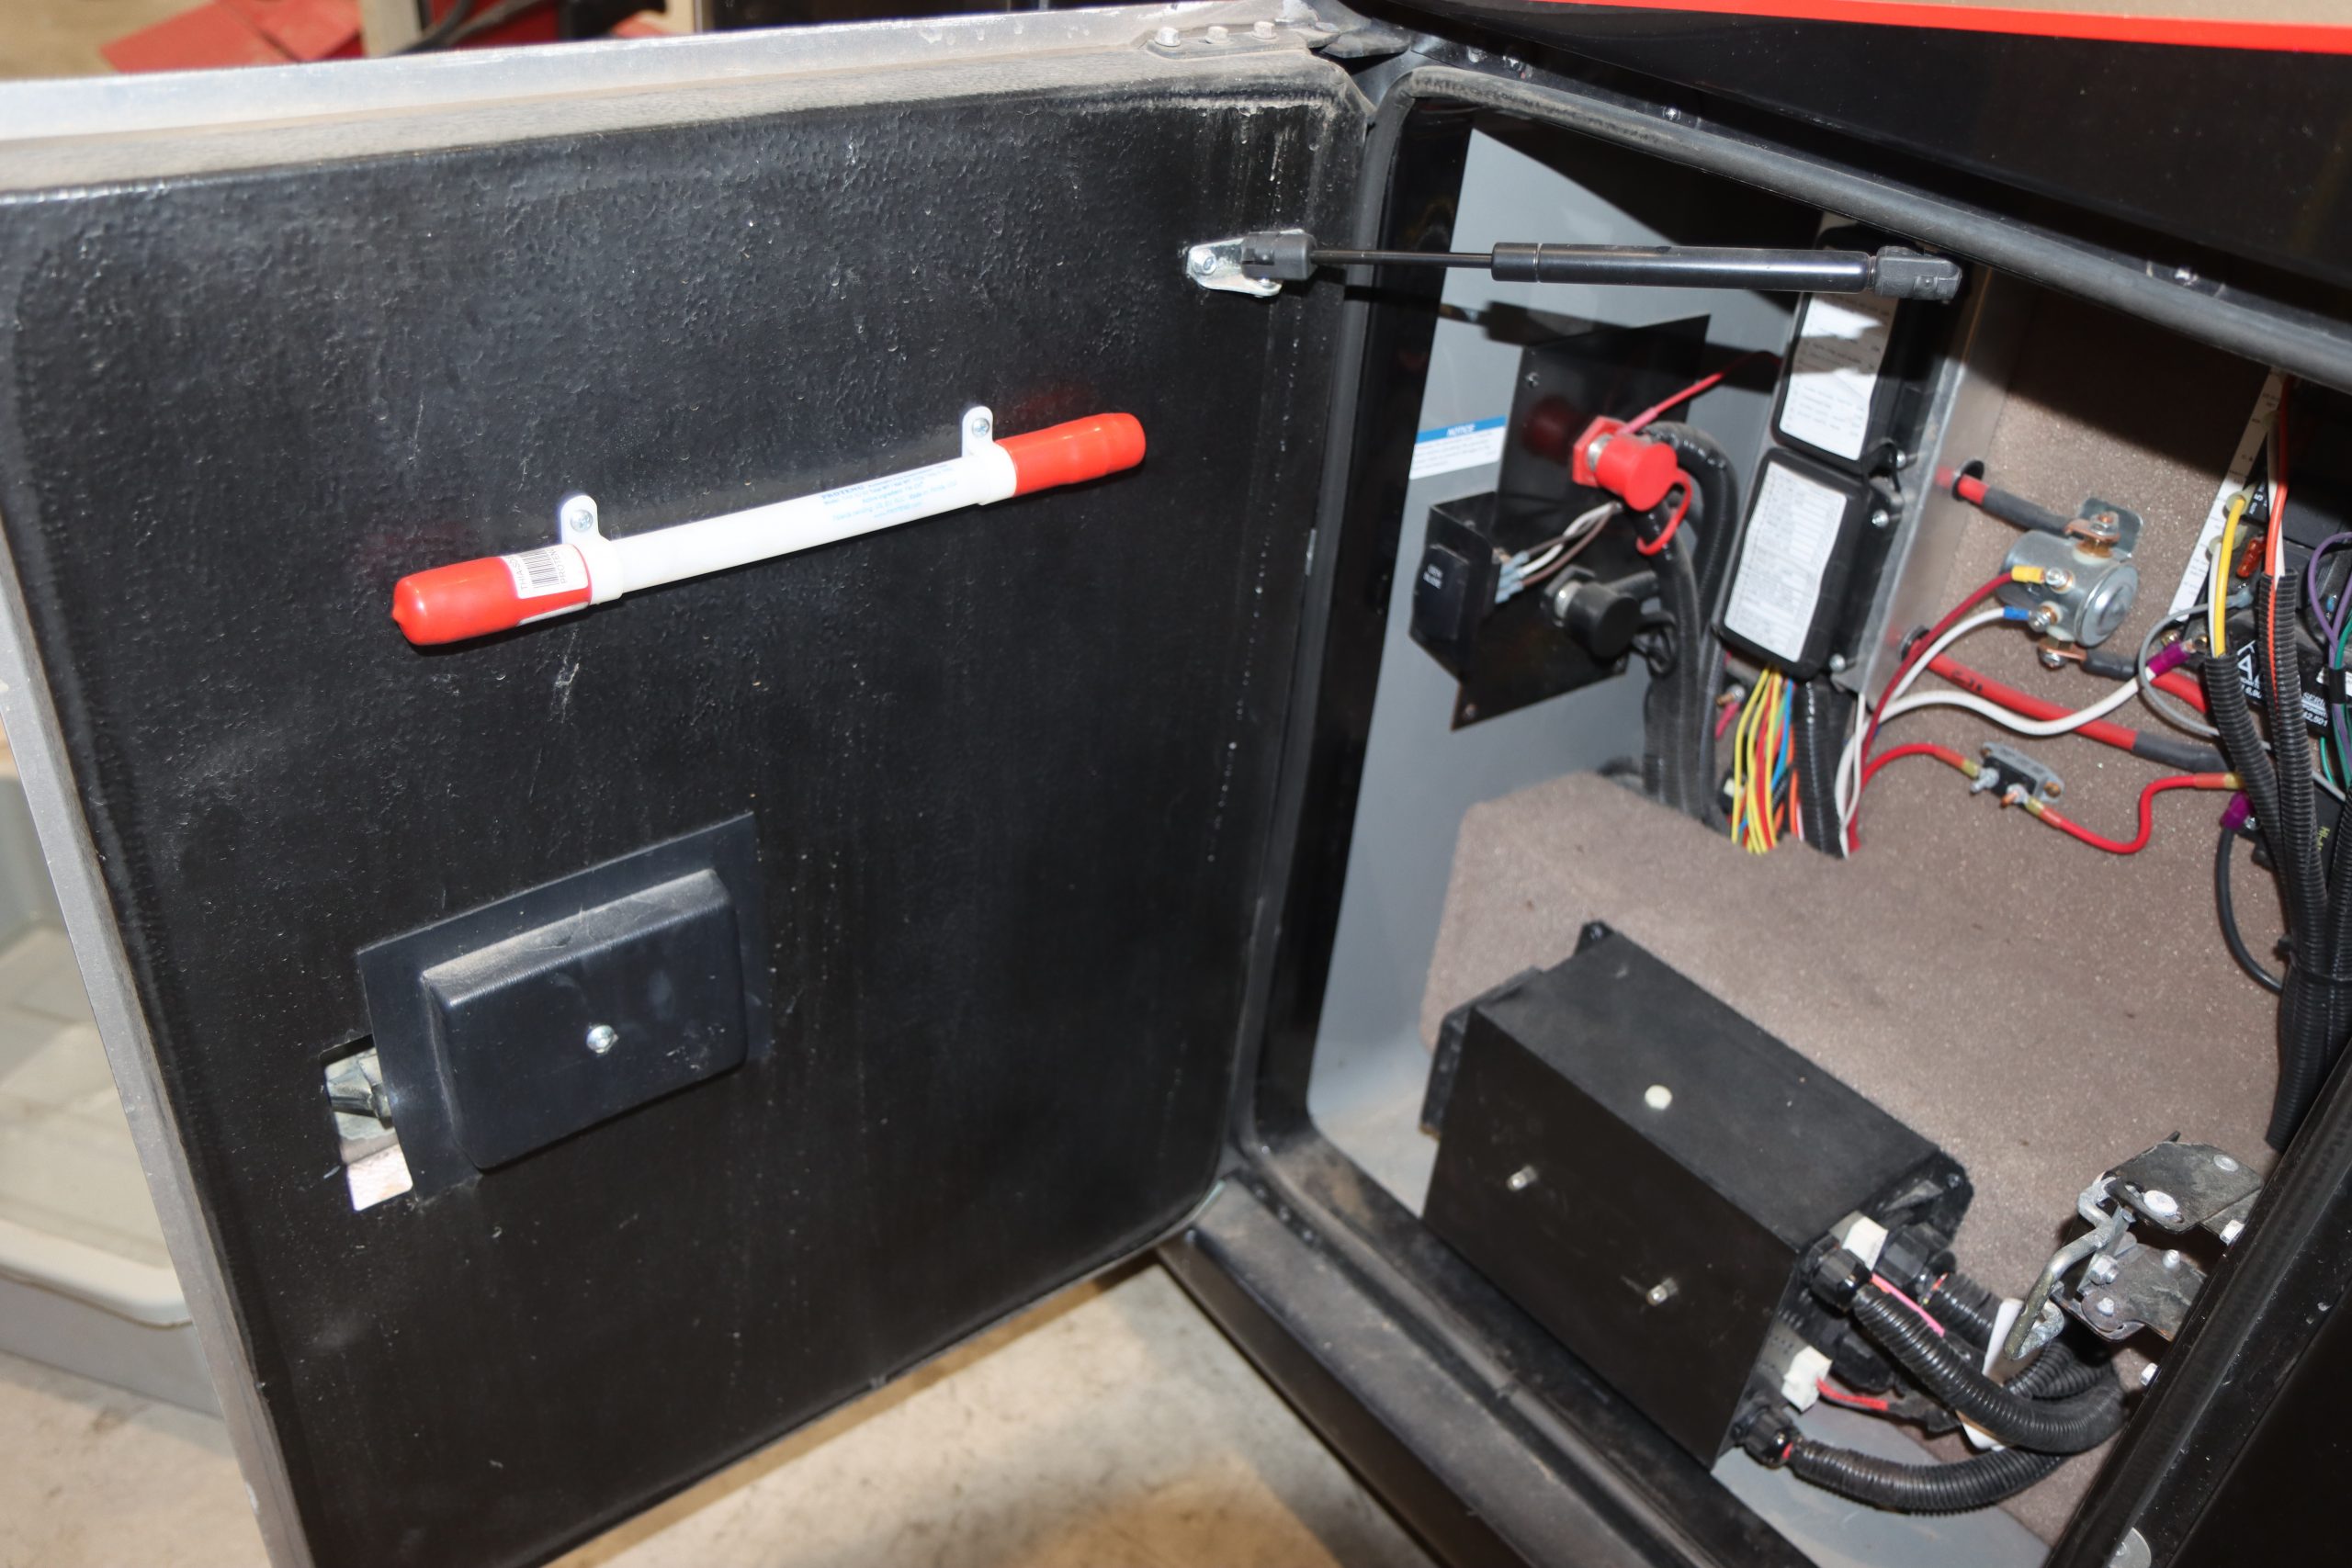
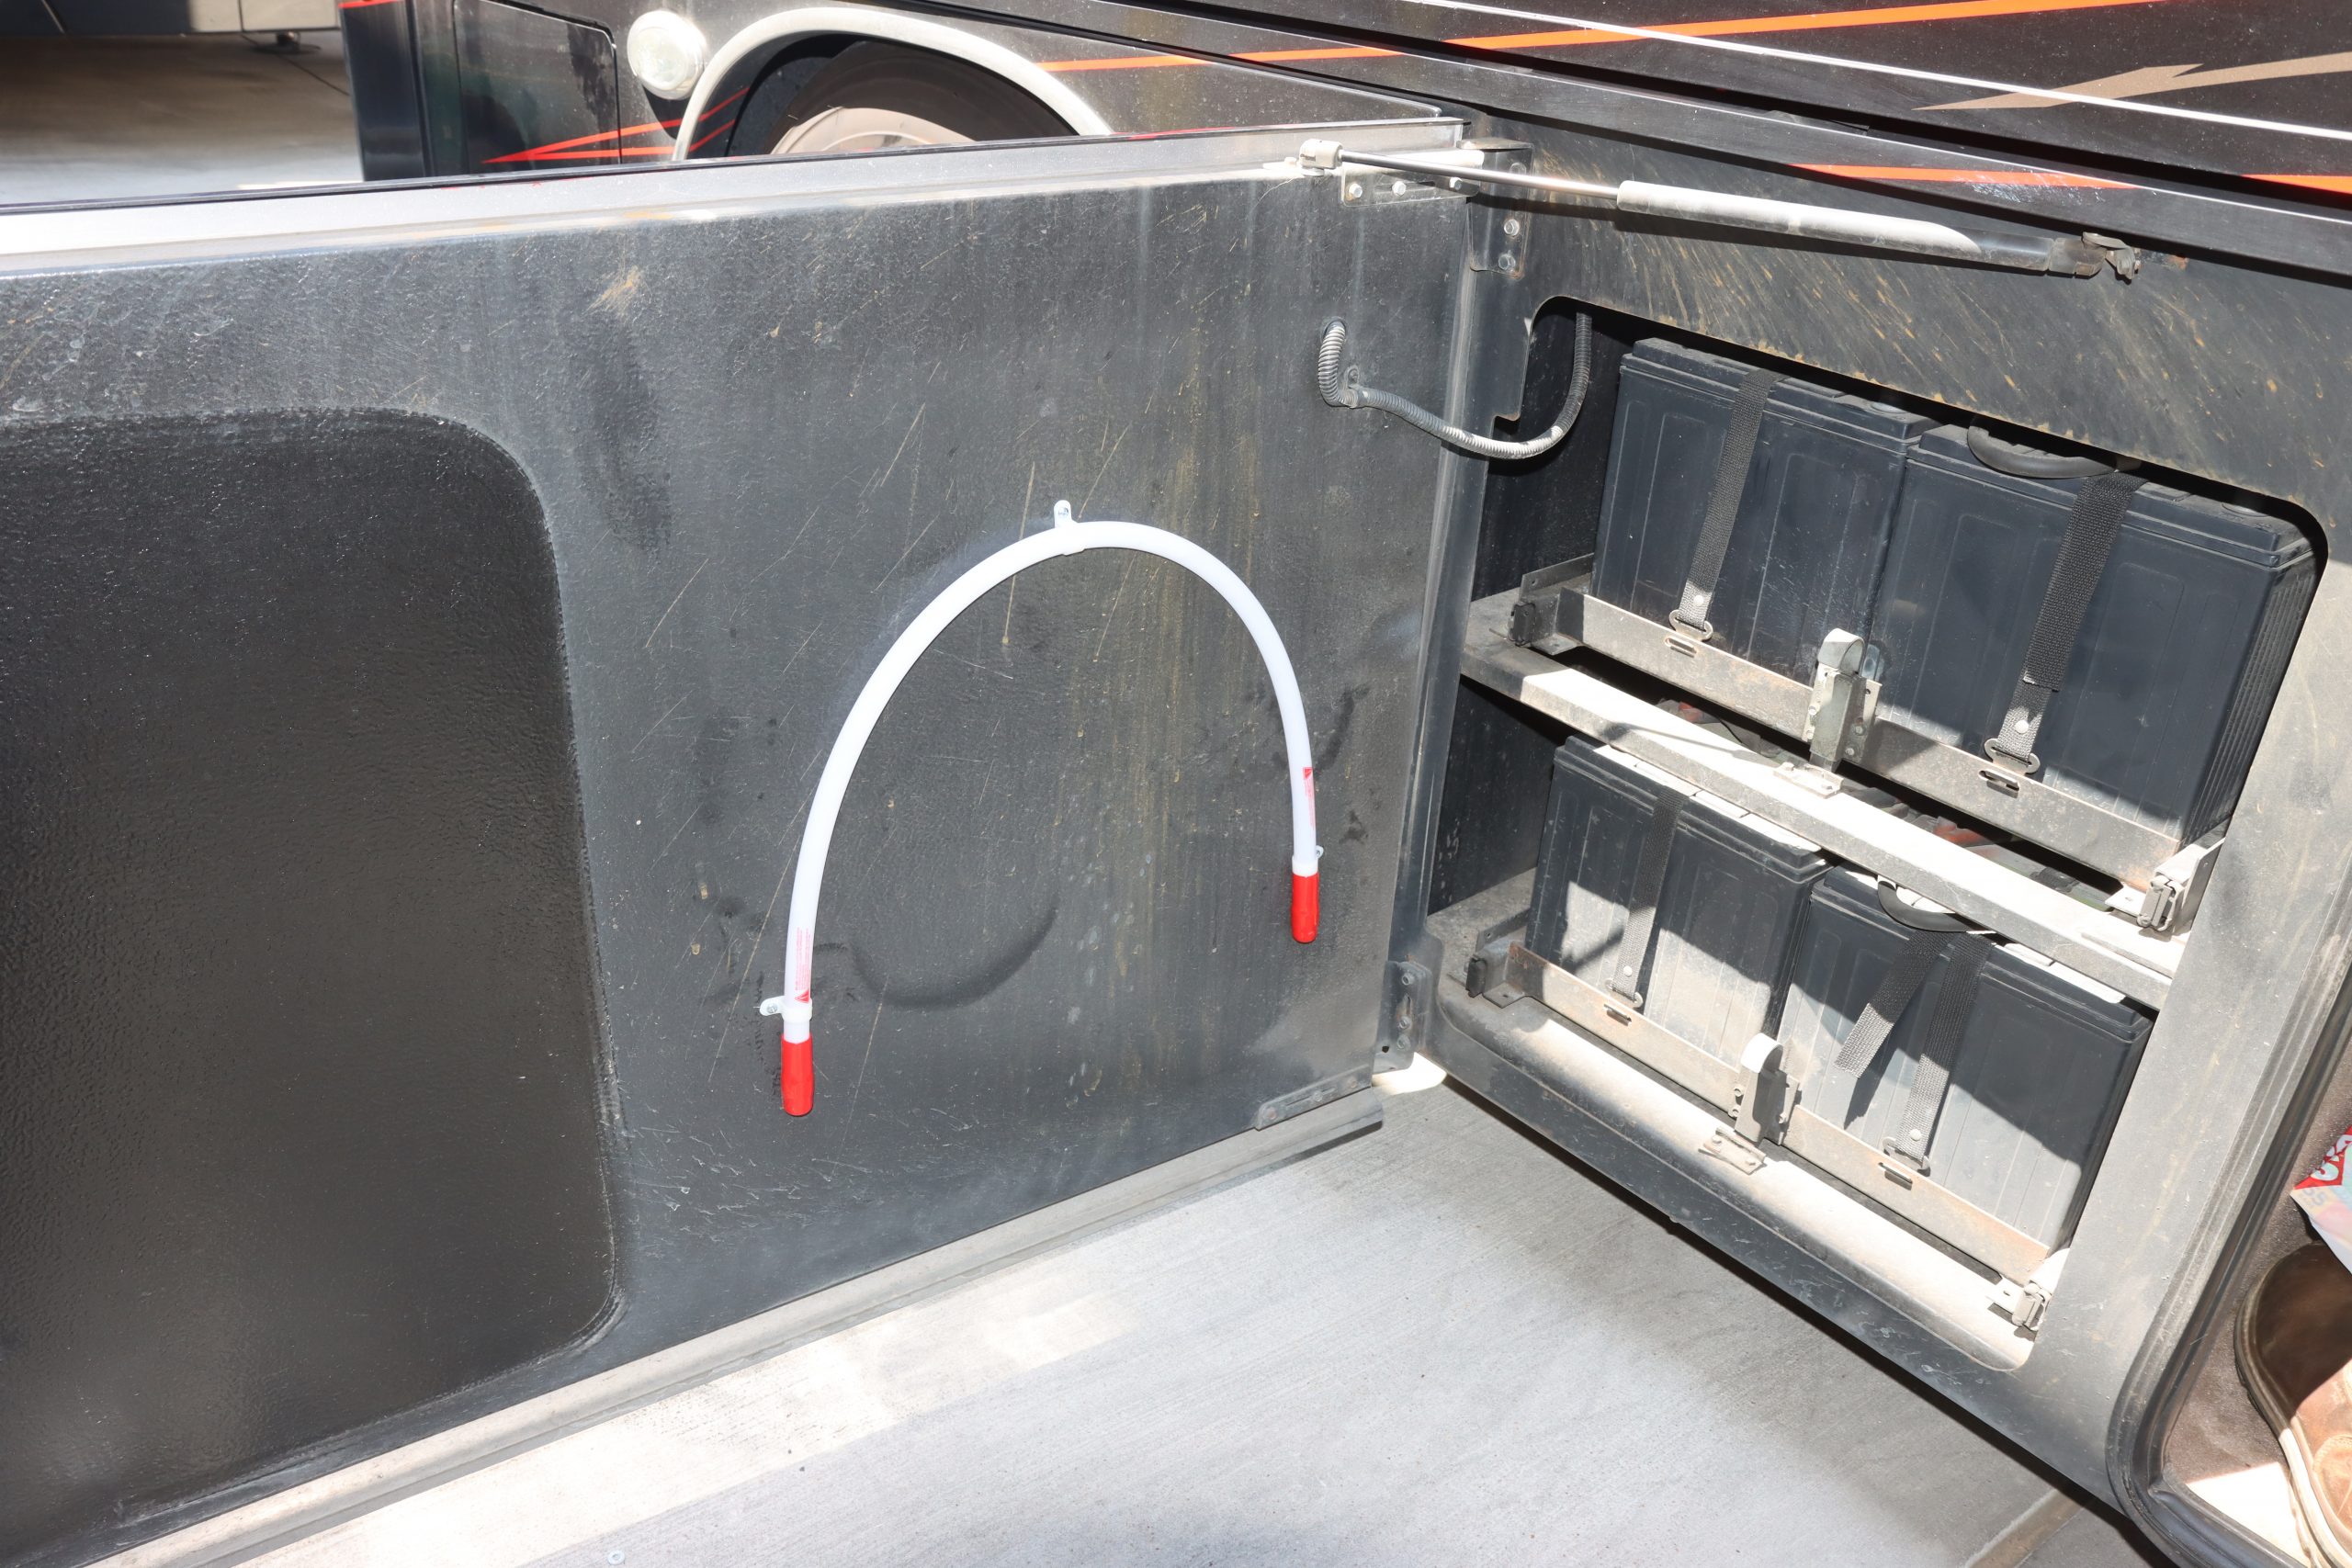
The eight chassis batteries are now protected by a 3′ long THIA by Proteng device

Normally, the device would be mounted above the batteries but this compartment has two stacks of four each and is pretty tight, so the device was mounted in a U-shape to the inside of the bay door to cover both layers of batteries. Another device was placed in the compartment where the electrical transfer switch is located. This was the same compartment where the Aqua-Hot is located, so a larger device was mounted to service this area.

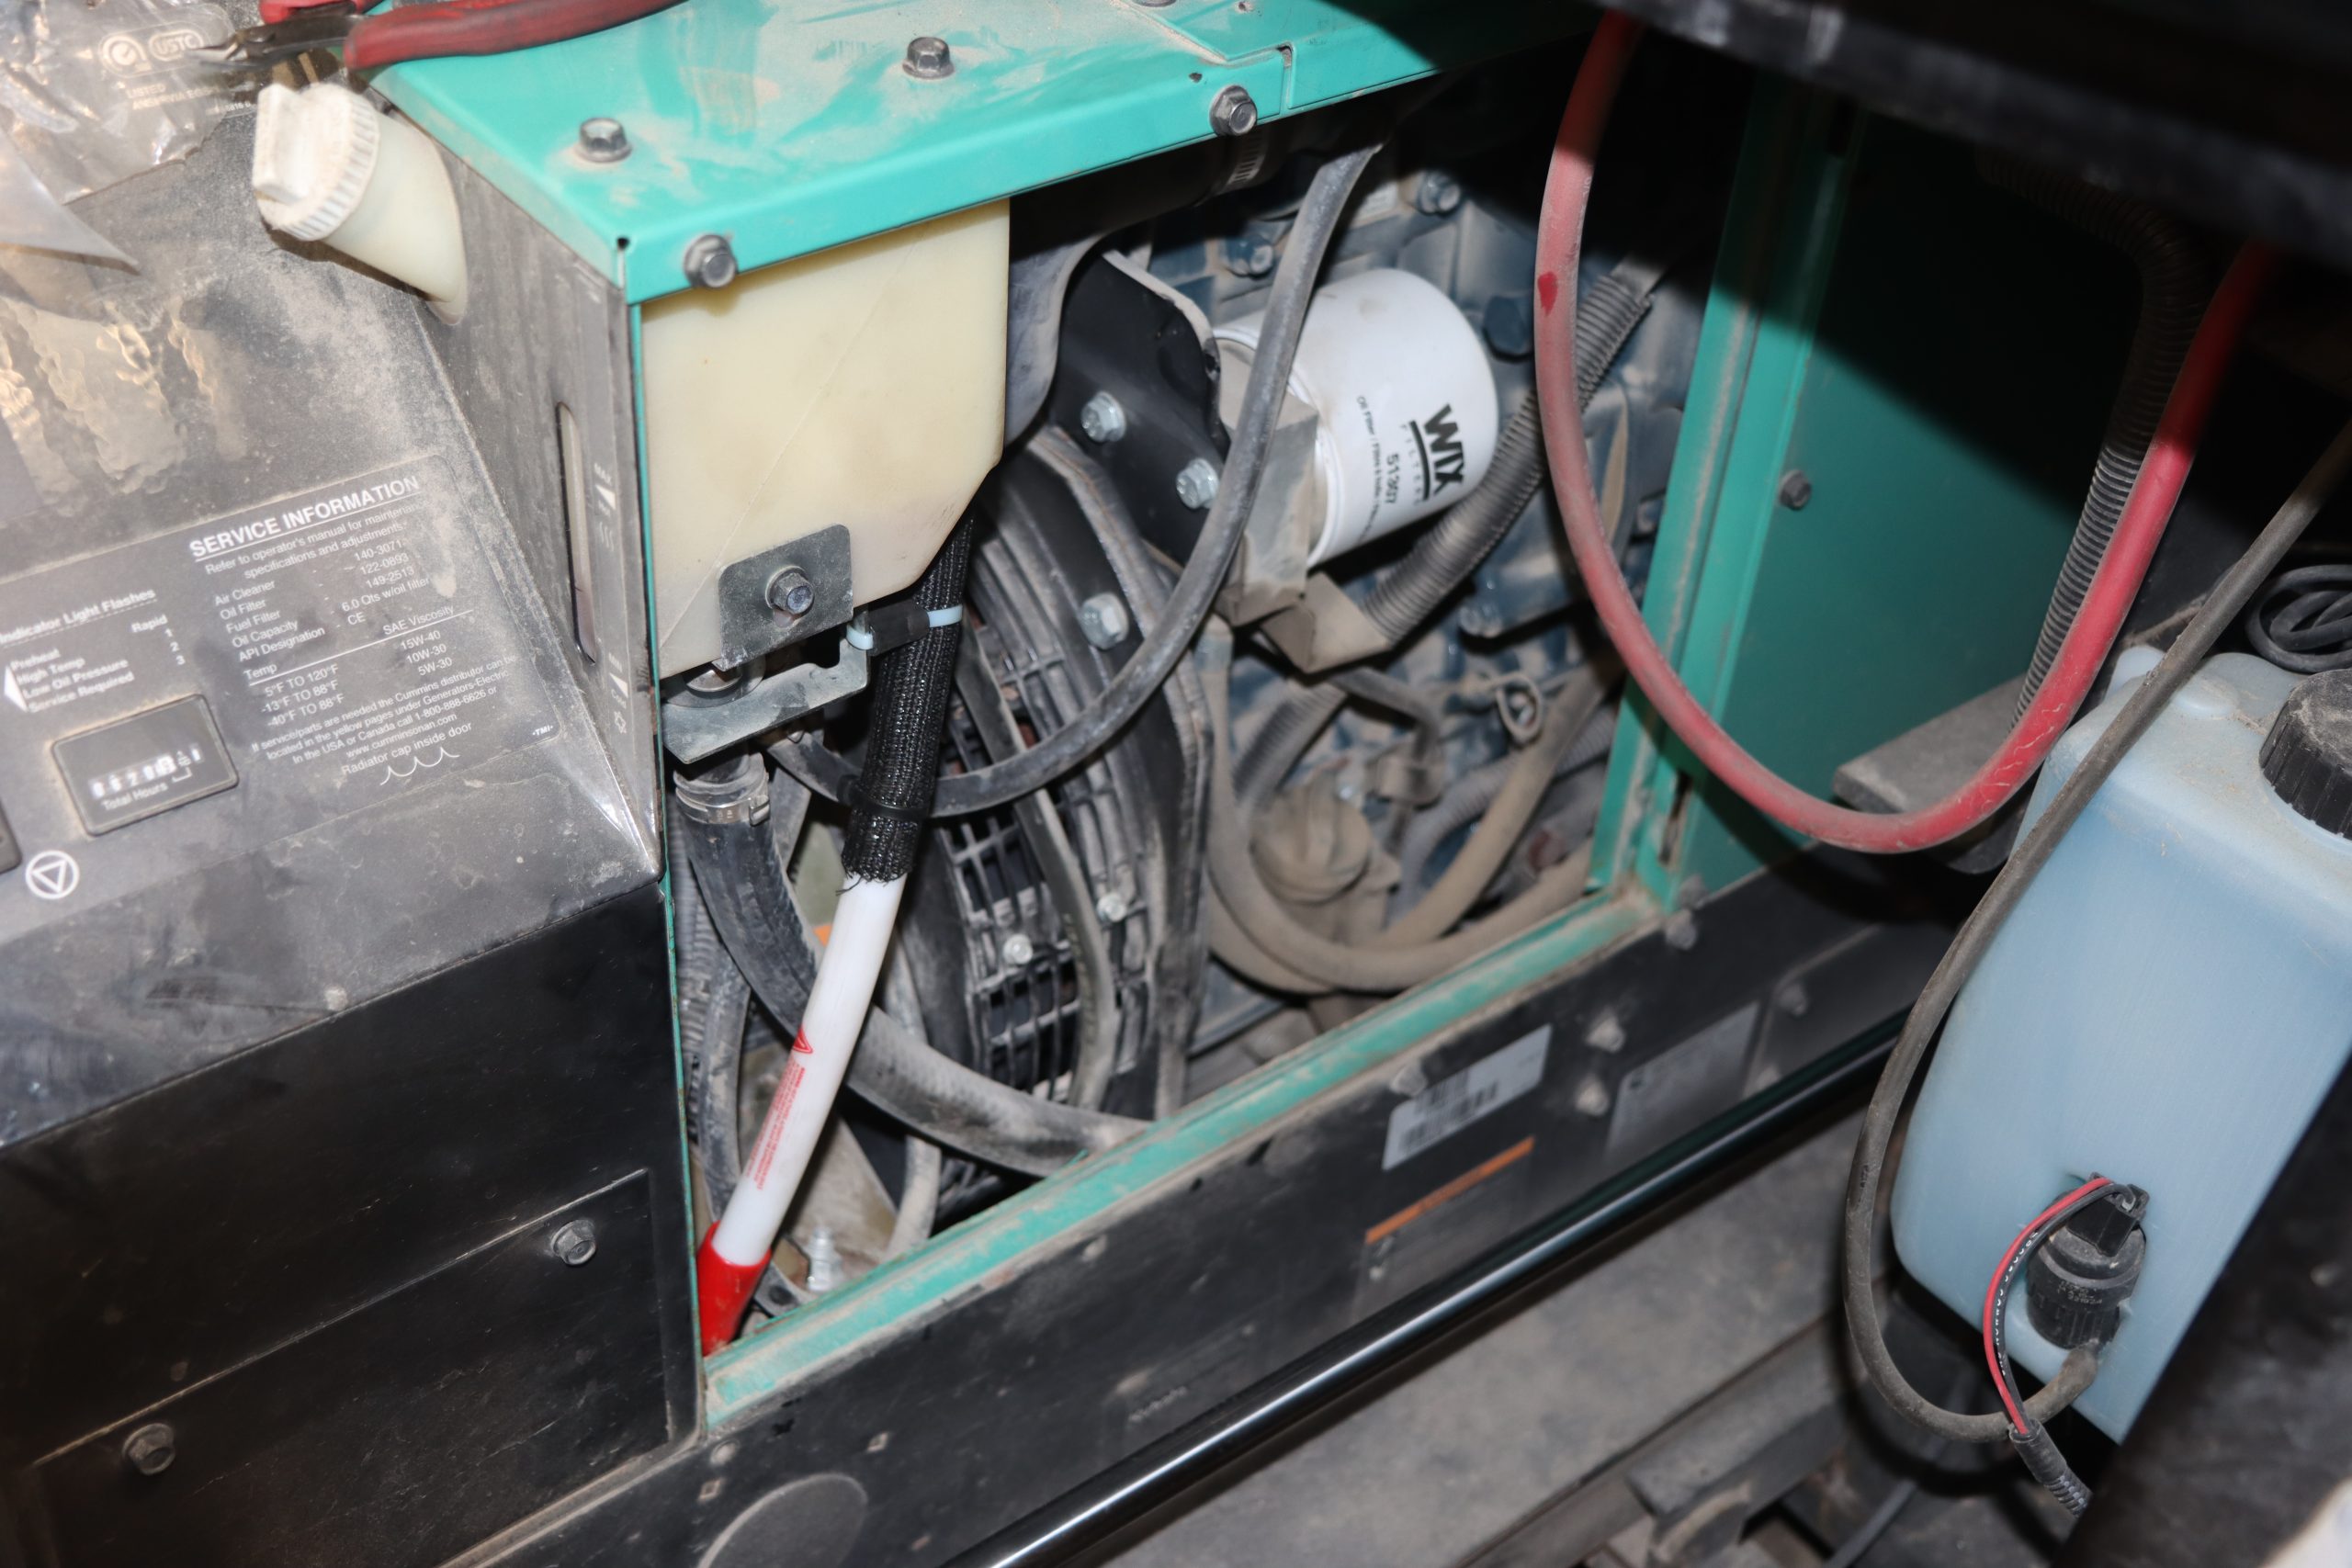
Entegra used a pair of Magnum inverters and mounted them on a tray between the frame rails above the front pass-through storage bay so another device was inserted above the inverters to properly protect them. Lastly, the generator received a second heavy duty device that was inserted inside the generator’s enclosure. That completed the system on our coach.

Protend fire protection installation
Proteng tube in generator house

NIRVC tech installing 3′ device into the Onan 12.5 KW generator

THIA by Proteng device in the generator housing

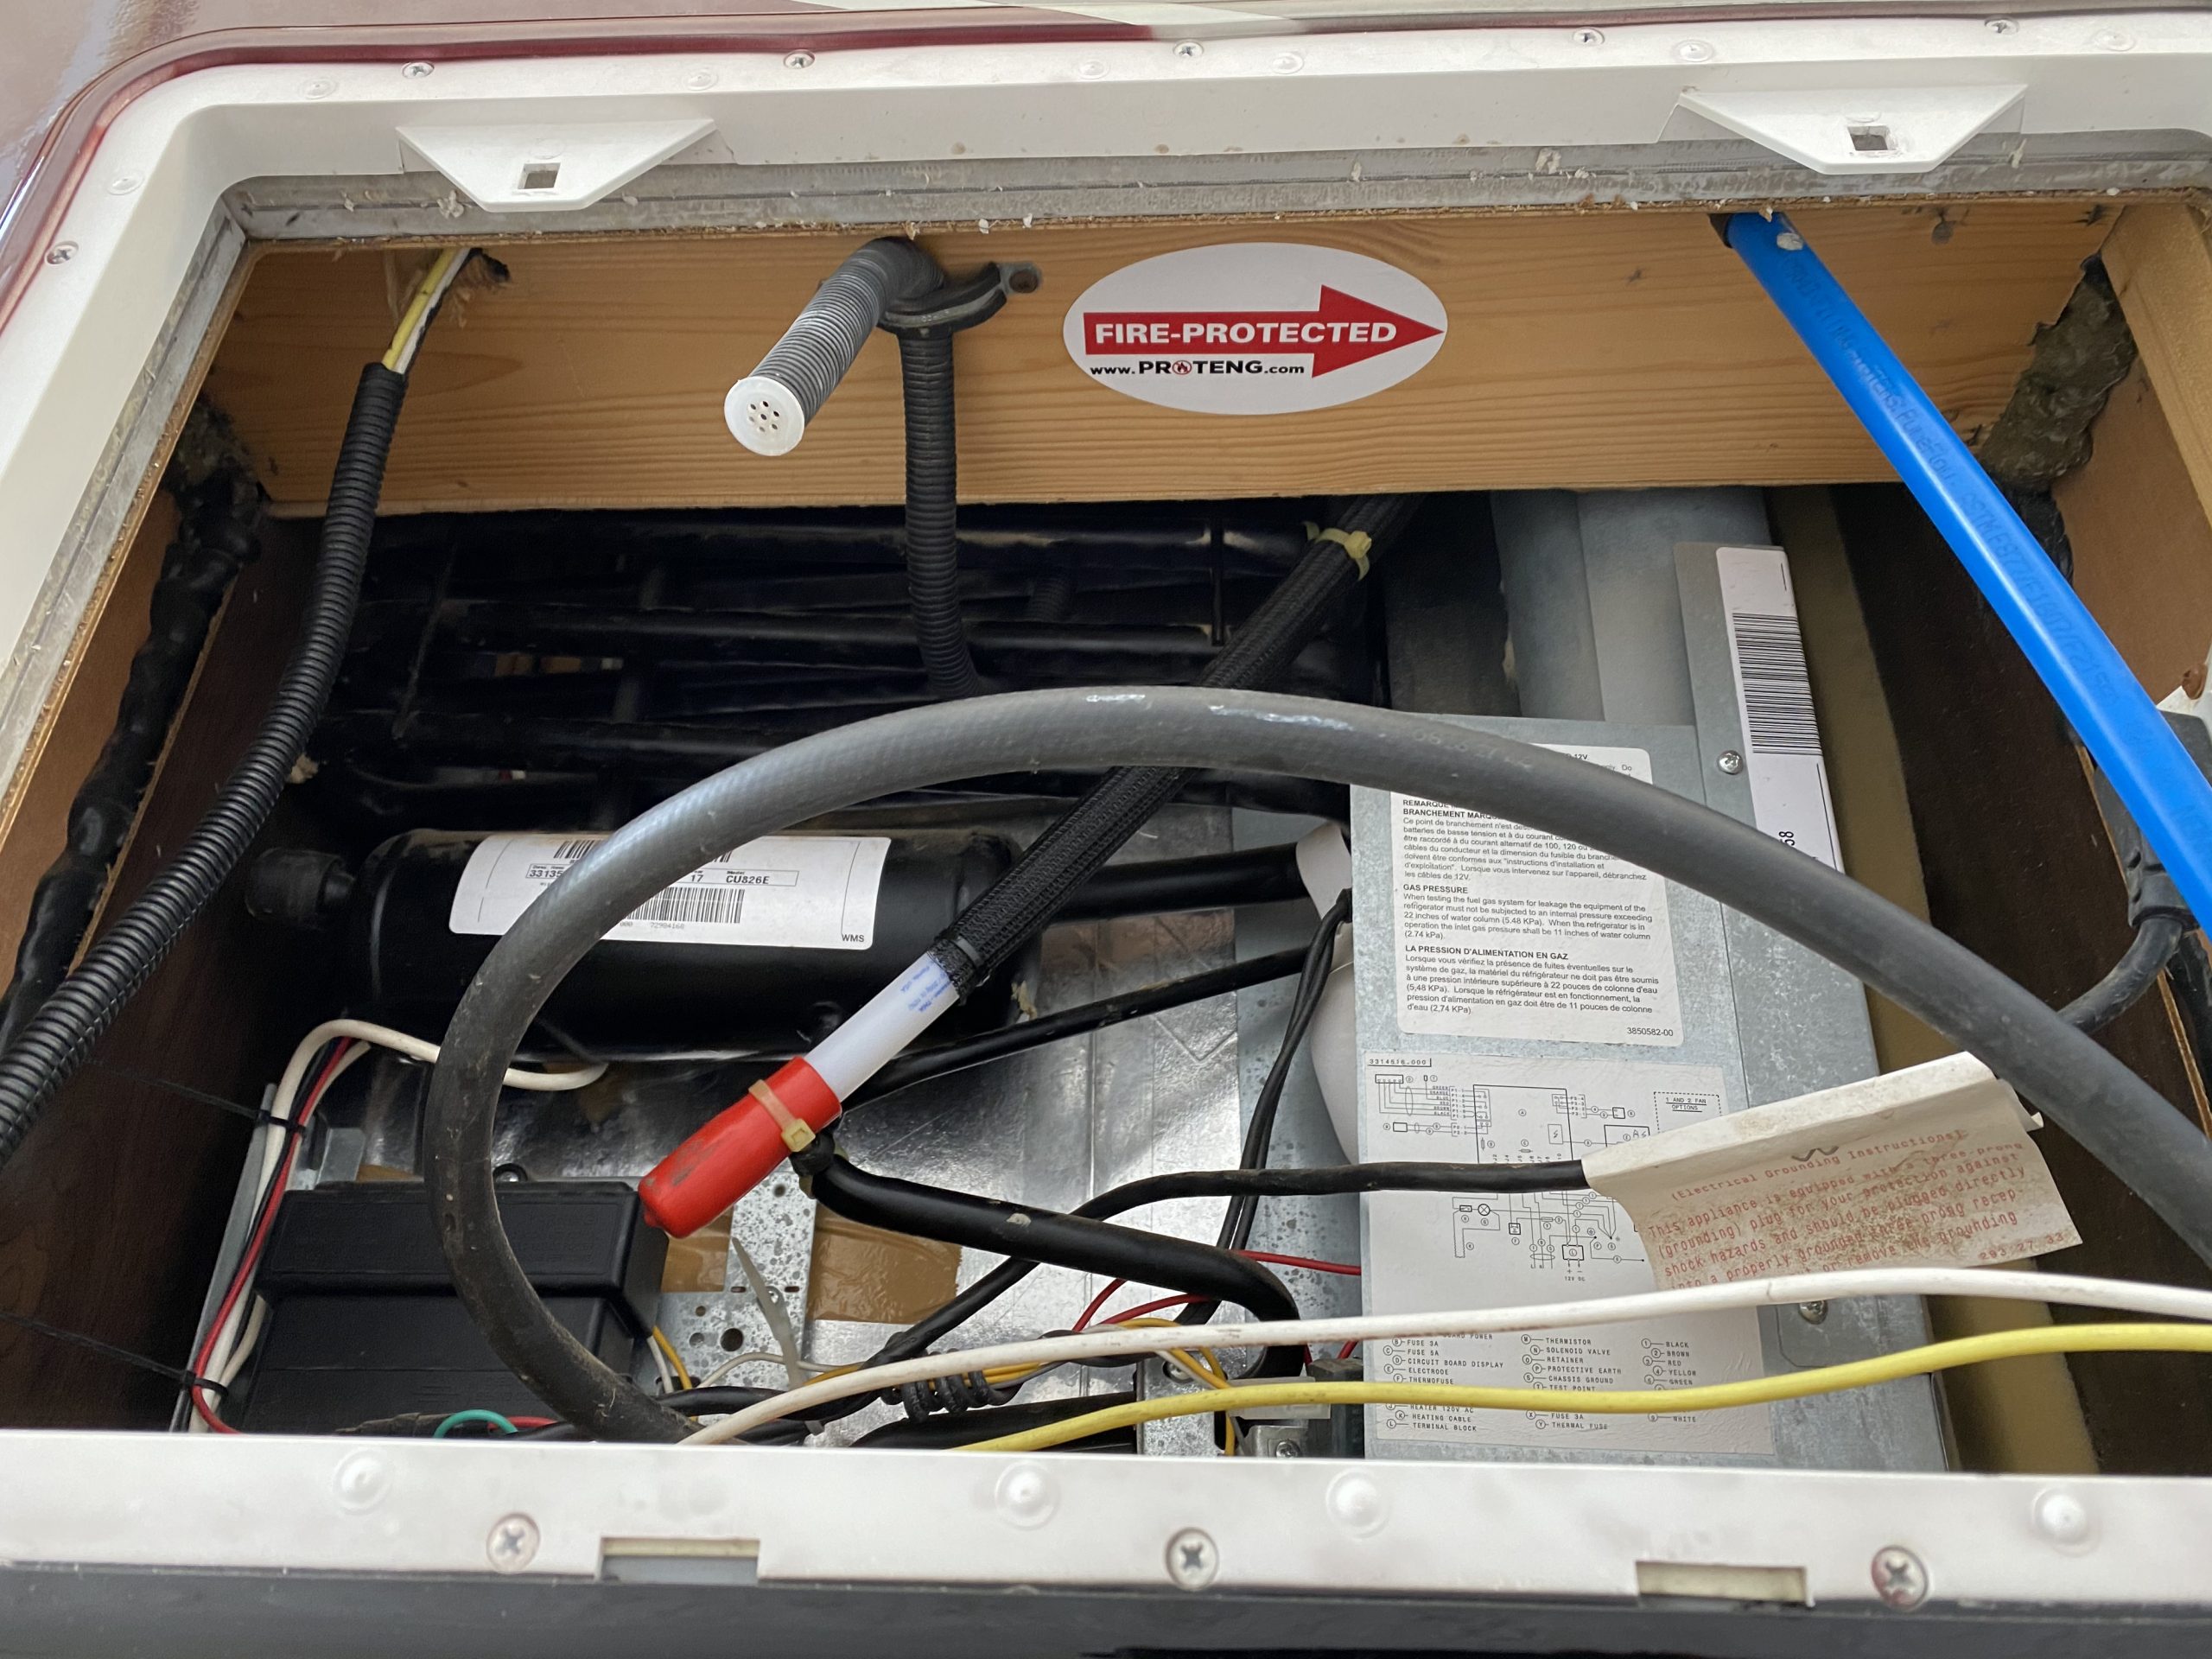
We have a residential refrigerator that is tucked into a cavity in the slideout, so we did not equip that with an extinguisher. However, if we had an absorption style RV refrigerator, we most certainly would have placed a device behind the fridge.

Proteng fire suppression system

THIA by Proteng systems are ideal for protecting absorption style RV refrigerators. This particular coach had a device installed the fridge.

Protect Your RV with THIA by Proteng

THIA by Proteng for RVs is sold exclusively through any of the National Indoor RV Centers. All of the devices are made in the USA, although the material isn’t available locally and has to be imported from Europe. The systems are backed with a 4-year warranty. Prices vary from $159 up to $1,399, depending on the length of the device. Every system is custom designed for each RV, so prices will vary accordingly.

Learn more RV fire safety tips here.

National Indoor RV Centers blogger Mark Quasius profile picture

Mark Quasius is the founder of RVtechMag.com, the past Midwest editor of RV Magazine, writes for numerous RV-related publications and a regular Contributor to FMCA’s Family RVing Magazine. Mark and his wife Leann travel in their 2016 Entegra Cornerstone.

RV Electricity 101 – Part 2 An RV Owner’s Guide to RV Electrical Systems

Last month we began our tutorial on RV electricity explaining the basics of electricity (the boring part), how the electrical panels are configured and briefly touched on generators. This month is part two of a three-part series and we’ll get a bit more interesting as we help you understand batteries, transfer switches and inverters. Finally, we’ll conclude this series next month with the final installment that will cover more advanced topics such as solar power, surge protection and energy management systems.

Transfer Switches

Sometimes the 120 volt devices in your motorhome need to be powered when you are not plugged into a campground pedestal, frequently referred to as shore power. When shore power is unavailable, the on-board generator set can be used to power these devices. Generators can be used in a number of situations, such as camping in remote areas where access to power is not available. A number of systems, such as lighting, water pumps and fans, are powered by your 12 volt battery. However, there will come a time when these batteries need to be recharged. The on-board generator can be used to power the coach’s battery charging system in the absence of shore power. Another use for generators is to power the rooftop air conditioners to make for a more comfortable motorhome interior in hot weather.

Your RV’s 120 volt electrical system is fed through a central distribution panel where all of the circuit breakers are located. In order to power this panel from two different power sources we can choose one of two methods. The first is the more cost effective and least costly and is commonly used in lower cost travel trailers. That method entails hard wiring a power cord to the breaker panel’s inputs. When not plugged into shore power this cord can be plugged into a generator set outlet to provide power to the RV’s electrical systems. While this method is inexpensive, it’s less convenient because you have to physically switch the plug from the shore power receptacle to the generator receptacle. The second method is to install an automatic transfer switch.

Automatic Transfer Switch

Automatic Transfer Switch

A transfer switch is basically a three way switch that switches between two inputs and connects them to a single common output. An automatic transfer switch mounted in a motorhome is located prior to the breaker panel where it can intercept the shore power cord feed to the breaker panel. The output of the transfer switch then goes to the main breaker of the breaker panel. The shore power cord is connected to one of the inputs in the transfer switch while the output from the generator is hard wired to the transfer switch’s second input. Transfer switches will connect one of these two inputs to the switch’s output. Manual transfer switches need to be manually switched by moving the switch lever on the box and are uncommon in a motorized RV. Automatic transfer switches commonly used in an RV will do this automatically and are logic controlled to switch under a given set of conditions. Generally automatic transfer switches will default to the generator inputs and are mechanically held. Once shore power is present the magnetic coils will pull the switch’s contact relays over to the shore power side. This is why you typically hear that clunk when the switch engages shortly after connecting to shore power. As soon as the shore power is no longer present the switch will revert back to its generator priority position.

Automatic transfer switches contain relays that switch between the two power sources. The magnetic coils that activate the relay contacts are engaged when the circuitry detects the presence of shore power. If you are running as large load the current across these contacts is substantial. When shore power is connected or disconnected, a large arc can occur across the contacts. Eventually this can pit the contacts and cause them to weld shut, rendering the transfer switch inoperative. If you have large loads operating it’s a best practice to switch them off before disconnecting from shore power to prevent this from happening. If your contacts do pit it is possible to file them clean by shutting off all power sources to the transfer switch, removing the cover and filing the contacts with some 120 or 220 grit sandpaper to clean them up. If they are too far gone the switch will need to be replaced or repaired. Another point of maintenance is to inspect the lug connections where the wires connect to the switch. The Allen head screws can loosen up over time, allowing loose wiring connections that can cause arcing in the connectors. It’s a good practice to inspect these connections every year or so and tighten them if necessary.

Generators

A motorhome has wheels, which means it’s mobile and doesn’t have to stay in one place forever. This means that shore power isn’t always available. Fortunately, most motorhomes are equipped with an on-board generator set to provide AC power when you are driving or when camping in a location that has no shore power. On some units you’ll find this generator in a basement compartment designed to provide adequate ventilation, intake air for the engine and a way to get rid of exhaust fumes. If you have a diesel pusher motorhome the odds are that your generator will be mounted in the very front of the coach, usually on a slide-out mechanism for ease of service. Permanently mounted generators are larger, heavier and quieter than their smaller portable cousins.

An Onan gasoline powered generator.

Onan gasoline powered generator

Gasoline powered Class A motorhomes will be equipped with a generator powered by a gasoline engine. The generator shares the same fuel tank as the vehicle engine but uses a separate fuel pickup within that tank. Usually these pickup tubes are cut short so that the generator will not run if the fuel level gets below a ¼ tank but this amount can vary from one manufacturer to the next. The reason for this is so that you can’t totally drain your fuel tank while dry camping. The ¼ tank remainder ensures that you will always be able to start your RV’s engine and drive to a refueling location. These generator sets are designed to slide into a basement compartment that is designed for that purpose so access to the controls and engine service points is done through the removable side cover on the generator, which also serves to contain the cooling airflow and add additional sound deadening capability.

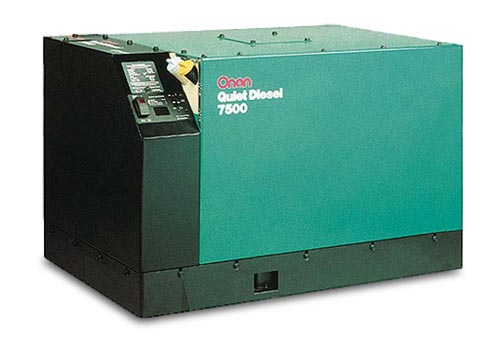
Onan Quiet Power diesel generator

Onan Quiet Power diesel generator

Diesel powered generators can be found on motorhomes that are powered by diesel engines. Some of the entry level class A diesels are really front engine gasoline chassis with a diesel engine in place of a gasoline engine. Also, many smaller B+ and Super C motorhomes are now being made with small diesel engines. In this case the diesel powered generator will be fairly small (in the 4 KW to 7 KW range) and will be mounted in a side compartment in the same fashion as the gasoline powered generators. On a rear engine diesel pusher, the front of the coach is clear of engines and radiators. In this case you’ll find a diesel powered generator that is mounted in the front cap on a set of slide rails. The generator can be slid forward out of the coach to allow better access for servicing the unit. These units generally start at around 7,500 watts and run up to 10,000 or 12,500 watts in size. Some older motorhomes used a propane powered generator that ran off the RV’s on-board LP tank. However, these are rare and less desirable because the limited capacity of the propane tank didn’t give the generator a very long running time before the LP tank was empty. Used coaches with propane powered generators are very hard to sell and their resale value reflects this.

Generators that are rated up through 8,000 watts are usually single pole 120 volt-only generators, referred to as “in-phase” generators because both windings are in the same phase. Larger generators, 10,000 watts and up are two pole split-phase 120/240 volt generators with a center tap neutral. Because motorhomes rarely have any 240 volt appliances you may think that this arrangement isn’t needed. But if you refer back to our split phase 120/240 diagram you’ll recall that each phase has a given amount of amps available. That’s what allows you to balance your load and eliminate the heavy wiring required for a 10KW generator, which would output 83.33 amps if it was an in-phase design. Note that a 50 amp electrical service is equivalent to 12,000 watts, which is the size generator required if you needed to supply a full 50 amps to your RV’s breaker panel.

Frequency and RPM

Earlier we saw a graph of the AC and DC waveforms. The vertical height of the waveform represented voltage. But we also need to control just how fast this electrical pulse occurs. This is plotted horizontally on the graph and is referred to as frequency, which is labeled as Hertz. In North America all electrical power is 60Hz while in Europe and most of the rest of the world electrical power runs at 50 Hz. Hz is basically a counter of how many electrical pulses or waves occur in one second. A small portable generator must run at 3,600 RPM in order to produce 60 Hz of electrical power. When you divide 3,600 revolutions per minute (RPM) by 60 seconds we get 60 revolutions per second. It takes two field coils, a north pole and a south pole, to create the magnetic field necessary to create electricity. There are two field coils in a small portable generator, so it takes one revolution of the generator to create one Hertz. When the generator is turning at 3,600 RPM it will produce 60 Hz. It doesn’t matter what size output the generator makes but the speed at which it turns is important.

Small portable generators tend to be noisy because an engine running at 3,600 RPM isn’t very quiet. They were designed to be light and portable. In a motorhome this isn’t important because the generator doesn’t need to be lifted because it will be mounted into the RV. What is important is the noise level. If we add a second set of field coils to our generator, we will double the frequency to 120 Hz when running at 3,600 RPM, which isn’t good and will burn up our electrical devices. But if we take that same 4 pole generator and slow it down to 1,800 RPM we will still have 60 Hz. It’s just that we are passing twice as many magnets during the same revolution so by reducing the number of revolutions by half we will still maintain 60 Hz. This is the way many RV generators are set up. The 1,800 RPM speed of the engine allows for quieter operation. Because we don’t have to lift this generator we can also add a nice large muffler to it. The big drawback is that we have to use a larger engine. A small 8 HP engine is capable of creating 3,500 watts at 3,600 RPM but when you slow it down to 1,800 RPM it will only put out around 5 HP, which isn’t enough. By going with a 12-14 HP engine, we will still have 8 HP available at 1,800 RPM to then make our 3,500 watts of power. This means that the engine will be physically larger, weigh more, be quieter and more durable, and cost more than a smaller engine that is running higher revs. But the gains are well worth it in an RV application. Large utility power plants carry this even further and can use as many as 24 field coils in their generation systems so that they only have to turn 300 RPM. Less RPMs means greater life but more weight and size, while less magnets means less weight and size but greater speed and wear.

There is one exception to this RPM rule for generators. There is a trend towards inverter generators which use a variable speed engine to produce DC current to an inverter board within the generator. The inverter will convert DC power to AC power electronically. A DC generator is not sensitive to its RPM because the inverter controls the frequency and voltage electronically. These are smaller generators, such as the Onan Quiet Diesel (only up through 8KW) and small portables such as the Honda EU series. The benefit to this is that the generator can run at a lower speed when the demand for power is light, ramping up to higher speeds as the demand increases. This will minimize fuel consumption and supposedly reduce the noise level, although some models can actually be louder at full song compared to a traditional 4-pole generator. The electronic circuitry of the inverter will regulate the output voltage at a steady 120 volts and the frequency at a consistent 60 Hz.

Effects of Altitude

Any engine will produce a given amount of power based upon how much fuel and air it consumes, and higher power loads and RPMs consume more fuel. Because fuel and air are in a somewhat constant ratio, the engine will require more air at higher power outputs. But as we drive our motorhomes up into higher elevations, the air gets thinner and the engine loses its ability to produce its maximum rated power. This results in a corresponding drop in generator output wattage.

high-altitude image of a Suncruiser at 11,000

High-altitude image of a Suncruiser at 11,000 feet

 Different engines will react in varying amounts. For instance, the output wattage of the Onan Marquis Gold series of gasoline powered generators will lose 3.5% for every 1,000′ in altitude gain over 3,000′. The Onan Quiet Power Diesel 10,000 watt will derate 3.5% for every 1,000′ over 500′ and it further derates by 1% for every 10° F increase in temperature over 85° F. A good rule of thumb for most gensets is that you will lose 10% of the rated output every time you gain 3,000′ in altitude. This means that a 7,500 watt generator running at 9,000′ of altitude will only be capable of producing a bit over 5,000 watts at that altitude.

Diesel engines are pretty well able to handle the fuel injection requirements at higher altitudes but carbureted gasoline powered engines do not have that luxury. The Onan Marquis Gold series of generators uses carburetors that have an altitude compensation adjustment on the carburetor. By dialing in a higher altitude you will lean out the mixture to prevent spark plug fouling and excessive smoke. It is very important that you also dial it back when descending to lower altitudes or else the engine will run lean and you can burn the engine’s valves.

Breaker Panels

Breaker panels serve two functions. They provide a central distribution center for all of the various circuits to tie into the incoming power supply, and they also provide overload protection to prevent electrical fires from any short circuits. Fuses are pretty much a thing of the past on high voltage circuits in RVs, so resettable circuit breakers are provided in their place. Breaker panels, also called power distribution centers, are mounted in an accessible location inside the RV so that the circuit breakers can be reset as needed. They are also used to de-energize a given circuit so that circuit can be safely worked upon without endangering the operator.

A 30 amp in-phase circuit breaker panel

A 30 amp in-phase breaker panel

Circuit breaker panels are going to vary quite a bit from one brand to the next as well as between a 30 amp and a 50 amp service. A 30 amp service will be single pole 120 volts so it will have 3 wires feeding it – a black hot wire, a white neutral wire, and a green or bare copper ground wire. Because it’s a single pole service, all of the breakers will be fed by the same common hot wire.

A 50 amp split-phase circuit breaker panel

A 50 amp split-phase breaker panel

A 50 amp service will be different because it’s a two pole split phase service with two hot wires. In this case the black wire will be referred to as L1 while the second hot phase will be a red wire and referred to as L2. In this instance the breaker panel will have two main lug inputs and a divided buss that sends L1 to half of the breakers while sending L2 to the other half. In either situation there will be a main breaker that controls power to the entire distribution panel. It will either be a single pole 30 amp breaker or a two pole 50 amp breaker, depending upon which service your motorhome is equipped with.

In addition to the main breaker there will be a number of output breakers – one for each circuit in the coach. Any given circuit may contain multiple outlets, but that particular breaker will control every outlet on its circuit. So if a device that is plugged into an outlet causes the circuit breaker to trip, that entire circuit will be dead. Some of the panels used in motorhomes are fairly small so that they don’t take up too much room, which is somewhat limited in an RV. However, there may not be enough available slots for the number of circuits that are needed. Split circuit breakers are commonly used in this application to solve this problem. A split breaker places two half width breakers into one common unit that snaps into a single breaker panel slot. This gives you the ability to run twice as many circuits as normal circuit breakers. Of course, you still need to find enough room inside the box to stuff all of that wire so that may be the limiting factor.

Sub-Panels

Normally, all of the circuits can be powered from the one breaker panel. Many motorhomes are now coming with more complex electrical systems and are using inverters to power certain devices. We’ll talk more about inverters in a later chapter, but for now let’s just say that inverters use battery power to produce 120 volt AC power. Inverters are also fed 120 volt AC power from the breaker panel. They have an internal transfer switch that passes the shore power through rather than using the batteries to produce power. It will pass this power through whenever it is available or invert it from the batteries when it is not. This means that any devices that need to be powered from the inverter need to somehow be connected to its output. They still require some sort of overload protection so many of the larger inverters send their output, or the pass through power, to a sub-panel. This sub-panel will act as a distribution point for all of the circuits that are desired to be run off the inverter. It will have a few circuit breakers in it to protect these circuits from any overloads. The inverter itself will receive power from either one or two circuit breakers in the main panel. In this way all of the AC power from the main breaker panel will pass through the inverter and into the sub-panel, where it can be distributed to the desired circuits. Many of the larger inverters also serve as battery chargers, so whenever shore power or generator power is present it will charge the batteries in addition to operating in the pass-through mode.

Iota integrated breaker panel

Iota integrated breaker panel

This requires the installation of a second panel. Adding a sub-panel to an RV does take up valuable space, which isn’t always that easy to do. Some breaker panels, such as the Iota IDP-240B, offer an integral sub-panel. By splitting the buss inside the panel, a portion of that box can be used for sub-panel circuits if the inverter is wired to return power to that portion of the buss bars. This offers a huge advantage when trying to fit a breaker panel into an RV without tying up valuable space. The Iota is a compact breaker panel with an attractive cover with a smoked glass cover over the breakers. If a breaker trips, an LED can be configured to illuminate, which identifies the circuit as tripped without requiring removal of the cover. It can be configured with the split buss design so a separate inverter fed sub-panel is not necessary.

Batteries and Chargers

Batteries are critical to an RV. They start the engine and provide power to run accessories when driving. When parked they provide power to run lighting, water pumps, and various other 12 volt accessories. They can even be used to power an inverter to provide 120 volt AC power. Because of their heavy use they can sometimes be a source of aggravation and maintenance. Let’s take a closer look at batteries, how they work, and how to properly care for them. We’ll also delve into battery chargers and charging methods.

The battery compartment from an Allegro Bus

The battery compartment from an Allegro Bus

A single battery may be fine to operate your passenger car but it’s just not enough power to handle the more advanced requirement of an RV. To do this, multiple batteries are arranged together into a battery bank. There are two types of batteries and each type has a different intended use. Automotive batteries are what you have in your car. They are designed to output a large burst of amperage to start the vehicle, then slowly recharge from the vehicle’s alternator. The key here is that they dump a lot of amperage in a short time, then rest for a while slowly getting recharged. Most diesel motorhomes will have two engine-starting or chassis batteries in order to crank these larger engines.

When camping, your coach electrical systems operate quite differently. They will draw fewer amps than a starter motor but they will do that over a longer period of time. For this application deep cycle batteries are used. Deep cycle batteries are designed for maximum performance by slowly draining amps from them and sustaining this draw over a longer period of time. Most coaches will have four deep cycle batteries in a battery bank to ensure that there is enough capacity to supply adequate power over a longer length of time. This can vary and some smaller coaches may only have two, while larger coaches may have as many as eight batteries in a bank.

RV electrical systems are 12 volt systems. Whenever you connect multiple batteries together you have to make the proper connections in order to maintain 12 volts. If batteries are connected in parallel they will retain their voltage, but if they are connected in series the voltages will add up. So, if you have a bunch of 12 volt batteries that you want to connect into a battery bank, you simply connect all of the positive and negative posts together to give you increased load capacity or amp-hours. But many RVs are using 6 volt batteries for their deep cycler applications, which are commonly used in golf cart applications. They have a heavier plate design and are more durable, plus they output more power than a 12 volt battery of similar dimensions. The only downside is that you need to connect them properly to get a 12 volt output. Basically, you connect a pair of 6 volt batteries together in series to give you a single 12 volt battery. Then you connect the positive posts of this pair together with all of the other pairs and then do the same with the negatives. The following diagrams show a four battery bank of both 12 volt and 6 volt batteries and will help explain this better.

diagram of series versus parallel battery connections

diagram of series versus parallel battery connections

Battery Types

Batteries come in different types. For RV applications the most common are flooded batteries or AGM batteries. Flooded batteries are filled with electrolyte. This electrolyte is a diluted form of sulfuric acid. When a load is placed on the battery, the acid puts a charge on the lead plates and creates electricity. At this time some of the sulfur and oxygen leaves the acid and forms a sulfate on the lead battery plates, leaving water as the remainder. If a battery is totally discharged, the battery plates will be coated with sulfate and the electrolyte will be mostly water, which is why dead batteries can freeze in cold temperatures but fully charged batteries will not freeze. When the battery is recharged, the sulfate falls of the battery plates and recombines with the water to change it back to acid again. If the battery is overcharged (in other words excess voltage is applied to it when it already is charged up), the water can boil out of the battery and acidic vapors can leave via the vented battery caps. This reduces the water level and if it gets below the battery plates it can harm the battery. It also tends to corrode the battery connections because of the acidic vapors. Maintaining the proper water level is critical to good battery performance.

AGM batteries use electrolyte but not in a liquid form like flooded batteries. The acidic electrolyte is absorbed into glass fiber mats that are wrapped around the lead battery plates. With AGM batteries there is no need to ever worry about adding water because there is no water in them so maintenance is greatly reduced. The battery terminals also are not as susceptible to corrosion as flooded batteries because there is only microscopic outgassing, or venting, of electrolyte vapors. The outgassing of flooded batteries means they need to be in a vented compartment and clear of anything that could create a spark. AGM batteries can be located anywhere because they truly are sealed. AGM batteries are typically used in aircraft and they can be used in any orientation, even upside down, with no negative consequences. AGM batteries also offer greater performance over a comparable flooded battery because the voltage drop curve is flatter.

Voltage State of Charge
12.6+ 100%
12.5 90%
12.42 80%
12.32 70%
12.20 60%
12.06 50%
11.9 40%
11.75 30%
11.58 20%
11.31 10%
10.5 0%

Battery Charge Voltages

A fully charged battery will test out at 12.6 volts. This is “at rest” voltage. When a battery is being charged, the alternator or battery charger will put out higher voltage, sometimes as high as 14.5 volts. Immediately after stopping the engine or switching off the battery charger, the battery will have a false surface charge which is meaningless and probably in the mid-13 volt range. Leave it rest for a while (at least 15 minutes or as long as an hour or two) before testing. This will allow the battery to rest and lose its surface charge. A slight load will help shorten that time somewhat. You can continue to draw current from the battery until the at-rest voltage drops below 11.9 volts. At that point only 40% of the battery capacity remains. In other words, you’ve used 60 amps from a 100 amp battery. If you continue to use the battery below this point you can get current from it, but the voltage will be low and that won’t do your electrical equipment any favors. You will also drastically shorten the battery’s life.

Batteries are not really rated in years of life. A battery is typically rated at 50 cycles of discharge and recharge. In other words you can totally discharge the battery, then recharge it. That’s one cycle. Do that 50 times and the battery will be shot. The level at which you discharge isn’t linear, it’s graded on a curve. So, if you only drain the battery halfway and then recharge it you won’t double your life to 100 cycles. It’s more like 200 or more. Similarly, if you only drain your battery to 75% you won’t quadruple your battery’s lifetime to 400 cycles. It’s more like 1,200 cycles. It is to your advantage to keep your battery bank from getting too low by frequently recharging it.

If you were to plot battery voltage vertically on a graph against battery consumption horizontally on that graph, you would see that the voltage doesn’t drop off in a straight line. It falls off on a curve, which drops fairly rapidly at the halfway point. This helps explain why the old rule of thumb is to not discharge your batteries below 50%. So, a 220 amp-hr battery is safely capable of giving up 110 amp-hrs without risking any damage to that battery. AGM batteries have less internal resistance than flooded batteries. This means that they can take a charge faster than flooded batteries but it also means that their voltage drop graph will be much flatter than a flooded battery. By the time you reach that 11.9 volt level you have given up many more amp-hrs than you would with a flooded battery. Typically, an AGM battery can give up 30% more amp-hrs than a flooded battery, so you can get 140 amp-hrs from a 220 amp-hr battery instead of the 110 amp-hrs that you would be able to get from a flooded battery. In effect, you are getting some free usable battery capacity from an equal sized battery bank.

Battery Testing

Battery testing tends to be confusing for some. Part of the reason is that there are three tests that one can perform on batteries and not one of them will give you the total picture. You need to understand what these testing devices will do and how to interpret that information. To do this we’ll look at voltmeters, hydrometers, refractometers, and carbon pile testers.

Array of battery measuring devices

Array of battery measuring devices

The voltmeter is the first thing that anyone goes for. It’ll tell you just how many volts the battery has in it. If this is performed on a battery that has been resting, we can use the above chart to determine if it is fully charged or not. However, it’s not the ultimate tool because it won’t give you any indication as to the ability of the battery to deliver electricity under load. It could just be a surface charge that will fall flat when a load is applied. If your battery has a bad cell the voltmeter won’t give you an accurate reading of how good your battery is. Remember that the electrolyte in each cell changes between acid and water depending on the charge level. To check each cell, we need to take a sample of the battery fluid and test it for specific gravity because acid is heavier than water. If we use a hydrometer we can extract a sample of the electrolyte and test its specific gravity. A fully charged battery cell will have a specific gravity of 1.277 at 80F. As the charge level decreases, so will the specific gravity. The following table shows the various charge levels, at rest voltages, and specific gravity. By testing each cell we can test to see if one bad cell is causing the battery to fail. If one cell is bad, then the battery will need to be replaced. An even better way to test for specific gravity is to use a refractometer. You simply place a drop of fluid onto the refractometer, aim it at a source of light, and look into the eyepiece. The display will show you exactly what the specific gravity is and is temperature compensated, whereas when using a hydrometer you will need to apply temperature correction tables to the float reading. Refractometers also have another benefit in that the same unit can also be used to test antifreeze protection levels.

Percentage of Charge Specific Gravity Corrected to 80o F At Rest Voltage
100 1.277 12.73
90 1.258 12.62
80 1.238 12.5
70 1.217 12.37
60 1.195 12.24
50 1.172 12.1
40 1.148 11.96
30 1.124 11.81
20 1.098 11.66
10 1.073 11.51

All of the above in formation serves to inform you of the battery’s state of charge. It has no bearing whatsoever on the ability of the battery to produce any volume of power, although you first need to know that the battery is charged up before continuing with further testing and it will point out any failed cells within the battery. To determine its output capability, you will need to perform a load test. The best tool for deep cycle batteries is a carbon pile tester. A carbon pile tester consists of a carbon pile rheostat. As you dial the knob in, it increases resistance and simulates a load on the battery. It’s bigger than a light bulb but smaller than a dead short, so think of it as a controlled short that will suck power from your battery. The tester also includes a voltmeter and ammeter. You simply connect the alligator clips to the battery terminals and dial in the knob on the tester. The display on the ammeter will indicate the load increase. For deep cycle batteries, you dial it in until the ammeter reads two times the rated battery current, so a 100 amp-hr battery would get turned down to a 200 amp draw. For chassis batteries you dial it in to 50% of the CCA rating of the battery. You then check the voltmeter to see if the voltage holds in the green zone. If it drops down into the red zone, your battery is not capable of sustaining that output level and will need to be replaced. At the same time, you can inspect the battery cells to check for any boiling or bad cells if you want to know why your battery failed. Voltmeters and hydrometers alone will not give you this information. You need the variable load of the carbon pile tester to accurately test this.

Battery Care and Maintenance

To ensure that your batteries perform their best and last the longest you will need to take care of them. Batteries can’t pass power to the electrical system if their connections are all corroded. The acidic electrolyte in flooded batteries tends to eat away at the copper and lead connections and eventually corrosion will build up and hamper the flow of current. You will need to check and clean these connections regularly as part of a scheduled maintenance cycle. Flooded batteries can lose water over time and it’s important to check your water levels so that they do not get so low as to expose the battery plates. Keeping the batteries away from very hot locations will help in this but the biggest cause of battery water evaporation is due to overcharging. Putting excess voltage into a battery that is nearly charged will boil the electrolyte and the battery will outgas. If you find that you are repeatedly adding water to your batteries, it’s time to check your charger’s float voltage.

Battery Chargers

We all know how easy it is to take power out of a battery. What about recharging them when they are low? Batteries in a motorhome can be charged in a number of ways depending on the current mode of operation and whether they are chassis batteries or coach batteries. First off, we need to understand that there are two separate battery banks on a motorhome – the chassis batteries and the coach batteries. The chassis batteries are for starting the motorhome’s engine and powering the headlights, wipers, and other chassis related accessories. When driving down the road the vehicles alternator will charge the chassis batteries. The “house” portion of the motorhome has a separate bank of batteries called the coach batteries. These are deep cycle batteries that will power the lights, domestic water pump, fans, and any other accessories that are related to living in the coach while parked. These batteries are kept separate from the chassis batteries so, in the event that you run them down too low, you will still be able to start the motorhome’s engine. A Charge Solenoid is installed to connect both the chassis and battery banks together. This solenoid is engaged whenever the ignition key switch is in the “on” position. The engine can then recharge both battery banks when driving down the road. As soon as you are parked the solenoid opens and the two battery banks are divorced once again.

A convertor

Convertor

A Xantrex inverter/charger

Xantrex inverter/charger

But, what about when we are parked at a campsite? We don’t want to have to run the engine all the time to recharge these batteries, so we need other options. The first option is a battery charger that is dedicated to the coach’s electrical system. This charger is a 120 volt device that will be powered whenever we plug into shore power or run our generator set. In addition to charging the batteries we also need to provide clean power with consistent voltage to power the 12 volt electrical components while we are parked rather than use the batteries to power them. This device is called a converter. The converter is hard-wired into the 120 volt electrical system as well as the 12 volt system. It “converts” 120 VAC power to 12 VDC power to run the 12 volt accessories as well as charge the coach battery bank. So, now we have the ability to recharge the coach batteries via the engine alternator when driving or via the converter when parked with shore power or when running the generator. When boondocking we can use the batteries to provide power. When the voltage gets to that magic 50% mark, we can fire up the generator set for an hour or two to power the converter and recharge the batteries. The actual charge time will vary according to the size of the converter as well as the size of the battery bank. If the battery bank is 440 amp-hrs and it is at 50% you’ll need 220 amp-hrs to bring it to its fully charged state. If you have a 60 amp converter you’ll be looking at close to 4 hours to output that much power. Larger converters take less time but cost more.

Another popular device is the inverter. An inverter does just the opposite of a converter. It creates 120 VAC power from 12 VDC. It is used to power 120 volt devices via battery power so that you don’t have to run the generator all the time. Small inverters run from 250 watts up to 1,000 watts and are installed into an electrical circuit. No battery charging capabilities exist on a basic inverter so most diesel pushers use an inverter/charger unit. These units combine the features from both an inverter and a converter. They are generally found in larger sizes, such as 2,000 watt and 3,000 watt. These inverters are connected to a dedicated 120 volt circuit breaker in the main breaker panel and also connect to the coach batteries via large diameter battery cables. They feature an automatic transfer switch that will pass shore power through when present, or switch over to battery fed inverter power whenever shore power is not present. Note that the running the generator is the same thing as shore power in this instance. Whenever 120 VAC power is present the inverter not only passes that power through to the electrical devices fed by it, but it also acts as a converter and provides 12 volt current to power the house accessories and recharge the coach battery bank. Typical inverter/chargers have battery charging capacity in the 100 to 140 amp-hr range so they are larger and faster than a converter. When an inverter/charger is present there is no need for a converter.

Both converters and inverter/chargers feature three battery charging modes. When a battery is low on charge the first mode is the bulk mode. This mode provides full charging output to the batteries. As the battery approaches the full mark the charger will kick into absorption mode. In this mode the voltage is regulated to not be excessive so that the batteries can absorb this charge without boiling. Finally, in order to maintain a charge in a battery that is very close to full the float mode will be engaged. In this mode charger output voltage will be limited to no more than 13.2 volts so that excess outgassing does not occur. You can safely leave your batteries connected to the charger indefinitely if it’s in float mode without fear of boiling out water. Of course, this assumes that your charger’s float mode is functioning properly. If you are adding water frequently it’s time to have your charger’s float voltage checked.

Equalizing Batteries

We talked earlier about how battery electrolyte loses its acid content and turns to water and deposits sulfate on the battery plates as it is discharged during normal operation. We also mentioned how this sulfate “falls off” the battery plates and recombines with the electrolyte as the battery is recharged. But this process isn’t perfect and some of the sulfate will remain on the battery plates. The more we use the battery, the more sulfate remains on the plates. Each time that the sulfate remains on the plates we lose some battery capacity. If it continues we have a sulfated battery that just isn’t capable of giving us the performance that it was originally designed for. If we wait until it’s really serious the battery will need to be replaced. However, it is possible to clean some of this sulfate off of the plates if we don’t wait until it’s too far gone. This can be done by a process called equalization. When we equalize batteries we apply excessive voltage to that battery, or battery bank. This excess voltage will boil the electrolyte and cook the sulfate off so that it can recombine with the electrolyte, restoring both the electrolyte and battery plates to their original condition. This process isn’t 100% perfect either, but it will greatly extend your battery’s life and improve its performance if done regularly. The time frame between equalizing batteries will vary as to how you use your batteries. If you frequently run them low and recharge them, you’ll need to do this more frequently than if you are plugged into shore power most of the time and don’t demand those deep swings in charge level. If you use them hard, equalizing every 6 months would be a good idea, otherwise once a year should be sufficient.

Equalizing requires a period of time where you will put high voltage into your battery bank. Most converters and inverter/chargers have the ability to perform an equalizing procedure on your batteries. Refer to your owner’s manuals for the exact technique used to initiate an equalizing charge with your particular charger. When equalizing the charger will output around 15.5 volts. This is too much for your coach’s electrical devices to handle so it’s important to disconnect any loads in the coach during this time. Operating the battery disconnect solenoid switch will kill most power to the coach, but there may be a few devices that are connected directly to the batteries and are not run through the disconnect solenoid. Check for these and pull fuses or whatever else it takes to disconnect them. Note that it is not necessary to disconnect the chassis system because you will only be equalizing the coach batteries. Chassis batteries do not require equalizing because they are not deep cycle batteries or subject to those conditions. Also, equalizing is only to be done on flooded batteries. If you have AGM batteries equalizing is not needed, nor should it ever be performed on AGMs or they will be damaged by the equalization process.
That’s it for this month. Be sure to check out next month’s final installment that covers low voltage circuits, inverters, automatic generator start systems, solar power, energy management systems, and surge suppression.

National Indoor RV Centers blogger Mark Quasius profile picture

Mark Quasius is the founder of RVtechMag.com, the past Midwest editor of RV Magazine, writes for numerous RV-related publications and a regular Contributor to FMCA’s Family RVing Magazine. Mark and his wife Leann travel in their 2016 Entegra Cornerstone.

DEF Head Issues? Everything RVers Should Know About DEF (Diesel Exhaust Fluid).

The EPA has authored numerous regulations in vehicle emissions levels in an effort to improve the quality of the air we breathe. Increased regulations on diesel engine emissions are one area that has affected owners of diesel powered motorhomes since 2003. The EPA 2007 regulations were a big change requiring ultra-low sulphur diesel fuel and the addition of a Diesel Particulate Filter (DPF) to the exhaust system to reduce the level of soot in the exhaust.

The next big step was the Tier IV EPA 2010 emissions standards which took effect for the most part in model year 2011 motorhomes. These regulations were a significant step in reducing pollutants from diesel engines and required some major changes in the design of diesel engine emission systems. The prevalent method of achieving this was Cummins’ implementation of Selective Catalytic Reduction technology, commonly referred to as SCR. In addition to the Diesel Particulate Filter, SCR technology adds more complexity to the emissions system but significantly lowers emissions below the EPA 2007 specifications.

The SCR aftertreatment system resides above the muffler on the exhaust manifold side of the engine.
The SCR aftertreatment system sits above the muffler on the exhaust manifold side of the engine.

The SCR system adds a decomposition reactor where Diesel Exhaust Fluid (DEF) is injected into the exhaust stream where it forms ammonia vapor. The ammonia and nitrogen oxides in the exhaust flow together and pass into the SCR Catalyst, where they react to form nitrogen and water vapor and reduce emissions to near-zero levels. SCR is aftertreatment technology so it destroys these harmful emissions after combustion, which gives the engine manufacturer the ability to fine tune their engines to produce maximum power, efficiency and fuel economy. Other than clean exhaust, the biggest impact upon coach owners is the necessity of having to maintain a supply of  DEF in the coach’s storage tank .

However, changes to the EPA requirements in 2017 have resulted in a large number of DEF issues involving failed DEF sensor problems, resulting in forced engine shutdowns that have caused major downtime and cancelled trips for some owners. Before we get into the specifics of that and how to deal with it, let’s first begin with a better understanding of the components of this system and DEF itself.

Refilling a DEF tank from a 2-1/2 gallon jug.
A shot of refilling a DEF tank from a 2-1/2 gallon jug.

What Is DEF?

Diesel Exhaust Fluid, or DEF, is a product designed exclusively for use in diesel engines using SCR emissions technology. It’s basically a non-hazardous solution of 32.5% urea and 67.5% water. It’s clear and colorless and has a slight smell of ammonia. DEF isn’t something you can make yourself and engine manufacturers specify that any DEF used should by certified by the American Petroleum Institute (API), the same people who rate engine oils and other petroleum products. The API has a Diesel Exhaust Fluid Certification Program that allows DEF producers to display the API certified label on their DEF packaging.

The production of DEF is governed by the ISO 22241 standard. This ensures that DEF is produced with an exacting 32.5% urea concentration. This concentration is also designed to offer the lowest freezing temperature of DEF, 12o F. Contaminated fluid can damage SCR injectors and catalysts so the level of impurities is limited to strict tolerances and DEF quality is also monitored. Urea used in manufacture of fertilizer is not allowed and only distilled or deionized water may be used in DEF production. Even the containers are regulated by ISO 22241 because DEF is corrosive to carbon steel, copper and aluminum so these containers may not be used. If your DEF container bears the API DEF Certification Mark, you can be assured that the product meets the ISO 22241 standard and is safe to use in your vehicle.

Just how much DEF your coach will use varies with the size of the engine and how hard you are working the engine. A common statement is that DEF usage will equal 2% of your diesel fuel usage but this is just a generalization. Lighter RVs with small displacement engines that are driven more leisurely have seen figures as low as 1.5% while larger heavy coaches with the 15 liter X series engines have gone as high as 4%, depending on how hard you are working the throttle and how much weight you are towing.

Instrument panels include a DEF level indicator
Instrument panels include a DEF level indicator as well, such as this common 4 LED bar graph display built into the fuel gauge.

Handling DEF

DEF isn’t overly difficult to handle but there are a few considerations to keep in mind. Bulk DEF is available at truck stops from dedicated DEF pumps located on the driver’s side fuel island, oftentimes right next to the diesel fuel pump and located behind a rubber flap to prevent freezing in cold weather. DEF is also available in 2.5 gallon containers at auto parts stores, gas stations and most large retailers, such as Wal-Mart. As long as the container bears the API Certification Label it will meet the ISO 22241 standards so paying more for certain name brands of DEF won’t give you a better quality of DEF. It’s only ammonia water and doesn’t contain additives like a sophisticated engine oil or high tech lubricant.

DEF can evaporate if stored at high temperatures for prolonged periods because it is 67.5% water but field tests have shown that there isn’t a significant risk of evaporation from DEF tanks as long as you keep your tank or container securely closed. DEF does have a shelf life of two years but this can be reduced if the DEF is exposed to direct sunlight or if the temperature remains above 86o F for sustained periods. DEF packaging does have an expiration date so keep that in mind if you plan on stocking up on DEF. Ideally your DEF should be stored in a location where temperatures do not drop below freezing or exceed 85 degrees and will be consumed within one year of purchase.

DEF Tank
The tanks are equipped with a blue filler cap that is appropriately labeled. The filler necks are designed to prevent the larger sized diesel fuel nozzles from accidentally being used in these tanks.

DEF is always stored in its own tank and should never be put into a diesel fuel tank nor is diesel fuel ever to be put into a DEF tank. Fortunately there are a few safeguards in place to help prevent this from happening. Diesel fuel nozzles are 0.87” (22mm) in diameter while DEF nozzles are 0.75” (19mm) in diameter so this should prevent anyone from accidentally inserting a diesel fuel pump nozzle into a DEF tank. DEF tank caps are also blue in color to help identify them and separate them from diesel fuel tank caps. Diesel fuel is lighter than DEF and will float on the top of the DEF if it somehow managed to get into the tank but even a small amount of diesel fuel will damage the SCR system so do not run the engine. Instead, call a service center immediately and do not drive the vehicle until they remove the diesel fuel from the DEF tank.

On the other hand it is possible to insert the smaller DEF nozzle into a diesel fuel filler neck. If this happens, do not start the engine. DEF contains 67.5% water and this can have disastrous effects if mixed with your diesel fuel, including exploding fuel injector tips. If this happens, do not drive the vehicle and call for help to have the fuel system drained or cleaned to remove the DEF. Some bulk DEF pumps have magnetic switches built into the nozzle to help prevent this from happening. The DEF tank has a magnet placed in the filler neck that allows the DEF nozzle to open up and dispense DEF. The nozzle will not allow any flow without that magnet, such as when inserting the DEF nozzle into a fuel tank filler. However, not every DEF pump has these magnetic switches and neither do any of the 2.5 gallon jugs so you do need to pay close attention to which tank you are adding DEF to.

DEF is not hazardous to handle but it can stain clothes if you spill any on your clothing. If you do spill any DEF on your clothing just wash it away with water. If you spill a small amount on the ground just rinse it with water or wipe it up with a paper towel or rag. Once any residue dries out it will turn to crystals, which can also be rinsed away with water. As mentioned earlier, DEF can be corrosive to carbon steel, copper or aluminum so if you spill any on those metals you may want to rinse that off fairly quickly.

Pump DEF nozzles
Pump DEF nozzles are stored behind a rubber flap to help keep it from being confused with diesel fuel nozzles and to help prevent it from freezing.

DEF In Your Coach

Now that you know what DEF is let’s take a look at how it is implemented in your coach’s emissions system. It begins by storing the DEF into the typical 10 to 15 gallon polypropylene storage tank, which is required in order to prevent corrosion between the DEF and any metals. There are limits on the length of the hoses that connect the DEF tank to the engine’s emissions systems so you’ll find the tank located at the rear of the coach on a diesel pusher chassis or at the front if a front engine vehicle such as a Super C or Sprinter type chassis. Most side radiator chassis don’t have enough room to place the DEF tank on the driver’s side of the coach so the tanks will be located on the curbside. Unfortunately, pump DEF at truck stops is always on the driver’s side to accommodate the driver’s side DEF tanks on trucks so this doesn’t work well for an RV but in recent years the chassis manufacturers began to add additional driver’s side DEF fills to make it more convenient for a motorhome owner to use pump DEF when refueling. This does require moving the coach forward after pumping fuel so that the pump nozzle can reach the driver-side DEF filler at the rear but this a small inconvenience that is worthwhile because it allows you the ease of refilling your DEF tank and receiving the bulk pump price versus the higher cost of retail DEF jugs.

DEF freezes at 12o F so it needs to be kept warm enough to allow tit to flow. The engine’s cooling system passes heated engine coolant through a heating element in the DEF tank to warm the DEF enough to allow this to happen. In extremely cold temperatures the DEF will not initially flow until the heat in the engine coolant has warmed up the DEF, which happens fairly fast, and the emissions controls will allow enough time for this to happen without throwing an error code. Whenever the engine is shut down you may hear a buzzing noise coming from the rear of the coach. This is an electric purge pump that will run for approximately 60 seconds and will drain all of the DEF from the hoses and return it to the tank to prevent any freeze damage to the lines and valves should the temperature drop below freezing. DEF expands about 7% when frozen so you also need to keep a bit of air space above the DEF in the tank to allow for expansion during cold weather. The filler neck in DEF tanks is generally low enough to prevent over-filling but if your curbside tank also has a second driver’s side filler cap you will want to keep an eye on this. Don’t fill it all the way up or else the DEF won’t have room to expand and damage will occur.

DEF Tank Cap
The tanks are equipped with a blue filler cap that is appropriately labeled. The filler necks are designed to prevent the larger sized diesel fuel nozzles from accidentally being used in these tanks.

The DEF is then sent to a dosing valve. This valve is electronically controlled and sprays DEF into the decomposition chamber, which is located immediately after the Diesel Particulate Filter, and is both a filter and a catalyst that removes carbon particles from the exhaust gas and traps them into a wall flow filter. At the same time nitric oxide in the exhaust gas is then converted to nitrogen dioxide in the diesel oxidation catalyst. As the nitrogen dioxide flows through the wall-flow filter it reacts with the carbon to produce carbon dioxide. As the exhaust flows out of the DPF and into the decomposition chamber a light mist of DEF is sprayed from the dosing valve into the decomposition chamber. It then forms ammonia through a series of chemical reactions. Together, the NOx and ammonia pass from the decomposition reactor to the SCR catalyst chamber where they react to form nitrogen and water vapor. The end result is exhaust with near zero emission levels.

DEF is a critical component and without it your emissions system will not work. EPA requires that the vehicle emissions system must be fully operational at all times so certain safeguards are put in place to ensure that you cannot continue to operate the vehicle without DEF. To ensure you know how just much DEF is in your tank, a DEF gauge will be located on the instrument panel. In most cases this is a series of four LED bars built within the diesel fuel gauge. Four green bars will be displayed whenever the DEF tank is fuel. Three green bars indicate ¾ full while two green bars indicated ½ full and one green bar indicates ¼ full. Once the level of DEF in the tank reaches 10% that last green bar will turn to amber. Typically the LCD Information Center on the instrument panel will display a “LOW DEF” warning in addition to displaying a warning icon on the panel. The vehicle will continue to operate normally but if you have allowed the tank to get this low this is the point where you really need to consider how soon you can add more DEF to the tank. If you continue on without adding, the amber LED bar will turn red when the DEF level in the tank reaches 5%. The Information Center will now display “ENGINE PERFORMANCE DERATE EMMINENT”. You now have very little time left to add DEF before your engine derates. Once the level drops to 3% the display changes to “ENGINE PERFORMANCE DERATE ACTIVATED” and your engine will be derated and there will be a 25% reduction on its torque output. You’ll still be able to limp off the road at reduced power but you’ll still be burning DEF as you do so and the next step is the final step.

DEF filter location
The DEF filter is located at the rear of the DEF tank at the very bottom. Access to the DEF filter is gained by unscrewing the removable round filter cover.

Once the DEF tank gets down to 0% the red LED bar remains illuminated and the Information Center now displays “SPEED RESTRICTION ON. DEF REQUIRED”. Engine torque will now be limited to 60% and the vehicle speed will be limited to 5 MPH. That’s enough to pull off to the side of the road but you will need to fill the DEF tank to at least 10% in order to drive to a location where you can top off the tank. Carrying a 2.5 gallon jug or two of DEF as a safety precaution can be a wise choice, even if you normally refill with pump DEF at truck stops.

DEF systems aren’t high maintenance. If you store your coach over a longer periods of time or run the engine for very short and infrequent runs your DEF can get old and beyond its shelf life. In that case the best practice is to drain the DEF from the tank and replace it with fresh every year. There is a DEF filter located near the bottom of the DEF tank. This filter should be replaced every 200,000 miles or two years, whichever comes first. The filter is easily removed with a 1-1/16” 12-point socket and extension. If the cap wasn’t excessively tightened you may be able to remove the DEF filter cap with a channel-lock pliers without damaging the cap. The filter is at the base of the tank so you’ll be looking up at it. Just be sure that you are off to one side when you remove it because a bit of DEF will dribble out of the filter housing. The actual Cummins DEF filter is a small cartridge filter and comes with a small tool to help yank the filter out of the housing. This filter is sometimes forgotten by owners when servicing their chassis but a plugged or restricted filter can lead to a failed DEF pump, which is a more expensive repair, so do not neglect this filter.

Cummins DEF filter and tool
The Cummins DEF filter includes a small removal tool to aide in removing the filter from the housing.

DEF Sensor Issues

The DEF head are inserted into the top of the DEF tank. The head consists of the DEF pickup tube, the engine coolant heater tube and the DEF sensor. The sensor was originally designed to sense the level of DEF in the tank but in 2016 the EPA mandated that new sensor designs were required that also detected the concentration level of DEF to ensure that owners weren’t diluting their DEF with water and rendering the emissions system ineffective. These sensors showed up mainly in the 2017 model year coaches. Unfortunately, while the original 2016 and prior year sensors were trouble-free, these new sensors began failing at a rapid rate. In particular, the sensors used in the Spartan chassis had the most failures. These sensors were made by Shaw and had issues where the electronic circuit board had failed, which was determined to be heat related due to the close proximity of the engine’s exhaust system as well as the fact that hot engine coolant was constantly circulating through the DEF head.
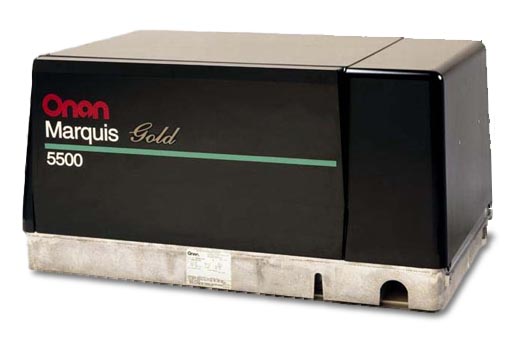
When the sensor failed the engine would shut down, typically displaying one of the following fault codes showing abnormal update rates:

            SPN 3364 FMI 9 (Cummins Fault Code 3868) –DEF quality

            SPN 1761 FMI 9 (Cummins Fault Code 4677) – DEF tank level

            SPN 3031 FMI 9 (Cummins Fault Code 4572) – DEF tank temperature

These codes were designed to detect weak DEF, low DEF level or DEF that had been overheated in the tank. If the sensor chip fails any one of these fault codes may appear, even though there is nothing wrong with the DEF itself. But the faulty sensor will derate and eventually shut down your engine.

The Shaw sensors were revised over time but the newer revisions still had issues and as of generation 6 there were still continuing failures and many RVs were sidelined due to a lack of replacement sensors, mainly due to the electronic chip shortage affecting the automotive industry in general in addition to the time involved in developing a new chip revision. The EPA began working with Cummins to allow an industry-wide software solution to allow vehicles with failed sensors to operate temporarily until replacement parts are available. But the EPA and Cummins haven’t yet determined how soon this software update will be available so a few RV owners simply took the initiative and developed the software to create a DEF sensor simulator.

This simulator was a small electronic piece that is used to communicate with the ECM in place of the faulty DEF sensor. You simply unplug the 4 conductor harness from the DEF sensor and connect it to the simulator. The simulator is designed to provide normal readings to the engine’s ECM so that it can continue to operate without shutting down by transmitting normal readings to the engine’s ECM. The caveat to this simulator is that you no longer have any information as to the level of DEF in the tank so you needed to physically monitor the level of DEF in the tank. However, it allowed the owner to operate the vehicle and complete the trip rather than be sidelined. The system will still meter DEF to the SCR so the pollution abatement portion of your emissions system will still operate as designed.

The simulator is a DIY home build operation if you are handy with electronics. Check out https://defsim.myervin.com/def-sensor-simulator-quick-build for instructions on how to build this if you are interested. The software is offered free of charge. You just have to buy the components you need, download the free software to its chip and build it yourself. While it is illegal to modify a vehicle’s emissions system in an effort to defeat the DEF system, this simulator does not defeat the emissions operation so is therefore not illegal. It’s strictly a temporary way to operate your vehicle until it can be properly repaired whole still retaining full emissions capability.

Shaw’s latest generation 7 sensors began to arrive around May of 2021 and as of this writing there don’t seem to be failures with these sensors so it’s quite possible that this issue is no longer a concern. However, having a simulator on hand may just be the insurance you need to keep your motorhome operating should a failure occur.

National Indoor RV Centers blogger Mark Quasius profile picture
Mark Quasius is the founder of RVtechMag.com, the past Midwest editor of RV Magazine, writes for numerous RV-related publications and a regular Contributor to FMCA’s Family RVing Magazine. Mark and his wife Leann travel in their 2016 Entegra Cornerstone.

Which RV Class is Best for You?

Not all RVs are created equal. The perfect adventuring companion for one RVer might feel clunky or limited to another. A family that enjoys the practical coziness of a Class B RV might not get the same benefit out of riding in a roomy Class A RV—and vice versa!

It doesn’t matter whether you’re a weekend warrior or a regular cross-country adventurer: the RV lifestyle has something to offer you. There’s a sense of freedom and authenticity that comes from seeing America (or the world beyond). By picking the right RV type, you can ensure your trip is off to the best possible start before you’ve even left your driveway.

Read to the end for a link to a downloadable NIRVC motorhome buyer’s guide with in-depth RVing 101 videos from NIRVC’s Angie Morell.

In the meantime, here’s the best RV class for you …

… If You Mainly Do Weekend Trips

You’ve got a lot of options to choose from for weekend trips! Which RV can depend on how much time you plan on spending inside once it’s parked at a campsite. RVers who want to spend time inside, watch some TV, and do some cooking will likely benefit from a Class C RV or Super C RV—both of which offer ample space to lounge around while remaining relatively easy to maneuver in and out of campsites.

Meanwhile, Class B RVs are perfect if your adventures are mostly happening outdoors. These compact RVs are often called camper vans or sleeper vans for a reason: they offer a reliable place to sleep and little else. While many provide indoor cooking spaces and bathrooms, they’re an incredibly affordable and practical option for drivers who are planning outdoor activities.

… If You’re Planning a Cross-Country Adventure

Making long-distance trips requires a combination of space and practicality. On the one hand, having enough room to stretch out and relax is vital for recharging after long distances on the road. On the other hand, larger RVs come with trickier considerations for driving and parking, and this can be a hassle if your trip includes mountain roads.

Class C RVs are the most reliable if you’re planning to go coast-to-coast. They offer enough amenities to maintain a comfortable life on the road while their truck chassis provides an accessible, maneuverable drive.
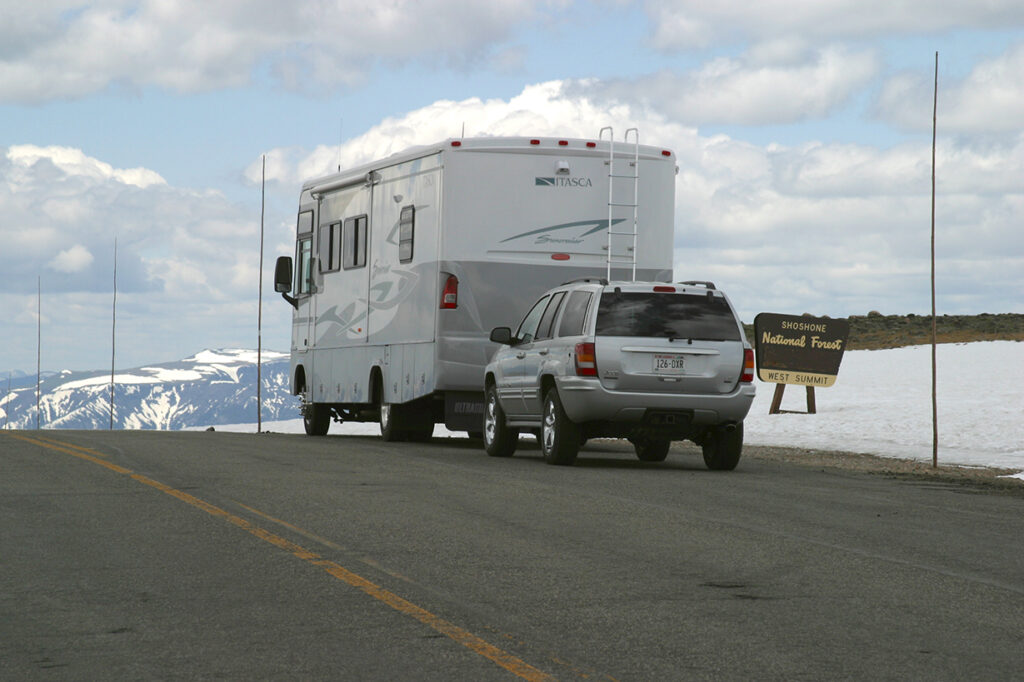
… If You Want to Live in Your RV Full-Time

This one can also vary, both on what the terms of your living condition are and what you’re planning to get out of life in an RV.

Life on the road full-time is possible in any size of RVs, but smaller ones can start to feel cramped, fast. A Class A RV means you’ll never have to worry about space, comfort, or features, but it does mean some parts of the country can be frustrating to drive through during the winter months. Meanwhile, a Super C RV might not offer as much space, but it more than makes up with extra flexibility and maneuverability.

… If You Want to Travel Like a Rockstar

This one is easy: pick a Class A RV. No other class of RV offers the same degree of luxury and amenities as these palaces-on-wheels. Each one is a comfortable, completely self-contained living situation, meaning you’ll never have to worry about feeling cramped, bored, or restless on the road.

… If You’re Traveling for Work

From indie musicians to nature photographers, Class B RVs remain the favorite for professionals on the go. While picking one means making a few compromises in sleeping space, they’re incredibly easy to get on (and off) the road, which can make a huge difference for a professional on-the-go.

SUMMARY:

Of course, no two RVers are exactly alike. Every person gets something different out of adventures on the road, which means a different type of vehicle best suits every person. That’s why there’s no substitute for taking the time to explore the ins and outs of your prospective RV to understand the unique advantages of your vehicle. There’s also no substitute for having an RV expert on your side when you’re shopping for one.
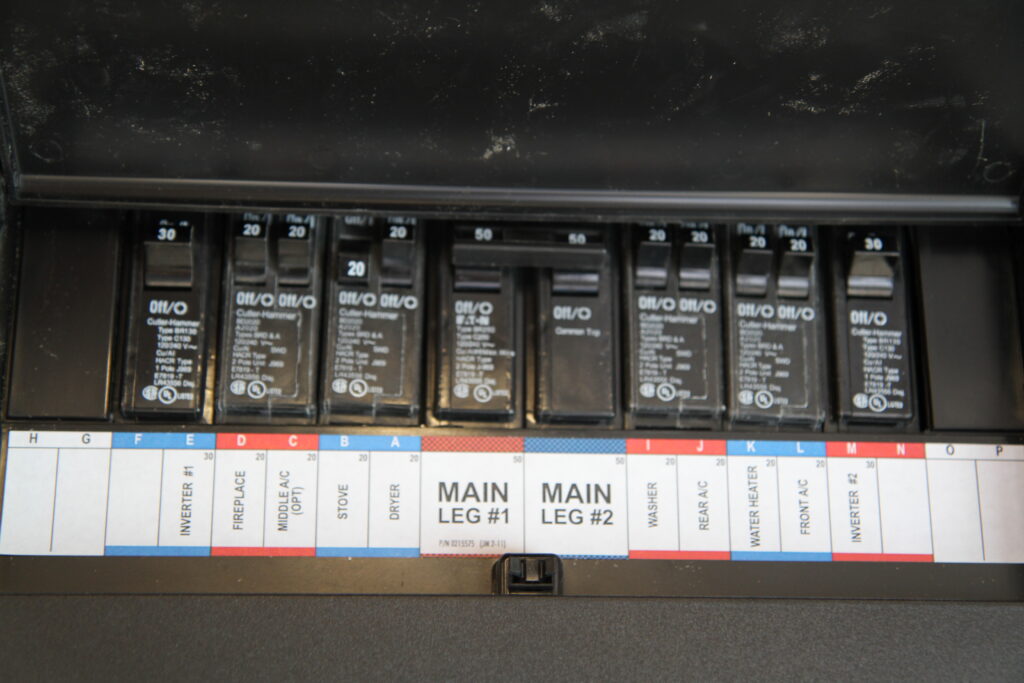
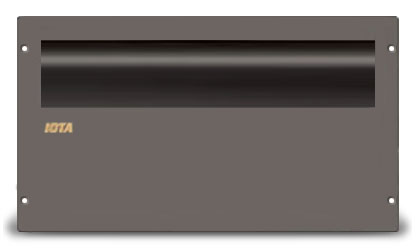
National Indoor RV Centers would love to be your go-to resource for all things recreational vehicles. Our staff of certified RV Lifestyle Specialists will work with you to find the best possible ride. We don’t just get people on the road, we keep them there with a full suite of RV maintenance, storage, and detailing services.

Download Angie’s NIRVC Motorhome Buyer’s Guide below.

Then jump on our website and search our inventory today at NIRVC.com or call 800.250.6354 to begin the next chapter of your RV journey. See you soon!