3 Advantages to Financing Your RV

Just like it matters where you buy your RV, how you finance it matters too! 

Picking the perfect RV is no easy task. Across every brand and RV class, some seriously great options are available. From Newmar‘s massive Class A King Aire RVs to the comparatively humble Class B Winnebagos, there’s something for everyone.

Once you’ve picked the perfect RV, you’ve still got one more big choice ahead of you: how to pay for it. While RV newcomers often assume the process is similar to buying a car, reality can be much more complex—especially if you’re choosing a high-end model. 

Given how big of an investment an RV can be, many drivers are tempted to either pay cash out of their savings or secure a line of credit from their bank, which allows them to cover most (if not all) the cost of a new motorhome. However, this isn’t always the best route to take.

Working with your RV dealership’s financing options can have some serious advantages, both in the amount of money you owe and the terms you get for repaying it. Let’s take a look!

Financing an RV Offers More Flexibility in Repayment Terms

As RVs can be individually expensive purchases, they come with many considerations when navigating repayment terms. It’s not unheard of for the loans on some luxury RVs (Class A vehicles especially) to extend over 20 years or 240+ months. That means these loans have more in common with a second mortgage instead of a car loan.

It’s hard to imagine your local bank or credit union offering terms like these. Many likely aren’t familiar with the intricacies of owning an RV, and this can create a whole host of headaches.

Discussing financing options with your RV dealership can also save you the steps of dealing with a pre-approval process, which can translate to serious time savings. Depending on where you would otherwise source your RV financing, it’s easy to miss an entire season dealing with clerical tasks. By contrast, an RV dealership understands how important it is to get you behind the wheel of your new RV as soon as possible.

Financing Also Offers Lower Average Monthly Payments

Working with your RV dealership to figure out financing options doesn’t just translate to more flexibility in your repayment timeline; it can also easily translate to lower monthly payments. As we mentioned above, some RV loans can last more than a decade, which translates to very different considerations versus a regular car loan.

More often than not, these longer RV loans translate to significantly lower monthly payments, sometimes as low as $200! Renting an RV for that much money is considered a steal, so try to wrap your mind around owning one for that amount. 

Even better, drivers can expect to pay a lower average down payment as well. As there are fewer hoops to jump through when you reach out directly to your RV dealer, you can expect a cleaner (and more affordable) close on your new motorhome!

An RV Dealership Will Be Uniquely Qualified to Work With You

If you’re noticing a theme here, it’s that RV dealerships are better equipped to work with the unique needs, costs, and considerations of owning an RV than virtually any other source of financing. 

There’s a really obvious reason for this: RV dealerships know more (and care more) about RVs than other sources of financing!

Beyond perks like lower down payments and more flexibility in choosing a repayment window, you can rest assured your servicer actually understands the intricacies of owning an RV! (That’s not something you can always say for banks and credit unions.) This understanding translates to a better all-around experience. After all, your RV dealership’s goal is to sell you an RV, which means they’re strongly incentivized for finding the best possible financing options for you. 

Our financing office works with drivers to find the best possible options for their unique circumstances. Learn more about the different financing options available at NIRVC.
Living Full-Time In An RV

What Is It Like Living in an RV?

Life looks different on the road. There are plenty of immediate, obvious ways that living in an RV is different from living in a fixed home, but some of the biggest differences can be hard to appreciate until you’re actually behind the wheel. Here are some of the most significant ways that life changes when living in a motorhome: 
Your Pace of Life Slows Down – and That Can Be a Good Thing

RV life operates at a fundamentally different pace than life elsewhere. The best parts of RVing are often found when exploring new places or unusual locales. That’s difficult to do if you’re constantly in “go” mode. Over time, you’ll naturally adapt to a pace that lets you savor your surroundings, which can look pretty different from the hustle and bustle of digital life. 

This naturally comes with a change in how you perceive the world. Instead of frantically counting down the days until Friday, you begin to view each week as a chapter in a larger, ongoing journey. In time, you come to appreciate special events even more because you view them as magical moments in time, not hours in a schedule.

Traveling Means You Get Diverse Experiences From Unexpected Places

RV camping lets you see parts of the country that are easy to miss if you only travel by air. Every state is full of interesting detours, quirky towns and beautiful sights that are best appreciated from the road. 

One of the most liberating aspects of RV travel is that it’s (hopefully) not subject to the same schedule crunch as trains and planes, meaning that you’re free to take your time if a place catches your interest. Veteran RVers will tell you that some of their best adventures come from unexpected places, and living behind the wheel of a motorhome makes you equipped to appreciate them when you find them.

You Meet New Friends – and Plenty of Interesting Locals

While not every person you meet at a campground is going to land in the “birthdays and baptisms” part of your life, you’re bound to make plenty of friends. RVers are a famously friendly crowd, meaning that you’re sure to find good company at almost any campsite that you visit. Over time, you may even start to notice some familiar faces at the different places that you frequent! Social media and RVer groups like AIM Club make it easier than ever to connect with like-minded individuals while attending exciting rallies, outdoor excursions, RV training courses and other fun RV-focused experiences. 

New friendships aren’t always limited to other RVers either. During your travels, you’ll undoubtedly meet plenty of locals, and that provides plenty of opportunities for making new friends! 

You Get a New Appreciation for (and New Definition of) Safety

When your home is on wheels, you quickly learn to appreciate all of the care that keeps it running. You also develop a strong sensitivity to potential safety hazards, and that means thinking about it in a way that suburbanites and city dwellers don’t. As an RV owner, any issues in your vehicle translate to issues with your house, and visa-versa. 

Most home and apartment owners merely have smoke alarms and fire extinguishers to fight fire, but RV drivers will happily opt for something more advanced. A leading example of this is THIA by Proteng, a patent-pending fire suppression system that is heat-activated, minimizing fire damage by eliminating heat at the source. 

Ultimately, It’s About the Little Things

Living in a motorhome allows you to appreciate life from an angle that’s difficult to find anywhere else in the modern world. While you’ll be sacrificing some areas–a fixed routine or consistent access to sushi–you’ll be gaining in just as many others. One of the biggest changes that happens is a newfound appreciation for the little things. 

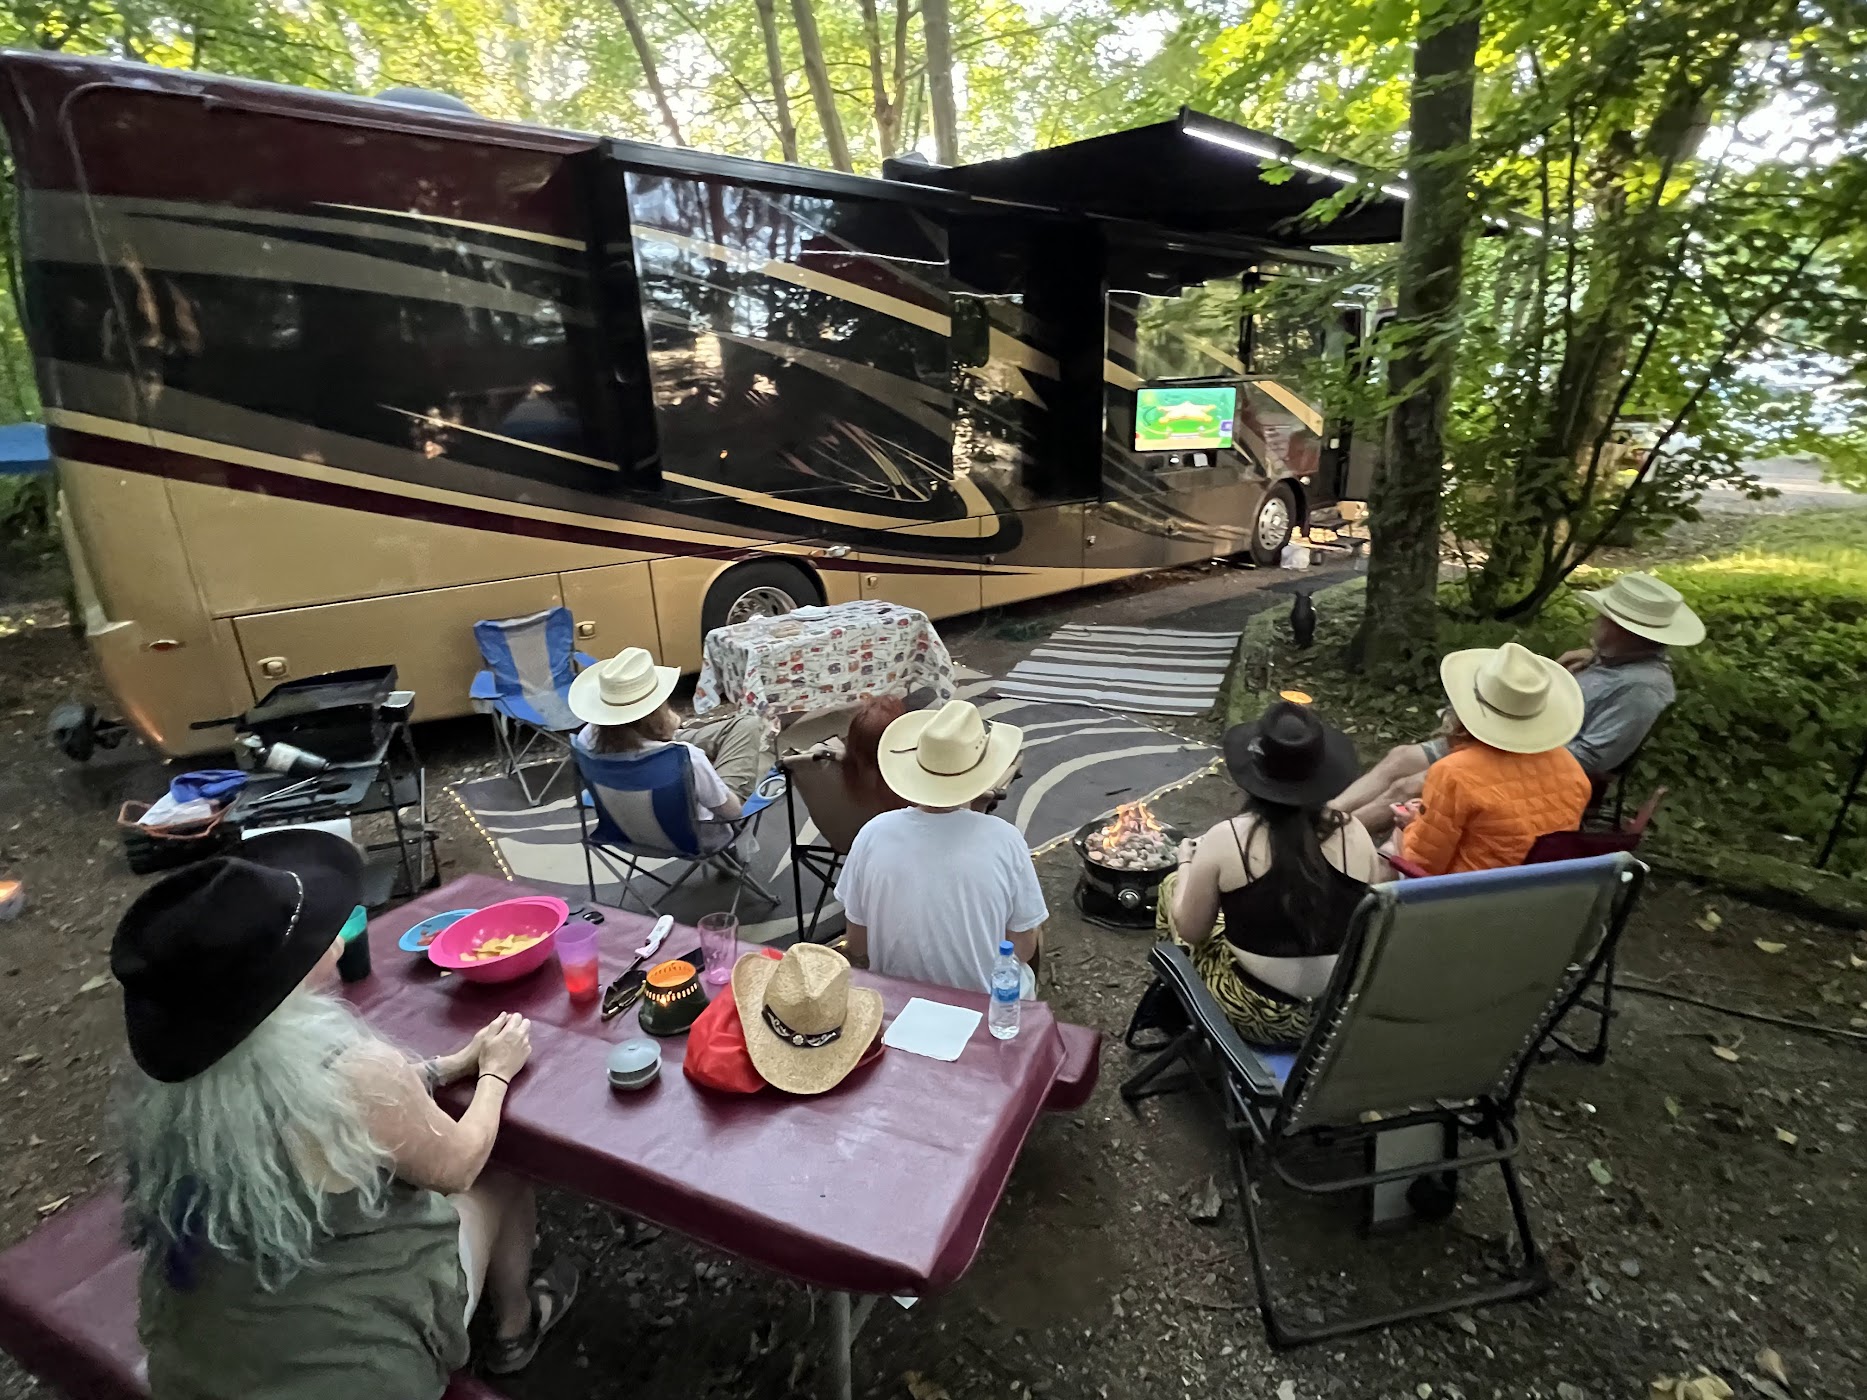
While an RV trip is ultimately about getting somewhere (like the East Coast or the Grand Canyon), the little moments that happen along the way are often what make it magical: Unexpectedly good food from a local dive; nights spent stargazing free from the light pollution of the city; grilling away the afternoons with newfound friends at a shady autumnal campsite. These small adventures are what make RV life worth it and you’ll come to develop a profound appreciation for them. 

RV life is ultimately about adventure, and there’s no shortage of it to be found on the open road. Sometimes these adventures are big cross-country endeavors, and sometimes they’re as simple as an afternoon of fishing. Either way, living behind the wheel of a motorhome puts you in a unique position to experience – and appreciate – all of the magic that our big, beautiful country has to offer.

If you’re ready to take the next step and learn more about RV living, contact one of our Lifestyle Specialists today!

RV Generator Selection

RV Generators: A How-To Guide

Modern motorhomes are packed with the latest technology and household conveniences. Items such as washer/dryer laundry centers, dishwashers, entertainment systems featuring multiple HD TVs, residential refrigerators and electric cooktops all require 120 volt AC power – and that’s in addition to the rooftop air conditioners. 

All of these items operate just fine when you are parked and plugged into a campground pedestal that supplies shore power to the coach, but what happens when you are driving or camping at a location that does not have any shore power? 

Many coaches have inverters that will power some devices, such as a residential refrigerator, microwave oven and entertainment systems. But larger AC power loads can’t be handled by an inverter when driving, such as rooftop air conditioners. Plus, dry camping inverters can draw down your battery bank pretty quickly, so you will need to rely on the motorhome’s generator to provide AC power in order to operate these items and to recharge your battery bank.

Generators come in various forms and sizes, so it’s best to analyze what your power consumption needs and particular applications are when choosing the best generator for you. First, let’s understand a bit how generators work…

Portable- Versus Permanently-Mounted RV Generators

Most larger Class A coaches will come equipped with a generator that is permanently installed in the coach. Larger diesel pushers generally have them installed in the nose of the coach and are mounted on a slide-out rail for ease of service. Gasoline powered motorhomes that are of a front engine design will have them installed in a side compartment, or may even be an optional feature.

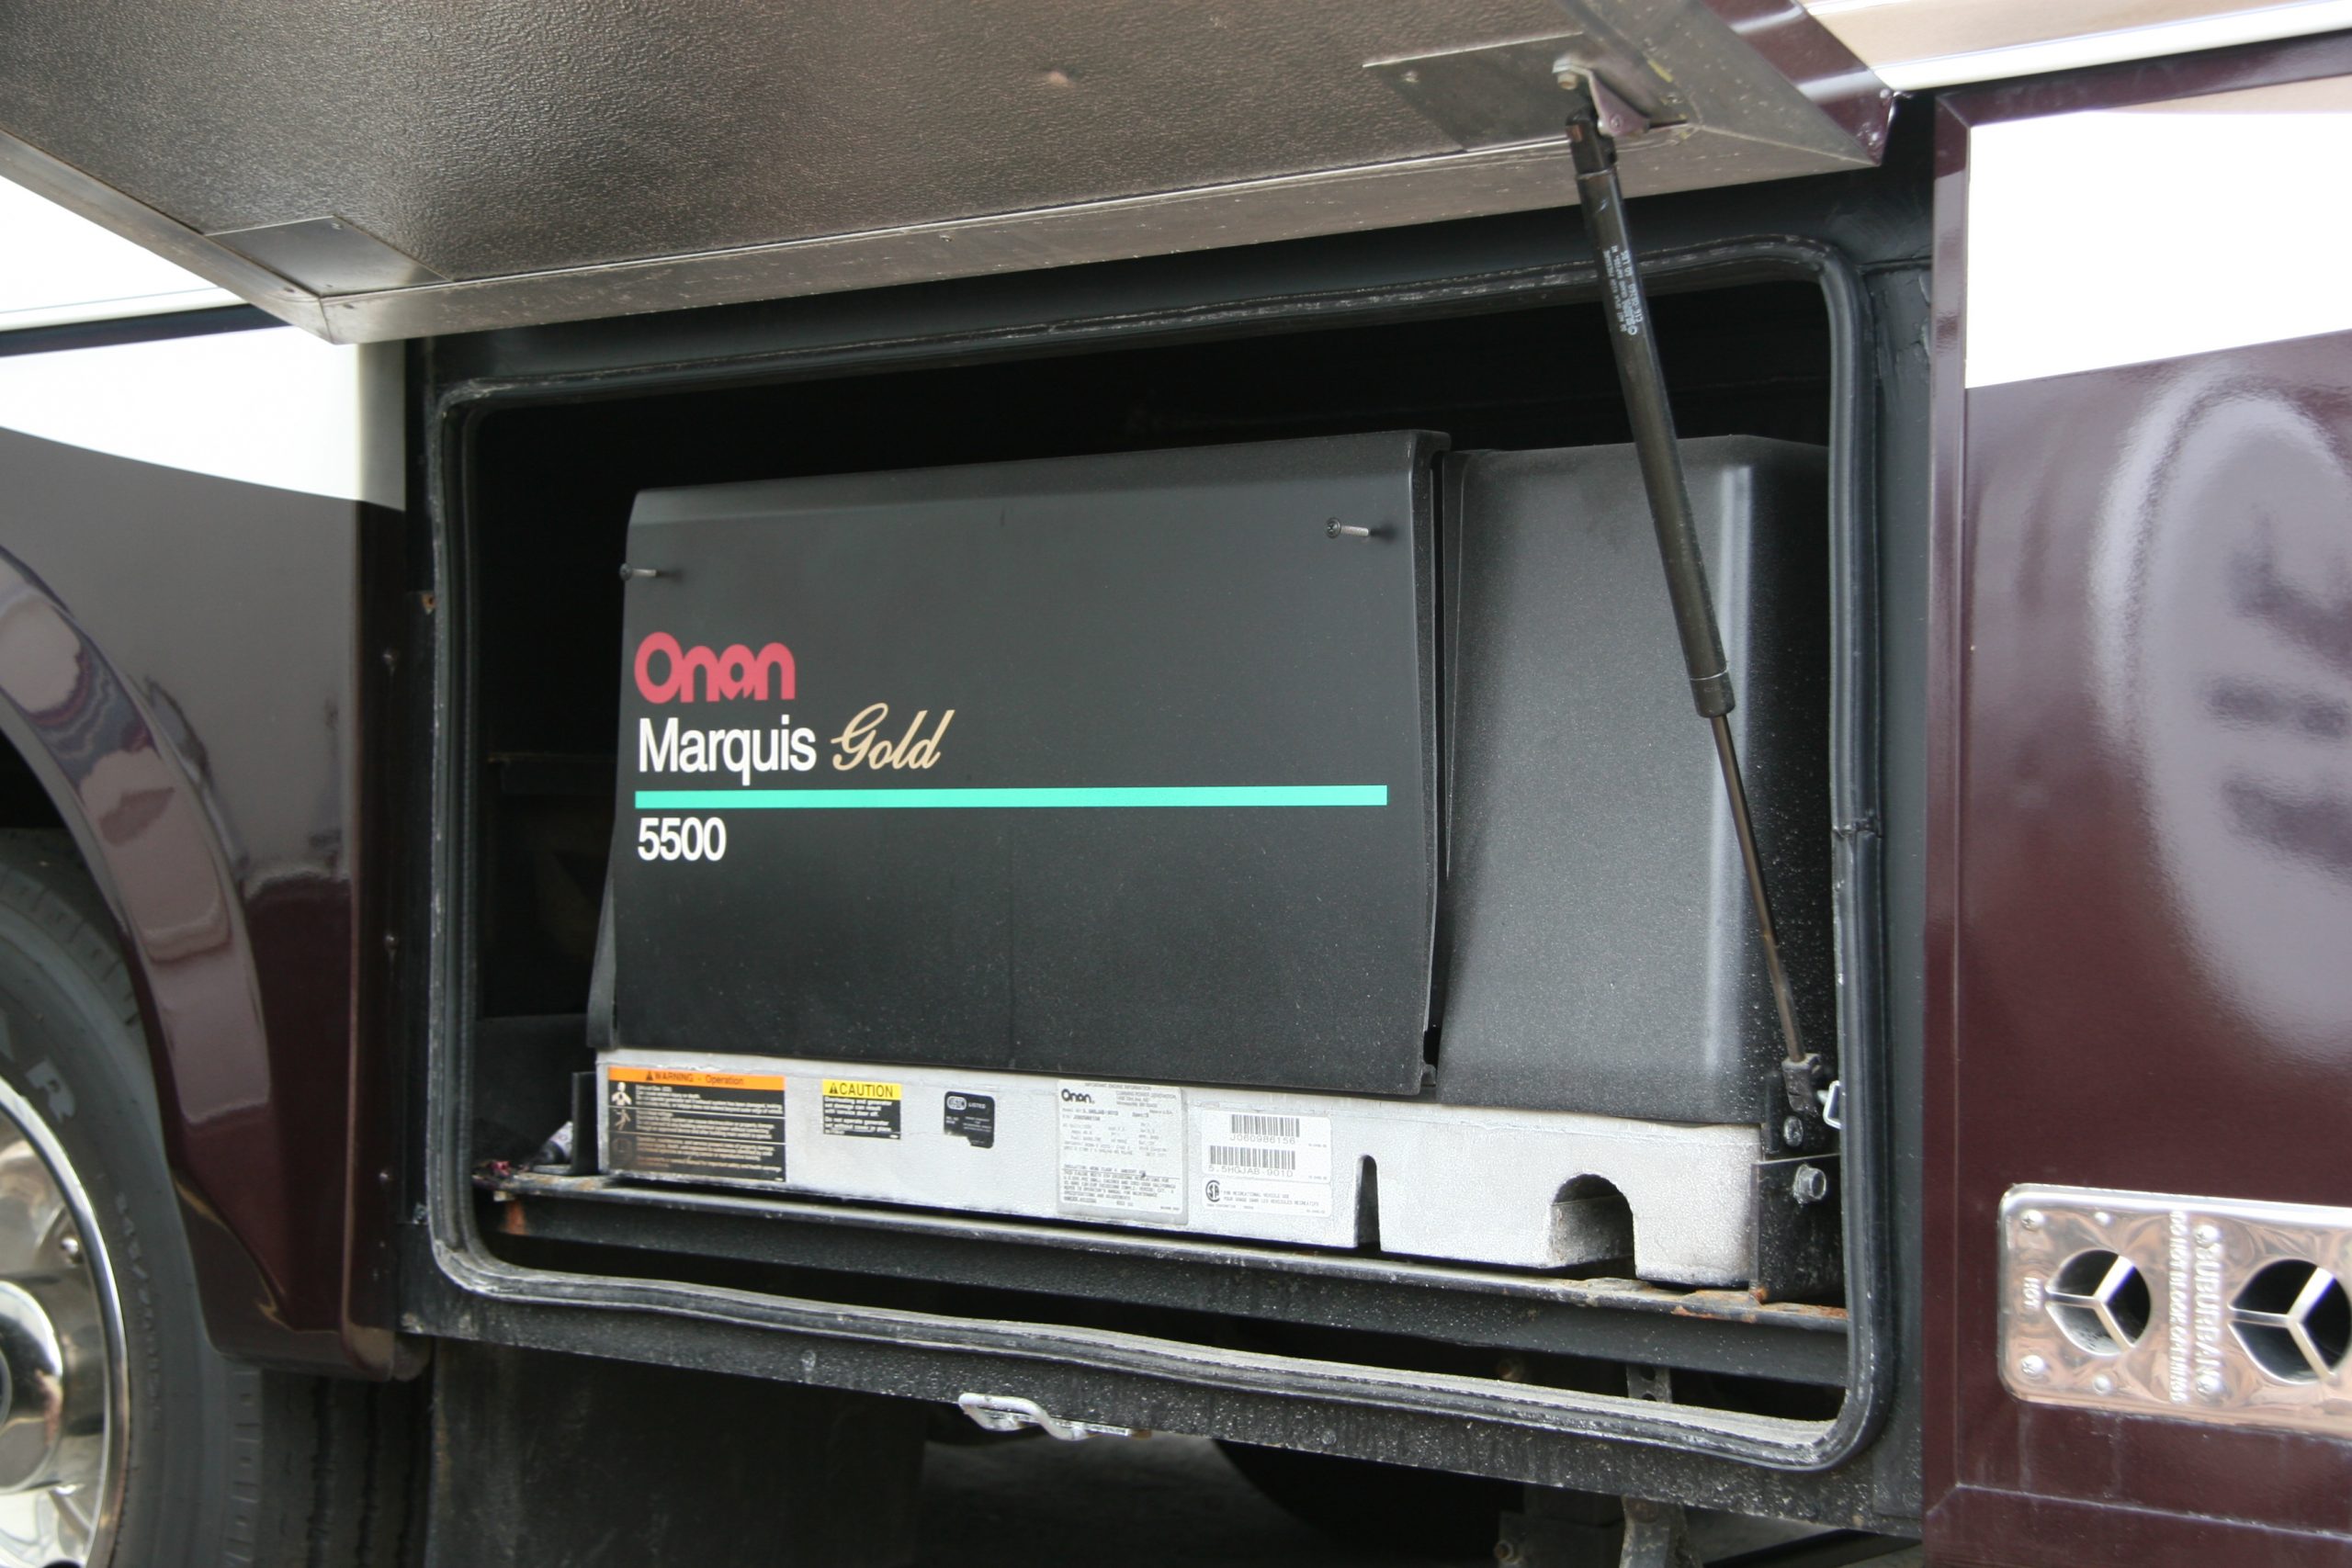
National Indoor RV Centers blog RV Generator in Class A motorhome

Generators such as this 5500 watt Onan Marquis Gold gasoline powered generator are commonly mounted in a basement compartment on gas powered class A motorhomes.

Installed generators have the benefit of using the same fuel tank that feeds the engine. The output wiring is connected to an automatic transfer switch, making it a simple task to start the generator via a switch in the motorhome’s interior. Smaller Class C and Class B motorhomes are limited on storage, so a generator is often an option not chosen by the buyer, opting instead for more storage space. In that case, a portable generator might be a better choice.

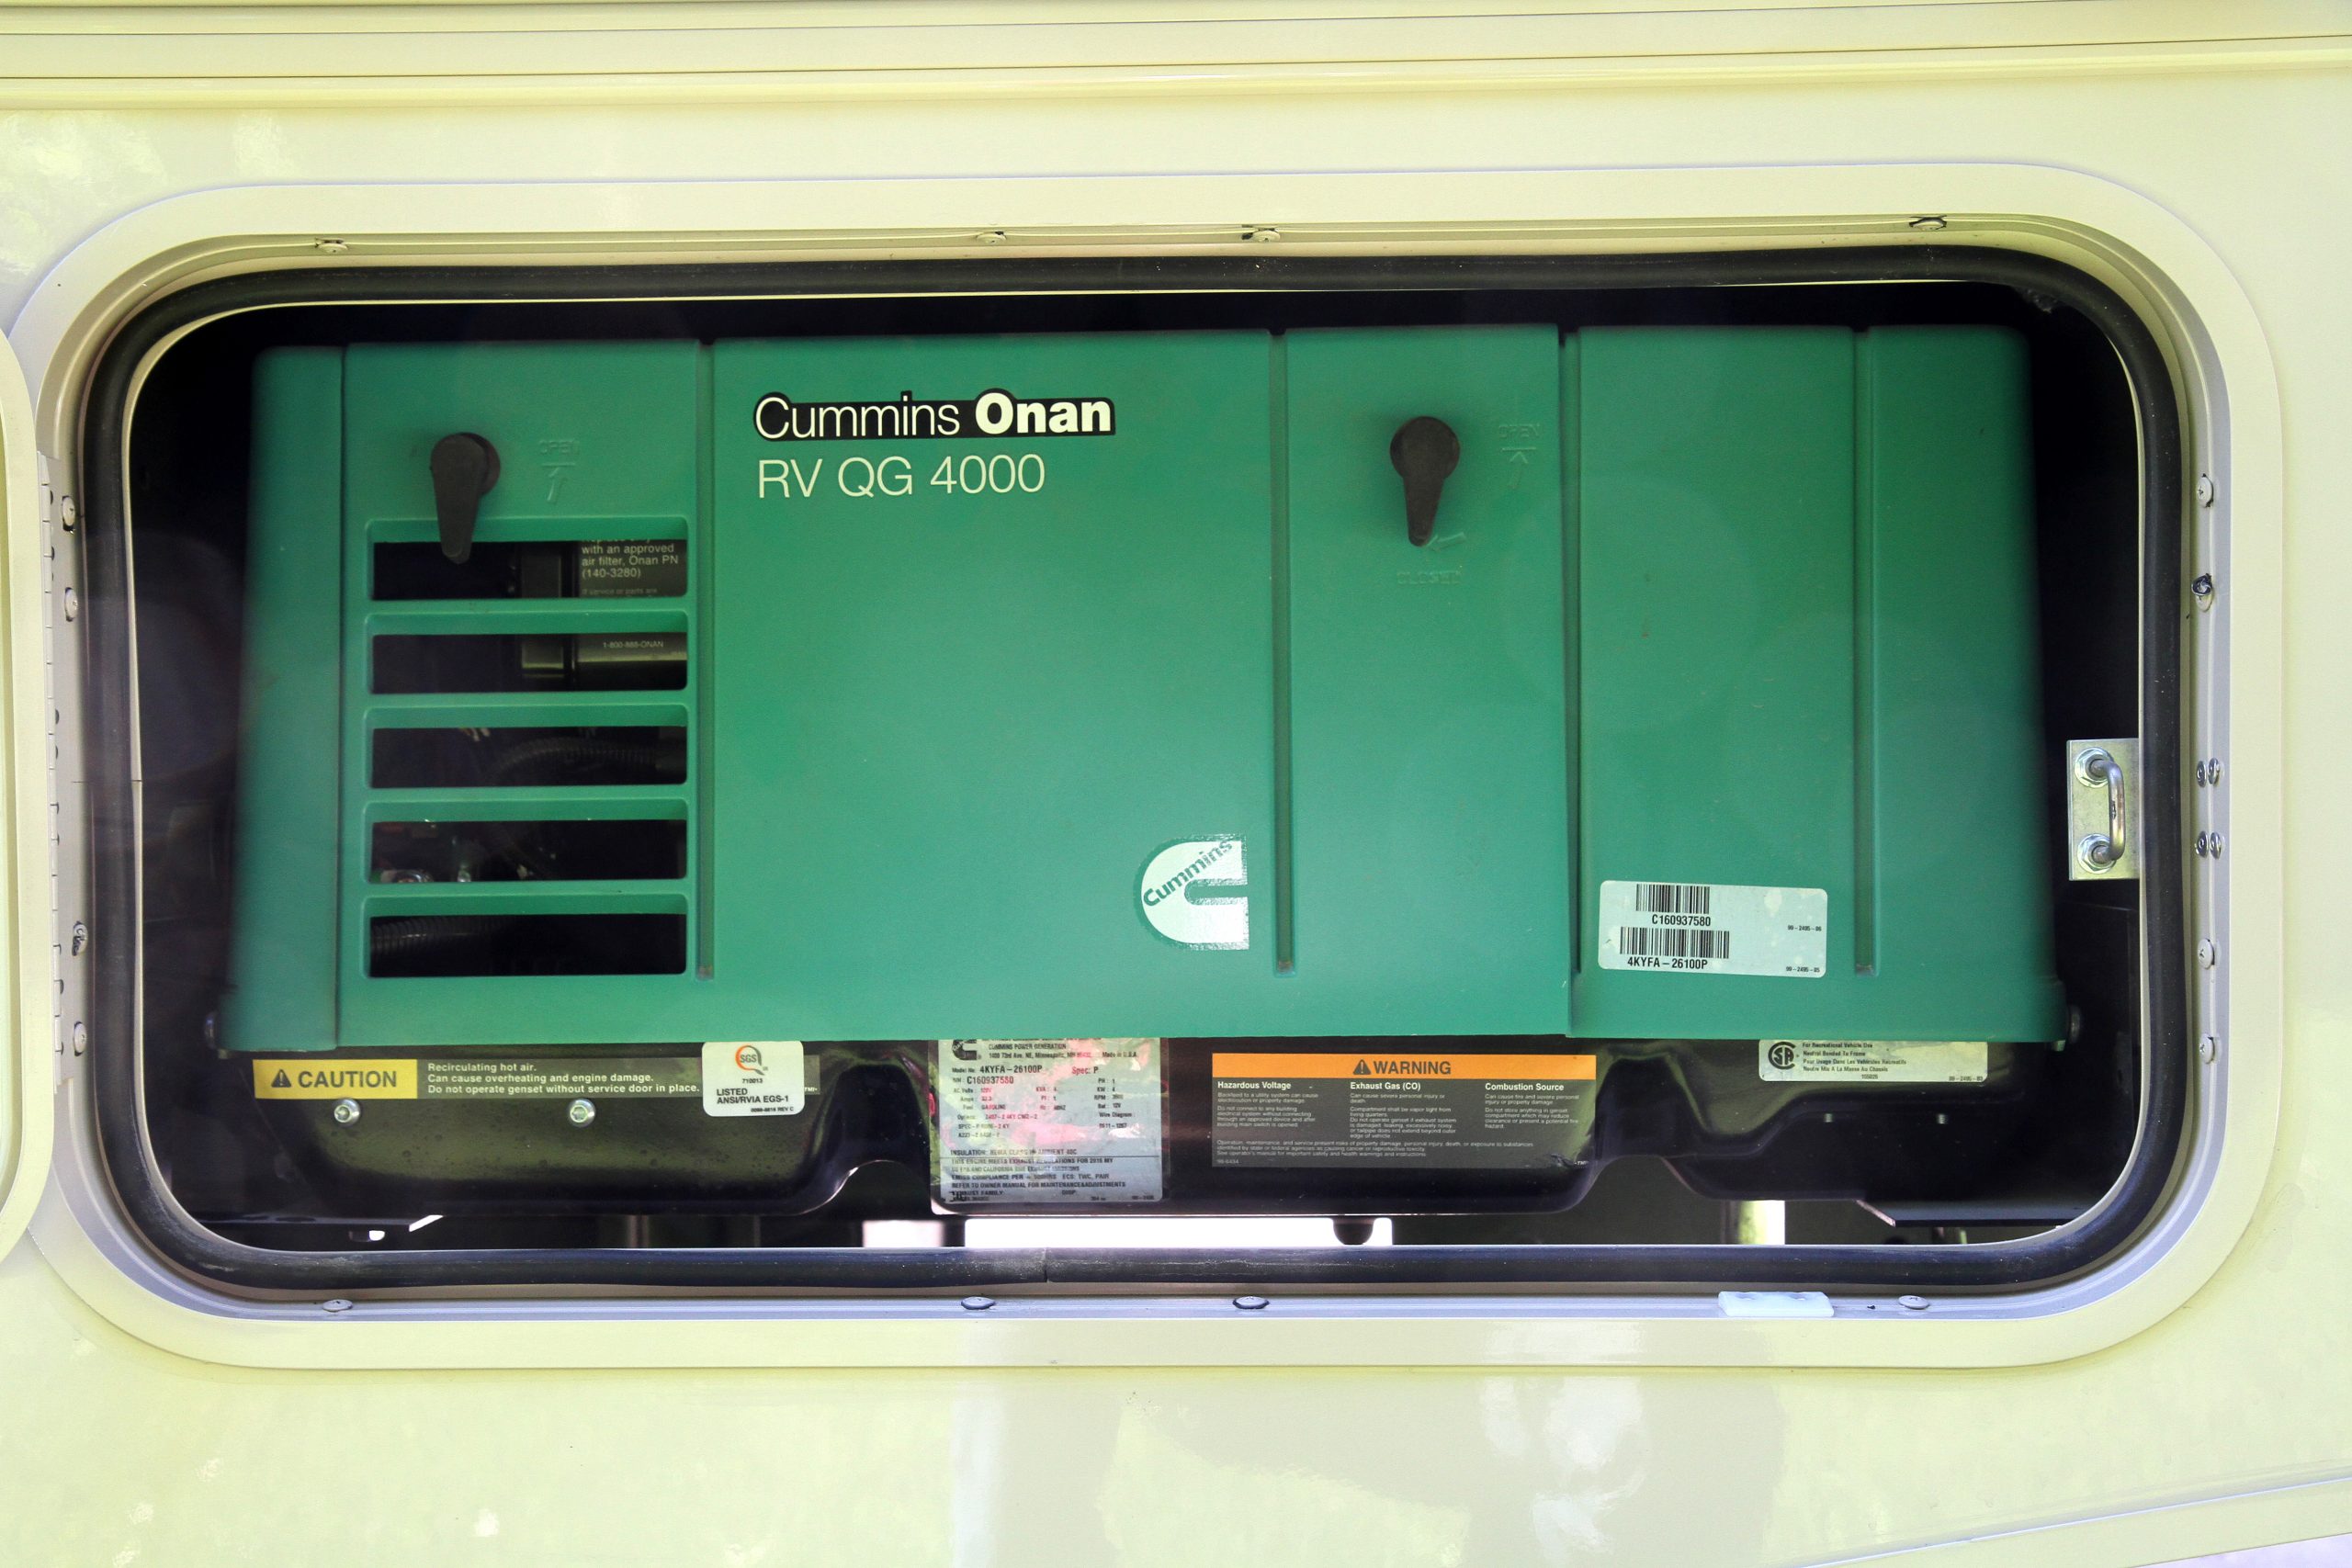
National Indoor RV Centers blog-RV-compact-generators-Class C-Class B motorhomes

Compact units – such as this 4,000 watt gasoline powered Onan – are typically installed in Class C or B+ coaches where basement cargo space is limited in height.

Portable generators won’t tie up your RV’s basement storage space, but you will have to find some place to carry it, like in the back of a pickup bed. They can multitask, so you can use the generator in other locations without the RV. You can even use it to provide emergency power during an outage at your home. One drawback is that you need to carry a separate fuel supply for the generator, which also requires storage. Weight is also a consideration because the need for horsepower increases as the wattage demand goes up. More horsepower means larger engines that are heavier, making the generator harder to handle.

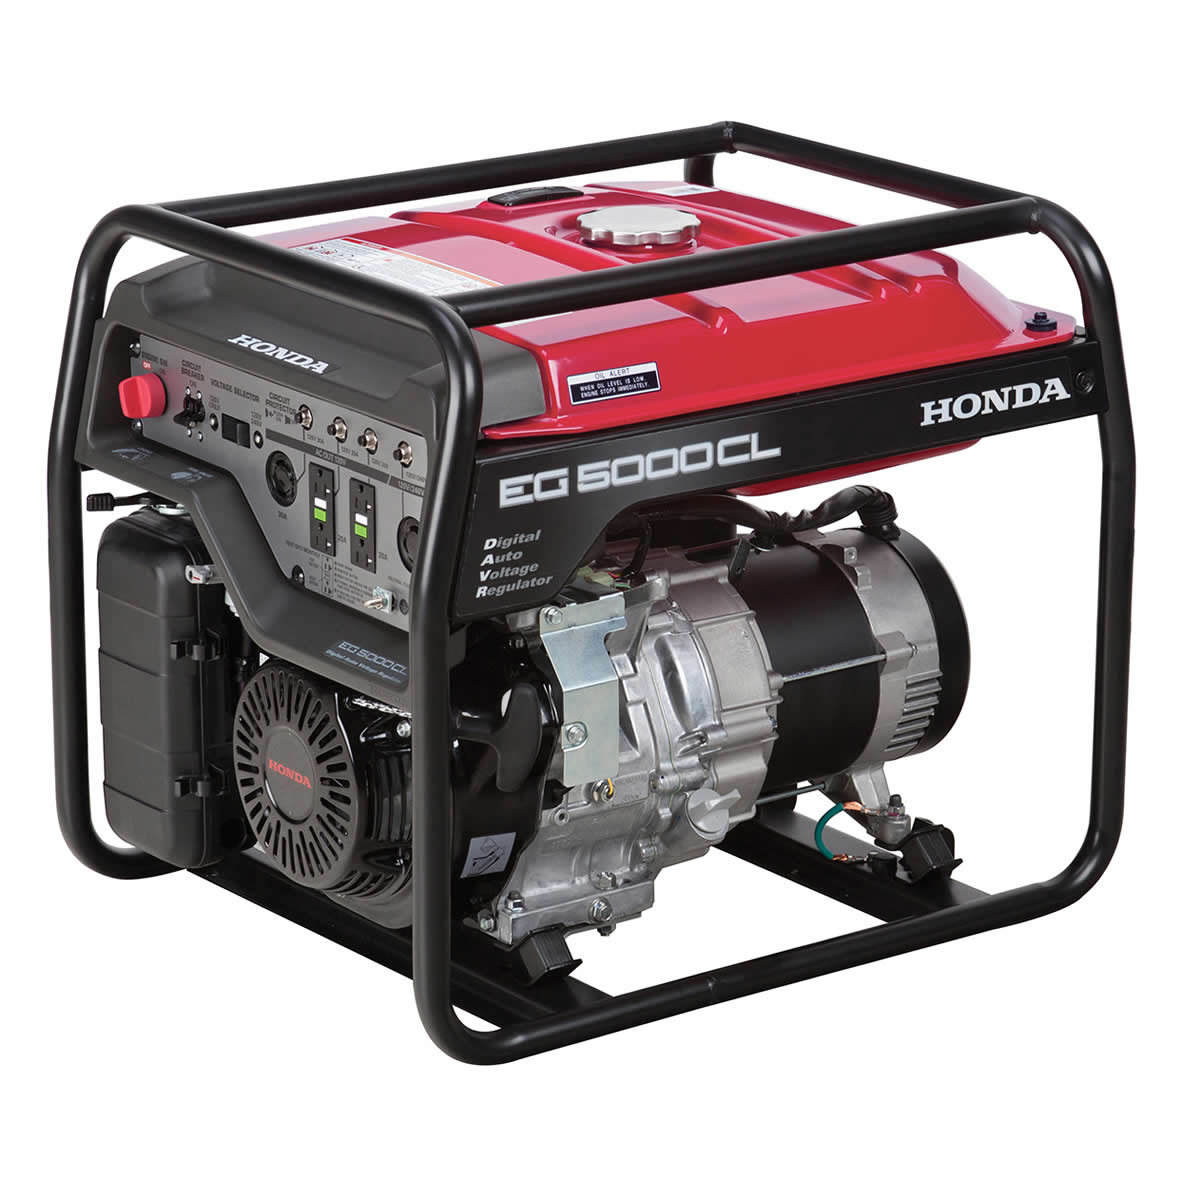
National Indoor RV Centers-blog-RV generators-portable generator for motorhome use

Units such as this Honda 5,000 watt are portable and can be moved by two persons.

Frequency

 Household power in North America is 60 Hertz – which is the measurement of the power’s frequency or wavelength per second – while electrical power in Europe is 50 Hz. Any electrical device designed for use in North America will require 60 Hz power in order to operate. Frequency in a generator is determined by the number of times a magnetic field passes by a generator’s stator winding and receives an induced charge. In a generator with two field coils, the generator needs to spin at a constant 3,600 RPM in order to create 60 Hz power while a generator with four field coils only needs to run at 1,800 RPM.

Most portable generators are of the two pole design to save weight on both the engine and the generator itself. For example – a 3,500 watt generator will require around 8 HP to generate that much electrical power. A typical 8 HP engine will produce that power at peak RPM, which is going to be close to the 3,600 RPM that a two pole generator will operate at. A four pole generator will only need to turn at 1,800 RPM to achieve 60 Hz, but a four pole generator is heavier and bulkier and the engine won’t be able to create its maximum rated power at that slower speed. Therefore, a large engine rated in the 12-14 HP range at 3,600 RPM will need to be used so that 8 HP is still available at the lower 1,800 RPM. The extra weight and size of the larger engine and generator doesn’t make it a good choice for a portable generator but is best suited for a stationary mount where the quieter operation associated with lower RPMs is beneficial.

Split Phase Versus In-Phase:

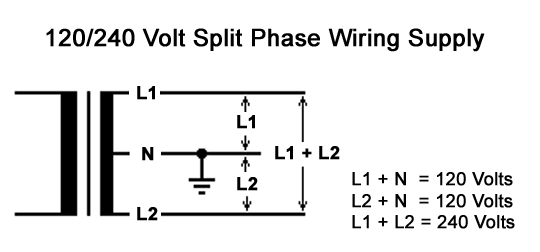
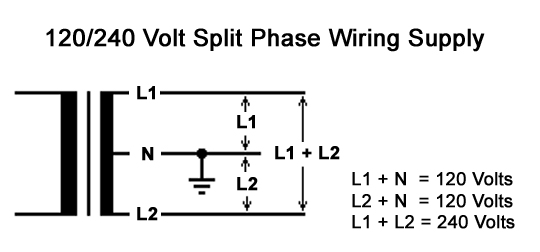
Regardless of whether your generator is a two pole or four pole unit, there will be two field windings that provide power to the receptacles. Each winding is capable of producing 120 volts of AC power at one half of the rated capacity of the generator. These windings can be connected in series to offer 120 or 240 volts in a split phase design, or in parallel to offer only 120 volts in what is referred to as an in-phase design. For example – a 6,000 watt generator has two field coils, each with 3,000 watts of available power at 120 volts. Referring to the graphic below, we can see that there are 6,000 watts of 240 volt power available between L1 and L2. There are 3,000 watts of 120 volt power available between L1 and Neutral, and another 3,000 available between L2 and neutral. 3,000 watts at 120 volts is only 25 amps. Unfortunately, you can’t draw 30 amps on one circuit because the two fields are in series.

National Indoor RV Centers blog RV Generators split phase wiring

The graphic referred to in the text as the Split Phase diagram

The split phase system works fine on larger generators, such as 10,000 watts and up, but has its limitations on smaller units. Many of the smaller units used in RVs do not have 240 volt capabilities, which is fine because 240 volt appliances in an RV are extremely rare except for very high end coaches. In this case, the two windings are placed in parallel rather than series. This eliminates any 240 volt capability but allows for the full 6,000 watts to be available on any one circuit. This is referred to as an in-phase system and is generally used on generators rated at 7,000 watts or less. 

Inverter Generators

Inverters are the opposite of converters. A converter takes 120 volt AC power and converts it to 12 volt DC power to operate lights, water pumps, fans and other 12 volt accessories in the RV as well as battery charging power. An inverter takes 12 volt DC power from the batteries and inverts it to create 120 volt AC power. Small inverters can be used to power an entertainment system while larger inverters can power a number of receptacles and appliances. This means you don’t have to run your generator to keep a residential refrigerator cold while driving and can also operate a microwave and a few outlets. They are helpful because it extends the time interval between times when you need to run the generator to recharge batteries or run larger loads.

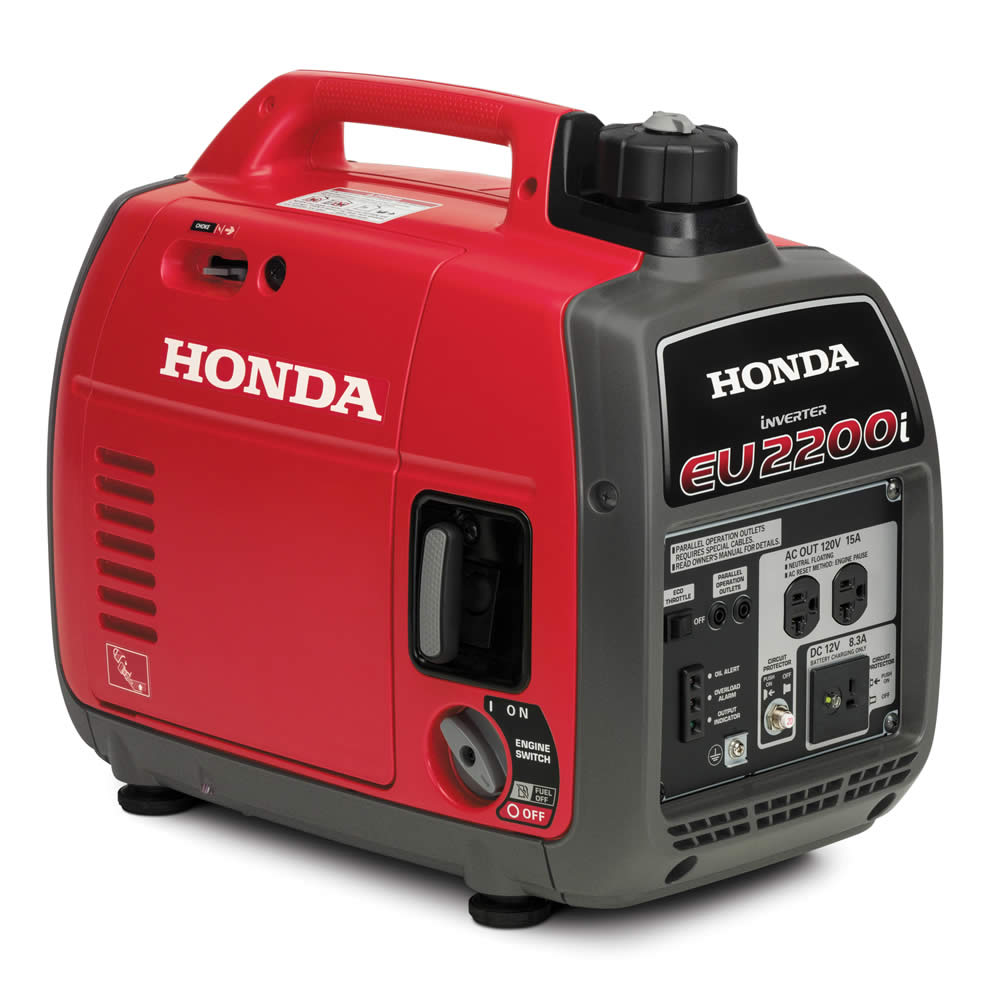
National Indoor RV Centers-blog-RV generators-inverter- based-Honda 2200-unit

An inverter based Honda 2200 watt unit.

However, inverter technology has also filtered into generators as well. Inverter based generators are popular in some of the small portables, such as the Honda EU2200 series as well as in the Onan Quiet Diesels in the 7KW to 8KW range. In a sense, these generators are not true AC generators, although their eventual output is AC power. They are actually DC generators that send their variable DC output through inverter circuitry built into the generator itself. This eliminates the requirement to operate at a steady 1,800 or 3,600 RPM because the inverter electronics convert the DC power from the generator into 120 volt AC power and establish a 60 Hz frequency electronically. 

A DC generator has no requirement to turn at any given speed because the output power increases as the generator’s speed increases. This allows the generator to operate at a lower RPM under light loads, saving fuel and reducing the noise level. 

As you add more demand for power, such as when an air conditioner starts up, the generator’s speed will increase to raise the power output level, all the while maintaining a steady 120 volt AC power level at a 60 Hz frequency. Inverter based generators also put out fairly clean power with low levels of noise or total harmonic distortion (THD), which is a benefit when powering sensitive electronic equipment. Inverter generators are not found in the larger 10KW  sizes and up because the inverter boards would be large and expensive and generally not necessary with the stability present in the larger diesel generators. However, they are quite popular in the smaller portable models.

Sizing

When selecting the proper size generator, it’s important to remember that wattage is the measurement of true power. A 50 amp shore power supplies 50 amps of 120 VAC power on each leg. “Amps” x “volts” = watts, so a 50 amp shore power receptacle is capable of providing 6,000 watts power on each leg, for a total of 12,000 watts. Therefore, if you want a generator that can match that power, you’ll need a 12,000 watt generator. If you don’t use all of that power, you may be able to step down to a 10,000 watt generator, but the biggest factor is with air conditioning. A coach with two rooftop air conditioners may be able to get by with a 7,000 watt generator, depending on how many other 120 volt accessories you have. But any coach with three rooftop units is going to need at least 10,000 watts.

 When sizing up a generator, you need to consider how your loads are distributed across the breaker panel. A split phase generator can only supply half of the total capacity on each leg, so you have to be sure that your heavy loads are evenly distributed across both legs of the panel. Remember that each leg has a given amount of amperage and on a split phase generator, they cannot be shared. If your loads are imbalanced, you’ll need a much larger generator just to feed one leg while the other leg is not being fully utilized. 

Another consideration is static versus dynamic loads. Lighting and heating elements are static loads in that they always consume the same amount of amps. Dynamic loads are associated with components that have load requirements that vary under different conditions.

Motors are considered dynamic loads because the current draw varies according to how hard they are working – plus, they generally have a startup surge which can be up to three times the running load. Consider the case of an air conditioner. It may have a typical unloaded draw of less than 10 amps, but when it first starts up it will have a surge of in excess of 20 amps as the capacitor start motor starts up against the head pressure in the refrigerant. If the unit was resting long enough, it may settle in to around 10 amps immediately after startup but as the head pressure increases and the unit works hard, it can draw 12-14 amps. Consider that you most likely won’t be starting all three air conditioners at the same time so you don’t need to use the peak starting surge for every unit when calculating how large your generator needs to be. Remember that “volts” x “amps” = watts, so just multiply your amps by 120 to convert to watts in order to determine how many watts you’ll need. 

Following are some examples of typical load requirements:

Air Conditioners 1400-2000 watts
Refrigerator 600-1000 watts
Electric Frying Pan 1000-1500 watts
Electric Stove Element 675-1000 watts
Electric Water Heater 1250 watts
Hair Dryer 500-1500 watts
CRT Television 200-600 watts
LED Television 100-375 watts
Portable Ceramic Heater 750-1500 watts
Toaster 1000 watts
Satellite Dish and Receiver 200 watts
Battery Charger/Converter 750-1400 watts

When sizing your generator, you also need to consider the fact that altitude affects the engine’s ability to create power. Different engines react in varying amounts. An Onan Marquis Gold series of gasoline powered generators will lose 3.5% of power for every 1,000-foot gain of altitude over 3,000 feet. The Onan Quiet Power Diesel 10,000 watt will derate 3.5% for every 1,000’ over 500’ of altitude and it further derates by 1% for every 10oF of temperature increase over 85oF. This equates to a 7,500 watt generator running at 9,000’ of altitude that will only be capable of handling 5,000 watts at that altitude unless the engine has enough excess horsepower to allow for it.

National Indoor RV Centers-blog-RV generators-diesel generator

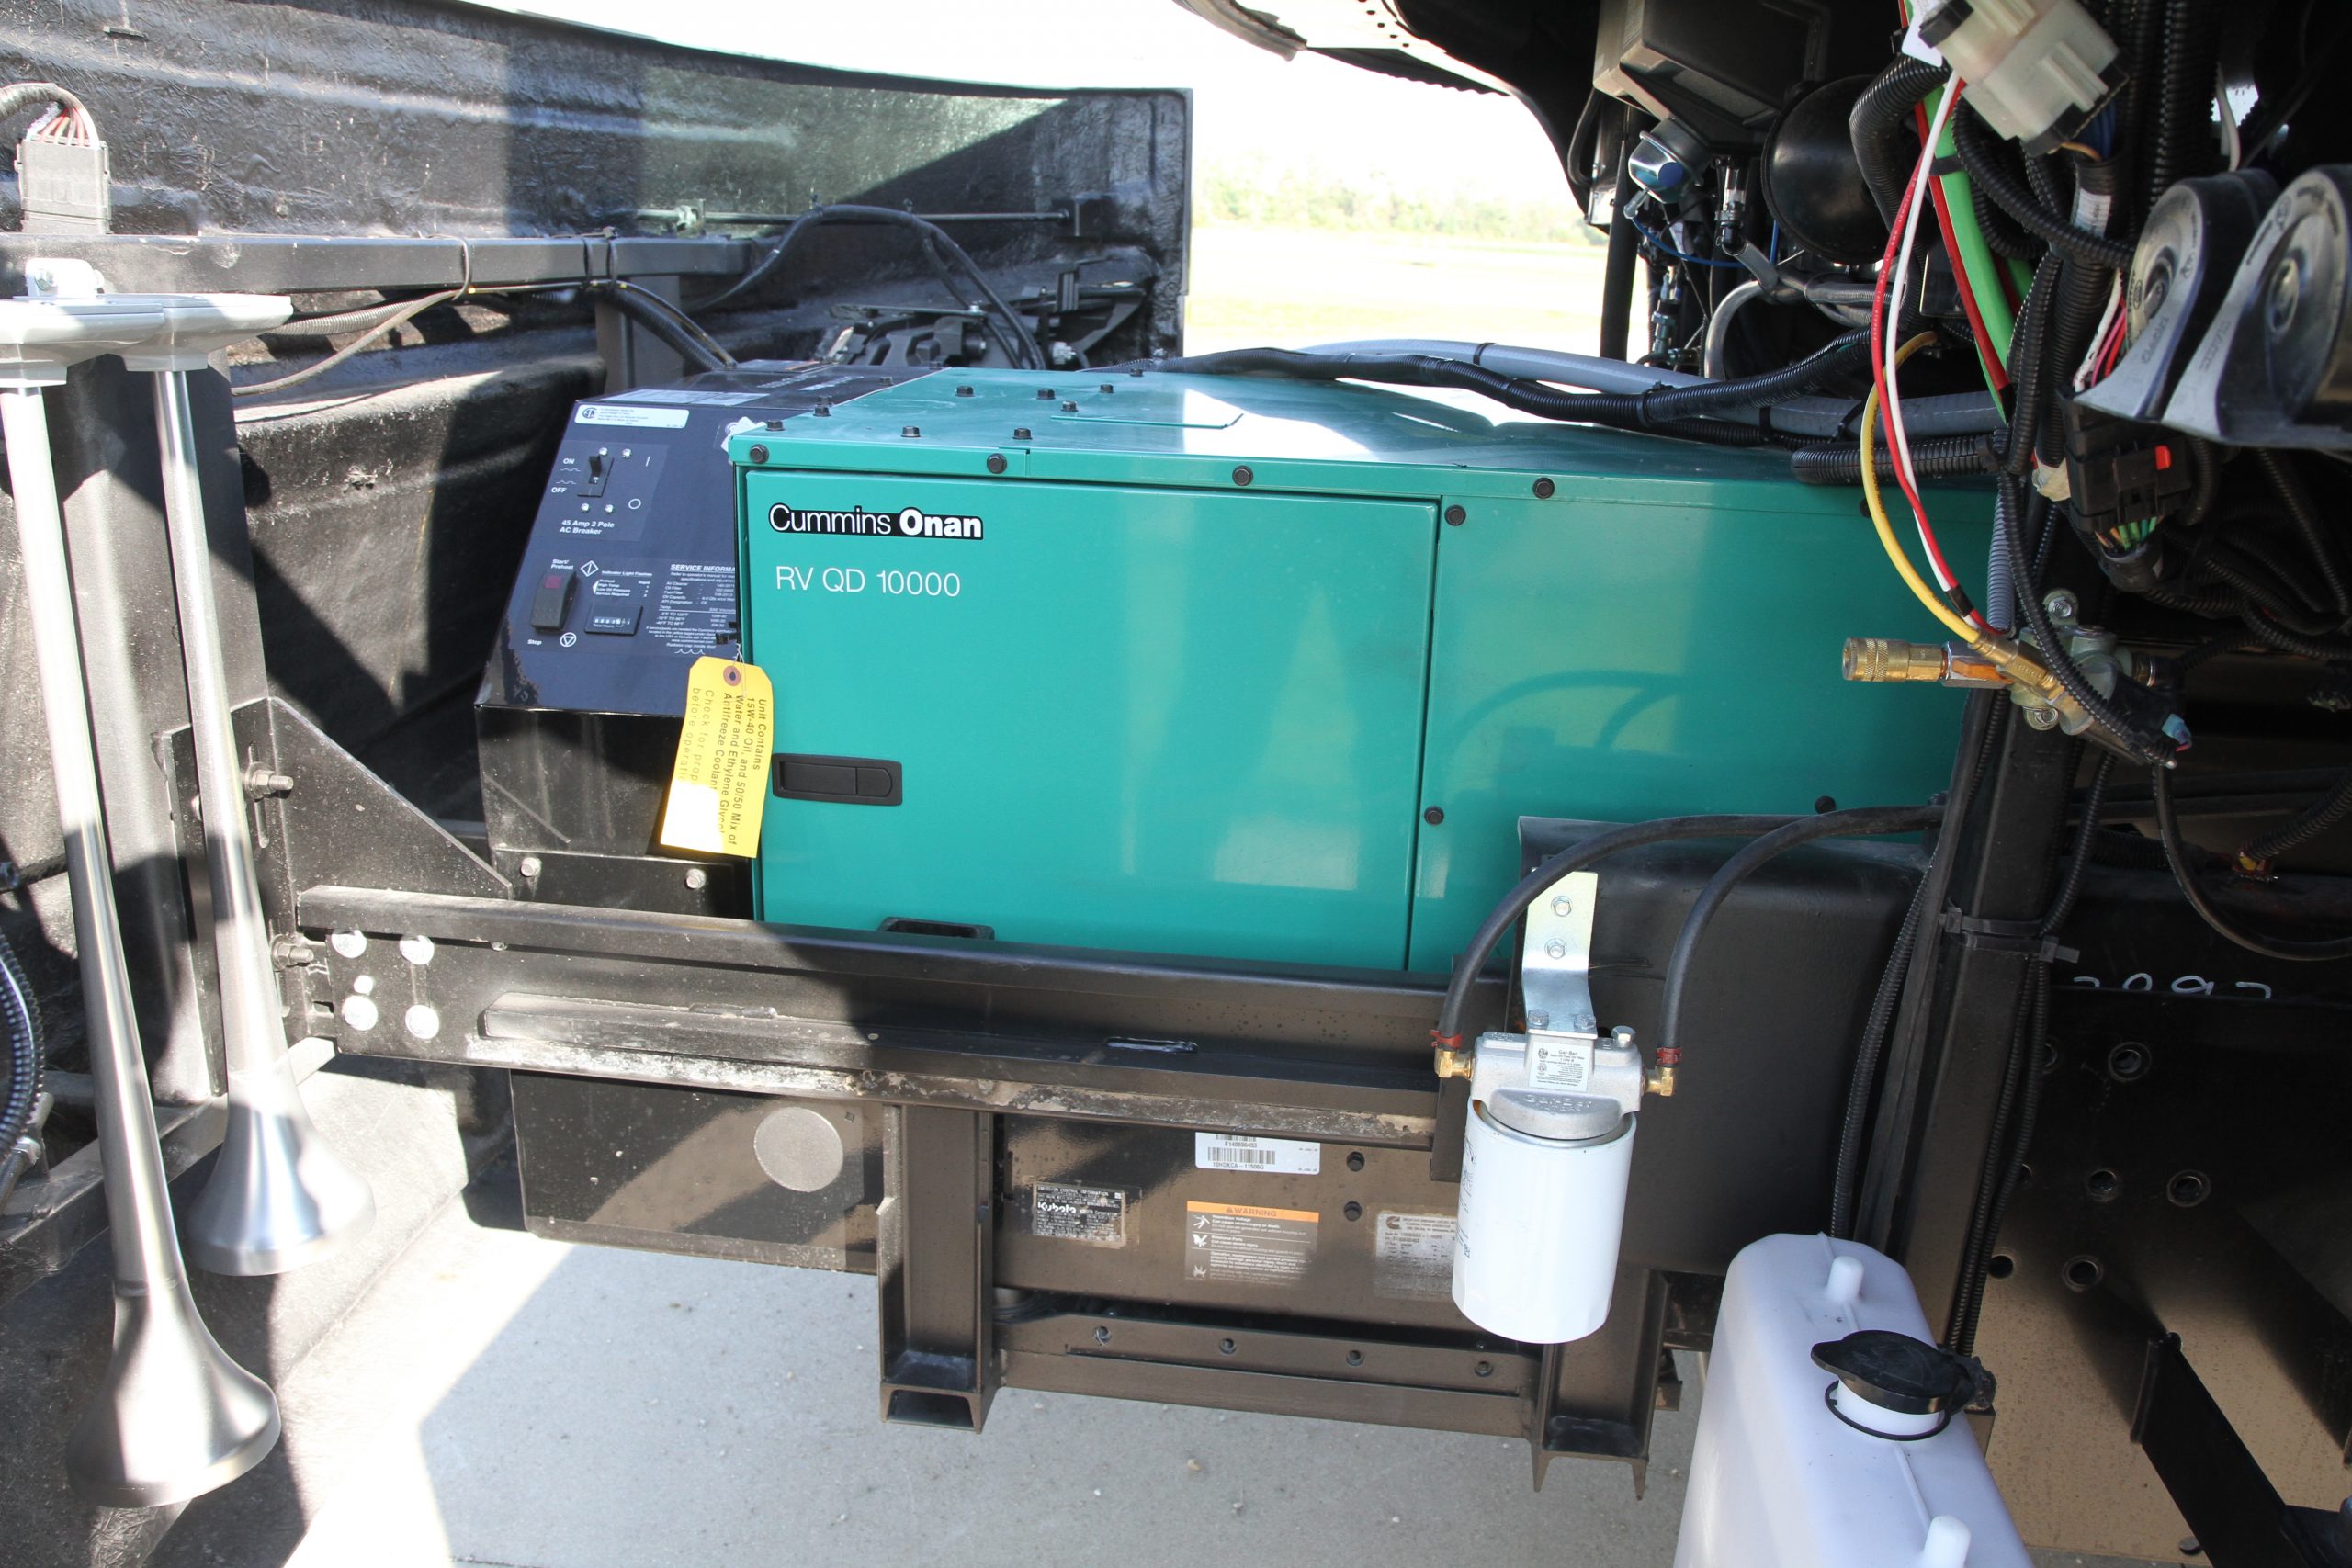
Most Class A diesel pushers have diesel powered generators, such as this Onan 10,000 watt installed in the front cap area of a Newmar London Aire are placed on slide-out rails for ease in service access.

Diesel engines are pretty much capable of handling the fuel injection requirement at higher altitudes but carbureted gasoline powered engines will have issues with running rich due to lack of air. Some generators, like the Onan Marquis Gold series, have a mixture adjustment on their carburetors. You can adjust the fuel flow with a lever to lean the engine out when operating at higher altitudes. But be sure to reset it to the full rich position when you return to the flatlands or else you run the risk of burning valves by running the engine too lean.

Armed with this information, you should be ready to select the best generator for your RV lifestyle. Be sure to include your generator when you have your RV tech perform scheduled maintenance on your motorhome. Taking care of it will ensure it will take care of you when you need it.

How To Power Your RV

How to Power Your RV

Your RV’s 120 volt electrical system is fed through a central distribution panel where all of the circuit breakers are located. In order to power this panel from two different power sources we can choose one of two methods. The first is the more cost effective and least costly and is commonly used in lower cost travel trailers. That method entails hard wiring a power cord to the breaker panel’s inputs. When not plugged into shore power this cord can be plugged into a generator set outlet to provide power to the RV’s electrical systems. While this method is inexpensive, it’s less convenient because you have to physically switch the plug from the shore power receptacle to the generator receptacle. The second method is to install an automatic transfer switch.

Automatic transfer switch

Manual vs Automatic Transfer Switches

Manual transfer switches need to be manually switched by moving the switch lever on the box and are uncommon in a motorized RV. Automatic transfer switches commonly used in an RV will do this automatically and are logic controlled to switch under a given set of conditions. Generally automatic transfer switches will default to the generator inputs and are mechanically held. Once shore power is present the magnetic coils will pull the switch’s contact relays over to the shore power side. This is why you typically hear that clunk when the switch engages shortly after connecting to shore power. As soon as the shore power is no longer present the switch will revert back to its generator priority position.

Generators for Your RV

Sometimes the 120 volt devices in your motorhome need to be powered when you are not plugged into a campground pedestal, frequently referred to as shore power. When shore power is unavailable, the on-board generator set can be used to power these devices. Generators can be used in a number of situations, such as camping in remote areas where access to power is not available. A number of systems, such as lighting, water pumps and fans, are powered by your 12 volt battery. However, there will come a time when these batteries need to be recharged. The on-board generator can be used to power the coach’s battery charging system in the absence of shore power. Another use for generators is to power the rooftop air conditioners to make for a more comfortable motorhome interior in hot weather.

Generators for Gasoline Engines

Gasoline powered Class A motorhomes will be equipped with a generator powered by a gasoline engine. The generator shares the same fuel tank as the vehicle engine but uses a separate fuel pickup within that tank. Usually these pickup tubes are cut short so that the generator will not run if the fuel level gets below a ¼ tank but this amount can vary from one manufacturer to the next. The reason for this is so that you can’t totally drain your fuel tank while dry camping. The ¼ tank remainder ensures that you will always be able to start your RV’s engine and drive to a refueling location. These generator sets are designed to slide into a basement compartment that is designed for that purpose so access to the controls and engine service points is done through the removable side cover on the generator, which also serves to contain the cooling airflow and add additional sound deadening capability.

Onan Quiet Power diesel generator

Generators for Diesel Engines

Diesel powered generators can be found on motorhomes that are powered by diesel engines. Some of the entry level class A diesels are really front engine gasoline chassis with a diesel engine in place of a gasoline engine. Also, many smaller B+ and Super C motorhomes are now being made with small diesel engines. In this case the diesel powered generator will be fairly small (in the 4 KW to 7 KW range) and will be mounted in a side compartment in the same fashion as the gasoline powered generators. On a rear engine diesel pusher, the front of the coach is clear of engines and radiators. In this case you’ll find a diesel powered generator that is mounted in the front cap on a set of slide rails. The generator can be slid forward out of the coach to allow better access for servicing the unit. These units generally start at around 7,500 watts and run up to 10,000 or 12,500 watts in size. 

Some older motorhomes used a propane powered generator that ran off the RV’s on-board LP tank. However, these are rare and less desirable because the limited capacity of the propane tank didn’t give the generator a very long running time before the LP tank was empty. Used coaches with propane powered generators are very hard to sell and their resale value reflects this.

In-Phase vs Split-Phase Generators 

Generators that are rated up through 8,000 watts are usually single pole 120 volt-only generators, referred to as “in-phase” generators because both windings are in the same phase. Larger generators, 10,000 watts and up are two pole split-phase 120/240 volt generators with a center tap neutral. Because motorhomes rarely have any 240 volt appliances you may think that this arrangement isn’t needed. But if you refer back to our split phase 120/240 diagram you’ll recall that each phase has a given amount of amps available. That’s what allows you to balance your load and eliminate the heavy wiring required for a 10KW generator, which would output 83.33 amps if it was an in-phase design. Note that a 50 amp electrical service is equivalent to 12,000 watts, which is the size generator required if you needed to supply a full 50 amps to your RV’s breaker panel.

What to Consider When Choosing a Generation System 

Small portable generators tend to be noisy because an engine running at 3,600 RPM isn’t very quiet. They were designed to be light and portable. In a motorhome this isn’t important because the generator doesn’t need to be lifted because it will be mounted into the RV. What is important is the noise level. If we add a second set of field coils to our generator, we will double the frequency to 120 Hz when running at 3,600 RPM, which isn’t good and will burn up our electrical devices. But if we take that same 4 pole generator and slow it down to 1,800 RPM we will still have 60 Hz. It’s just that we are passing twice as many magnets during the same revolution so by reducing the number of revolutions by half we will still maintain 60 Hz.

This is the way many RV generators are set up. The 1,800 RPM speed of the engine allows for quieter operation. Because we don’t have to lift this generator we can also add a nice large muffler to it. The big drawback is that we have to use a larger engine. A small 8 HP engine is capable of creating 3,500 watts at 3,600 RPM but when you slow it down to 1,800 RPM it will only put out around 5 HP, which isn’t enough. By going with a 12-14 HP engine, we will still have 8 HP available at 1,800 RPM to then make our 3,500 watts of power. This means that the engine will be physically larger, weigh more, be quieter and more durable, and cost more than a smaller engine that is running higher revs. But the gains are well worth it in an RV application. Large utility power plants carry this even further and can use as many as 24 field coils in their generation systems so that they only have to turn 300 RPM. Less RPMs means greater life but more weight and size, while less magnets means less weight and size but greater speed and wear.

Supplemental RV Braking Systems

Towing without a supplemental braking system is dangerous RV driving

A motorhome is an excellent choice for traveling. Everything is self-contained and you have the comfort and security of sleeping in your own bed and cooking your own food. The only caveat is that they are large, so using it as a daily driver to go shopping or sightseeing in a national park just doesn’t work out very well. Fortunately, motorhomes are equipped with trailer hitches, making it easy enough to tow a smaller vehicle for your touring while the motorhome is parked at your campsite. Towed vehicles can include a vehicle placed on or in a trailer or loaded onto a tow dolly, but the most common method is to use a tow bar to flat tow your vehicle – commonly referred to as towing four-down.

There are a number of vehicles capable of being towed four-down but there are exceptions, so you’ll need to check with your manufacturer to see if your choice is flat towable. If it is, the next step is to verify that your coach is capable of towing your vehicle of choice. Larger Class A coaches have ample capacity, and some can tow as much as 20,000 lbs. but some smaller Class C motorhomes may only have a 3,500 lb. towing capacity, which will limit you from towing any vehicle that exceeds that weight rating.

In addition to the rating stamped on the trailer hitch, you’ll also need to look at the Gross Vehicle Weight Rating (GVWR) and the Gross Combined Weight Rating (GCWR) of your motorhome. The GVWR shows you the maximum amount of weight that the motorhome can safely weigh. The GCWR indicates the maximum safe weight of both the coach and any trailer or towed vehicle and will always be higher than the GVWR. For example: if you have your coach loaded to the maximum GVWR (let’s just assume 32,000 lbs. as an example) and your GCWR is rated at 36,000 lbs. it leaves you with 4,000 lbs. as the maximum safe weight of the towed vehicle or trailer. Your trailer hitch may be rated at 10,000 lbs. but you must limit the towed weight to the lesser value of the hitch rating or GCWR. If you do not load your coach to the maximum GVWR, then the difference between the GCWR and your actual coach’s weight when fully loaded will increase and you may be able to tow a bit more than the 4,000 lbs. in the above example.

The GCWR also assumes that you have brakes on whatever is being towed. If you have an enclosed or flatbed trailer it will most likely have brakes on those axles that are designed to work in conjunction with a brake controller in the tow vehicle. As long as you have installed a trailer brake controller in your motorhome, you’ll be fine. But when you flat tow another vehicle – it’s a different story. A car, Jeep or truck has its own braking system that is controlled by the driver when driving that vehicle. When you hook up to a motorhome to flat tow the braking system on the motorhome and the braking system on the towed vehicle are two separate entities. They do not work together, so you have no towed vehicle brakes when towing.

Fortunately, there are a number of third party supplemental braking systems on the market that will allow you to safely tow your vehicle and be compliant with the GCWR requirements.

Questions sometimes arise as to the legality of towing without a supplemental braking system, which varies according to state or province. I’ve also heard a few arguments from RV owners about not spending the money on a supplemental braking system because “you can hardly feel the towed vehicle behind the coach”. While the towed vehicle is a small percentage of the total weight, especially on a large tag axle diesel pusher, tests have proven that there still will be a difference in stopping distance during a panic stop. A study taken by Roadmaster and published on their website showed a 34’ class A motorhome took 132 feet to come to a complete stop from 50 miles per hour. When a medium size car was connected to the motorhome the stopping distance increased to 209’. When a supplemental braking system was added to the towed vehicle this distance decreased to 137’. Those extra 72’ can make the difference between safely stopping in time or being involved in an accident should an emergency stop be required.

Another reason for a supplemental braking system is to protect yourself and others during a breakaway situation. Some systems include this and some offer it as an optional accessory, but in either case this is something that every supplemental braking system should have. A breakaway system consists of a switch that is mounted on the towed vehicle and is connected to the coach via a small steel cable. Should the towbar fail or for any reason the towed vehicle becomes disconnected from the coach while driving, the cable will activate the breakaway switch and the supplemental braking system will apply the towed vehicle’s brakes to safely bring the vehicle to a stop and prevent a runaway that could possibly impact another vehicle.

I recall one incident I experienced where a supplemental braking system with breakaway device saved me from some major damage. I had recently rebuilt my towbar and decided to replace my locking towbar and hitch pin set while I was at it. Shortly after we left for a long trip and not more than an hour down the road, I heard and felt a large jerk on the back of the coach. I looked in my rearview camera and saw that our Jeep was following us about 10’ back from the coach. I knew that something had failed in the towbar, so I pulled over to the side of the road and got out to investigate. I saw that the main 5/8” hitch pin that holds the towbar into the coach’s hitch receiver had failed, allowing the tow bar to pull out of the hitch and drag along on the ground. The safety cables held and kept the Jeep behind me and the breakaway cable applied my M&G supplemental braking system on the Jeep, keeping it at a distance from our coach. Had I not had a breakaway system, our Jeep would undoubtedly have plowed into the back of our coach once I attempted to slow down, damaging both the front of the Jeep and the rear of the coach. Our safety cables were stretched beyond being useable but I had kept the old set of locking hitch pins and a spare set of safety cables along, so I replaced them, reconnected the towbar and happily went on our way with no damage to either vehicle.

Types of Supplemental RV Braking Systems

Supplemental braking systems are available in several different versions. Some systems are portable and can be taken out of the vehicle when not needed while other systems are permanently installed into the vehicle. In either case, these systems will provide supplemental braking ability to the towed vehicle. Both methods have pros and cons so let’s look at the differences and see which method works best for you.

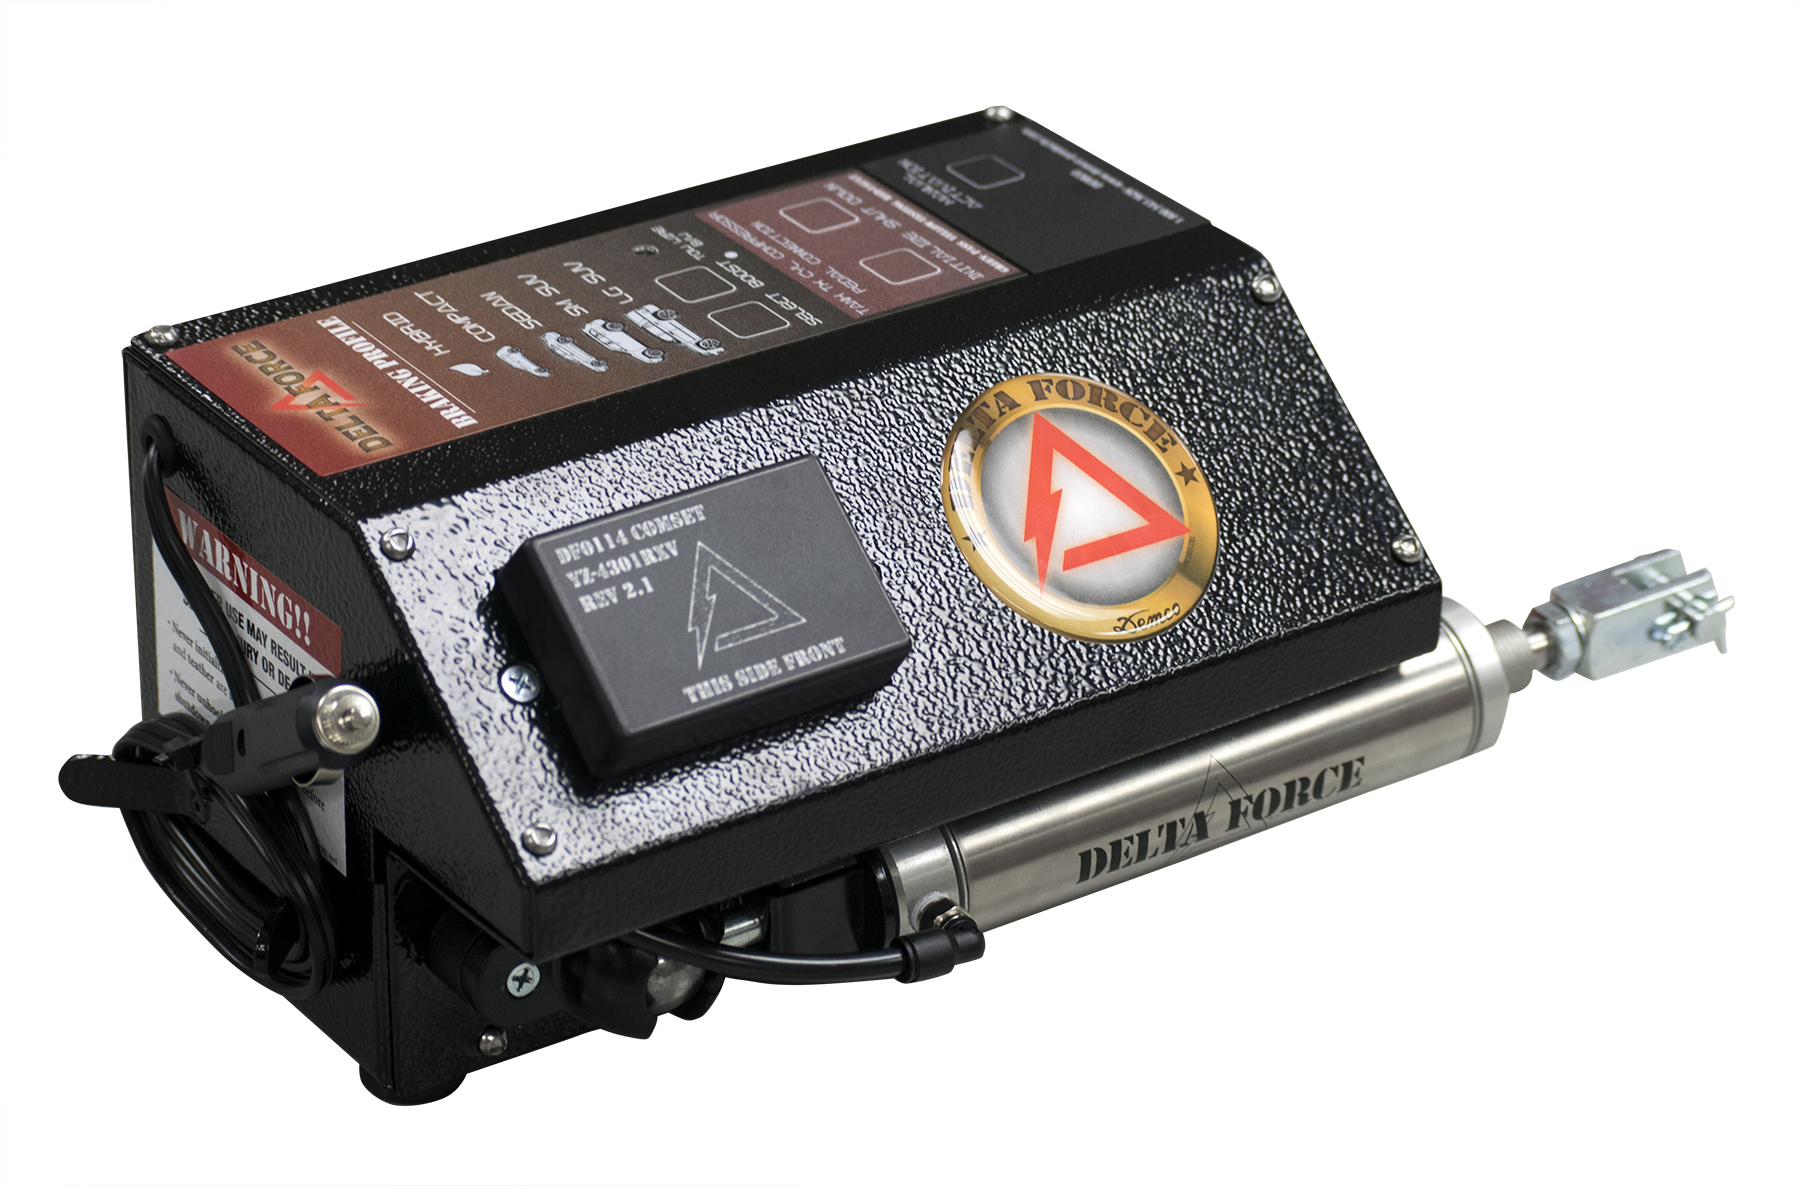
National-Indoor-RV-Centers-blog-supplemental-rv-braking-systems-for-class-a-coach-or-motorhome-demco-delta-force-portable-braking-system

Demco’s Delta Force is a portable system.

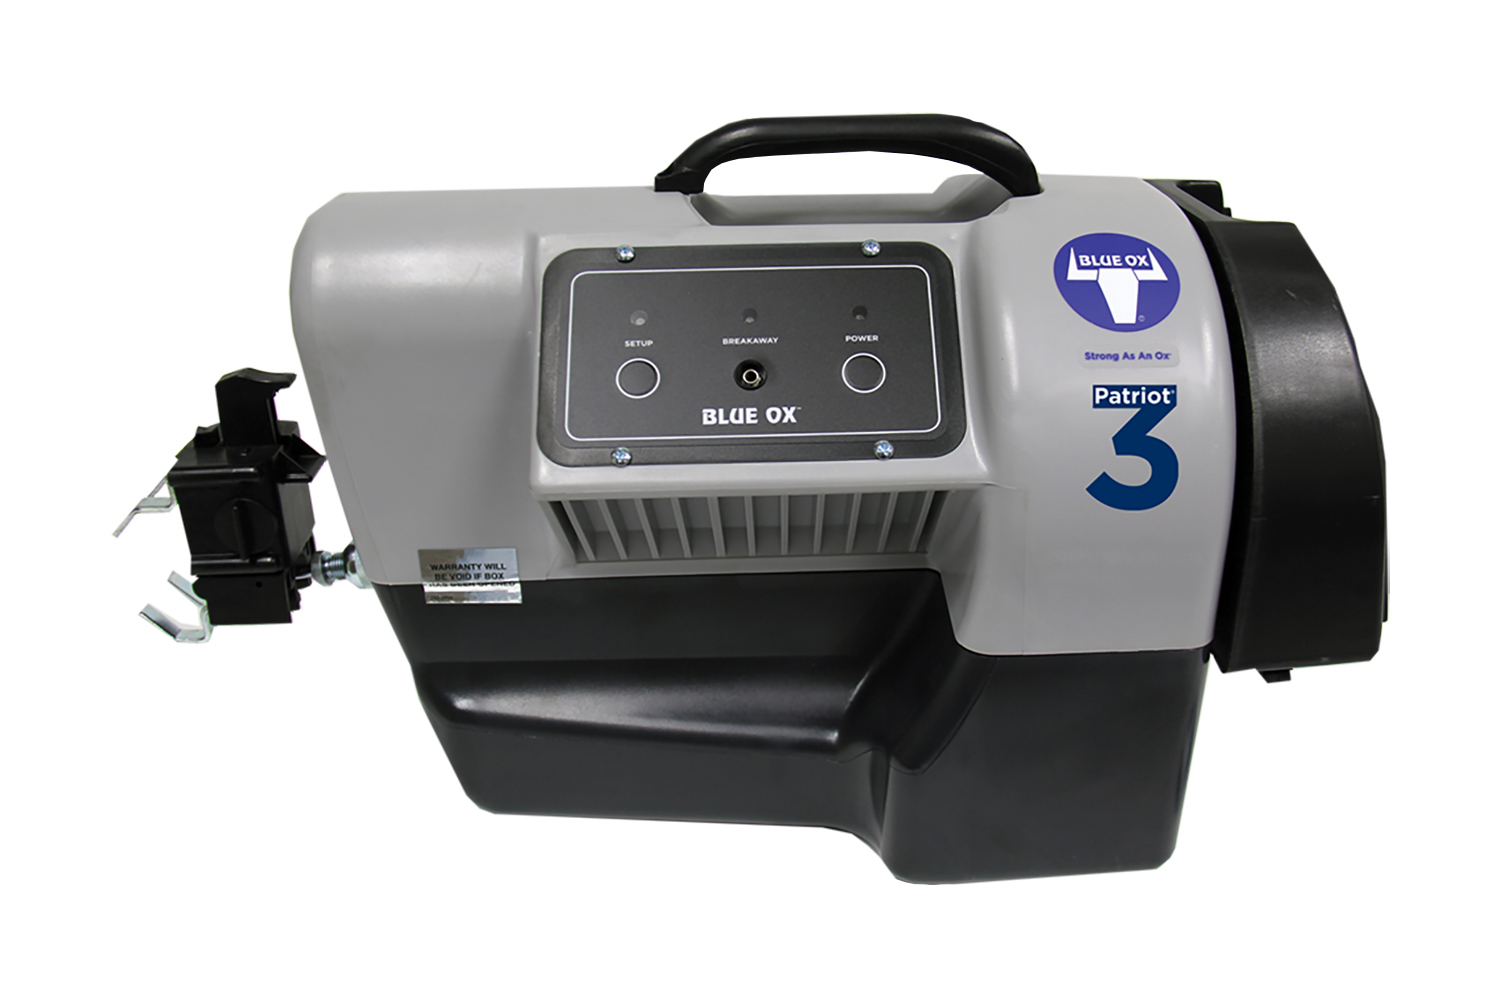
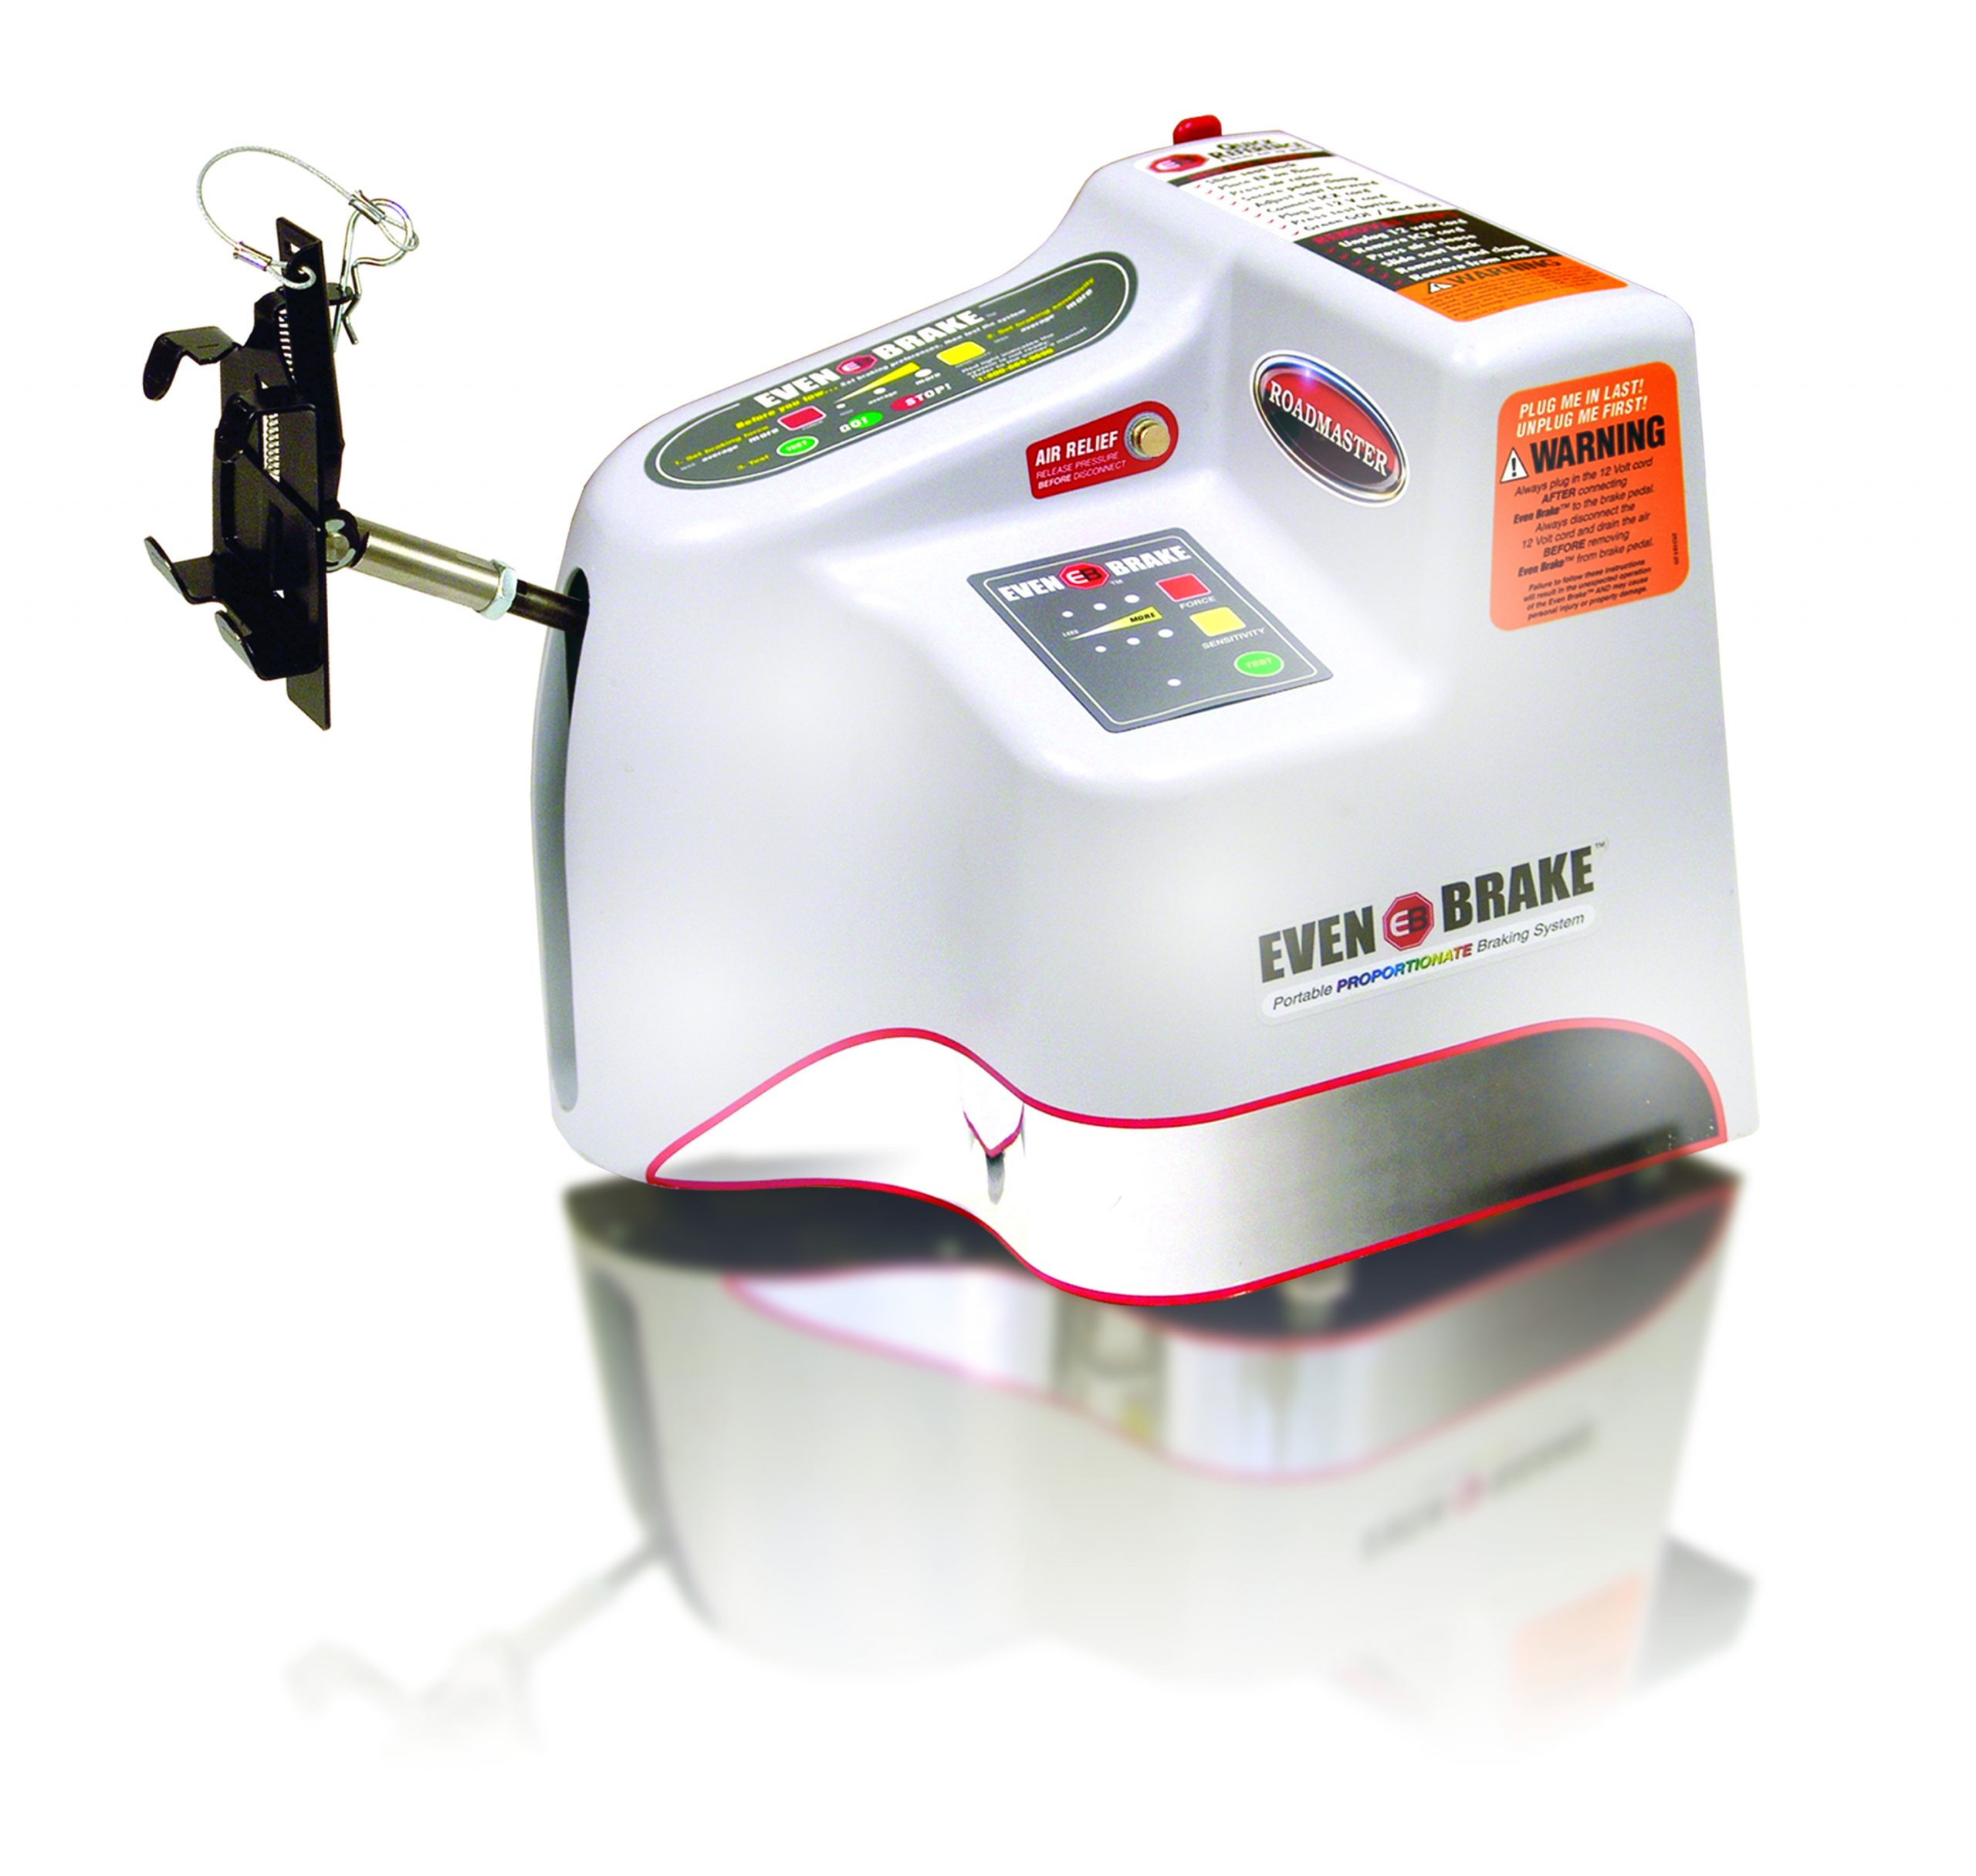
Portable systems are placed upon the floor of the driver’s footwell. They operate by actuating an arm that clamps onto the brake pedal. These units use 12-volt battery power to actuate the arm that connects to the brake pedal and use decelerometers to detect when the vehicle is decelerating. The main module is a box that contains the mechanism and sensors and rests on the floor, but generally must be placed against the driver’s seat so that the box stays in place when the brake pedal arm extends so that the box doesn’t move instead. Some of these systems may have additional brackets to help keep it from sliding while others simply rely on the seat cushion to prevent it from moving rearward when the brakes are applied. If you want a portable, you’ll have to consider how soft your seat cushion is and whether that will affect your choice of portable braking system. Popular systems are available from a number of manufacturers, such as Blue Ox’s Patriot 3 system, Brake Buddy’s Classic 3 and Select 3 systems, Roadmaster’s Even Brake system and Rvibrake’s Rvibrake 3.

National-Indoor-RV-Centers-blog-supplemental-rv-braking-systems-for-class-a-coach-or-motorhome-blue-ox-patriot-3
National-Indoor-RV-Centers-blog-supplemental-rv-braking-systems-for-class-a-coach-or-motorhome-roadmaster-even-brake

Blue Ox offers the Patriot 3, which is a portable unit that is placed on the driver’s footwell and connects to the brake pedal. It can easily be removed and stored or transferred to another vehicle.

Roadmaster’s Even Brake is another portable braking system that can easily be transferred from one vehicle to another.

Another caveat to a portable system is that they still do require some installation, so you can’t just drop it into any vehicle and expect it to work. You will need to mount a breakaway switch to the front of your vehicle and run its wires back to the footwell where they will plug into the brake controller. You’ll also need to provide a 12-volt power receptacle to plug the unit into. Many cars will have a 12-volt receptacle that is connected to the ignition key switch. That won’t work because the receptacle will not have any power when you are towing. You may have to install a constant-hot receptacle someplace in your dash area.

While these installation tasks are minor compared to a system that is permanently installed, you still have to deal with setup every time. This begins by placing the unit on the floor and connecting the clamp on the arm to the brake pedal. Then plug in the breakaway wires and power cord and position the unit so that it can’t move backward when the brakes are applied. You may also have a calibration routine to go through, depending on the manufacturer of your braking system. Once you are done towing you will have to disconnect the wires, remove the clamp from the brake pedal and find someplace to store the system.

The last consideration is that these systems use sensors to sense when the vehicle is decelerating because there is no communication between the towed vehicle and the coach. If you are using the coach’s Jake brake to slow down when descending a downgrade, the supplemental system will unnecessarily apply the brakes on the towed vehicle because it assumes you are braking. This can result in excessive wear and heat buildup when traveling in the mountains.

National-Indoor-RV-Centers-blog-supplemental-rv-braking-systems-for-class-a-coach-or-motorhome-nsa-ready-brake

NSA’s Ready Brake mounts to your hitch receiver and acts as a surge brake with your tow bar.

A system that is permanently installed takes a bit more labor to install but, once installed, it’s pretty much a hands-off forget-about-it system. The simplest is NSA’s ReadyBrake, which is permanently attached to the towbar. This is basically a surge brake system that senses the forward pressure of the towed vehicle under braking. As the module moves, it pulls on a steel cable that runs through the towed vehicle’s engine compartment to the area around the brake pedal. This cable attaches to the brake pedal and applies pressure to the pedal in response to the pressure applied to the towbar mounted actuator.

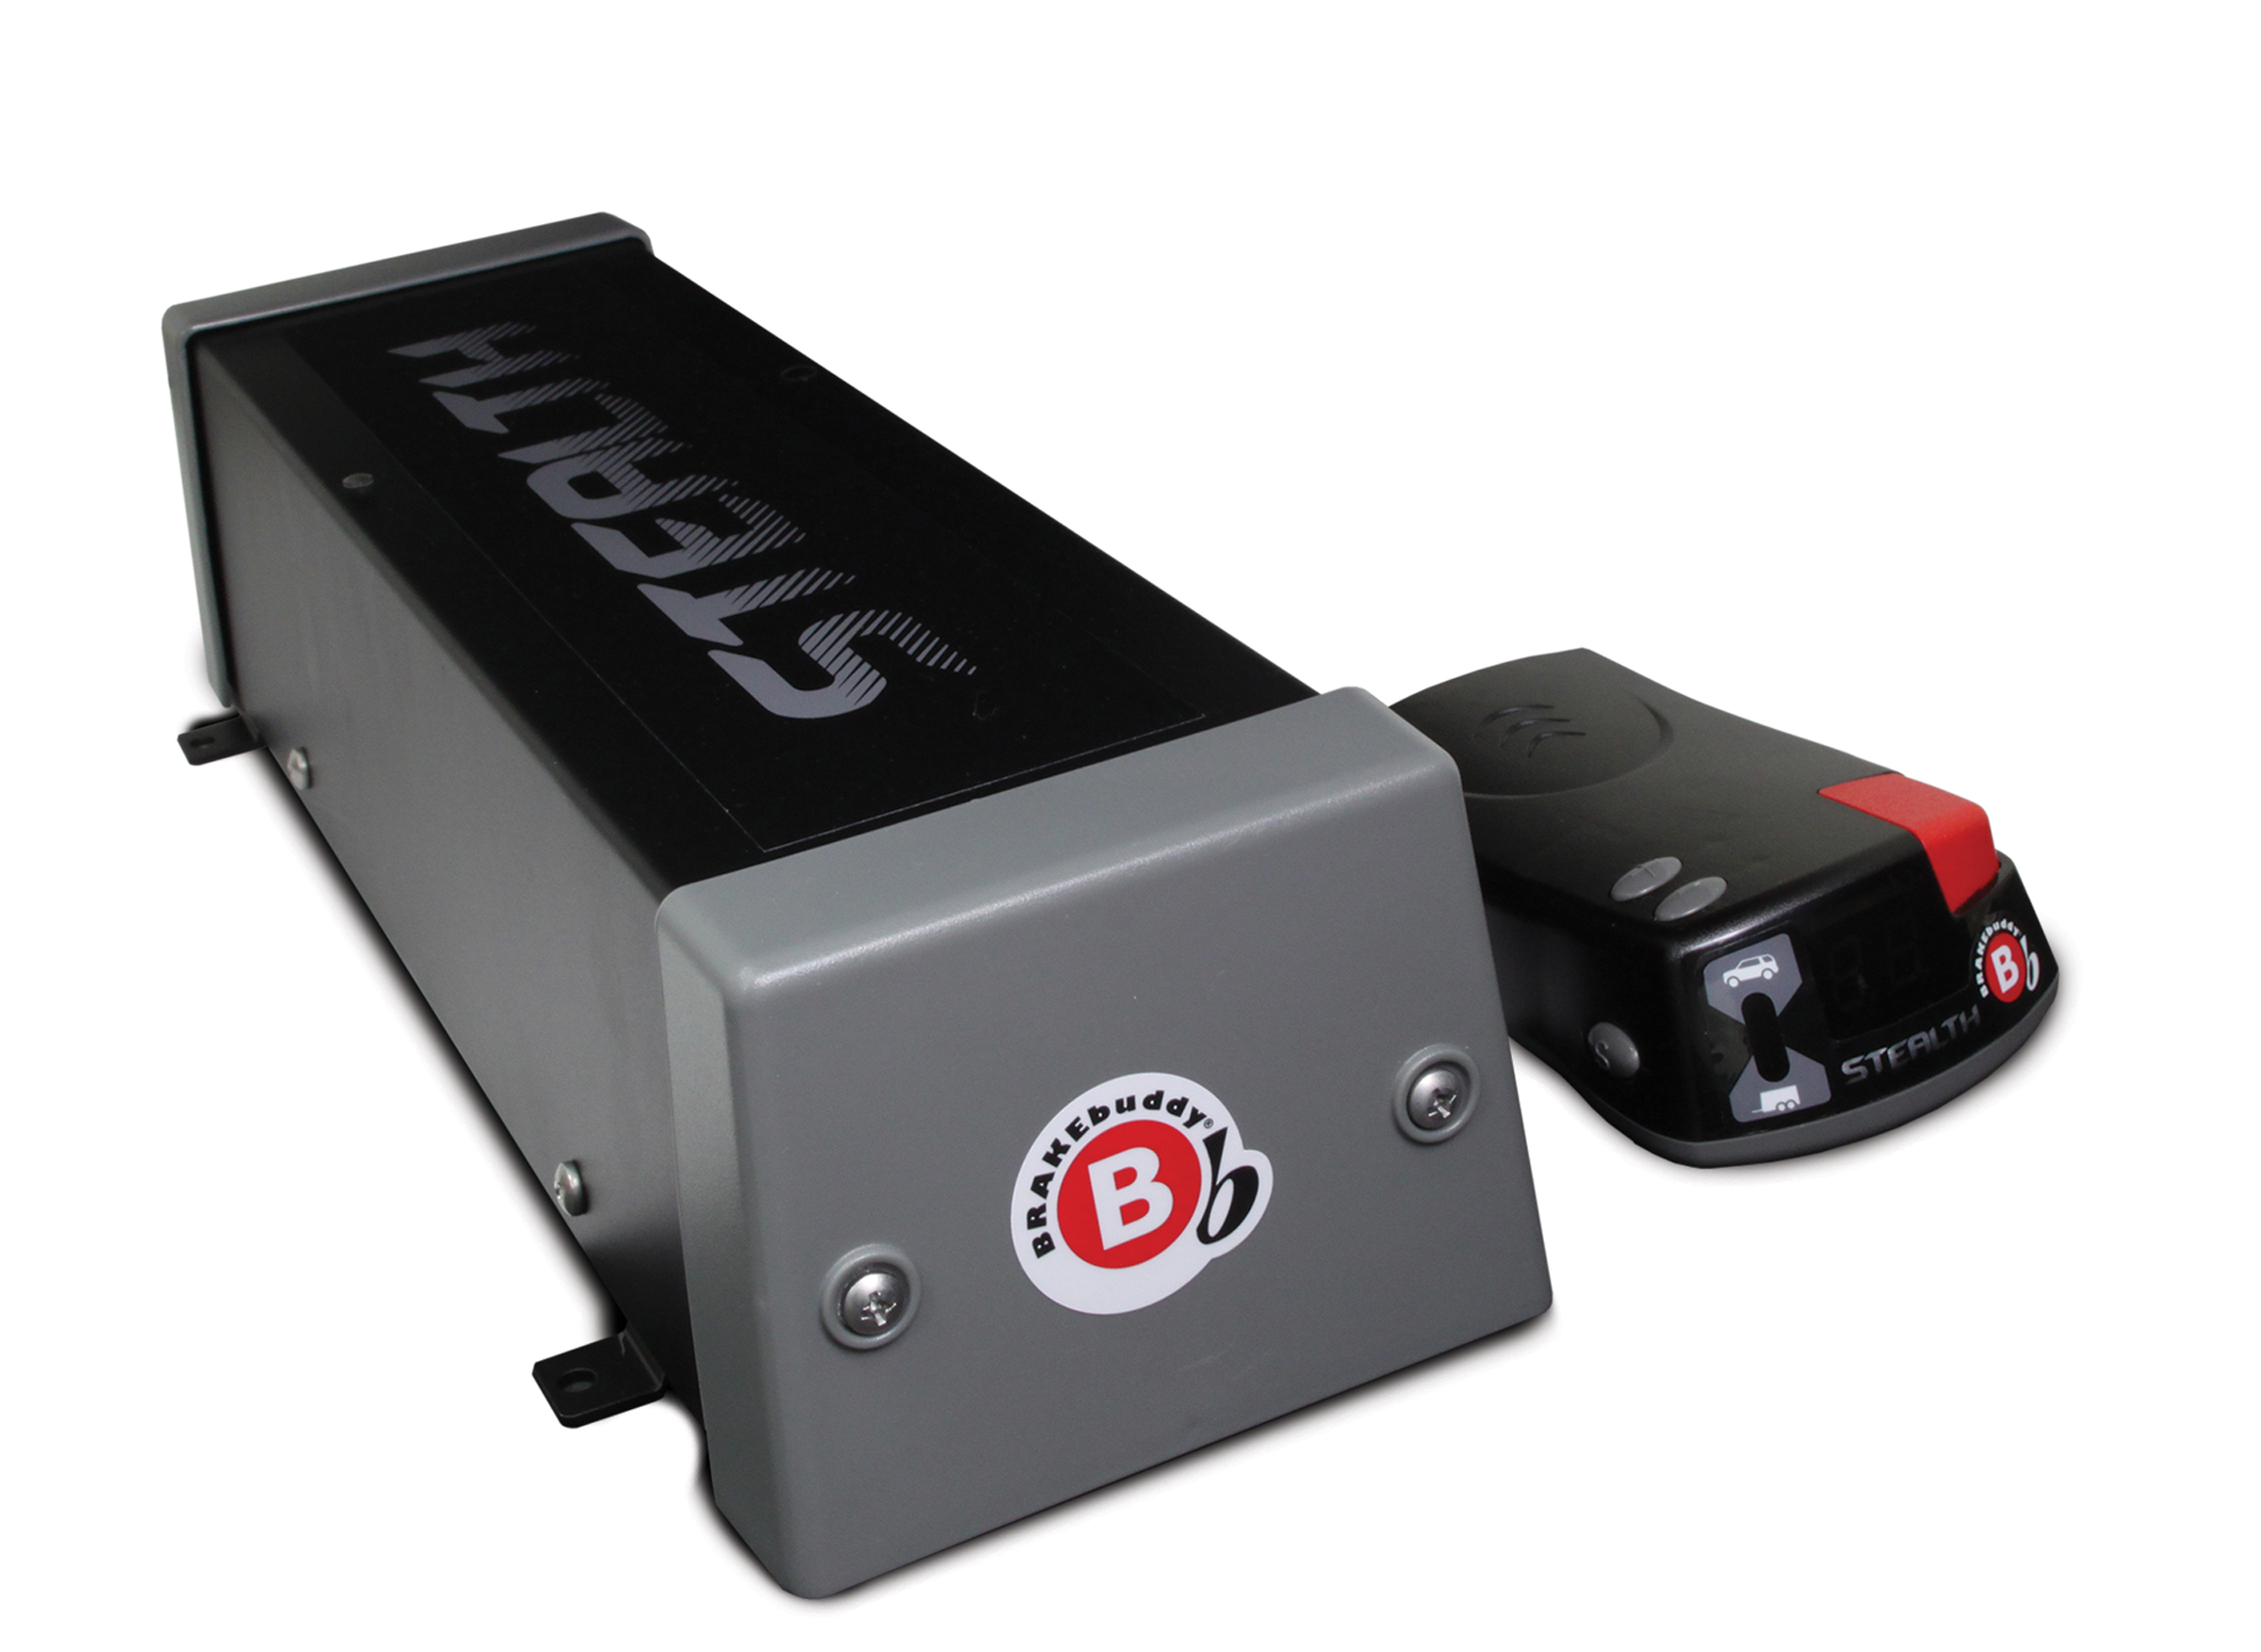
A number of popular systems are available for gasoline powered motorhomes. These use an actuator that attaches to the towed vehicle’s brake pedal, generally via a cable. The cable is behind the brake pedal so it doesn’t get in the way when driving the vehicle. Most use a decelerometer sensor to sense the rate of deceleration but are also connected to the motorhome’s brake light switch so that the brakes will only apply when the driver steps on the brake pedal in the motorhome, preventing any brakes from dragging when descending steep grades. Common systems include Brake Buddy’s Stealth system which is a dual-mode system that can also use the cockpit-controlled module to actuate trailer brakes as well as towed vehicle brakes.

National-Indoor-RV-Centers-blog-supplemental-rv-braking-systems-for-class-a-coach-or-motorhome-brake-buddy-stealth-dual-mode-braking-system

Brake Buddy’s Stealth is a dual mode system that can be used to activate trailer brakes as well as towed vehicle brakes.

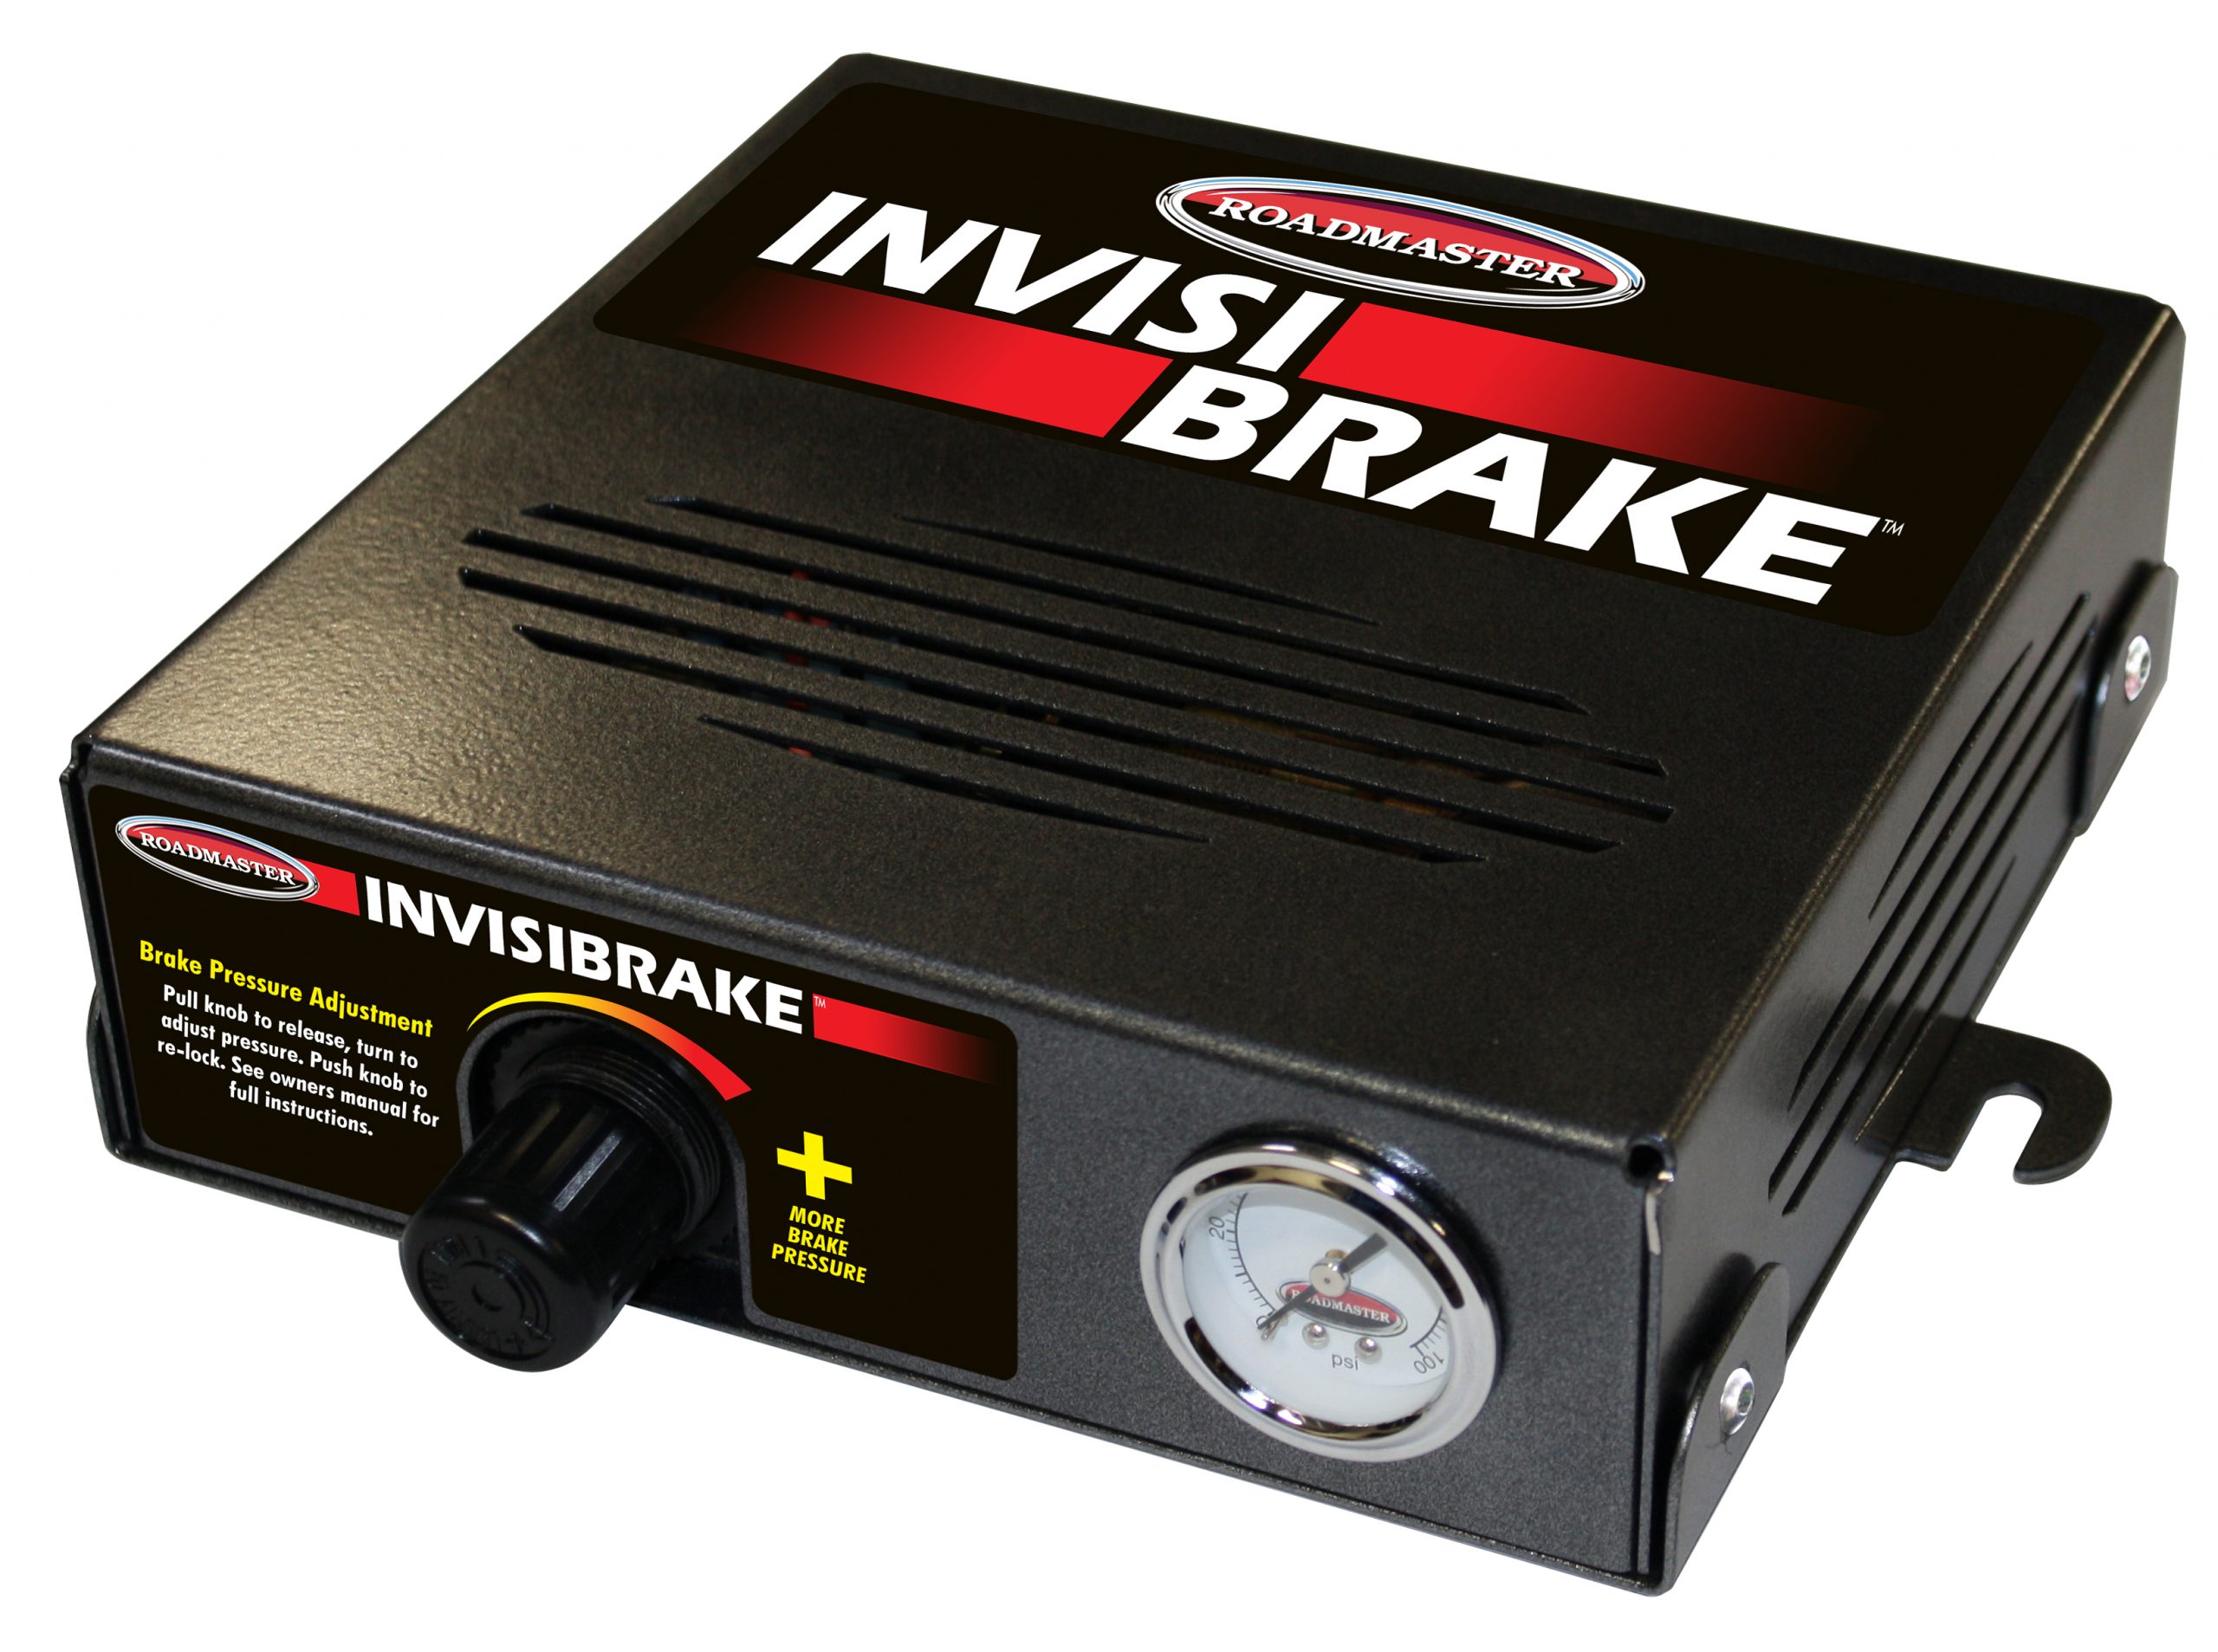
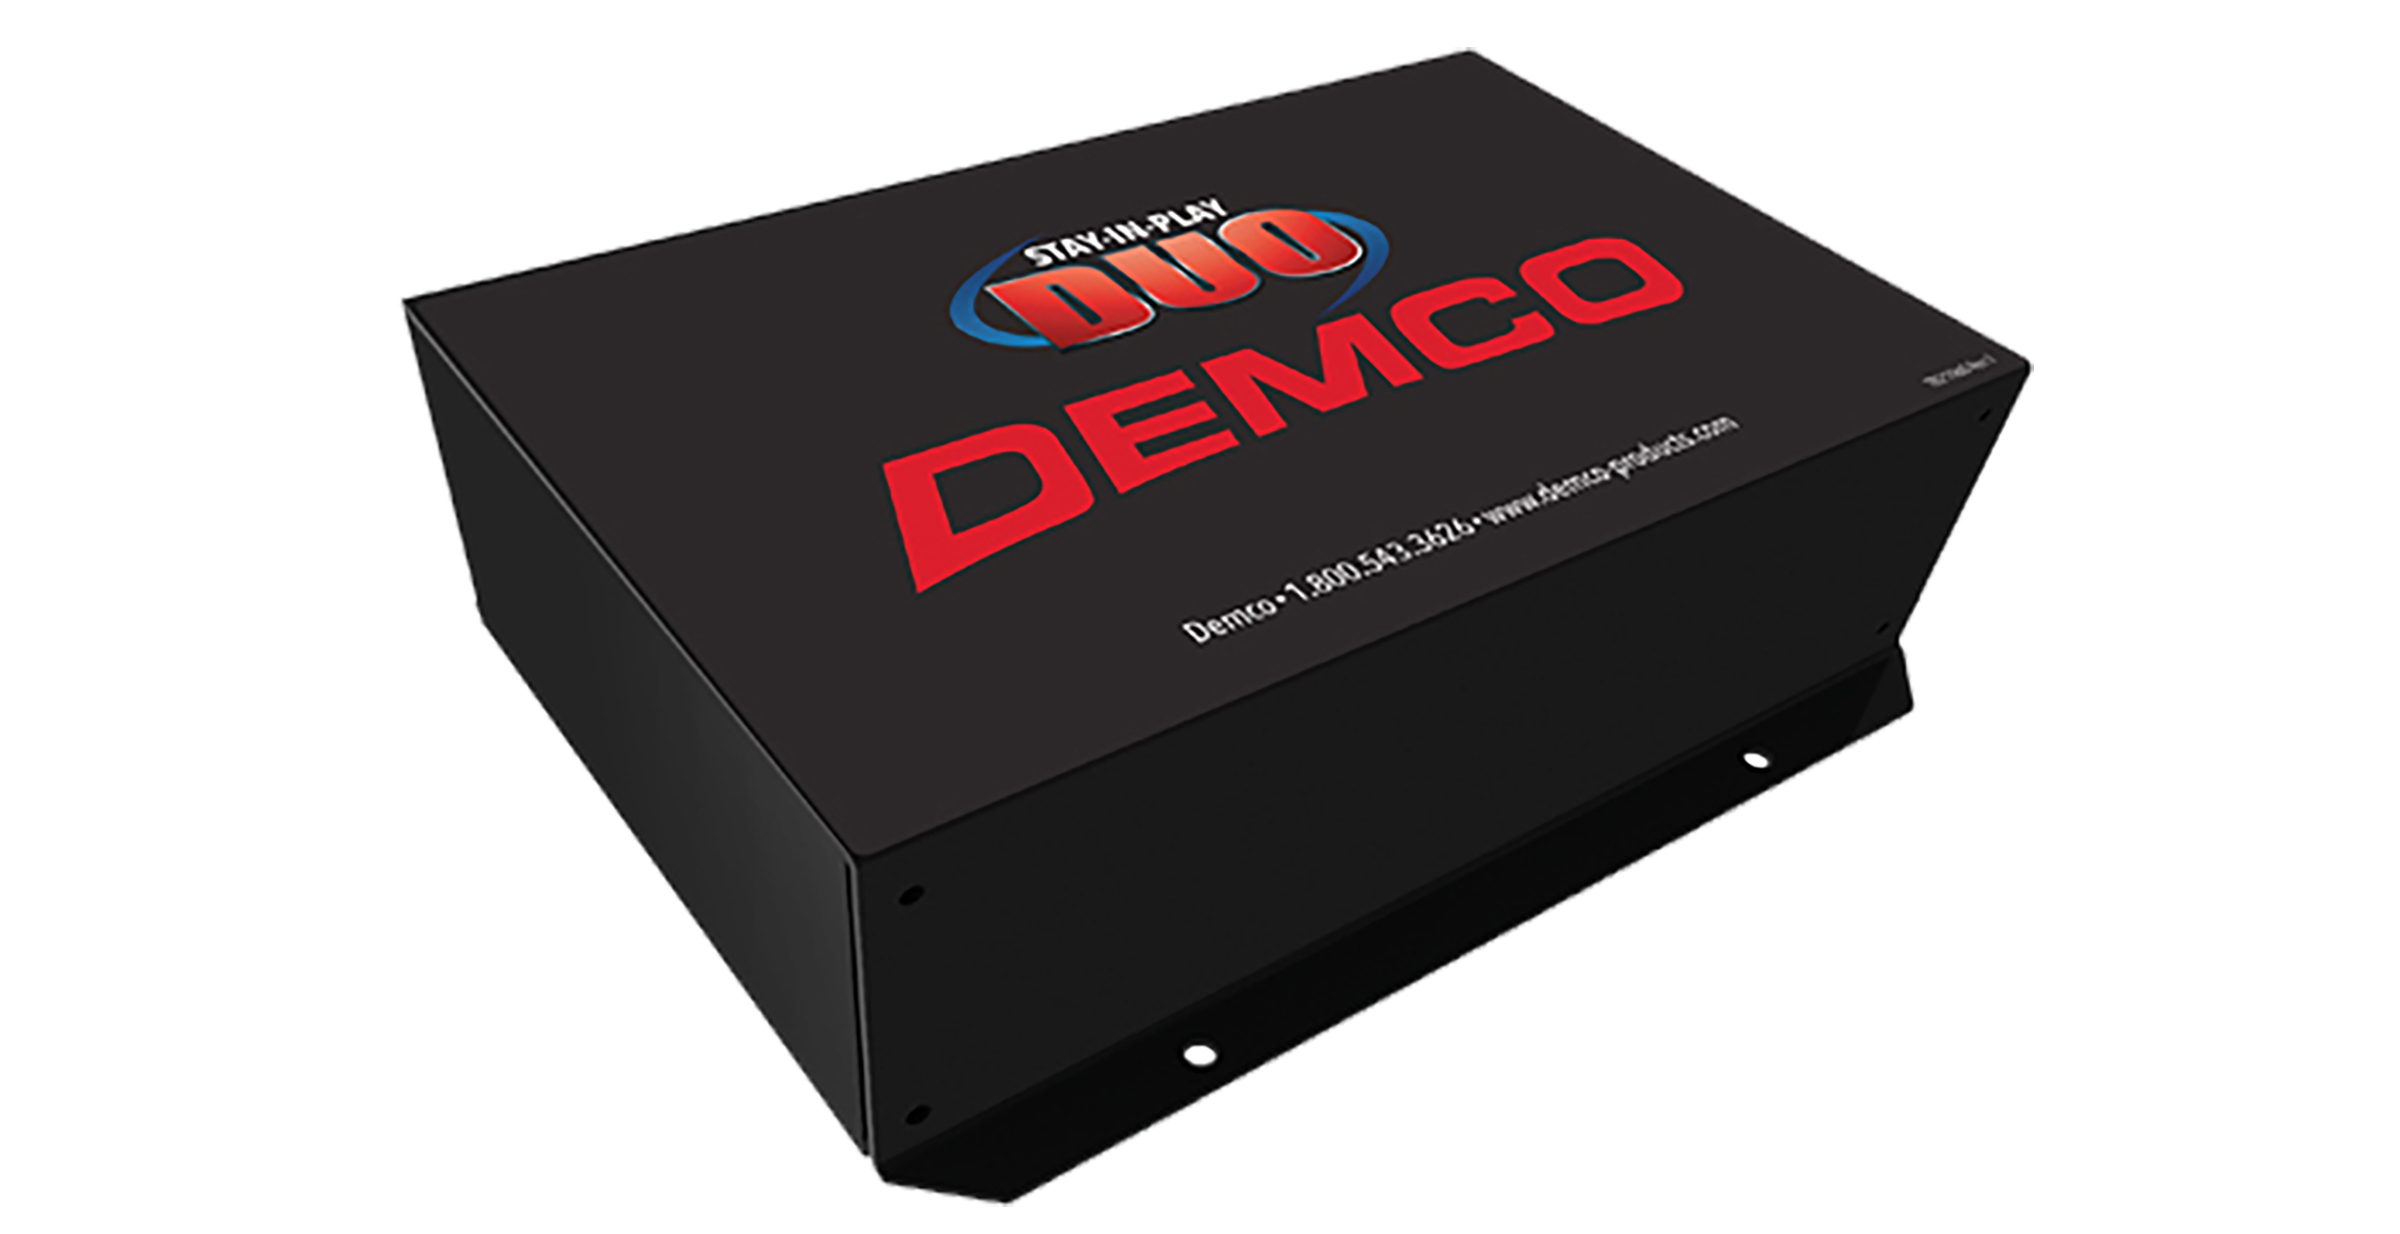
Other systems are Roadmaster’s InvisiBrake and Demco’s Stay-In-Play Duo. These systems can be used on diesel powered coaches as well, but they lack the true proportional braking available from a system that is designed for a coach with air brakes.

National-Indoor-RV-Centers-blog-supplemental-rv-braking-systems-for-class-a-coach-or-motorhome-roadmaster-invisibrake
National-Indoor-RV-Centers-blog-supplemental-rv-braking-systems-for-class-a-coach-or-motorhome-demco-stay-in-play-duo

Roadmaster’s Invisibrake is an excellent choice for coaches with hydraulic brakes. The controller can be mounts in any location and once set, does not need any further interaction.

Demco’s Stay-In-Play Duo utilizes a small module that mounts in the engine compartment and utilizes a cable attached to the brake pedal arm to operate the brakes. It’s a good choice for coaches with hydraulic brakes.

With a diesel-powered coach that has air brakes, you have lots of choices. If you recently upgraded from a gasoline-powered motorhome to a diesel pusher, you can continue to use your existing towed vehicle’s braking system. Or, you can upgrade to a pneumatic system that utilizes the air pressure from your coach’s air brake system to apply the brakes on the towed vehicle. The biggest benefit is that you can now get true proportional braking because the brakes on the towed vehicle will apply in the same amount and at the same time as the brakes on the motorhome. The harder you step on the coach’s brake pedal, they harder your towed vehicle’s brakes will apply. You can now coast and descend grades without any worry about prematurely applying or dragging the towed vehicle’s brakes.

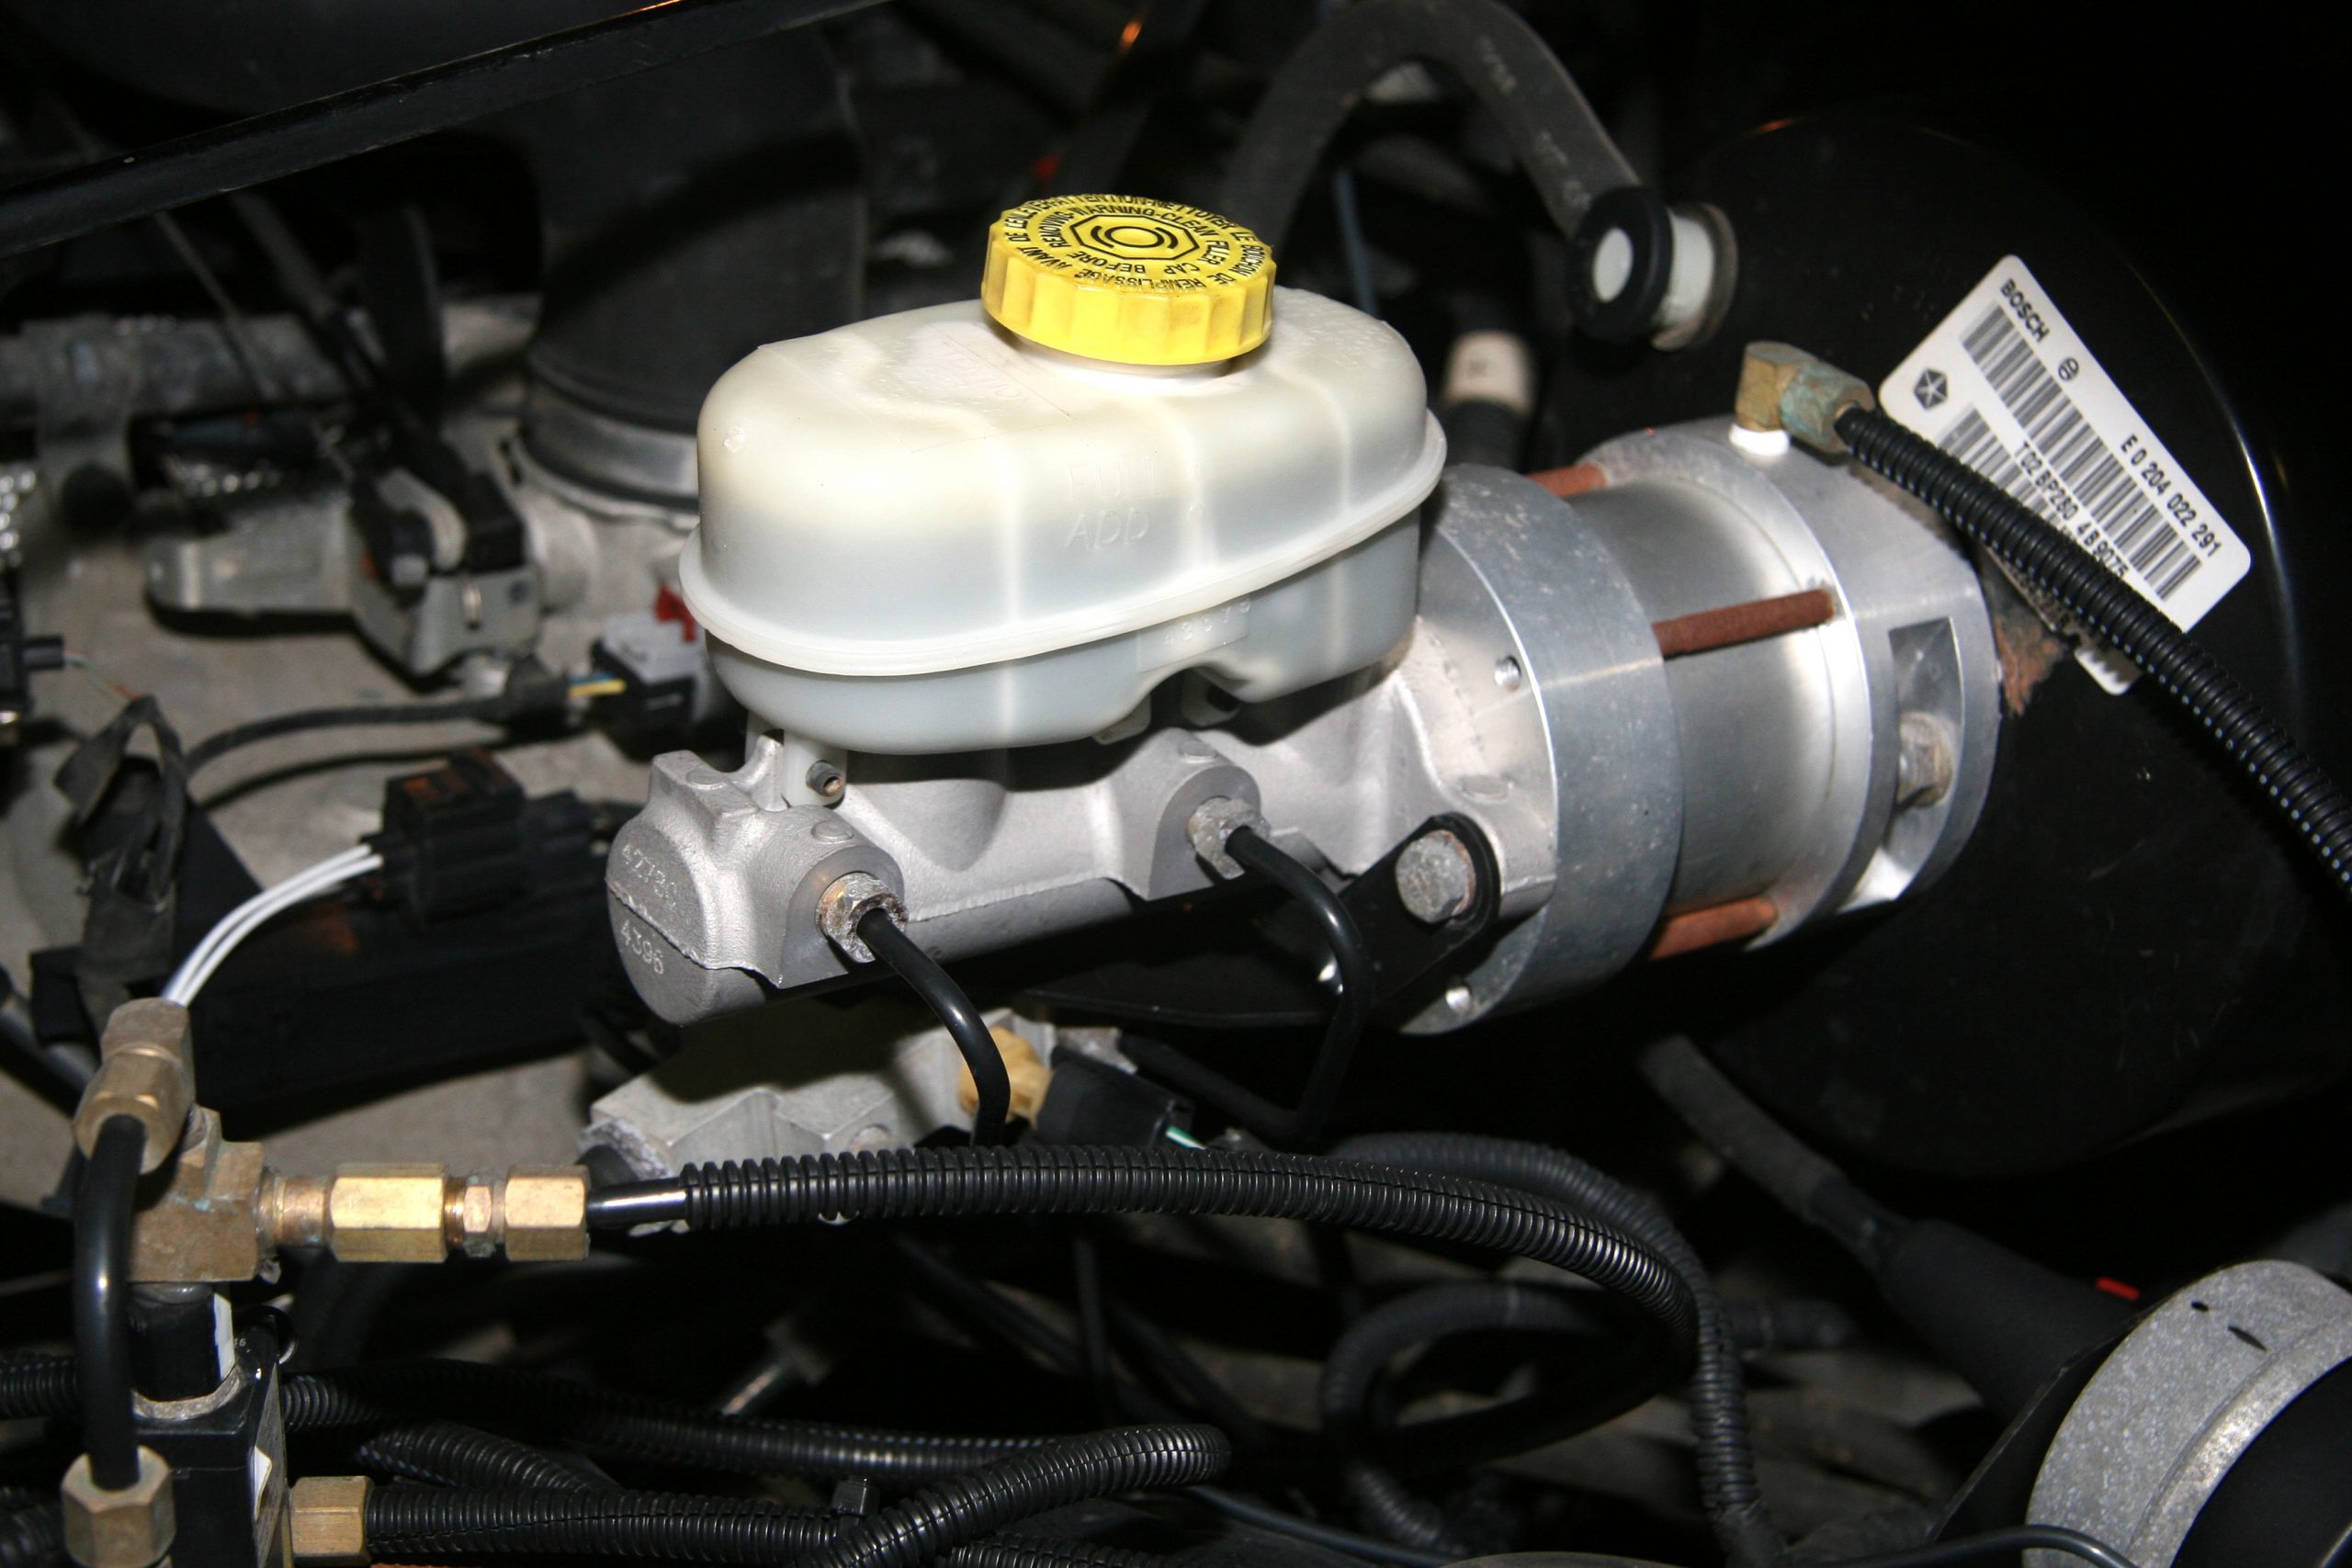
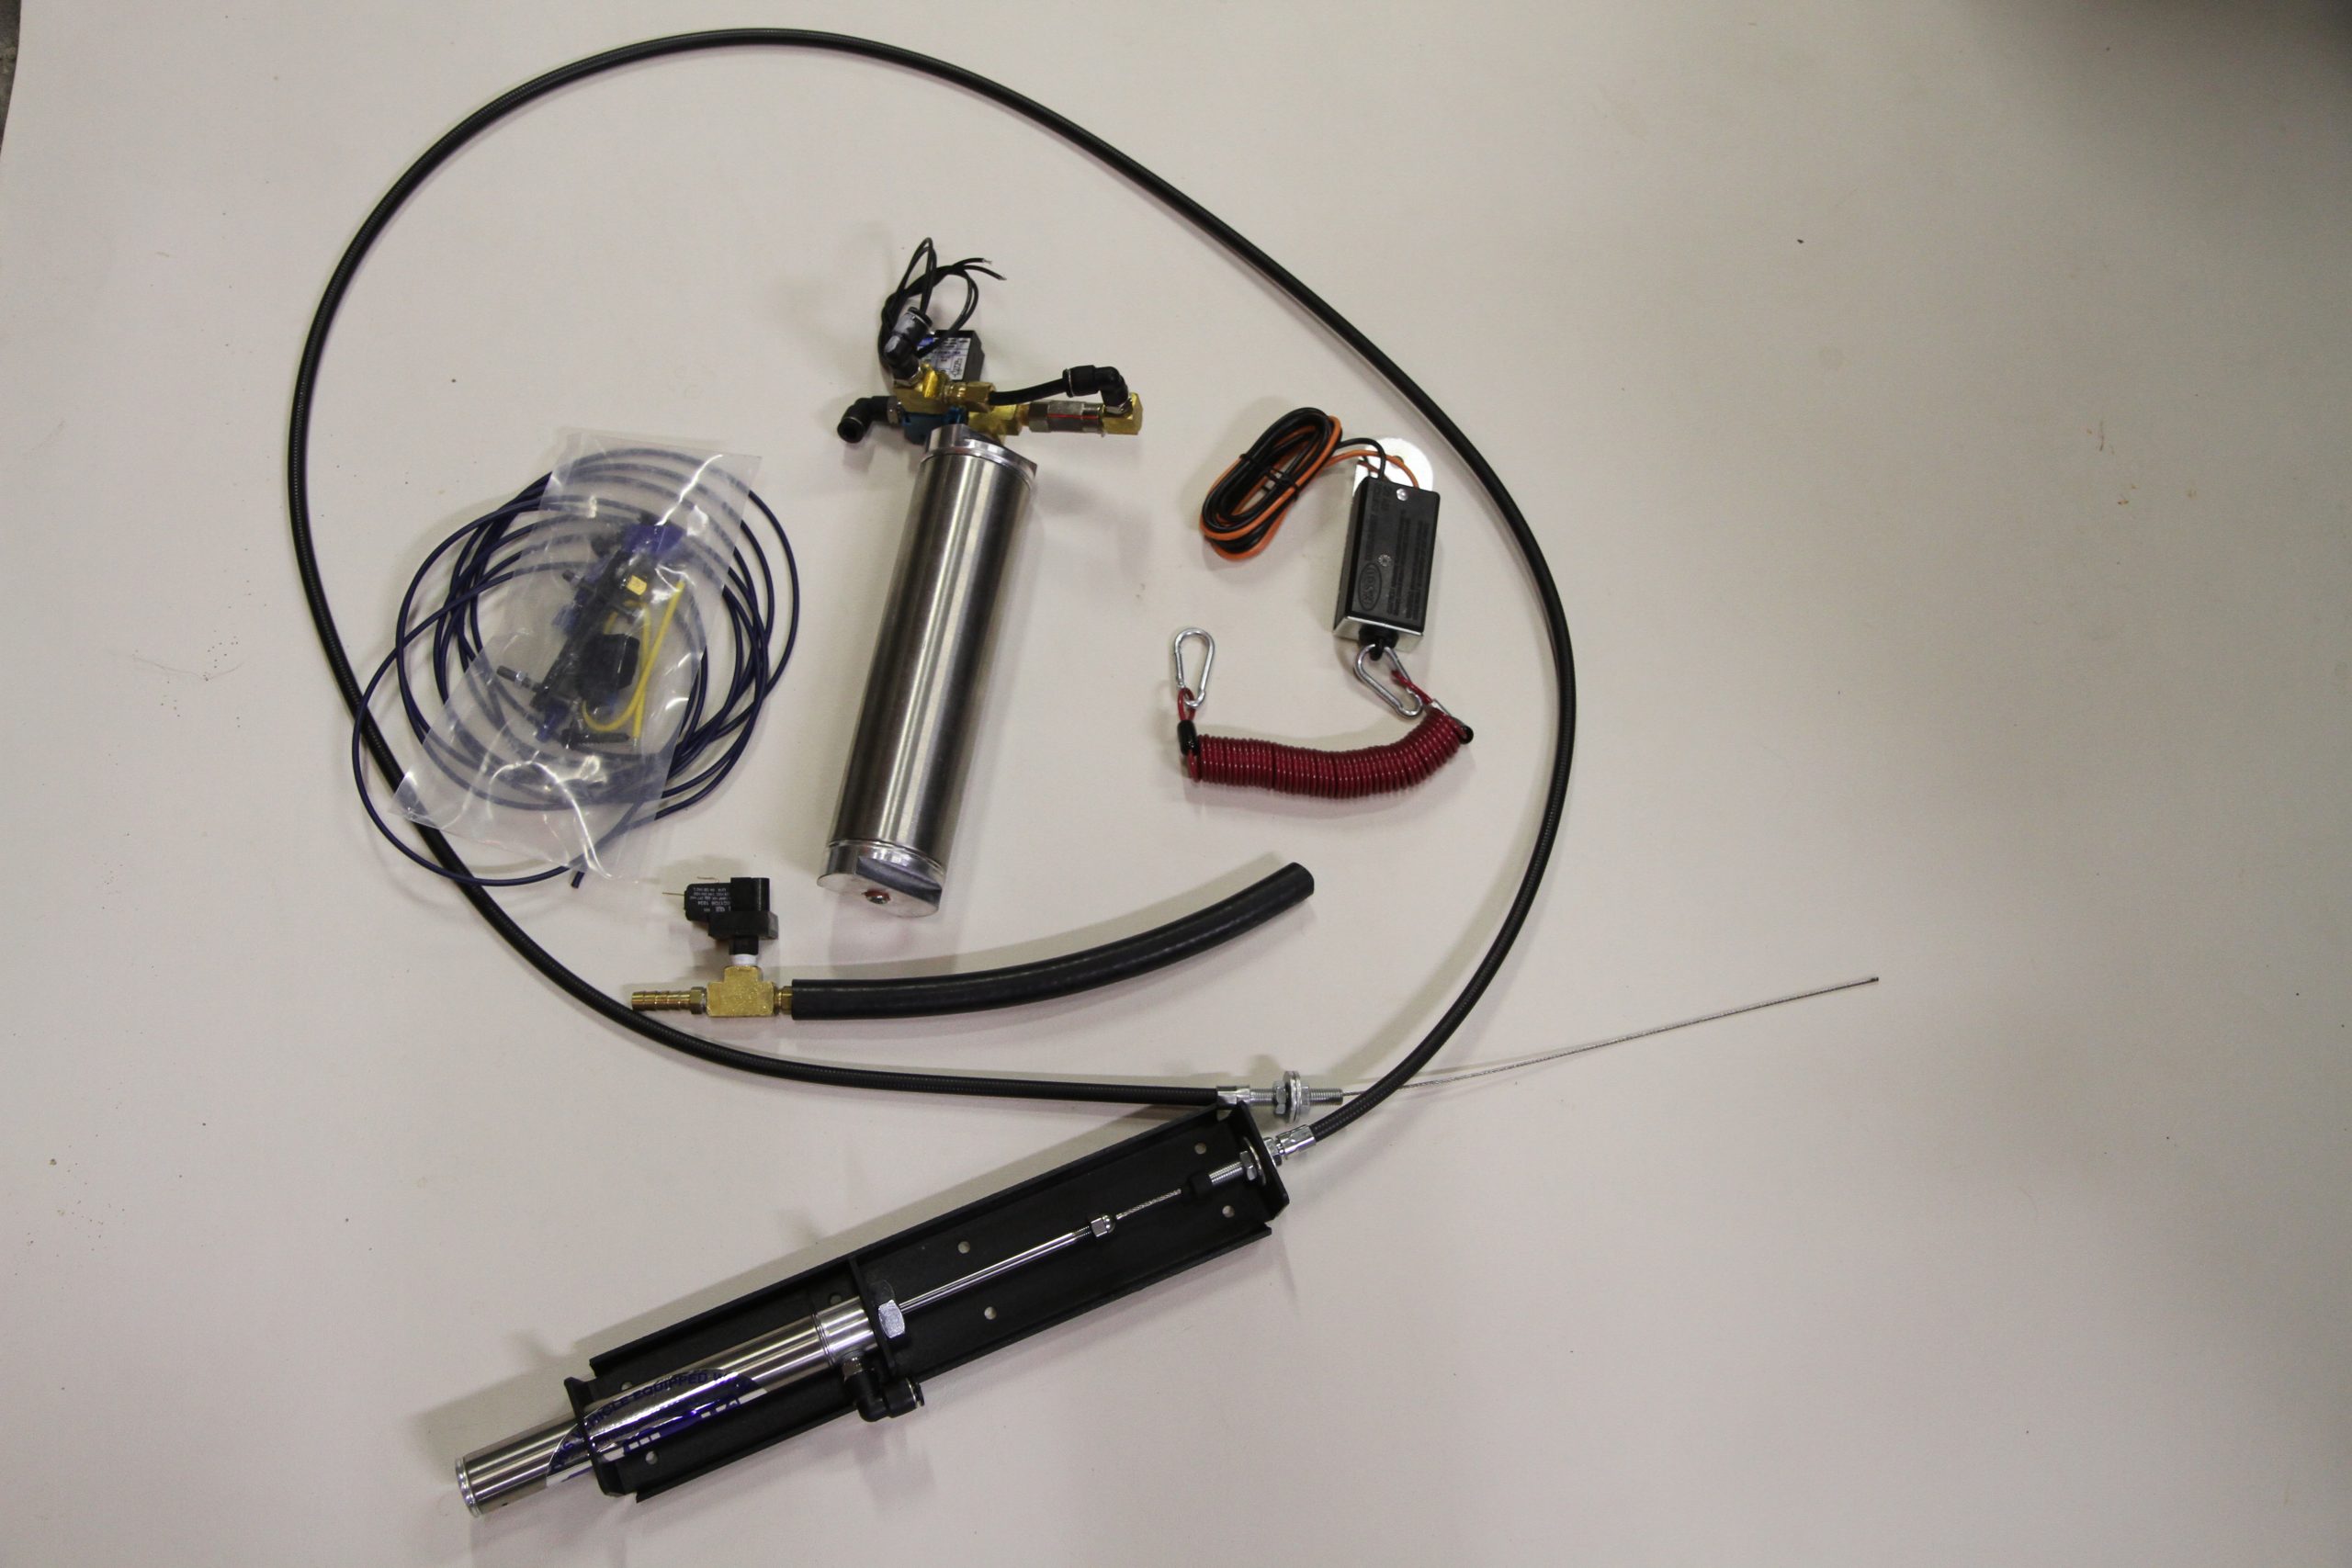
These systems involve the installation of a module under the hood that generally actuates a cable that pulls on the back side of the brake pedal arm. This module connects to 12-volt battery power to operate the breakaway valve and in some cases will operate a vacuum pump to provide a source of vacuum to the brake booster behind the master cylinder so that the power brakes are in operation. A pair of wires runs to the front of the vehicle and connect to the breakaway switch while a small air hose also runs to that area to serve as a connection to the coach’s air brake system. In addition to the usual trailer light umbilical, a steel cable for the breakaway switch and an air hose are also used to connect to the rear of the coach.

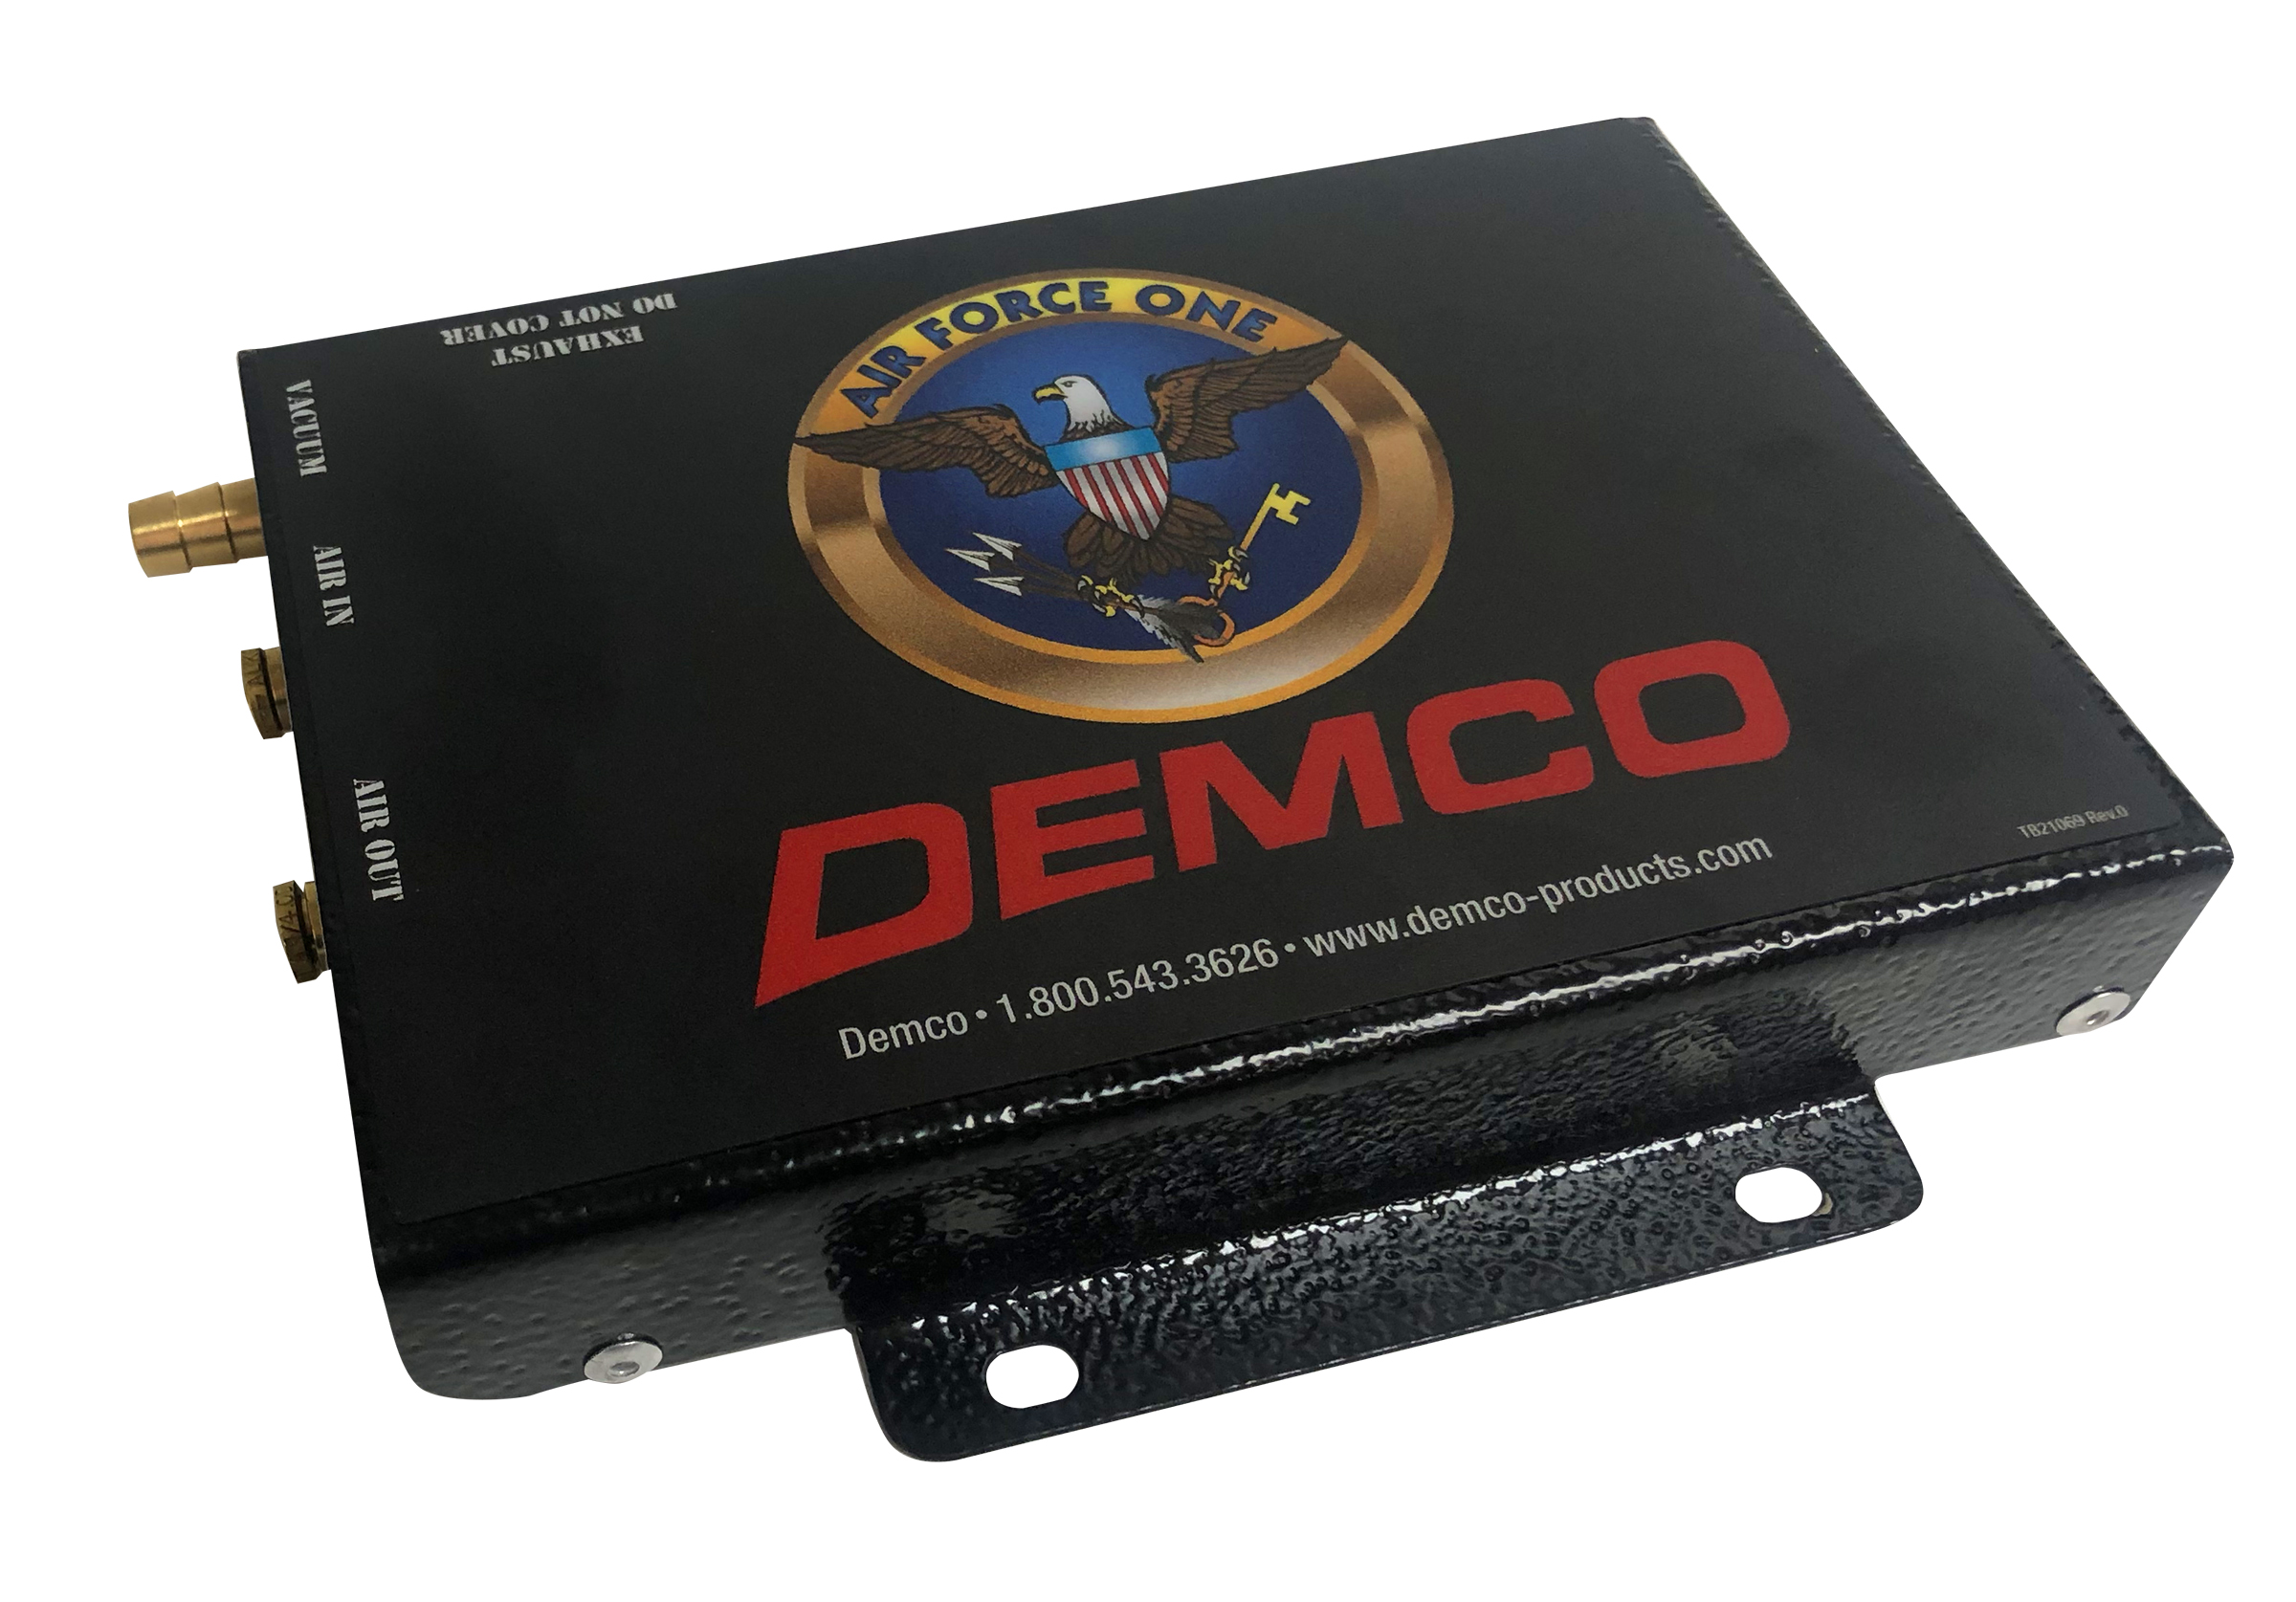
Some diesel pushers come from the factory prepped for supplemental braking systems and have a quick disconnect coupler at the rear of the coach. If not, you can get a DOT approved kit to allow your diesel chassis to do that. You can’t simply tee into a brake line some place or you may risk a loss of brake pressure on the coach should the air hose to the towed vehicle fail. These systems will add a small air tank and the necessary valves to isolate the towed vehicle’s supplemental braking system from the coach’s brake system to prevent any failure from affecting the braking of the coach. The most popular pneumatic true proportional systems are the M&G Tow Brake and Demco’s Air Force One.

National-Indoor-RV-Centers-blog-supplemental-rv-braking-systems-for-class-a-coach-or-motorhome-demco-air-force-one
National-Indoor-RV-Centers-blog-supplemental-rv-braking-systems-for-class-a-coach-or-motorhome-smi-air-force-one-central-controller-unit

Demco’s Air Force One uses a compact air operated cylinder that is connected to the brake pedal arm and uses the coach’s air supply to operate.

SMI’s Air Force One has a central controller unit that operates the air cylinder.

Note that either of these systems can be used on a gasoline-powered coach but it requires the purchase of an installation kit which includes a 12-volt air compressor that converts hydraulic brake pressure to pneumatic so that you can deliver true proportional air to the towed vehicle. These optional kits are a bit pricey but do give you true proportional braking and your towed vehicle will be ready for a diesel pusher if you decide to upgrade later on.

National-Indoor-RV-Centers-blog-supplemental-rv-braking-systems-for-class-a-coach-or-motorhome-m&g-tow-brake-module
National-Indoor-RV-Centers-blog-supplemental-rv-braking-systems-for-class-a-coach-or-motorhome-m&g-2.0-tow-brake

The original M&G Tow Brake is completely contained within the towed vehicle’s engine compartment and uses coach air pressure to provide true proportional braking. The module is inserted between the vacuum booster and brake master cylinder for failsafe operation.

The M&G 2.0 Tow Brake uses a remote air cylinder with cable to operate the brake pedal.

Selecting the correct system will depend on your needs. If you tow multiple vehicles and don’t mind living with the lack of true proportional braking and storage issues, then a portable system might be your best choice. If you want an “install once and forget about it” system, a permanently installed system should be your choice. If you are reasonably talented, you might make this a DIY installation but if not, you’ll want to have it done correctly by a certified chassis tech, such as those at National Indoor RV Centers. Electrically operated systems can be used on both gasoline- or diesel-powered coaches while pneumatic systems that tap into your coach’s air brake system can give you true proportional braking that will match the application of your coach brakes and prevent any false readings that can occur from inertia sensors used on many electrically operated systems.

Regardless of which system you prefer, it’s important to have a good supplemental braking system with a breakaway switch to be safe when towing. Towing without one is dangerous and is tantamount to driving without insurance and throwing out all your fire extinguishers. It’s just not an area to ignore.

National Indoor RV Centers blogger Mark Quasius profile picture

Mark Quasius is the founder of RVtechMag.com, the past Midwest editor of RV Magazine, writes for numerous RV-related publications and a regular Contributor to FMCA’s Family RVing Magazine. Mark and his wife Leann travel in their 2016 Entegra Cornerstone.

RV Electricity

RV Electricity

Understanding the basics of RV electrical systems is important to every RV owner. The electrical system of a motorhome can be quite complex, involving 12 volt DC battery power as well as 120 volt AC power. It’s unavoidable that issues will occur from time to time but many of these can easily be corrected by the RV owner with a basic understanding of electricity. Without this knowledge it can be a daunting task to track down and correct any electrical issues but knowledge is power (pun intended) so this tutorial will help you to better understand how your motorhome functions by teaching you the basics of electricity and how to apply that to your motorhome. 

AC vs. DC in RV’s

It’s important to know the difference between AC and DC power when working with your RV electrical system. AC, alternating current, and DC, direct current, both work together to power your RV. While the AC system is powered by an AC power source, the DC system runs off one or several battery systems installed in your RV. The AC system powers appliances like microwaves, air conditioning, and any power outlets, whereas the DC system powers your water, fans, lights, and TV. Generally, the AC system can generate more power than the DC system because of the RV battery limitations. 

RV Split Phase

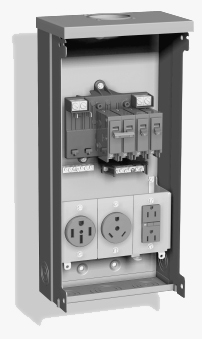
Most larger motorhomes now come with a 50 amp service while older motorhomes came with 30 amp services, as do many of the smaller towable RVs. Over the years a lot of amenities have been added to motorhomes. As washer-dryers, multiple air conditioners, larger refrigerators and other large accessories are added the power requirements also increase. But not every RV park has upgraded their electric supply to accommodate today’s electrical demands. Sometimes certain areas are set aside with 50 amp service while others still have 30 while some parks have upgraded their power grid properly. Because there needs to be compatibility with all RVs a multi-outlet pedestal is usually installed that will supply a 50 amp service, a 30 amp service, and even a 20 amp duplex receptacle for the smallest power requirements. A cutaway image of a typical power pedestal is shown below.

Power Pedestal

Power Pedestal

In the above pedestal image we can see three separate outlets. From left to right they are 50 amp, 30 amp, and 20 amp. Each receptacle has its own dedicated breaker sized for that particular outlet. This gives the RV owner the choice of choosing whichever outlet they need to best match their RV’s electrical service. 

Split-Phase Service

But, before we delve into the available services we first need to understand what a split-phase service is. 

120/240 Volt Split Phase service wiring diagram

When you create electrical power there is always a pair of windings in the generator that power is taken from. This is true whether it’s a small portable generator, a large diesel powered RV generator, or a huge megawatt generator at your local power utility. These two windings are connected together in series and a tap is run into their common center connection. 

In the above diagram we can see that the ends of these windings are identified as L1 and L2. The common center tap of these two windings is identified as N while L1 and L2 are the hot leads brought into your breaker panel at home and each is generally referred to as a “phase”. The N is the Neutral wire that goes to the neutral buss connection in your breaker panel. This is exactly the same way that your RV’s breaker panel is configured. If you put a voltmeter across lines L1 and L2 you’ll see 240 volts. But if you test L1 to N or L2 to N you’ll see 120 volts. Your breaker panel at home is wired so that every other slot is on a different phase and most RV breaker panels are wired the same way. 

The hot lead runs to whatever device you have on that circuit and the white neutral wire returns back to your panel’s neutral buss bar so that you have a completed 120 volt circuit. If you put a two pole breaker in you’ll be grabbing one of each phase so that 240 volts is sent to and from that device. 240 volt devices don’t require a neutral wire because the power runs from L1 to L2. So just how does this power flow? 

Earlier we talked about how AC power just shuttles back and forth. Well, all of the power in this panel leaves one phase and returns to the other. This is easy to understand if it’s a 240 volt load because the power leaves L1 and goes to L2 but it’s not as readily apparent when on 120 volts because the neutral can be misleading. With 120 volt circuits the power leaves one breaker, for example the L1 pole, and travels to the load. It returns via the white neutral wire to the neutral buss bar. If this is the only thing running in that panel the current will then get drained back to the power utility via the service’s neutral wire. But, if there are loads running that reside on the other side of the breaker panel, then this is not true. 

Electricity always follows the path of least resistance. In the case of an electrical service it always tries to go between L1 and L2 whenever possible. If you have a 20 amp load on a 120 volt L1 breaker and a 15 amp load on a 120 volt breaker on L2, 15 amps of power will shuttle back and forth between them, using the Neutral buss bar as a connector between them. They will be in balance and your ammeter will read 20 amps when testing on L1. When you test on L2 you’ll see 15 amps showing on your meter. If you were to clamp your meter onto the neutral wire you would see 5 amps displayed because the neutral wire only carries the imbalance between L1 and L2. If you had 20 amps running on each phase you would see zero amps on the neutral line. That’s because the AC power tries to shuttle back and forth between L1 and L2. That is what is called a balanced load. You try to achieve this when arranging your breakers in the panel because it minimizes the current flowing through the power company’s electric meter but that’s not always possible. If everything was on one side you’d be pulling 40 amps on one phase, zero on the other, 40 amps on the neutral, and 40 amps on the electric meter so you try to balance things as much as possible. 

Now that we know how the breaker panels are normally set up and how the power company sends its power, we need to figure out how this relates to our RV. RV’s rarely have any 240 volt items in them. Many of the larger RVs have 50 amp services, which are a 120/240 volt split phase system. But before we look at the 50 amp service let’s first look at the 30 amp service. 

30 Amp Service:

A 30 amp RV service is really just a glorified 120 volt single pole outlet. Electrical outlets are labeled with a NEMA code designation and the 30 amp outlet used in RV pedestals is designated a NEMA TT-30R and the plug is a TT-30P. The TT stands for Travel Trailer and is an RV specific receptacle so you won’t be finding this outlet in any residential environment. The P and R stand for Plug and Receptacle respectively. This is a 3 prong plug that consists of a 120 volt hot wire, a neutral wire, and a safety ground wire. The 30 amp RV receptacles do not use GFCI protection. If you have an older or smaller RV you most likely have a single pole 30 amp breaker panel where everything is on one phase. There’s no need to split breakers on a 30 amp panel because there is only L1 and 120 volts present. If you need to plug in at a location where there is no 30 amp RV style outlet you can buy a 15-to-30 plug adaptor at any RV dealer that will adapt your 30 amp RV plug to a standard 15 or 20 amp duplex receptacle. This is the way that RVs were made for many years but with today’s modern amenities it has become necessary to increase the power supply to the newer coaches. Keep in mind that 30 amps times 120 volts equals 3,600 watts and that is how much “stuff” you can operate until you run out of power. 

50 Amp Service: 

To facilitate the larger loads placed upon the newer RVs the 50 amp service was brought to the RV world. Whereas the 30 amp service was a 120 volt service yielding 3,600 watts of power, the 50 amp service is a 120/240 split phase service. The split phase service means you have two 120 volt 50 amp poles, which gives you a total of 12,000 watts. So the perceived increase from 30 to 50 doesn’t sound like very much but the real increase from 3,600 to 12,000 puts it into a more realistic perspective. Keep in mind that this assumes that you can utilize both of the two 50 amp poles effectively by balancing your load. If all of your loads are on one side of the panel you’ll only be using one 50 amp pole, which means that you can only get 6,000 watts. So, it is important to split your loads and balance them between both phases on the breaker panel in order to get maximum capacity. 

Very rarely will an RV have any 240 volt loads. Some RVs may have 240 volt stackable clothes driers or an electric heating element of some sort but it’s rare. Still, the ability to split the load among two poles means that each pole can handle 50 amps. If all of the circuits were placed on a single phase, as in the 30 amp service, then you would need a 100 amp service to provide that same amount of power. That would require some massive wiring to the pedestal and also some very fat and heavy power cords to the RV. A 50 amp split-phase system lets you get that higher wattage with a smaller #6 gauge wire. But what happens when you have an RV with a 50 amp power cord but the campground only has a 30 amp service at the pedestal?

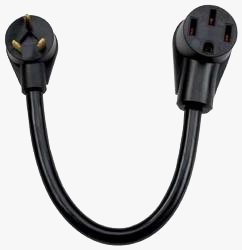
30-to-50 dogbone adaptor

30-to-50 Dogbone Adaptor

At times it becomes necessary to power an RV with a 50 amp service when there is no 50 amp NEMA 1450R receptacle available. Unlike the 30 amp NEMA TT-30R, the 50 amp outlet isn’t an RV-only receptacle so it can be found in residential and industrial applications as well and has a 4 prong outlet that has two hot wires – L1 and L2, as well as a neutral and ground wire. Any RV dealer or RV accessory store will offer an adaptor that is commonly referred to as a 30-to-50 dogbone adaptor, which is illustrated above. This adaptor will let you adapt your 50 amp plug to a 30 amp so that you can plug your 50 amp RV into a 30 amp RV receptacle if that’s all that is available. When you do this you’ll be limited to 30 amps of power though. The dogbone adaptor will connect the single 120 volt hot pole to both the L1 and L2 inputs of your RV’s 50 amp breaker panel. When you do this you will have the same phase across L1 and L2 so there will be no 240 volts available. But, seeing as how 99.9% of the RVs made don’t use anything with 240 volts, that’s volts that’s not a problem. 

In this situation all of the power will be going down the neutral wire. But, you are only sending 30 amps to the panel and your neutral wire is rated to handle 50 amps so you’ll be fine. You will have to be careful to manage your loads when running on 30 amps. If you fire up all of your air conditioners and water heater you are going to trip that 30 amp pedestal breaker real quick so you have to watch what you turn on. You can also add a second adaptor to change the 30 amp down to a 20 amp plug if you have to but then all you’re going to be able to do is keep the batteries charged and maybe run a few lights.

Full-Time RV? 12-Step Transition From Sticks & Bricks To Life On The Road

sticks & bricks definition:

A regular house, condo, apartment, or dwelling on some type of permanent foundation that does not have wheels. Sticks & bricks have a physical address. Sticks & bricks are always located at the same place on the map.

If you are already the happy owner of a fabulous motorhome… or if you are a soon-to-be new owner, planning on it, or just dreaming about it…

Have you ever thought about giving up your sticks & bricks and going full-time RV?

That’s exactly what we did, two years ago, in our new-to-us 2016 Entegra Aspire. We named her Charlie-The-Unicorn RV.

People have so many questions about living, working, and traveling full time in an RV! We did, too. We had no idea how or what we were doing – the logistics of it all – when we made the decision to go full time. We figured it out, mostly in the 60 days before we took off on this exciting and unknown adventure.

And, of course, we’re still learning.

So if you are thinking, planning, dreaming, or just wondering about the logistics and transition to full-time RVing from full-time sticks & bricks, keep reading… If we can survive this adventure, you can, too! I’ll do my best to share our experience and answer those burning FAQs (Frequently Asked Questions).

✅ 1 – Do you own an RV?

If so, and you feel confident you could live comfortably in your RV full time, proceed to Step 2!

If not, or if you want to consider other options for full-time RV living:

  • Go visit, or get in touch with, a Lifestyle Specialist at any of the six NIRVC locations across the country. They can help you find the perfect starter or upgrade RV for your transition to full-time RV life.
  • Purchase your full-time RV while you’re still at your sticks & bricks address, especially if you are financing any part of your purchase. 
  • Arrange storage and recreational-use (part-time) RV insurance while you’re in transition, but it’s all much easier at this stage than later. (You’ll change to full-time RV insurance coverage later, when you’re ready to go!) 
  • Start your research! Search term: “Full Time RV Lifestyle”. Google, YouTube, IRV2.com, and Facebook Groups can be your best resources, from when you’re first getting started to living full time in your RV.

We weren’t thinking about full-time RVing when we purchased our 2016 Entegra Aspire in 2020. It was a part-time escape plan for us at the time, which worked out great during the pandemic. And then…

✅ 2 – Getting out of your sticks & bricks

Decisions, decisions:

  • Sell or rent your home
  • Give notice on your lease, if renting
  • Set your launch date!

Everyone’s situation will be different, whether you own your home or rent and how long you’ve been there. I imagine every year in place might take at least a month longer to prepare, especially if there’s family history or grown & flown children.

We had about 60 days.

Our situation was easier than most. In 2021, after 25 years building our careers and raising three children in Atlanta, GA, we had packed our almost-empty nest up in 2019, to move ‘back home’ to Seattle, WA, to take care of my mom.

We had already gone through a big move, re-organized and gotten rid of a lot of stuff. We had leased a two-bedroom condo in downtown Seattle for two years to be near my husband’s new office and to figure out where we wanted to re-settle. Half our stuff was already in storage, at that point.

Two years later (2021)… well, everything changed during the pandemic:

  • We were both working from our small condo 24/7/365.
  • Our college kid, who had come back home during the pandemic, was able to return to school.
  • My mother passed away in January 2021.

The lease came up in May 2021, and we realized, with both of us working from home, an empty nest, and a 40’ luxury RV in storage north of Seattle… home could be anywhere. We set our full-time RV living launch date for Memorial Day: May 2021.

✅ 3 – What to do with all your stuff?

In the end, there are only three options with stuff:

  • Take it with you: find a place for it in your RV.
  • Store it somewhere: with family or a storage facility. 
  • Get rid of it: SELL – DONATE – TRASH

Even though we’d just done all of the above two years before, we had to go through it all again – this time, going from a 1,000 sq. ft. two-bedroom/two-bath condo with many shelves, cabinets and closets to our 400 sq.ft. mobile living space with very few storage spaces, sharing one RV closet and one dresser…

Pro Tip: Start early and be ruthless! 

  • Take inventory, create lists and spreadsheets (whatever works best for you).
  • Tag everything with sticky notes: RV – STORE – SELL – DONATE – TRASH
  • Start disposing immediately, whether it’s to sell, donate, or trash.
  • Start living in smaller space: downsize kitchen, bedrooms, and bathrooms in your sticks & bricks to use the same number and size of cabinets and drawers in the RV. Start using those cabinets and drawers for the things you want to take with you.
  • Figure out what to do with the rest: STORE – SELL – DONATE – TRASH.

FAQ: What did you do with all your stuff?

Honestly, I lived 30+ years of my adult life believing if you had to pay to store stuff, you really didn’t need the stuff – seriously!

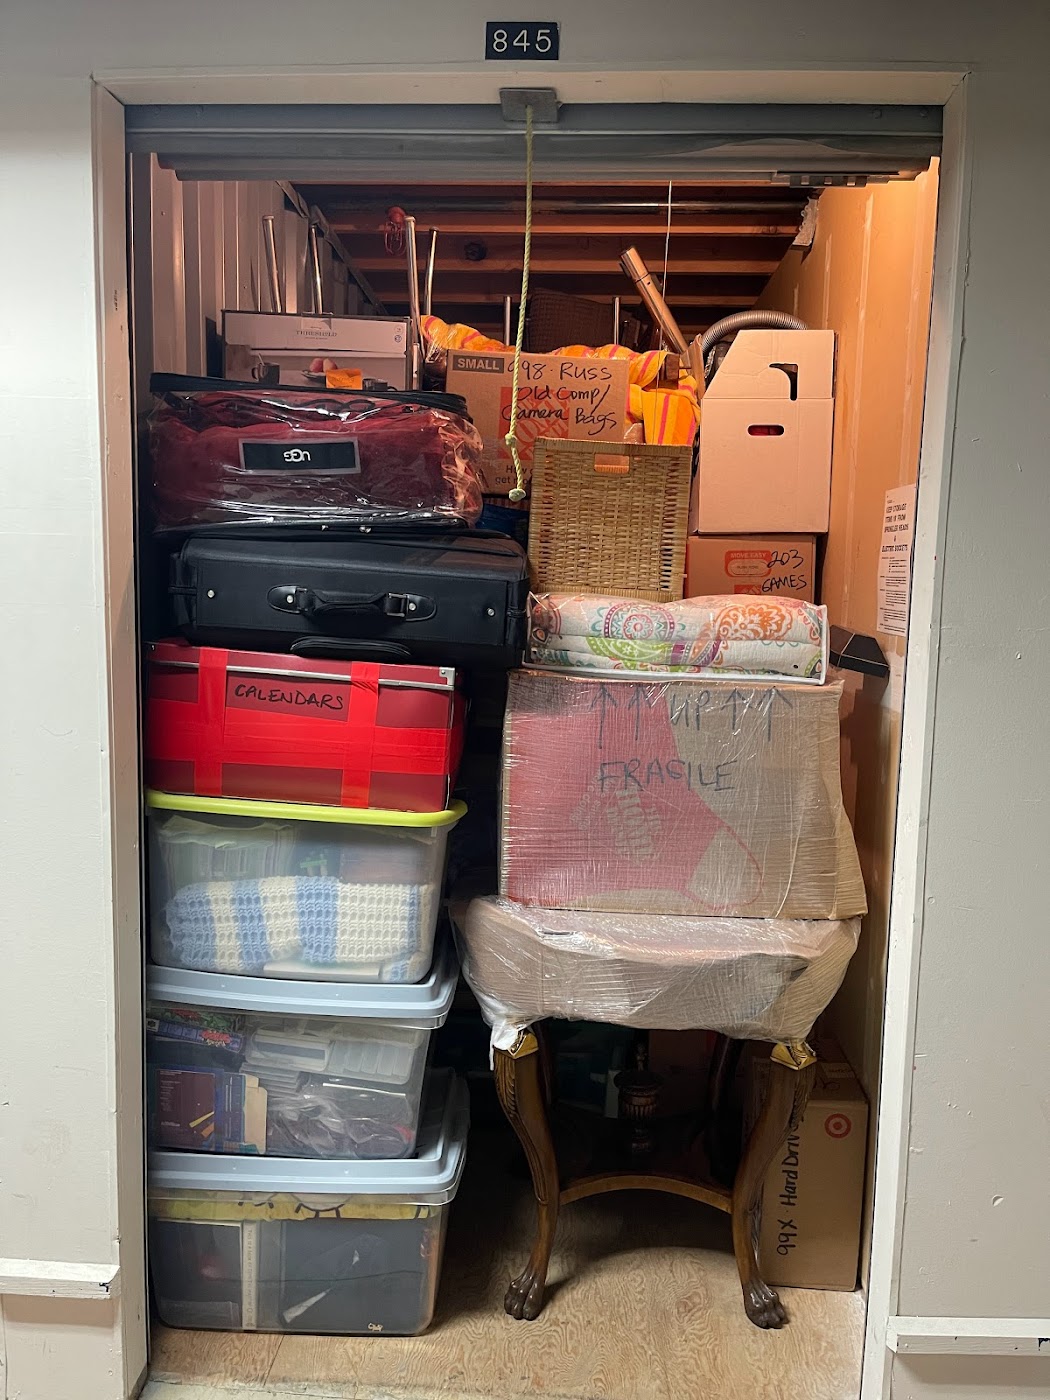
But there I was, in Seattle, WA, after the Big Move in 2019, with ONE (1) 5×10 storage unit already full of the things we couldn’t leave behind in Atlanta, knowing we’d be buying a house again, but couldn’t fit in the condo:


Excerpts from Sherri’s Countdown Journal:

— 54 DAYS TO FULL-TIME RV LIVING

We are going to pay for storage this first year, and probably for the rest of our lives. Or at least until our kids turn 40 and make the pilgrimage to the storage facility to reclaim the treasures and relics of their youth. Just like we did. An “Adulting 101” rite of passage. Too much stuff.

In fact, that’s where I’m headed today: our storage unit! I’m going to spend the morning with our existing storage, inventorying and organizing, hopefully pulling out some things we haven’t missed in two years and getting rid of it. To have room for more stuff we won’t see for the next two years…

— RV-9 (NINE) DAYS TO FULL-TIME!!!

We are now the proud renters of TWO (2) 5×10 storage units in Seattle, WA

National-Indoor-RV-Centers-blog-Sherri-Caldwell-full-time-RV-life-motorhome-living

Move to Seattle – Storage Unit #1

Storage Unit #2

✅ 4 – RV Living Space

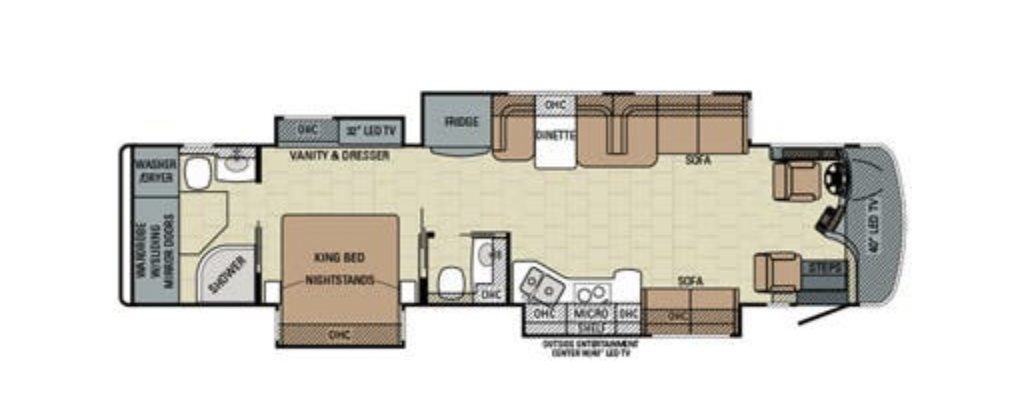
National-Indoor-RV-Centers-Entegra-Aspire-Class-A-motorhome-coach-40P-floorplan

The floorplan of our 2016 Entegra Aspire 40P

FAQ: What can you take with you when you live full time in an RV?

Well, that’s a puzzle, and puzzles can be fun:

  • Get a floorplan schematic of your RV, if you can. You might be able to find one online. Or make your own.
  • Measure your RV living spaces, especially drawers and cabinets and closets. Diagram where things might go.
  • Remember to measure vertical space and walls. It’s amazing how much extra storage space you can create with Command™ strips and hooks. 
  • Make room in your RV for things from home you’ll appreciate on the road: artwork and photo frames you can put on the walls (with Command™ strips); throw pillows & blankets; small decorative touches (preferably unbreakables). 
  • Visit and take your RV out every chance you get before your launch date – take stuff up, bring stuff back. (It’s an endless cycle, even after you launch.)

— COUNTDOWN: 52 DAYS TO FULL-TIME RV LIFE

We went up to the RV (at the storage facility) yesterday to spend some time on maintenance, planning, and organizing our very small space for full-time living & working. (I managed to find space to take a dozen books with me: 12 books!)

National-Indoor-RV-Centers-blog-Sherri-Caldwell-full-time-RV-life-motorhome-living

✅ 5 – RV Kitchen Essentials

FAQ: How do you outfit the kitchen for full-time RV living?


Trade-offs will be necessary:

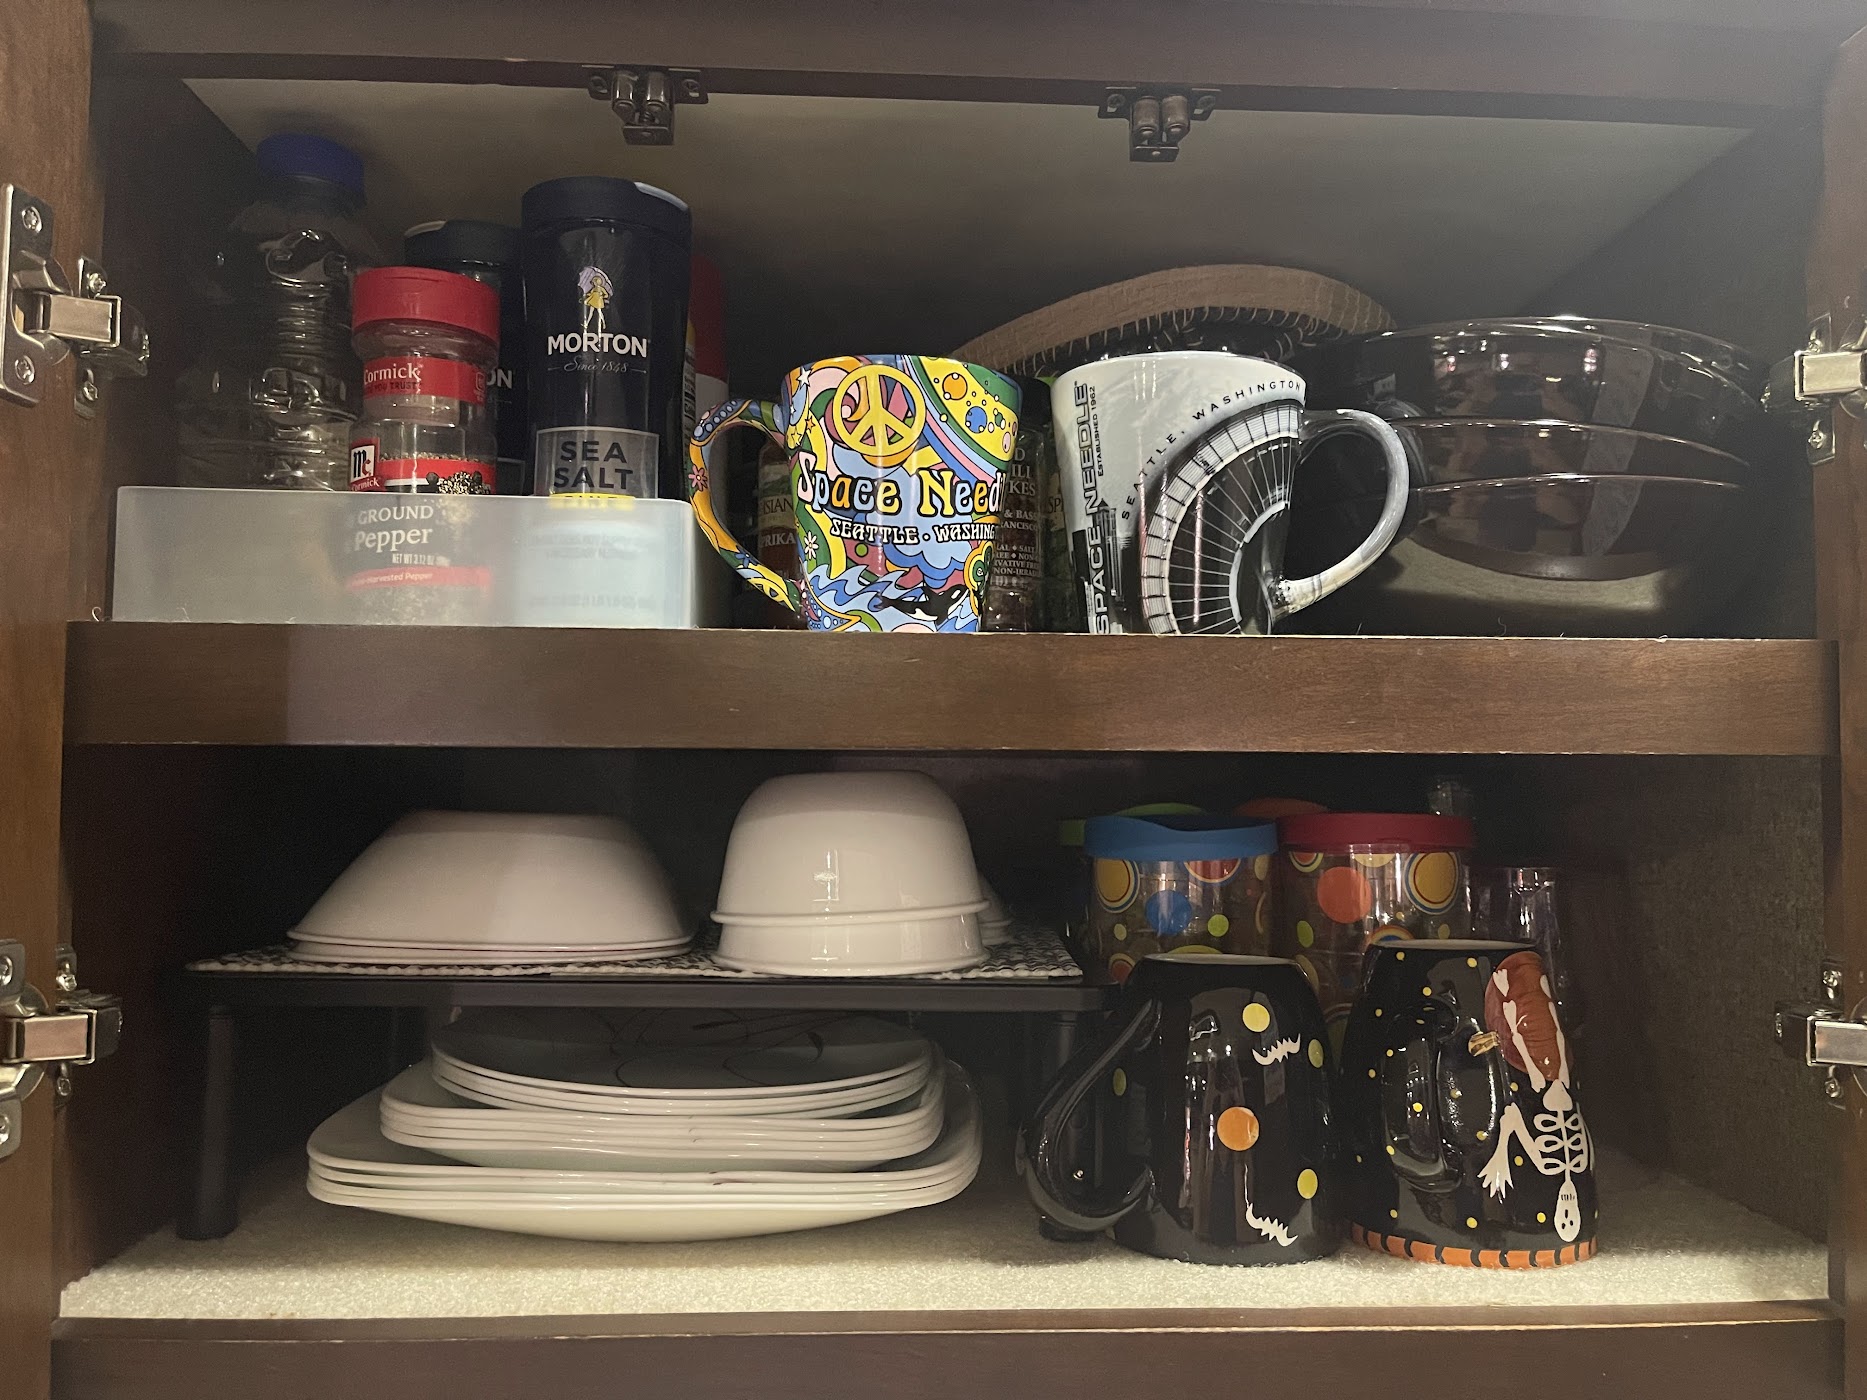
  • RV dishes: You won’t need or want 16 place settings of heirloom china and crystal in your rolling earthquake of an RV. You need a nice, simple set of durable dishes that will stack well and not take up too much space. For two adults, we bought a 4 place setting kit of Corelle dinnerware. I love it!*
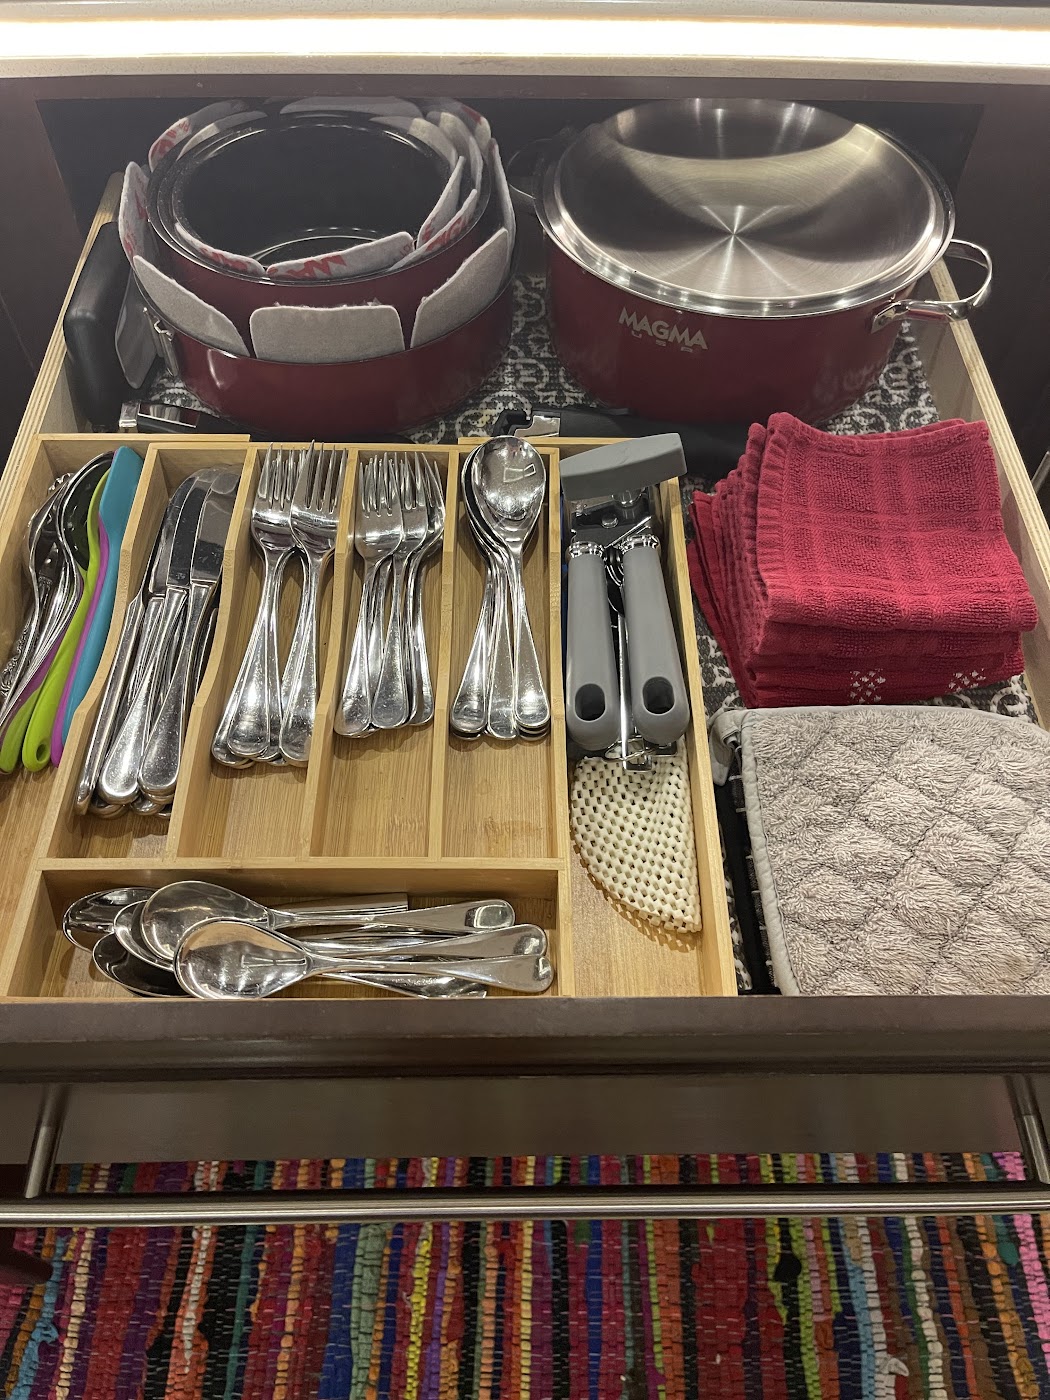
  • Silverware: Again, you won’t need or want your entire utensil drawer from home. You need enough, but not too much. We brought eight of each: knives, forks, soup spoons, teaspoons, and a couple of servers, which all fit nicely in the wooden organizer tray that fits in the drawer space available.
  • Same goes for all those kitchen appliances, gadgets, cooking utensils, mixing bowls and serving dishes: Bring all your unbreakable favorites to the RV, find secure space for as much as you can. Take the rest back home to SELL – DONATE – TRASH.
  • Paper Plates, Plastic Utensils & Red Solo Cups (I prefer clear, but hey, you do you) for casual outdoor dining and boondocking.

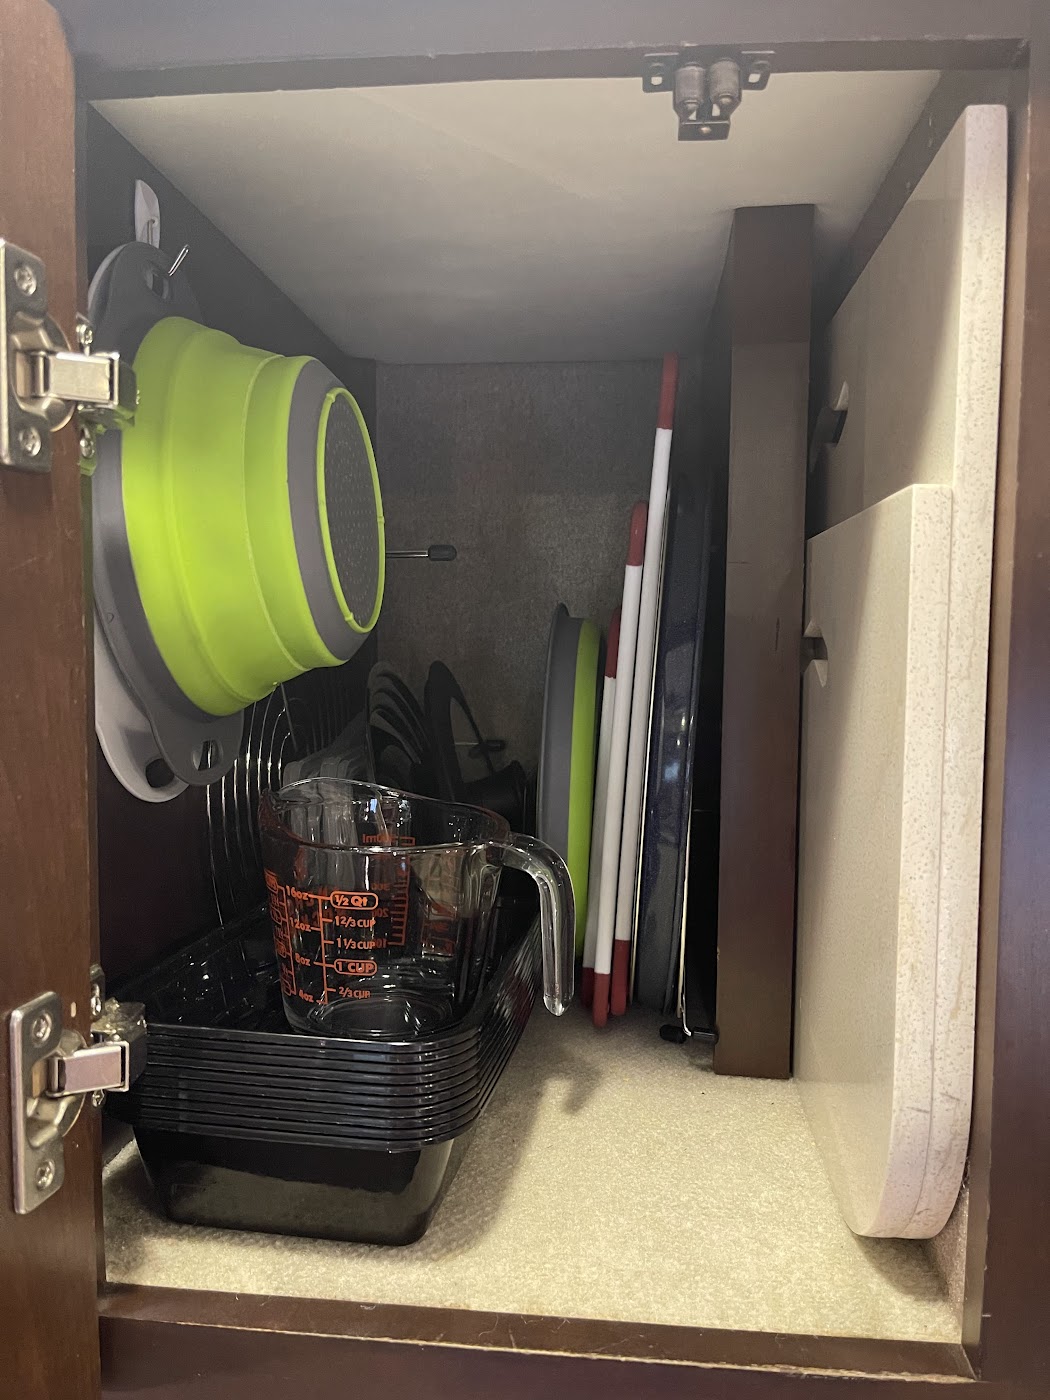
Our favorites for RV kitchen & full time living: New set of nested pots & pans for induction stovetop! – Collapsible colanders! – Nested, colorful melamine bowls for food prep and serving! –  Standard-sized MEAL PREP (brand: goodcook) rectangle storage containers with lids for storing or serving anything and everything!

National-Indoor-RV-Centers-blog-Sherri-Caldwell-full-time-RV-life-motorhome-living

*You might notice, in the pictures above, that I’ve bent and broken a few of my own suggestions. I do love my Corelle dishes, but I also missed the big stoneware bowls we use for pasta, salads, and bowl meals. So I went back to storage and brought four stoneware bowls with us. And four of our favorite coffee mugs. So far, so good.

✅ 6 – Domicile & Permanent Address 

Domicile (Merriam-Webster)
Legal: a person’s fixed, permanent, and principal home for legal purposes

FAQ: How do you get mail when you’re RVing full time?

Choosing and establishing your domicile and permanent address can be one of the trickiest steps in the transition from sticks & bricks to full-time RV living. You can only have one primary address at a time, for legal reasons, which include:

    • Vehicle Registrations & Driver’s Licenses
    • Insurance & Financial Accounts
    • Voter Registration
    • Taxes: Federal, State & Local
    • School, Employment & Health Insurance, if applicable

There are many reasons full-time RVers might choose to change their domicile state and permanent address when they sell or leave their sticks & bricks. Some states are more favorable for full-time RV living, for legal and tax purposes.

This is a topic you definitely need to research and make decisions to fit your own situation, with professional legal and/or tax advice as needed. 

We kept things simple and kept our domicile in Washington State. We have a lease agreement with a trusted family member and use their address for domicile and mail delivery. We’re there at least once a year, when we’re in Washington. They receive our mail and send a packet with mail, or whatever we need, whenever we’re in a place long enough to receive a package.

It was a relatively simple process for us to establish domicile and do all the things:

✔️ Mail forwarding & permanent change of address with U.S.P.S.

✔️ Vehicle registrations (RV and automobiles)

✔️ Driver’s Licenses

✔️ Voter Registrations

✔️ New Library Card! 🤓 (Did you know you can borrow ebooks and audiobooks online from your local library, anywhere you are?)


— COUNTDOWN: 40 DAYS TO FULL-TIME RV LIVING!

I still have moments (lots of moments) when I can’t believe we’re actually doing this…

✅ 7 – RV Financial

Related to domicile and permanent address considerations, financial organization is very important as you prepare for full-time RV living. Whether you are sharing a mailbox with family or using a mail forwarding service, you’ll want to move online as much as possible to cut down on paper mail: 

  • Manage all banking and financial transactions online.
  • Sign up for email billing and statements.
  • Arrange automatic payments for recurring expenses.
  • Review credit reports, close accounts, stop mail as much as possible. 
  • Cancel memberships, subscriptions and auto-shipments (i.e. Amazon Subscribe & Save).

→ Keep physical copies of current vehicle registrations and insurance documents with you, easily accessible in case of emergency.

→ Organize and keep your financial information and important documents up-to-date and easily accessible online in a secure folder or directory you can access from any computer. 

→ Your family or designated legal representative needs to know how to access information, if something happens to you. If you have a safe deposit box or rented storage units, make sure you leave keys and access information with someone you trust.

✅ 8 – Staying Connected: RV Internet

Unfortunately, Hubs and I are not retired or independently wealthy. The pandemic offered us a unique opportunity to work from home. And then we realized, with a big Class A Motorhome, “home” could be anywhere with good internets!

FAQ: What do you do for Internet? 

(This was our #1 Most Frequently Asked Question, in the beginning.)

Hubs works for a large technology company. He is online full-time, all day, every weekday, Zoom conferencing with his team and clients all over the world. Reliable internet access is critical for his job and our continuing ability to live and travel full time in our motorhome.

Again, the situation and requirements will be different for everyone on the road. We needed redundant data plan coverage from the Big Three cellular networks, along with equipment to network it all together and automatically switch back and forth according to the strongest cell signal wherever we happen to be across the country.

National-Indoor-RV-Centers-blog-Sherri-Caldwell-full-time-RV-life-motorhome-living

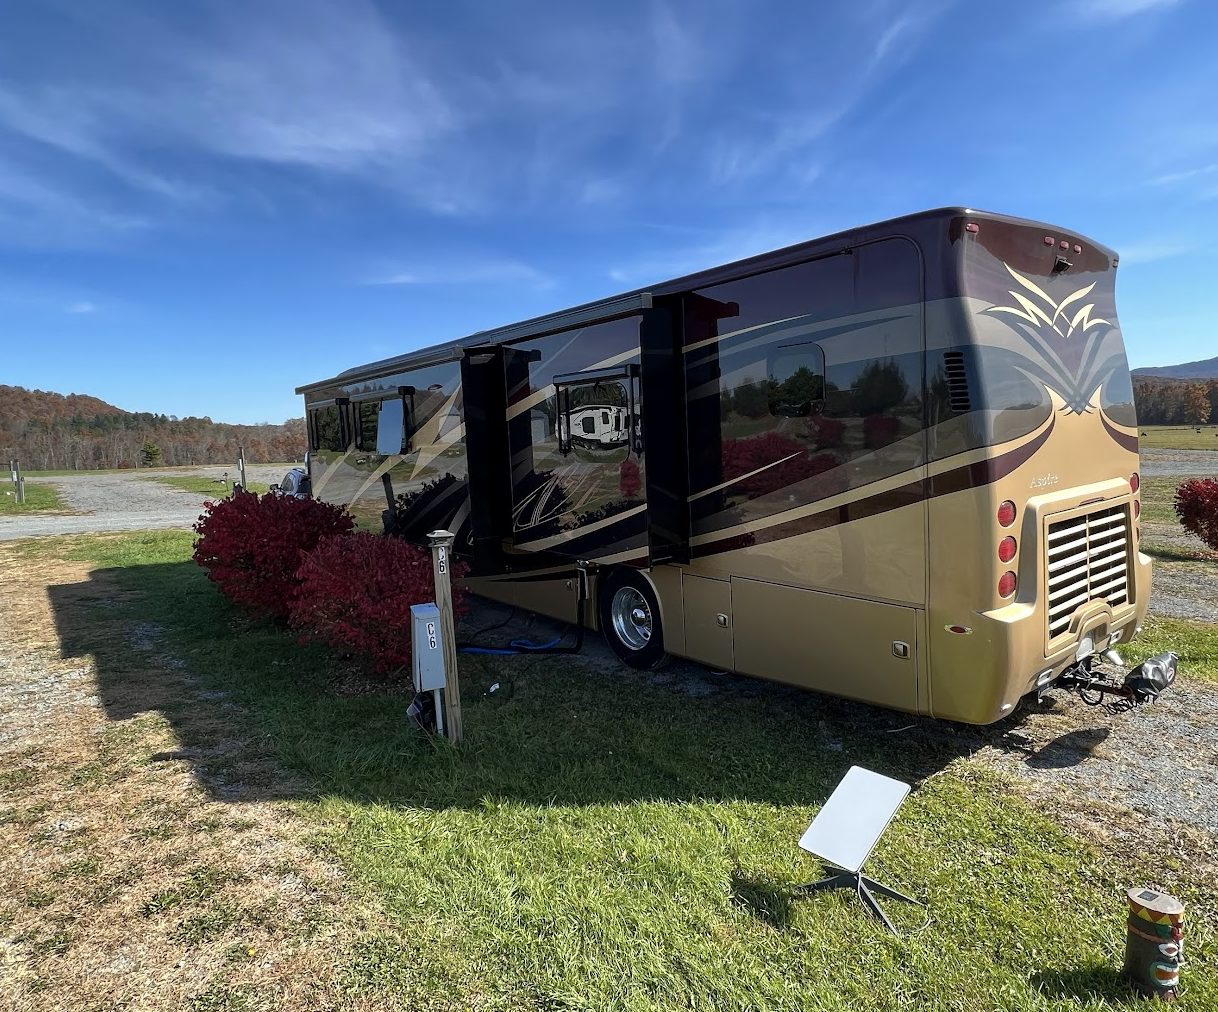
Last summer, while we were in Washington, we added Starlink RV, with the Starlink “Dishy” (satellite dish) set up outside the RV, leading to the current #1 Most Frequently Asked Question:

FAQ: How do you like Starlink RV?

Answer: We like it just fine for regular household internet, streaming services, and back-up when there is good satellite visibility. Turns out, it’s not so great for Zoom. Starlink service sometimes drops in and out as the satellites go by. You normally wouldn’t notice, but it can cause the dreaded freeze frame on Zoom, which is definitely not great for online video conferencing.

—> If you’re trying to figure out your internets for full-time RV living, check out Internet on the Go, one of NIRVC’s trusted RV Aftermarket Partners for added safety, protection, and convenience.

✅ 9 – Medical & Health Insurance

There are many things we are still learning about full-time medical and health insurance. As far as prep for full time RV living:

  • Health Insurance should be part of your domicile decision, depending on employment, Medicare eligibility, or private insurance/state program requirements. 
  • Schedule annual medical and dental appointments with plenty of time before your launch date, to allow for follow-ups.
  • Most full-time RV people we’ve met schedule time to be back home for annual appointments with their regular doctors. (Including us: We have reservations in June in a campground close to our medical center in Seattle to be nearby for  already-scheduled appointments.)
  • It is always a good idea to know where the local emergency services and urgent care clinics are located, wherever you are staying. Many campgrounds include that information in their campground guide. Keep those handy for reference, and to have your current address available, in case of emergency. (And for mailing address and package delivery. But that’s beside the point here. 😉)

✅ 10 – RV Prep: Maintenance, Service & Safety

Just like your physical health and safety, your RV needs to be ready to go full time, too:

  • Schedule full RV service and maintenance for all systems before you go. The more you can take care of before you go, and keep up with annual service appointments, the better. Of course, things will always happen along the way…
  • Learn as much as you can about basic RV maintenance and routine services you can take care of yourself. Some excellent resources for this include:

NIRVC Angie’s RV 101 Video Series on YouTube

AIM Club Collected Resources To Make Your RV Ownership More Enjoyable

  • Assemble an emergency road kit from your chassis manufacturer to have spare filters, fuses, belts, and liquids that you might need in the event of a breakdown on the road. Remember to carry necessary tools and safety equipment for emergency repairs.
  • Finally, just as you would in your sticks & bricks, make sure you have adequate safety features in place to protect your home and lives: smoke detectors, fire suppression, and security systems.
National-Indoor-RV-Centers-blog-Sherri-Caldwell-full-time-RV-life-motorhome-living

✅ 11 – Leaving Family

Getting ready to go, I struggled with the concept of Home Base. Of not being Home Base for our family while living and traveling in our RV. The worry of not being there for my kids, with no place for them to visit, or to stay, if needed.

We have three grown and nearly-grown kids: ages 28, 25 & 22. And, truth be told, they’re all over the U.S. right now, too, in their careers, and relationships, and school: Hawaii, Missouri, and Washington State.

No grandbabies yet (and that might change everything, right?). This is a time in our lives when our kids don’t need us, or necessarily want us around full time, for a few years, especially after the two years of close living with our college student.

It was hard to prepare for this. I cried a lot in those last 60 days, saying goodbye to family and friends in Washington, during the pandemic, when we couldn’t even get together, anyway.

But I learned some things in the last two years on the road, and I’m reassured to discover we’re closer, in some ways, by traveling the country full time in our big RV:

  • We’ve actually seen our loved ones — our kids, extended family, and friends — more now than we would have at home in Seattle. Even the Hawaii kid, who came and stayed with us for a week for a wedding in Atlanta! (We rented an AirBnB, while Charlie-the-RV was in for service at NIRVC – Atlanta.)
  • With everybody’s busy lives and schedules, and the difficulties of air travel recently, it’s easier for us to travel in the RV and stop in to see our people all over the country. We stay at a campground nearby and it works out great! 
  • Thank goodness for technology and the good old-fashioned telephone, er, cellphone, for connection.
  • We’ve enjoyed Zoom holidays, check-ins, and fun family game nights from four different time zones.
  • Every Sunday, I text a proof of life picture to our kids and let them know where we’re staying.

The kids are all okay. And we are, too.

National-Indoor-RV-Centers-blog-Sherri-Caldwell-full-time-RV-life-motorhome-living

✅ 12 – Finding places to stay

Finding campgrounds and places to park our 40-foot RV was one of my biggest worries from the beginning. This literally kept me up at night, months before making the leap to full-time. It can still be a challenge. I’m not, by nature, a long-term planner.

We’ve managed to stay at least 60 days ahead of our schedule. Some full-time RV people plan and reserve a year or more in advance, which you have to do in more popular areas and seasons. 

→ We tend to travel where and when people aren’t, to avoid the crowds.

FAQ: Have you ever stayed in a WalMart parking lot?

We have never stayed overnight on a WalMart parking lot, but we would, if we had to!

We have always found a place to stay, even if it was a Cracker Barrel parking lot in Mississippi one night early in our adventure … and a BJ’s parking lot in Florida one night, when we were caravan-ing with friends and had a breakdown.

In general, we stay at quirky, private campgrounds and nice resorts across the country, for a week or two at a time. We have an RV property we stay at in Florida for a month or two during the winter and a membership campground in Washington where we stay a month or two during the summer.

National-Indoor-RV-Centers-blog-Sherri-Caldwell-full-time-RV-life-motorhome-living

One of our quirky, wonderful campgrounds – White Sulphur Springs, Montana

FAQ: How much does it cost to live in an RV full time?

We’re still figuring that out, after two years on the road. One of the biggest expenses, traveling full time in the RV, is campground and resort fees. 

We have paid from $0 to $180 per night, for different types of campgrounds. A sampling of rental fees from different categories:

  • Most expensive (so far): “Oceanfront” “Resort” in Oceanside, CA – $180 per night 😳 
  • Luxury Motor Coach Resorts – so far, less than $100 per night, but these super-nice ownership/rental resorts can get pricey. 
  • Luxury RV Resorts: Sun Resorts & upscale KOA Resorts – $75 – $150 per night.
  • “Holiday Inns” of campgrounds: KOA Journey/Holiday, Good Sams – $50 – $90 per night. Clean, usually smaller, fewer amenities.
  • Quirky, privately-owned campgrounds: Our Favorites! $20 – $50 per night.
  • RPI (Encore/Thousand Trails)/Coast2Coast Membership Campgrounds – $10* per night. *But we do pay annual membership for these programs, about $150/year each.
  • Home Membership Park – $0 per night – 2 weeks in / 1 week out (to RPIs nearby). We purchased lifetime membership for about $4,000 in 2021, which included cross country RPI and Coast2Coast memberships. Our home park was bought out the very next day by Sun Resorts. We pay annual renewal of about $500 for privileges at that one location (Blaine, WA).

I have learned there is always a place to stay. Somehow it all works out.

— ZERO (0) DAYS TO GO RV FULL-TIME:

TODAY is the day! Hubs & I are moving into the RV FULL TIME!!! I am excited. Still a little… 🤪🤪🤪

So here we go.

National-Indoor-RV-Centers-blog-Sherri-Caldwell-full-time-RV-life-motorhome-living

May 2021: Full Time RV! Leaving our storage facility for the last time!

National Indoor RV Centers blogger Sherri Caldwell profile image

Sherri Caldwell is the founder of BooksAndTravelUSA.com – Full-time RV Travel Blog & Book Club/U.S. Literacy Project. With her husband, Russ, she is currently living, working, and traveling full-time in their 2016 Entegra Aspire: Charlie-The-Unicorn RV.

NIRVC’s RV Paint & Body Standards

Did you know at NIRVC, we do more RV collision and Paint & Body repair than anyone else in the country? As experts, we have set Paint & Body standards, so our work will be consistent across all of our locations. Our standards take into consideration four different factors: how far away from the coach we are standing, what kind of lighting we have, what angle are we looking at and what zones are we keying in on. 

Our multi-point inspection criteria ensures every motorhome leaving our facility meets or exceeds our customer’s expectations. 

We offer Full Paint & Body Service which means you have the convenience of having your work done on-site by technicians who know your coach and know you expect the work to be done right, on time and at a reasonable cost. 

RV Paint & Body/Collision Services Offered at NIRVC:  

    • Collision Repair and Restoration
    • Paint Cracking and Chipping Repair
    • Paint Oxidation and Fading Restoration 
    • Roof Damage Repair and Roof Sealant 
    • Ceramic Coating

We proudly offer Paint and Body at our Atlanta, Dallas, Las Vegas, Nashville and Phoenix locations. Contact us today to learn more! 

Solar Panels for RVs

Solar Panels in RVs 

Solar panels are widely misunderstood. The most common question posed is “How many solar panels do I need to run my RV?” But, the fact of the matter is that solar panels don’t run anything. It’s your batteries that will provide enough amp-hrs to power your electrical devices. Solar panels don’t output enough amp-hrs to run a device but they will continue to provide that slow and steady output over a fairly long time frame so in effect, solar panels are strictly battery chargers. Your electrical devices will draw amps from your batteries but solar panels will put some amps back into those batteries. Unless you have a massive solar panel array or are a real miser with your power consumption, you’ll never be able to keep your batteries from running down. Eventually you will need to run your generator to recharge those batteries and bring them up to a full charge. However, solar panels can add enough extra amps to extend the timeframe between generator runs so that it occurs at a time that’s more convenient for you.

solar panel array featuring four 120-watt panels on a 40’ coach

A solar panel array featuring four 120-watt panels on a 40’ coach

Limitations of Solar Panels in RVs

One of the biggest limitations of solar panels is that you need enough of them to make a difference. If you think that slapping a 50 watt panel on the roof is going to do something, then you are wasting your money. Unfortunately, panels take up some room and not every RV roof has an overabundance of that. The image above shows an array of four 120 watt panels on a 40′ coach. It was possible to place two on each side and still be able to walk down the center of the roof for service access on the gray non-skid surface. 

Solar panel with tilt mounts

Solar panels with tilt mounts align the panel to the sun for better performance

How to Maximize Power from Solar Panels

Solar panels create the most power when they are getting direct sunlight and lots of it. They can be ordered with flat mounts or tilt-up mounts. Tilt up mounts have the advantage of being able to be aimed at a southern exposure so that the solar panel can receive more light throughout the day. You do have to park the RV so that the panels are facing south though and that’s not always an option. Also, if you forget to put them down and lock them before driving away you’ll be buying new panels and patching some holes in the roof where they used to be mounted to. Overall, flat panels are the safe bet for a motorhome. The benefits of an adjustable mount just aren’t that much that it pays to put up with the hassles they bring unless you are staying in one place for a long time. 

Solar panels vary in output but it’s proportional to their size. You won’t find a panel that has significantly higher output than another in the same physical size. The biggest difference in panels is their ability to produce power under less than optimal conditions. Unfortunately, there is no rating method or specs that will tell you this so you’ll have to rely on information from other owners or a sales rep that you can trust. Some panels will put out their maximum rated output when it’s nice and bright but fall off sharply when the light is dimmer later in the day, early in the morning, or when it’s overcast. Some panels continue to produce respectable light output under less than optimal conditions. Those are the ones you want to have because it’s all about the total amp-hrs output during the day, not just what’s happening at high noon.

You’ll need to determine just how many amp-hrs you’ll be using during a 24 hour period. Take the wattage of any 12 volt items, such as lights, fans and blower motors, and divide by 12 to find the amps. Then multiply that number times the numbers or hours (or portion of an hour) that each item will be run during that day. Make a note of that number. Then do the same for all of your 120 volt loads except divide those wattage amounts by 10 instead of 12 to find out how many 12 volt amps will be needed to feed the inverter. This will allow for a 20% inverter efficiency loss, which is more than adequate for planning purposes. Add everything up and that’ll tell you how many amp-hrs you’ll need to run everything during a 24 hour period. 

Go look at your battery bank size. A typical four battery bank of 6 volt golf cart style batteries should be around 440 amp-hrs in size at 12 volts. You don’t want to run these batteries below approximately 50% charge level so you should limit their use to 220 amp-hrs before recharging them. If your above calculations show that you are consuming more than that, you won’t make it through the day. Calculate the difference between what you need and what you have and that’s your shortage. If you can install solar panels to exactly supplement that amount you’ll be able to make it 24 hours before recharging via the generator.

If you are an avid boondocker chances are you’ve figured out ways to minimize your power consumption. By doing the above math you may find that it’s possible to camp for a number of days before needing to run the generator. Solar panels can help extend that as well. Remember that we said earlier that solar panels don’t run anything. What they do is provide “free” amp-hrs of battery charging power that can help extend your recharge times to where it is more convenient for you. One other option is to just add more batteries. Extra batteries will cost you far less than solar panels so if all you are looking for is a few extra hours between charge cycles I’d look at adding batteries. If you do decide that solar panels are a good fit for your RV style then you still may want to add additional batteries. If you use AGM batteries rather than flooded batteries you’ll also get more runtime. This was discussed earlier in the Batteries chapter. Another way to maximize your solar panel output is with a good charge controller.

30-amp MPPT solar charge controller
water pump controller

A 30-amp MPPT solar charge controller

Typical water pump controller

RV Energy Management

RV Energy Management

Energy Management is simple – you just need to make sure that you don’t use any more power than is available. Battery power is finite. Eventually it’ll run out. By minimizing how many lights are on and the time they are on, battery life can be extended. Eventually you’ll need to recharge them, either by driving the coach or by running the generator. Adding extra batteries can extend that runtime as can the addition of solar panels. If you are plugged into shore power this isn’t an issue because your converter or inverter/charger will keep them charged while you use them.

AC power is a bit different. Unlike battery power, there is no reserve to draw from. You are limited to the total current capacity of your shore power pedestal or your generator’s capacity. Generators are generally sized for that particular coach so you should be able to run whatever loads you need to operate without exceeding the generator’s capacity. Of course there are exceptions where an undersized generator was specified in that particular coach rather than choosing the optional generator but those are the exception, not the rule.

Shore power pedestals vary in size. If you are running a small 20 amp cord to your RV from someone’s home you’ll be very limited as to what you can run. Battery chargers vary in current draw as to how many battery amps they are outputting. A battery charger that is outputting a full 100 amp bulk charge at 12 volts will be drawing 10 amps of 120 volt AC power. That can take up one half of your 20 amp circuit, which doesn’t leave a whole lot left. Many inverter/chargers have a setting on the remote control panel to define the shore power service. If you define the shore power at a lower level, say 20 amps, then it will limit the 120 volt power that the battery charger uses so that you can have more left to run other 120 volt items. You will need to manually set this once you are plugged into a smaller shore power pedestal.

Power Pedestal

A typical RV pedestal with multiple 50-30-20-amp receptacles

In the above image we can see three receptacles. This is a typical 50 amp pedestal which features a 50 amp, 30 amp, and 20 amp outlets. This pedestal allows virtually any type of RV to be serviced with power. The 50 amp outlet is a 120/240 volt split-phase outlet, capable of 12,000 watts of total power. If you have an RV with 50 amp service you should have no problems powering your RV’s electrical appliances when plugged into a 50 amp outlet. Older pedestals may only be configured with a 30 amp outlet however. This is a single pole 120 volt feed, capable of 3,600 watts of total power. You can adapt your 50 amp coach to this 30 amp outlet via a dogbone adaptor but you will be severely limited in just how much you can run in your RV. If the battery charger is pulling 5 amps and your two air conditioners are pulling 12 amps each you’ll be drawing a total of 29 amps. All it takes is for the electric water heater element to kick in or someone turning on the microwave and you’ll trip the pedestal breaker and you’ll be making a trip out to the pedestal to reset it, which of course always happens when it’s raining.

Manual Energy Management

Manual energy management entails turning off some loads so that you can turn on others. If you really need to get hot water it would be best to use the propane burner instead of electric if it’s hot out. If you need to use the microwave for a bit then you’ll have to shut down one of the air conditioners so that amperage can be used by the microwave temporarily. Eventually this gets to be tiring and you’ll either find places to stay at that only have a 50 amp service or you’ll wish you had an automatic energy system.

RV Automatic Energy Management Systems

An Energy Management System (EMS) automatically performs the circuit switching procedures for you. Do not confuse a true EMS system with surge protection. Some name brand surge protectors use the term EMS in their models and descriptions. In a way, this is true because they do more than stop surges. They also protect from low or high voltage but they are still part of the surge protectors category. True EMS systems do not consider voltage levels. They only monitor the amperage draw and perform shedding of various circuits to keep the total power consumption beneath the pedestal breaker rating.

remote display panel from the Intellitec Energy Management System

The remote display panel from the Intellitec Energy Management System

Let’s assume that you want to run two air conditioners (at 12 amps each), the electric water heater (at 10 amps), and your battery charger (4 amps in float mode). That’s a total of 38 amps, which won’t work on a 30 amp service. We’ve already switched the refrigerator over to propane so that’s out of the equation. The EMS will shed the first available load, which is the water heater so that everything else can run. You’ll then be drawing 28 amps. When the thermostat kicks out one air conditioner the load will be reduced to 16 amps so power to the hot water heater will now be restored and the new load will be 26 amps. If someone turns on the microwave and needs another 11 amps, the total draw would be 37 amps so the EMS will shed the next item on the list so now the water heater and one air conditioner will be shed. When the microwave is finished the next priority level circuit will be restored, which in this case is the air conditioner. By doing this the EMS prevents the pedestal breaker from tripping by limiting the total current.

A more recent entry into the energy management field is an EMS by Precision Circuits, Inc. This unit operates in similar fashion to the Intellitec system except it takes it one step farther. It actually interfaces with the inverter and will trigger the inverter so that it powers its output circuits rather than passing through shore power. This way when someone operates the microwave the inverter will power it rather than shedding a circuit. Should this continue for a long time the EMS will stop the inverter to prevent running the batteries too low and will shed circuits like a traditional EMS. This offers the benefit of not having to shut down your air conditioner on a hot day if other loads are going in and out. In order for this feature to function the PCI EMS must be connected to a Magnum inverter. A number of manufacturers are now using this more sophisticated system. An additional remote display panel is required – one for the inverter and one for the EMS.

Surge Suppression: Protect against low or high voltage

Technically, a surge protector protects against surges in electrical power. But surge protectors as used in RVs do far more. In addition to surge suppression, the most popular surge protectors also protect against low or high voltage levels. Low voltage can be a common occurrence in campgrounds that have added sites over the years but failed to upgrade their electrical grid to keep pace with the increased demand. Low voltage can cause quite a bit of damage so it’s important that you purchase a quality surge protector that includes over and under voltage protection as well. First let’s define just what an electrical surge is.

An electrical surge is where the incoming voltage rises to a point significantly higher than what it’s supposed to be. A voltage spike is similar but a spike is defined as lasting for one or two nanoseconds whereas a surge lasts three nanoseconds or longer. If the voltage is high enough it can damage your electrical devices. Earlier we talked about electrical voltage and how it is a measurement of pressure. If you get a sudden surge in water pressure you are apt to blow a hole in your fresh water supply hose but if you get a sudden surge in electrical pressure you are going to blow some electrical devices or sensitive electronics equipment. Surge protectors use metal oxide varistors, commonly called MOVs. An MOV does nothing at normal voltage levels but when the voltage rises to an unsafe level the MOV will short that power to ground to protect any downstream electrical equipment.

Importance of a Quality Surge Protector 

A quality surge protector designed for RV use will also have both over and under voltage protection. Overvoltage isn’t a real common problem in an RV park but it is a distinct possibility. Excess voltage will do the same damage as a surge except it’s generally not as high a peak voltage but it lasts for much longer. The most frequent condition is low voltage at the campground pedestal. You may arrive at your campsite early and check your pedestal voltage with a voltmeter and find it within tolerance. However, once other campers arrive and start to fire up their air conditioners the voltage is likely to drop. Without an automatic surge protector you would have no protection against low voltage damage to your coach unless you constantly monitor the incoming voltage. A good surge protector will disconnect power to the coach should either low voltage or high voltage conditions appear. At that time you would have the option of waiting it out, running your generator, or using an Autoformer to boost the incoming voltage – more on that later. Quality surge protectors for RVs are available from Surge Guard and Progressive Industries and are two well respected companies that offer their product through most major RV accessory sales outlets.

Surge Guard portable surge protector.
50-amp Surge Protector from Progressive Industries

A Surge Guard portable surge protector

A 50-amp portable surge protector from Progressive Industries

Benefits and Disadvantages of Portable Surge Protectors

In the images above, we can see two portable surge protectors. Portable units have the advantage of being able to be readily moved from one RV to another. This makes for a zero installation setup with no rewiring. Just plug it into the campground pedestal and plug the RV’s power cord into the surge protector. 

The disadvantages are that it is out in the weather and could get stolen or vandalized. There are locking kits available to lock them to the pedestal but then you are trading the convenience of not having the initial install versus connecting it and securing it to the pedestal every time you go camping. If the pedestal’s receptacle is very low to the ground it’s possible that the portable unit may not fit because of the right angle plug and the bulk of the unit that needs to hang down from the outlet.

One last caveat is that the hard wired units sometimes offer a remote display option so that you can monitor the incoming power from inside the coach. With a portable unit you won’t be able to utilize that option. The actual protection levels of the portable units are generally the same as their counterparts in the hard-wired segment so there’s no advantage or disadvantage there.

Surge Guard 50-amp hardwired surge protector
50-amp Surge Protector from Progressive Industries

Surge Guard 50-amp hardwired surge protector

A 50-amp Surge Protector from Progressive Industries

Surge Protector Installation

Hard-wired devices do take a bit of installation labor but it’s not that difficult. You simply mount the unit in the same electrical compartment that your RV’s cord is located in. Remove the power cord from the transfer switch and connect the cord to the surge protector’s input terminals. Then run a short whip cord from the surge protector’s output to the transfer switch and you’re all set. Some RV owners choose to just cut 2-3′ off the end of the power cord while some choose to buy another short chunk of cord from a home improvement store. If you have a power cord reel you’ll undoubtedly be buying a new whip. If your surge protector includes a remote display you will have to find a location for that display, mount it, and then connect it with a standard RJ11 modular phone cable. A cable is generally supplied but if you want to run a longer distance you may have to make a new, longer cable to reach the remote display panel.

The Best Energy Management System for Your RV

Surges are rated in Joules. The bigger the surge, the higher the number, so you want to get a surge protector with the highest possible rating. The popular Surge Guard 34560 is rated to handle up to 1,750 Joules of power surge. It will shut down power to the coach if the voltage falls below 102 Volts or is higher than 132 Volts. Various LEDs will inform you whether the receptacle is properly wired or has a bad ground, reversed polarity, or open neutral. If it shuts down the power due to low or high voltage or an open neutral wire it will reset itself once the power returns to within tolerances. There will be a two minute, 15 second delay before power is re-energized though to allow any air conditioner time to bleed off their head pressure. If you decide that you want to bypass the voltage cutouts feature and allow power through you can defeat the unit by turning a key switch. In this mode you will still have surge suppression, however. Surge Guard also makes automatic transfer switches with built in surge protection and low voltage protection. These transfer switches are becoming very popular in recent diesel pushers due to their ability to also communicate with a multiplexed network control panel.

The Progressive EMS-HW50C is the gold standard of surge protectors. It’s rated to handle up to 3,560 Joules of surge. Low voltage cutoff occurs at 104 Volts and high voltage cutoff occurs at 132 Volts. It comes with a remote LED display that is very easy to read. In addition to displaying the incoming voltage of both poles it will also display the amperage draw on each pole as well as the frequency in Hertz. If any pedestal mis-wiring is present or any shutdown has occurred the LED display will display a 2 digit trouble code that defines the problem according to the chart that is printed on the unit as well as in the owner’s manual. The remote display can be mounted inside the coach or in the basement compartment. In this way it’s handy to locate the EMS-HW50C near the back of the compartment where it’s easy to wire and still have the remote display located near the front of the compartment where it is easy to view. The bright LED is easy to read in bright sunlight and a bypass switch is located on the remote display to bypass the power shutdown function, just like in the Surge Guard above. You have the choice of selecting either a 15 second power-on delay or a 136 second delay. Most modern air conditioners have a built in two minute restart delay so 15 seconds is the normal selection. You can also buy a second remote display that allows you to mount one in the basement and one inside the coach if you desire.

While the EMS-HW50C is the old standard, Progressive Industries also make the EMS-LCHW50 surge protector. The “LC” stands for Liquid Crystal display. Instead of a remote LED display, the LC series uses an integral liquid crystal display that is located right in the cover of the unit. The protection level is the same as its big brother but, depending on where the unit is mounted, you may have more problems in viewing the display. LCD screens just aren’t as bright as LEDs and dark places and bright places are not their friends. Coupled with the fact that the remote LED display can be located anywhere and the LED holds a huge advantage. Still, the LC series does hold a $50 price advantage over its more costly brother.