Eco-Friendly RV Practices

Want a More Eco-Friendly RV Experience? Here’s Where to Start

Green RV living doesn’t have to be a chore. 


Being eco-friendly in an RV can feel like treading an incredibly delicate—sometimes contradictory—balance. On one hand, traveling in an RV offers an unparalleled sense of adventure. It allows you to appreciate scenic vistas and beautiful natural locations in a way that’s not possible with other forms of travel. On the other hand, RVs are powerful vehicles, and they can damage the places you visit if you’re not careful–especially if your adventurers take you to delicate areas.  

While it requires an additional degree of care and consideration, it’s entirely possible to abide by eco-friendly practices during your RV trips. Keeping your RV footprint green isn’t a simple one-and-done thing but rather a series of conscious choices to be made every time you hit the road. There’s no single, universal set of rules for being eco-friendly, but there’s plenty of agreement about good places to start. 

Here are a few things to keep in mind to maintain a greener, cleaner RV experience. 

Remember the 3 Rs: Reduce, Reuse, Recycle

This might sound basic or condescending but switching to RV life can cause people to forget the connections they have in place for sustainable practices. Recycling, in particular, can be a lot easier at home where you’ve got designated recycling bins versus RV campsites that may not have them.

So, properly recycling will likely require finding a designated center along your route. Services like earth911.com and recyclerfinder.com are both great resources for finding recycle sites near your campsite. 

Beyond that, it’s a good idea to invest in some reusable storage containers. In addition to minimizing your ecological footprint, having reusable bags for food, groceries, and supplies makes it easier to organize your RV and keep it clean. 


Be Mindful Of Your Energy Use

While it obviously isn’t the ONLY way in which your RV produces pollutants, your energy use is a good indication of your RV’s carbon footprint—and effectively lowering it means you’re reducing the impact your RV has on the environment. 

Taking charge of a recreational vehicle’s energy use looks different for everyone, but the same best practices for non-wheeled homes are a good place to start:

  • Turn off lights when you’re not using them.
  • Try to cluster showers, so you’re not overworking the water heater.
  • Remember, a cozy pair of socks can save you from having to crank the thermostat. 

Products like RVWhisper can go a long way in helping get a handle on your energy use. This particular product pairs with an app on your phone to deliver real-time reporting about your RV’s power usage, allowing you to be a lot more mindful about where your electricity is going. 


A Little LED Goes a Long Way

Simply put, LED lights are fantastic. Not only do they reduce your vehicle’s energy consumption, but they also aren’t made of glass either, which eliminates countless different safety, storage and maintenance considerations. While newer RVs have LED lights as a standard feature, older ones might require some upgrades.

No matter how fancy your LEDs are, they’re virtually guaranteed to require less power than conventional bulbs, resulting in better energy efficiency for your recreational vehicle. 

If you’re willing to sink some time and money into DIY projects, then the internet has no shortage of awesome inspiration for creative RV lighting. The flexibility offered by LEDs means you can do all sorts of interesting customizations with them. Want the lighting in your RV to mirror the sunrise and sunset? You can absolutely do that. Want to drive in a non-stop hot pink ambiance? The sky’s the limit.

Eco-friendly RV camping isn’t just a one-and-done switch you can toggle. It’s a series of active commitments you need to maintain to start seeing an impact on your ecological footprint. When done mindfully and intentionally, these eco-friendly practices don’t just minimize the stress your RV places on the environments you visit, it also makes for a more rewarding experience in the driver’s seat as well. 


Making sure your rig is in tip top shape can also help you manage the impact your motorhome has on the environment. Contact one of our  NIRVC locations to set up an appointment to get your RV serviced

THIA by Proteng: A Fire Suppression System

RV Fire Suppression: How to Avoid Disaster

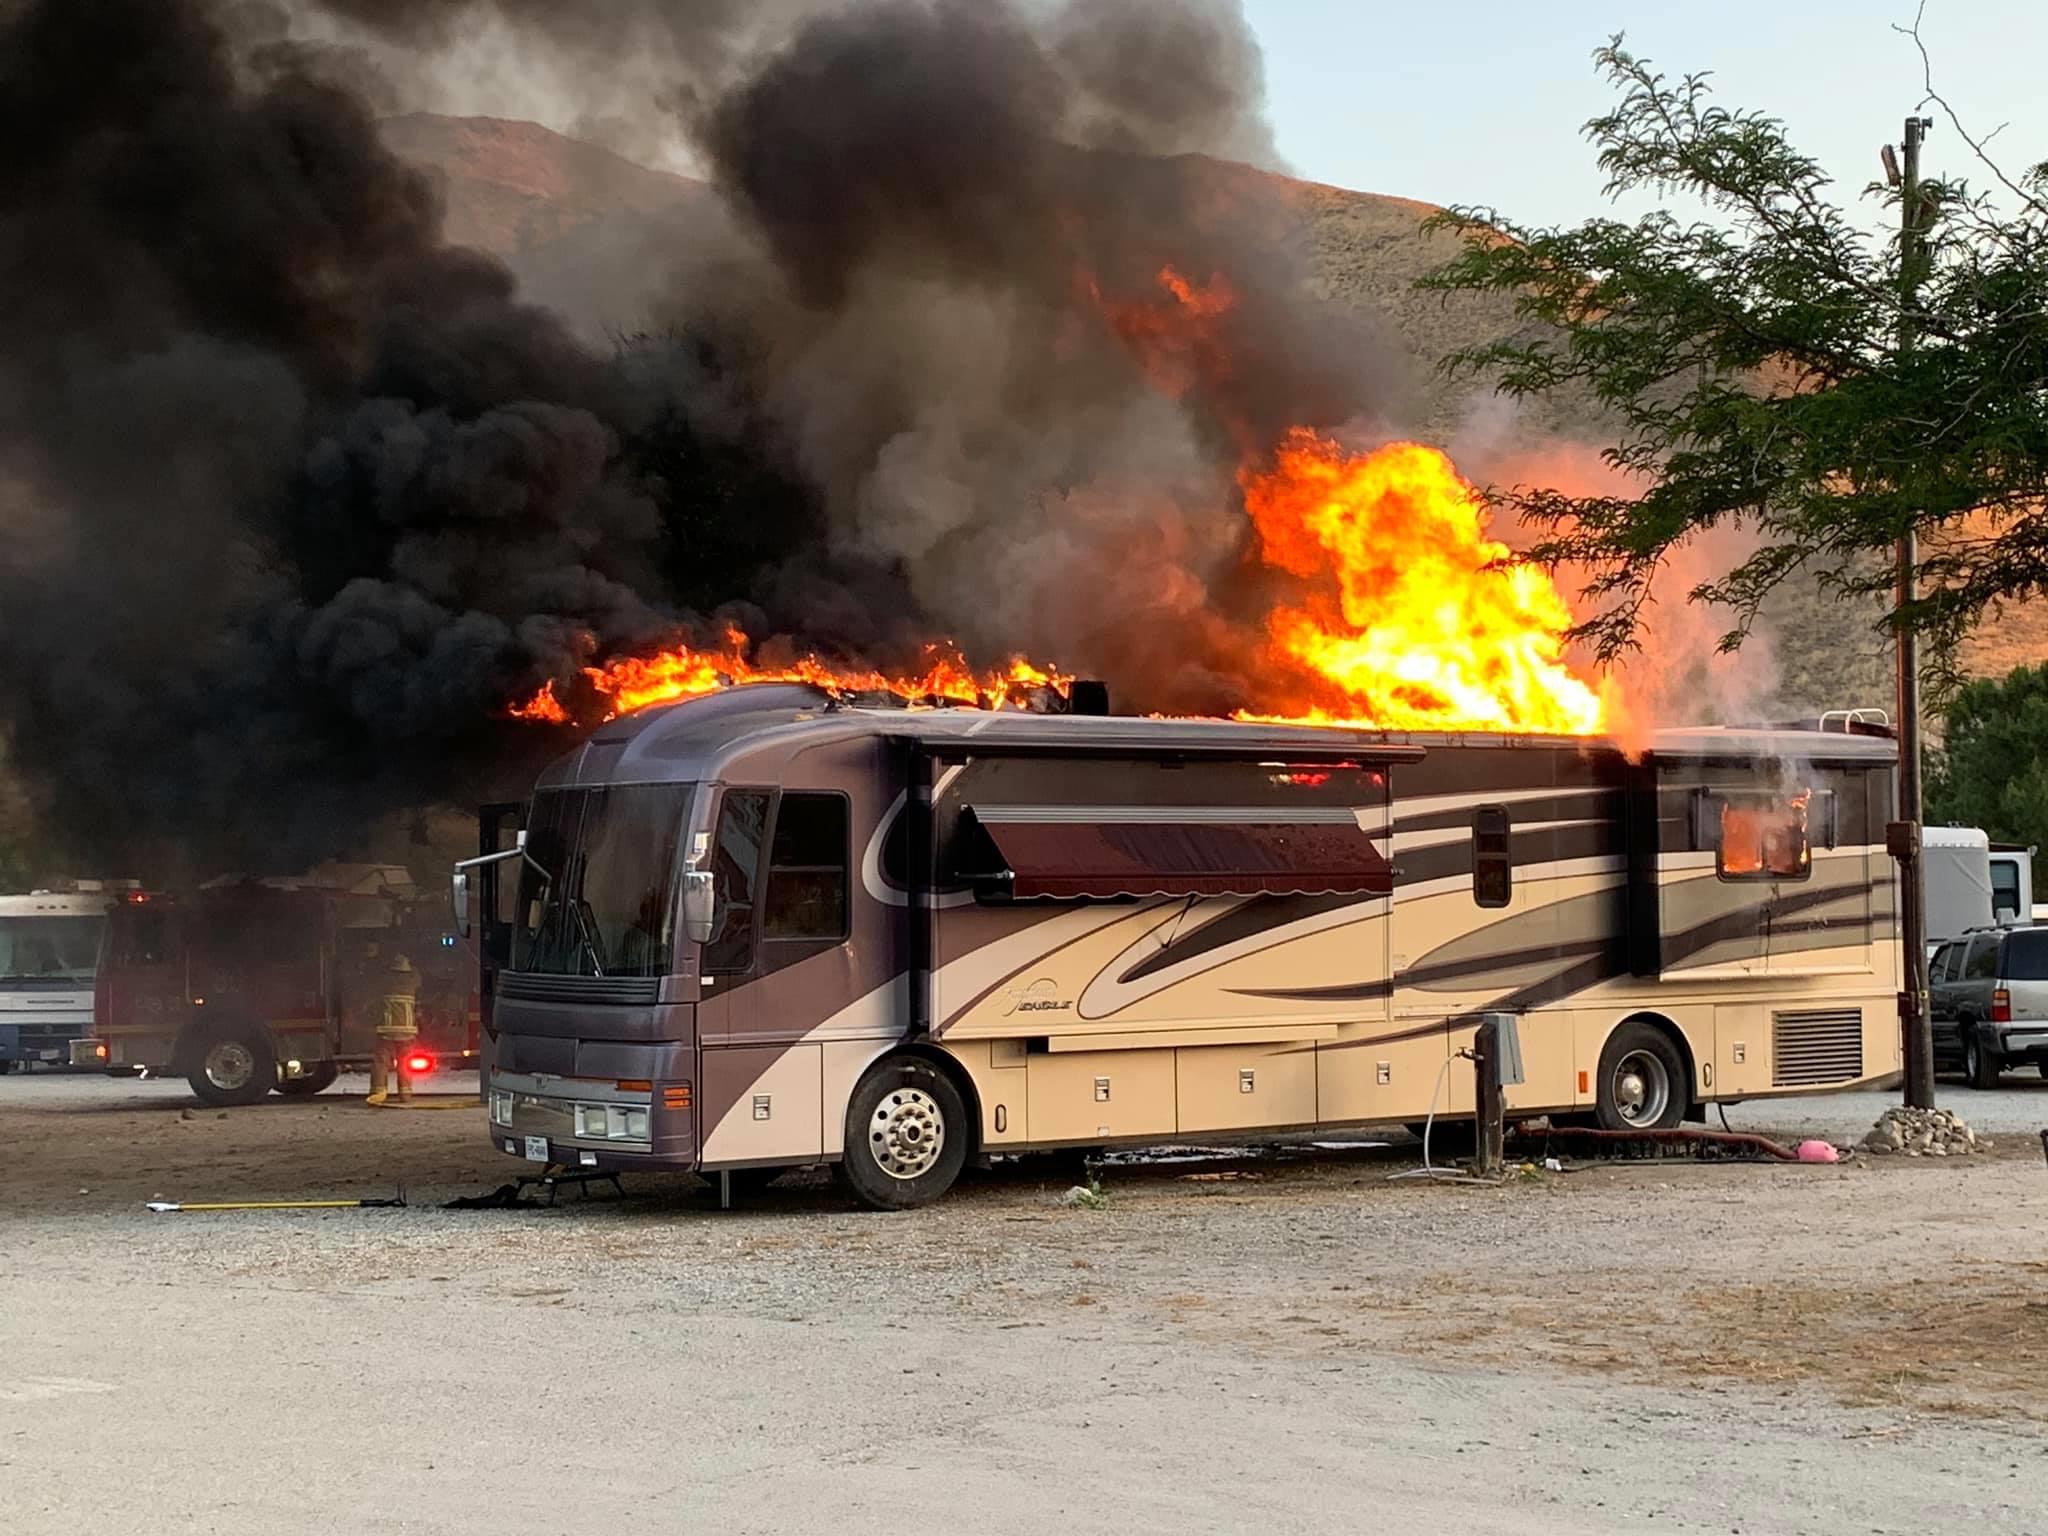
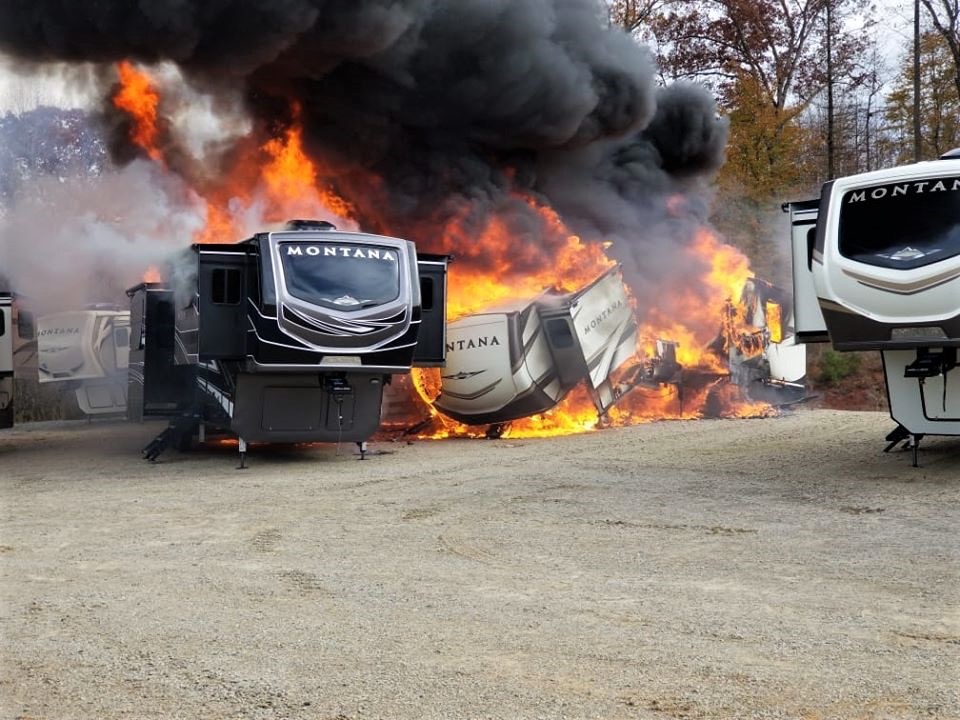
An RV fire is one of the worst things that can happen to an RV. An RV is filled with fiberglass, wood, carpeting, fabrics and almost anything else that can (and will) burn rapidly. Throw in a mess of electrical wiring and once a fire starts, you have very little time to do anything before it gets out of hand and your RV burns to the ground.

Thousands of RV fires occur every year. 

RV fire

RV Fires: How do RV Fires Start? 

About two thirds of these fires begin as an electrical fire where hot wiring or sparks can easily ignite any of these materials that surround the wiring. RV fires can begin in any number of areas where electrical componets are found. Common places for electrical RV fires to start include:

  • Engine compartments
  • Generators
  • Breaker panels
  • Battery compartments
  • Inveterts
  • Automatic transfer switches
  • A number of other areas

In addition to a fire that begins from an electrical failure, another potential danger area is an absorption style RV refrigerator where a cracked heat exchanger can allow hydrogen gas to escape and be ignited. This danger increases as they age.

rv fire

Manual Fire Extinguishers: Do They Work for RV Fires?

If the fire is not detected and dealt with immediately, it can be too late to remedy the situation and hopefully there’s enough time to bail out before your RV becomes engulfed in flames. If the fire is detected early enough, there is a good chance that it can be extinguished immediately to limit the damage and save the coach. However, this requires an automatic extinguisher system because it’s a rare opportunity that you would detect a fire in time to deal with it with a manual fire extinguisher. Couple that with the fact that most fire extinguishers in an RV are inadequate to handle most fires due to their limited size and technology, and it’s fairly obvious that an automatic fire suppression system is your best chance to save your RV. Before we go any further, let’s take a look at how various fires are categorized, what makes a fire and how to extinguish a fire.

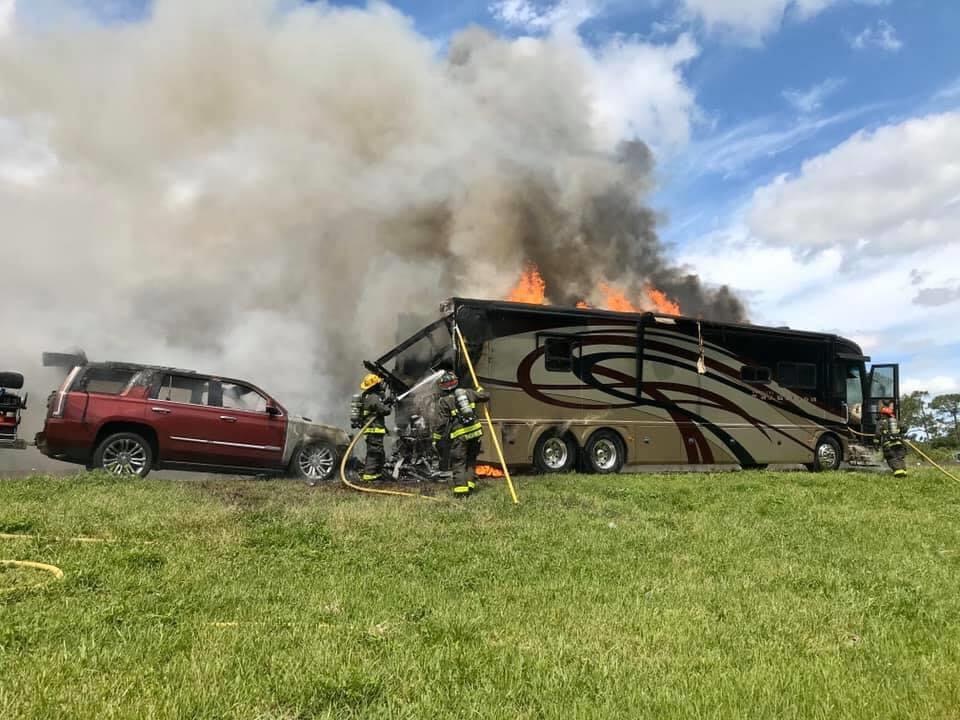
motorhome fire with towed vehicle
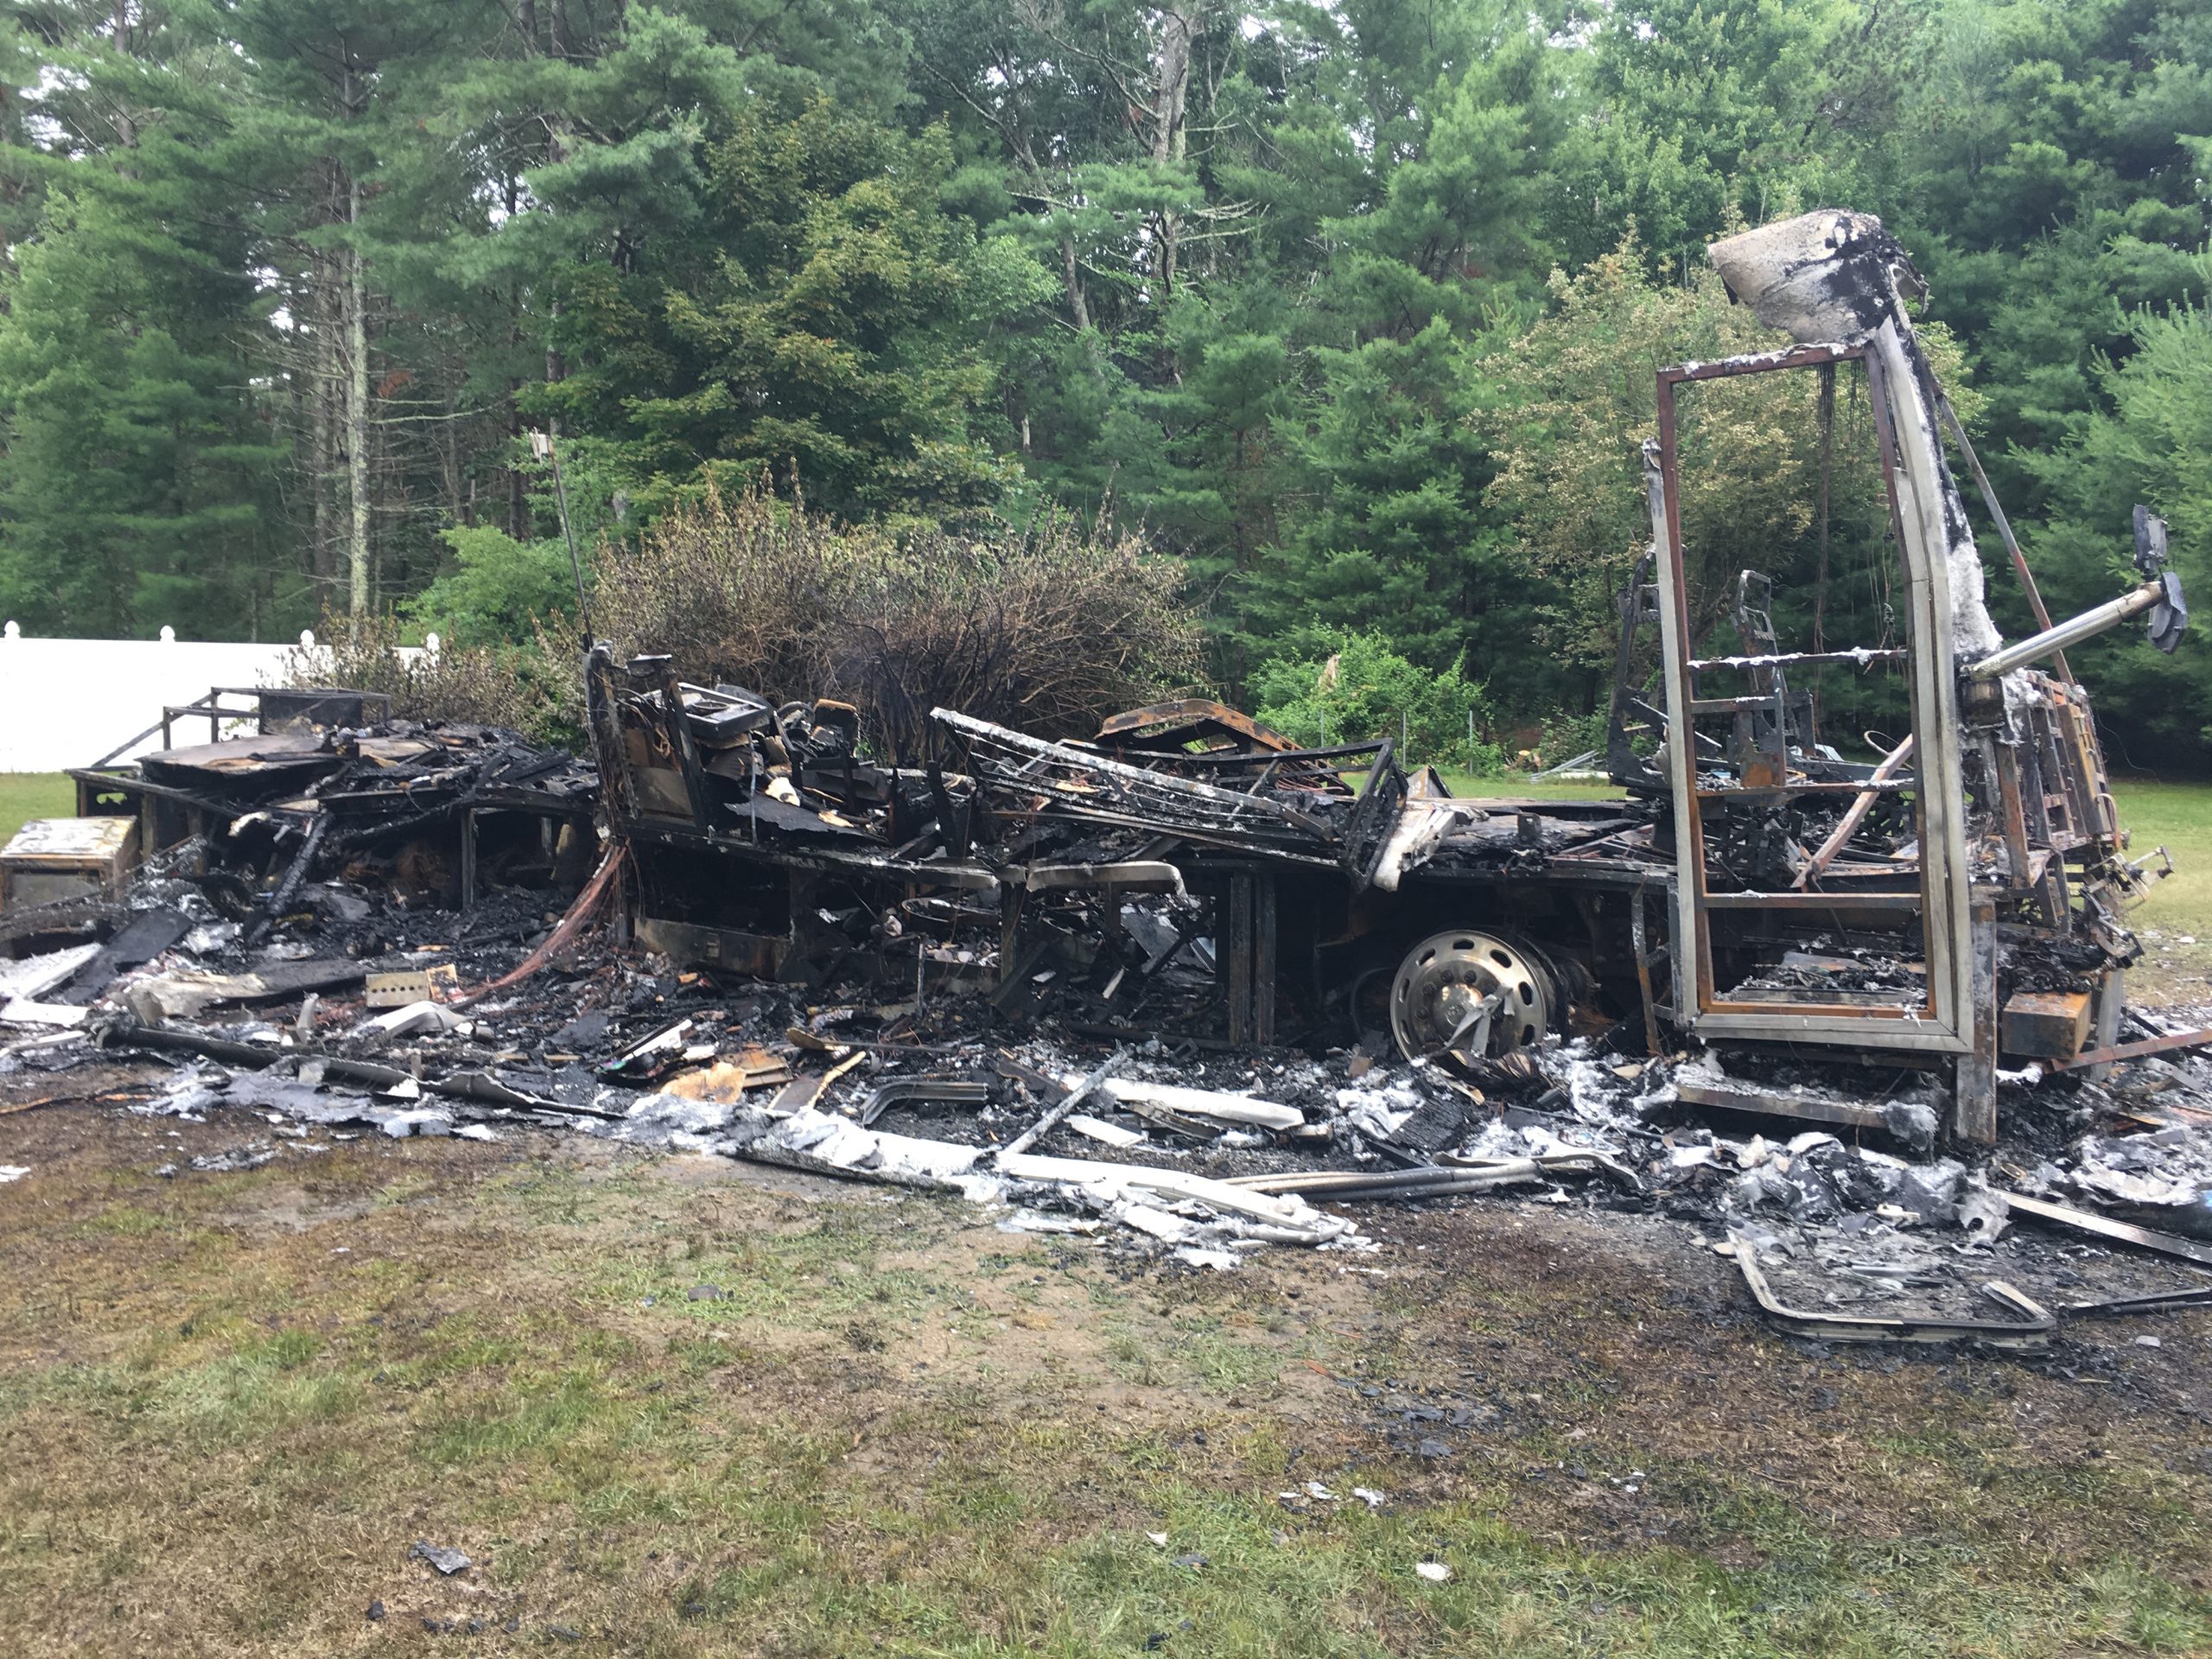
motorhome after fire

Fire Categories:

Fires are categorized by classes which are established by the National Fire Protection Association, or NFPA. Each category describes a fire that uses a specific type of fuel. Fire extinguishers are typically labeled as capable of handling certain classes. Following are some descriptions of fire classes:

  • Class A Fire – These are fires that begin with wood, cloth and paper as their fuel. The key to remembering this is by equating the letter “A” with “ash” which is what these fires leave behind.
  • Class B Fire – These fires occur in flammable liquids, such as gasoline, oil and other combustible fuels. Liquids boil so equate a class “B” fire with the word “boil”.
  • Class C Fire – These fires are electrical fires that occur in energized electrical circuits. Energized circuits pass a current, so equate a class “C” fire with the word “current” and you should be able to remember how to identify these three fire classes.
  • Class D Fire – These fires are from combustible metals such as magnesium or sodium and really don’t apply to RV use, so you won’t have to worry about those here.
RV engine fire

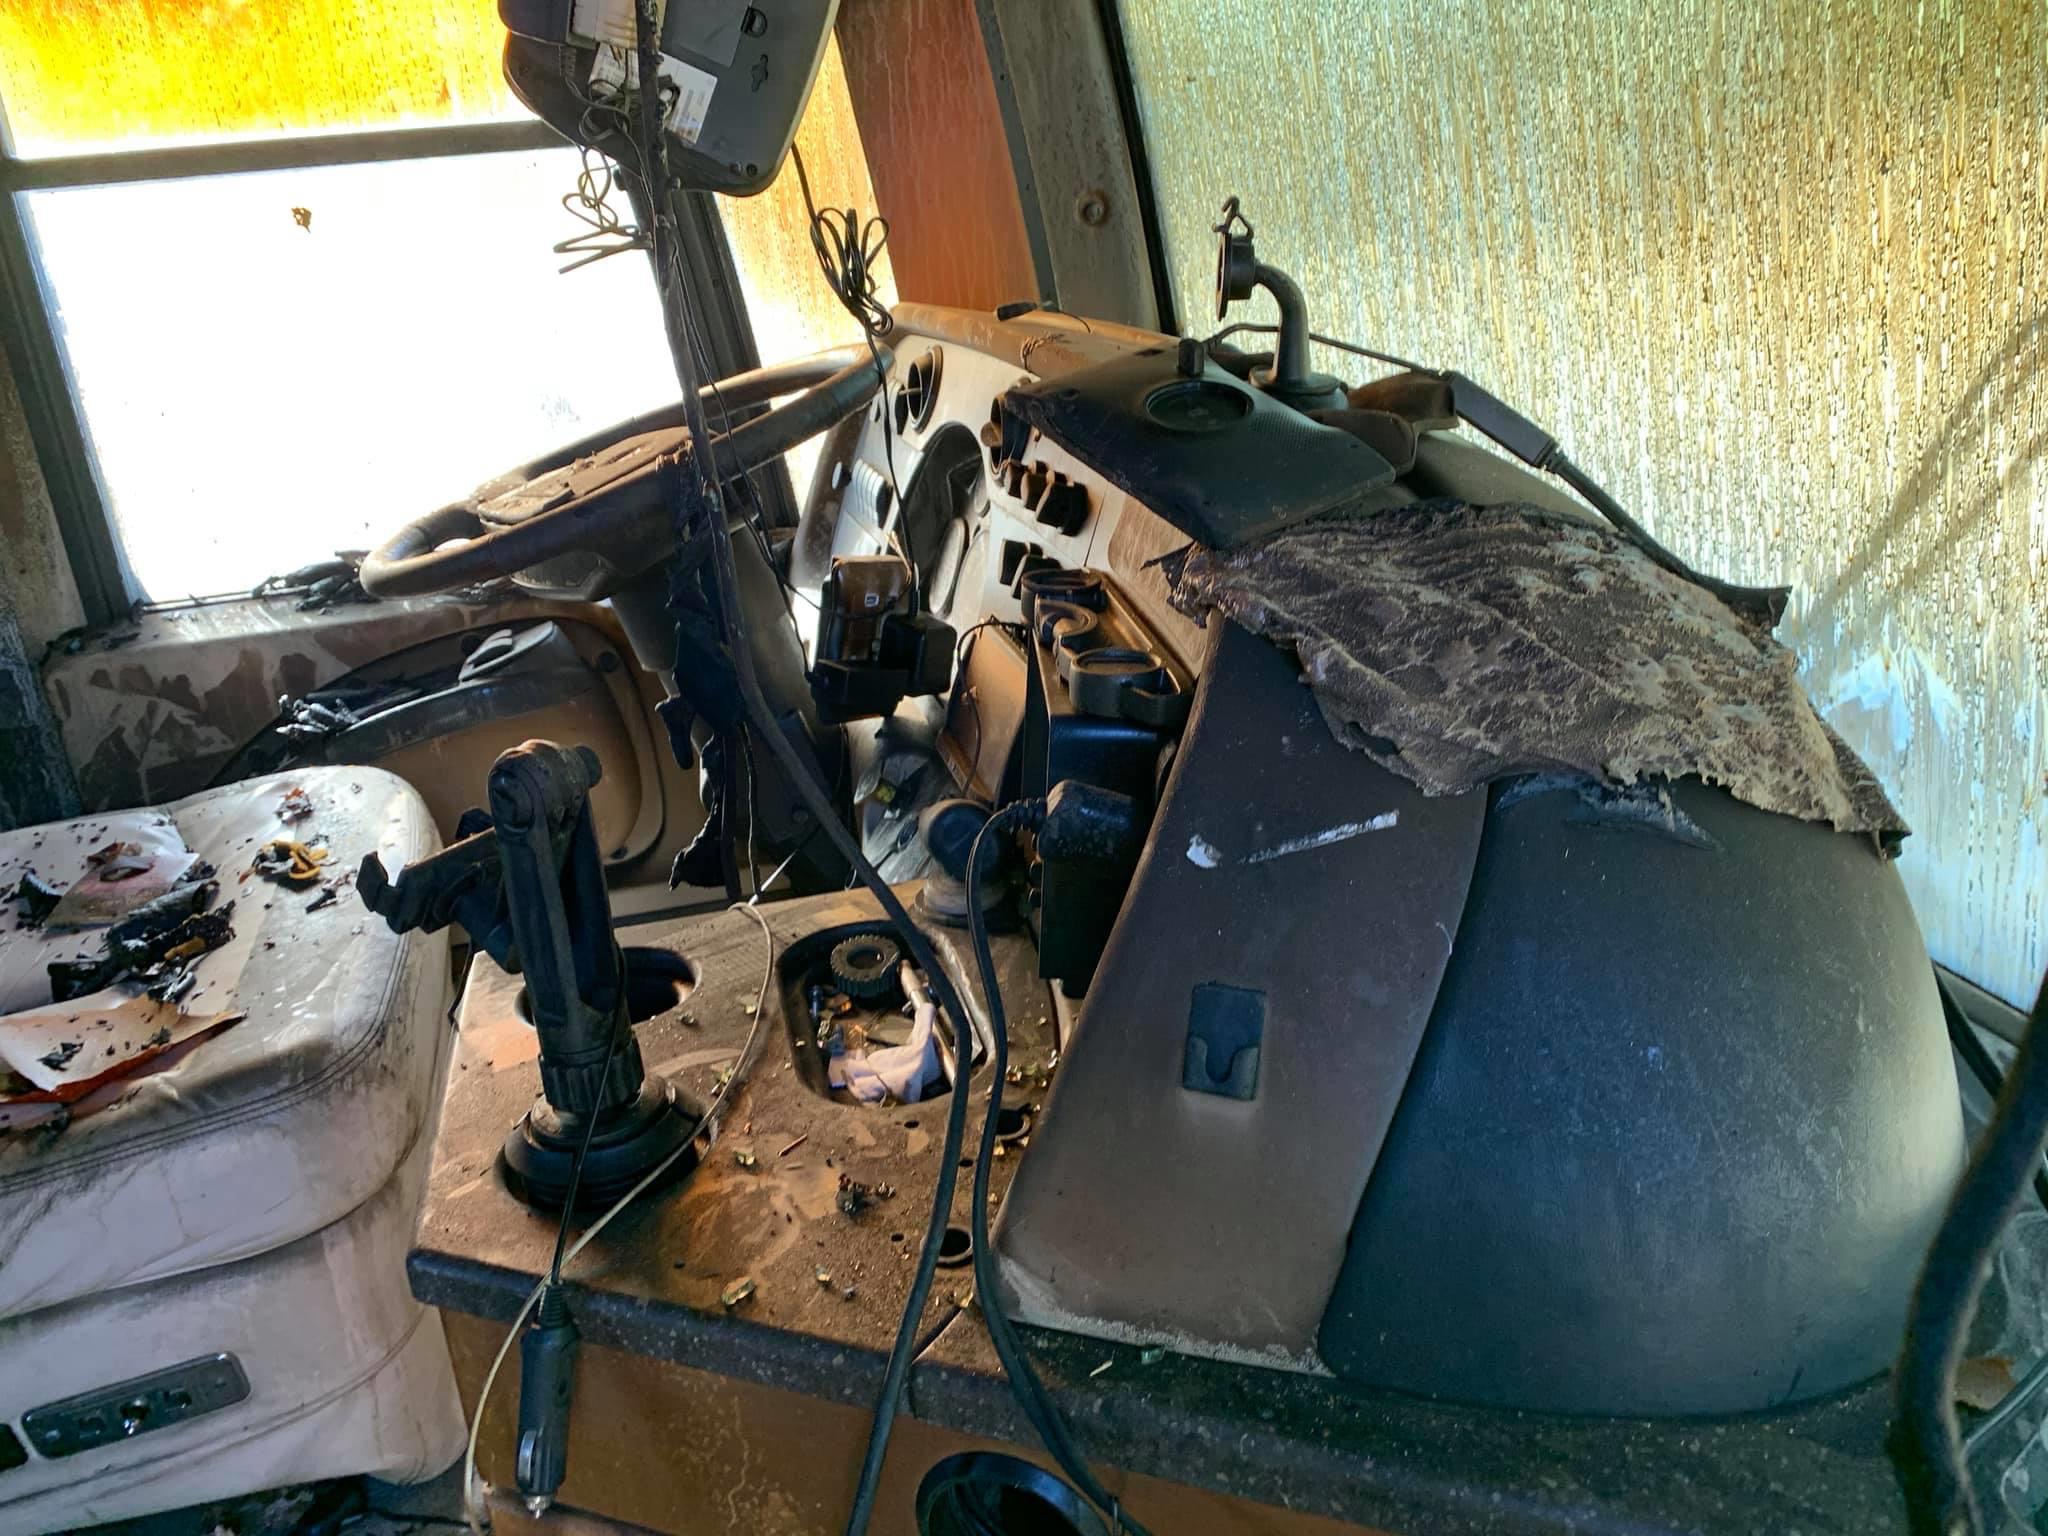
The cockpit of a gas Class A after  an engine fire

The Fire Triangle

In reality, a fire is nothing more than a rapid chemical reaction. Think of the hot sun darkening a piece of newspaper that has been laying around in a store window over several years, fading away until it turns into ashes. A fire is merely that same process only sped up to warp drive speeds, degrading it in seconds rather than years. This speedy process also generates lots of heat in a short period of time and is referred to as combustion.

In order to have combustion, three things must be present – fuel, oxygen and heat of ignition. These three elements are commonly displayed in the fire triangle. Take away any one item from the triangle and the fire will extinguish. The choice of which element to remove depends on the class of fire. Different fuels will have different temperatures that they will ignite at. You will need to heat up campfire logs to a fairly high temperature in order to cause them to ignite whereas paper or cloth can easily be ignited at a much lower temperature with a match or spark.

Class A Fires in an RV

A class A fire uses fuel such as logs in a campfire – or carpet, fabrics or paneling in your RV’s interior. Campfires are easy to extinguish just by dumping water on them so that the wood cools down to a temperature beneath the point of ignition. Dumping water on a class A fire in your motorhome interior isn’t such a great idea, however, due to collateral damage plus the risk of electrical shock. Most RVs come with a small dry chemical extinguisher that is rated for class A, B and C fires and operates by coating the fuel, thereby separating it from oxygen to suffocate it. But the chemical retardant has its own set of concerns. The chemical becomes toxic once heated and is also corrosive to any electrical components. The small size of these extinguishers also makes them inadequate for anything but the smallest fires. Fortunately, the majority of class A fires are the result of an electrical failure elsewhere, so if the source can be dealt with early on, it won’t develop into a major inferno.

Class B Fires in an RV

A class B fire uses liquid fuel such as diesel fuel, gasoline or oils. You should NOT use water to extinguish these fires or else the water will cause the liquid fueld to spread. These fires need to be suffocated with a dry chemical extinguisher or cooled down with CO2, foam or clean agent gas extinguisher.

Class C Fires in a RV

A class C electrical fire will require either dry chemical, CO2 or clean agent gas extinguisher to suffocate or cool the fire. Water and foam cannot be used due to the energized circuits’ shock hazard. However, a class C fire is only when the circuit is energized. Most class C fires quickly become class A fires once the circuit breakers trip to de-energize the circuit and the surrounding material starts to burn.

THIA by Proteng: A Fire Suppression System

The key to extinguishing a fire is a quick response with an extinguishing agent. Manually applied systems fail in many of these instances because the fire is generally established before the occupants notice the fire, assuming they are even present. Automatic extinguishers eliminate that lag but most are AFFF (Aqueous Film Forming Foam)-based systems that are limited to the engine compartment and maybe an absorption style refrigerator.

I decided to do an upgrade of my existing engine bay’s AFFF system after researching a new product available from National Indoor RV Centers that was designed specifically for RVs – THIA by Proteng. This system originated with race cars. Their high output engines created plenty of heat, meaning the potential for fire was high – especially in a crash. Proteng developed the THIA system of extinguishing fires, which has since been very popular with boats, airplanes, buses and other equipment but has just recently been introduced for RVs.

THIA device Proteng Fire Suppression system
Protemg THIA device

A small THIA by Proteng device used for small compartments

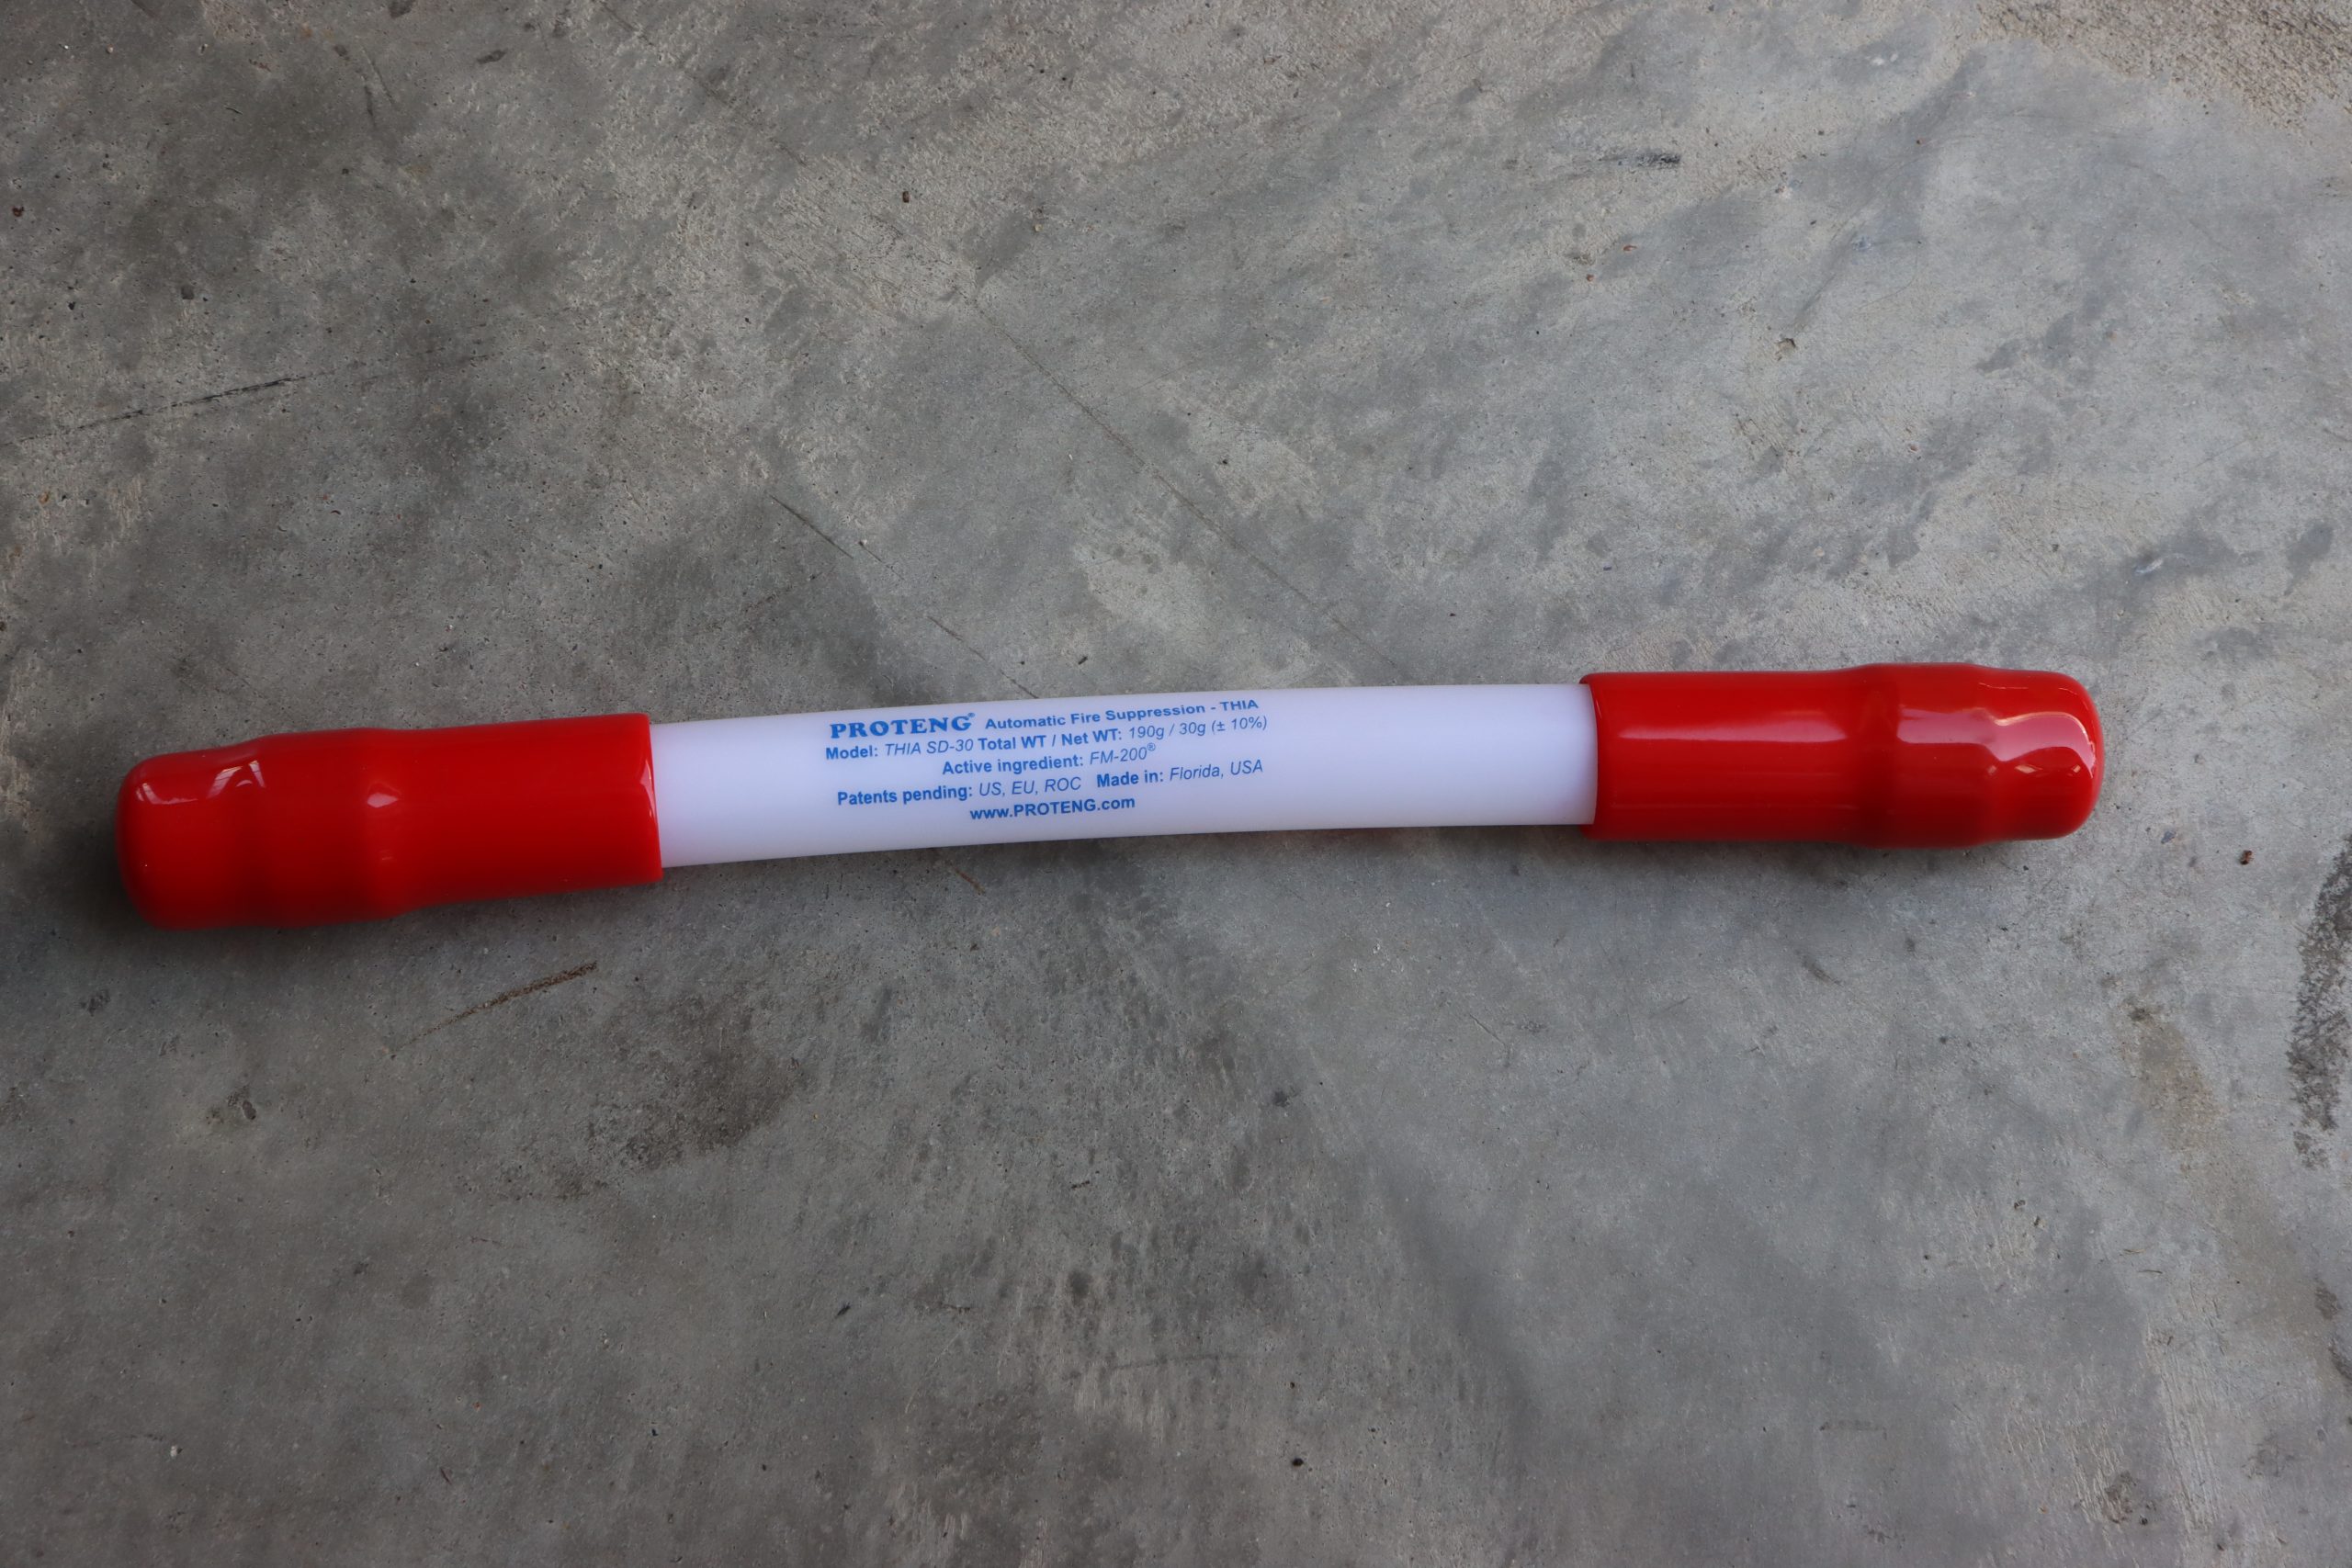
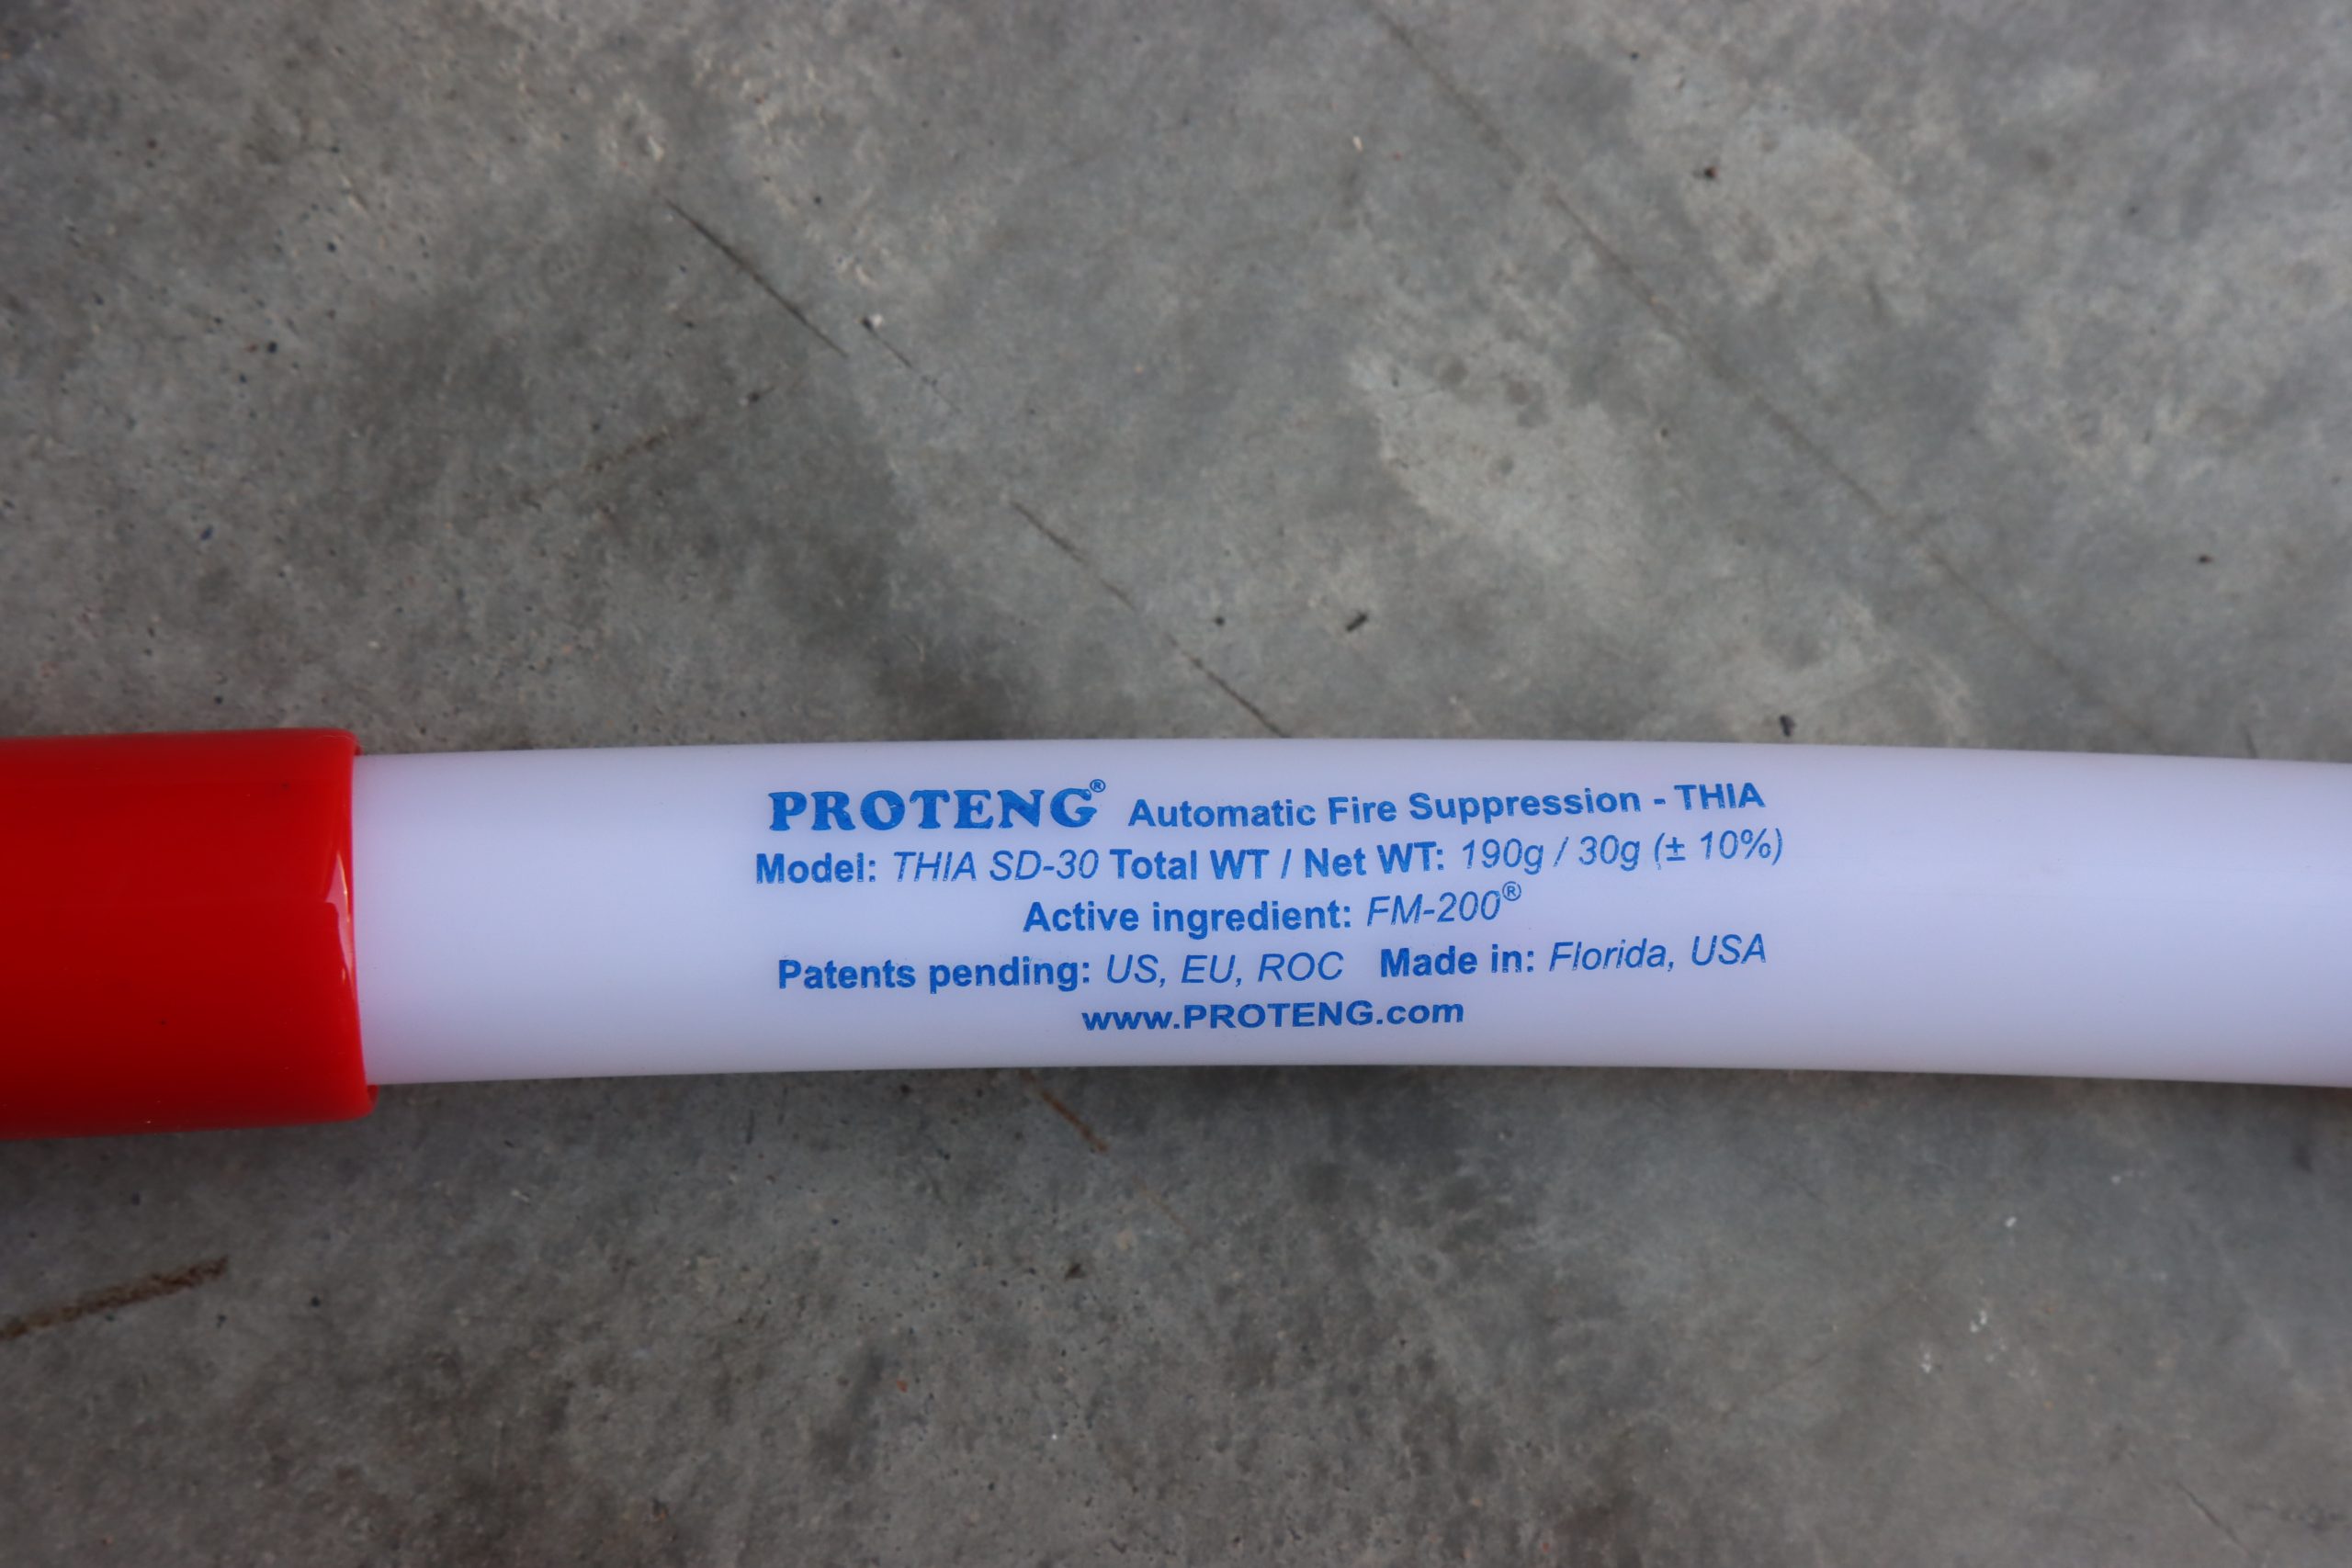
THIA by Proteng devices are labelled to identify each unit

What is THIA by Proteng?

THIA stands for Tube+Heat=Instant Action. The system consists of polyamide (a synthetic polymer) device that is filled with FM-200 fire retardant. FM-200 is a popular state-of-the-art retardant that eliminates many of the drawbacks of other retardants. Unlike dry chemicals or foam, it leaves no residue, is non-toxic and is safe to use on equipment without causing any collateral damage. You may consider it similar to Halon gas but that is not the case. Halon gas displaces oxygen from the air and is toxic. Halon is considered a clean agent gas but has an extremely high potential for ozone depletion, contributing to global warming. As such, production of Halon ceased under the 1994 Clean Air Act and was banned, although it is still legal to use existing Halon extinguishers. FM-200 is also a clean agent gas but is not toxic and functions by cooling down the fire’s fuel to a point lower than its flash point rather than displacing oxygen. Keep in mind that three things are needed to maintain a fire – fuel, oxygen and heat. Removing any one of these items from the fire triangle will stop the fire.

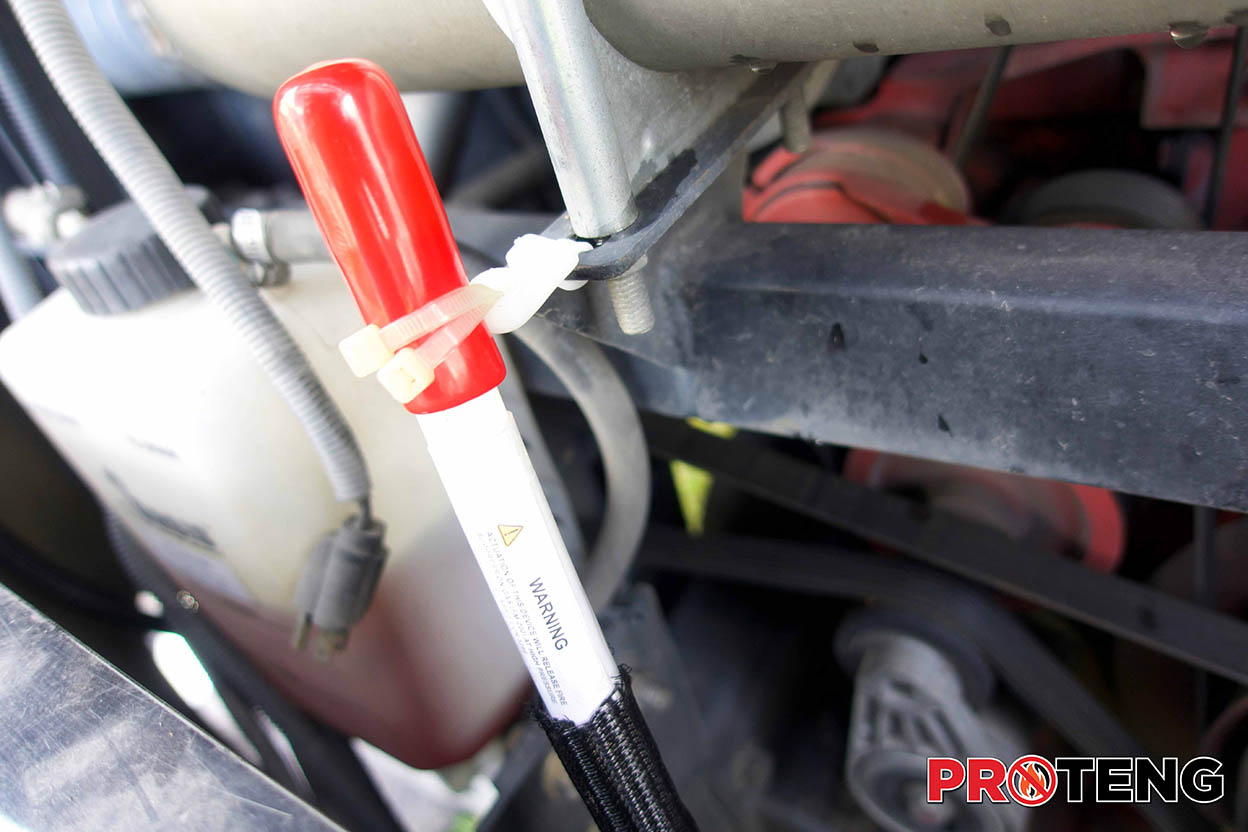
THIA by Proteng is a patent-pending system that uses polyamide devices that are filled with FM-200 and placed in strategic locations throughout the RV. These devices don’t require any bulky valves, hoses or wires which makes them perfect as standalone units requiring minimal installation. Different length devices are available that are custom fit for each area’s potential exposure. The devices are available in two temperature ratings – the standard duty devices are designed to rupture and actuate at 158 degrees Fahrenheit, while the heavy duty devices are designed to actuate at 194 degrees Fahrenheit. The HD devices are also wrapped with protective mesh shield for longevity as they are generally used in engine compartments and generator enclosures.

The devices fill with FM-200 and seals the end up with hydraulically crimped brass end fittings. The FM-200 at rest will have 72 PSI of pressure and will be in liquid form. As the devices heat up, the pressure will form gas at almost 350 PSI just prior to actuation. When the device heats up to the specified external temperature it ruptures, releasing expanding FM-200 in gas form at 1.6 degrees Fahrenheit to rapidly cool down the fire’s fuel, breaking the fire triangle and rapidly extinguishing the fire. 

THIA-50 Proteng Fire Suppression

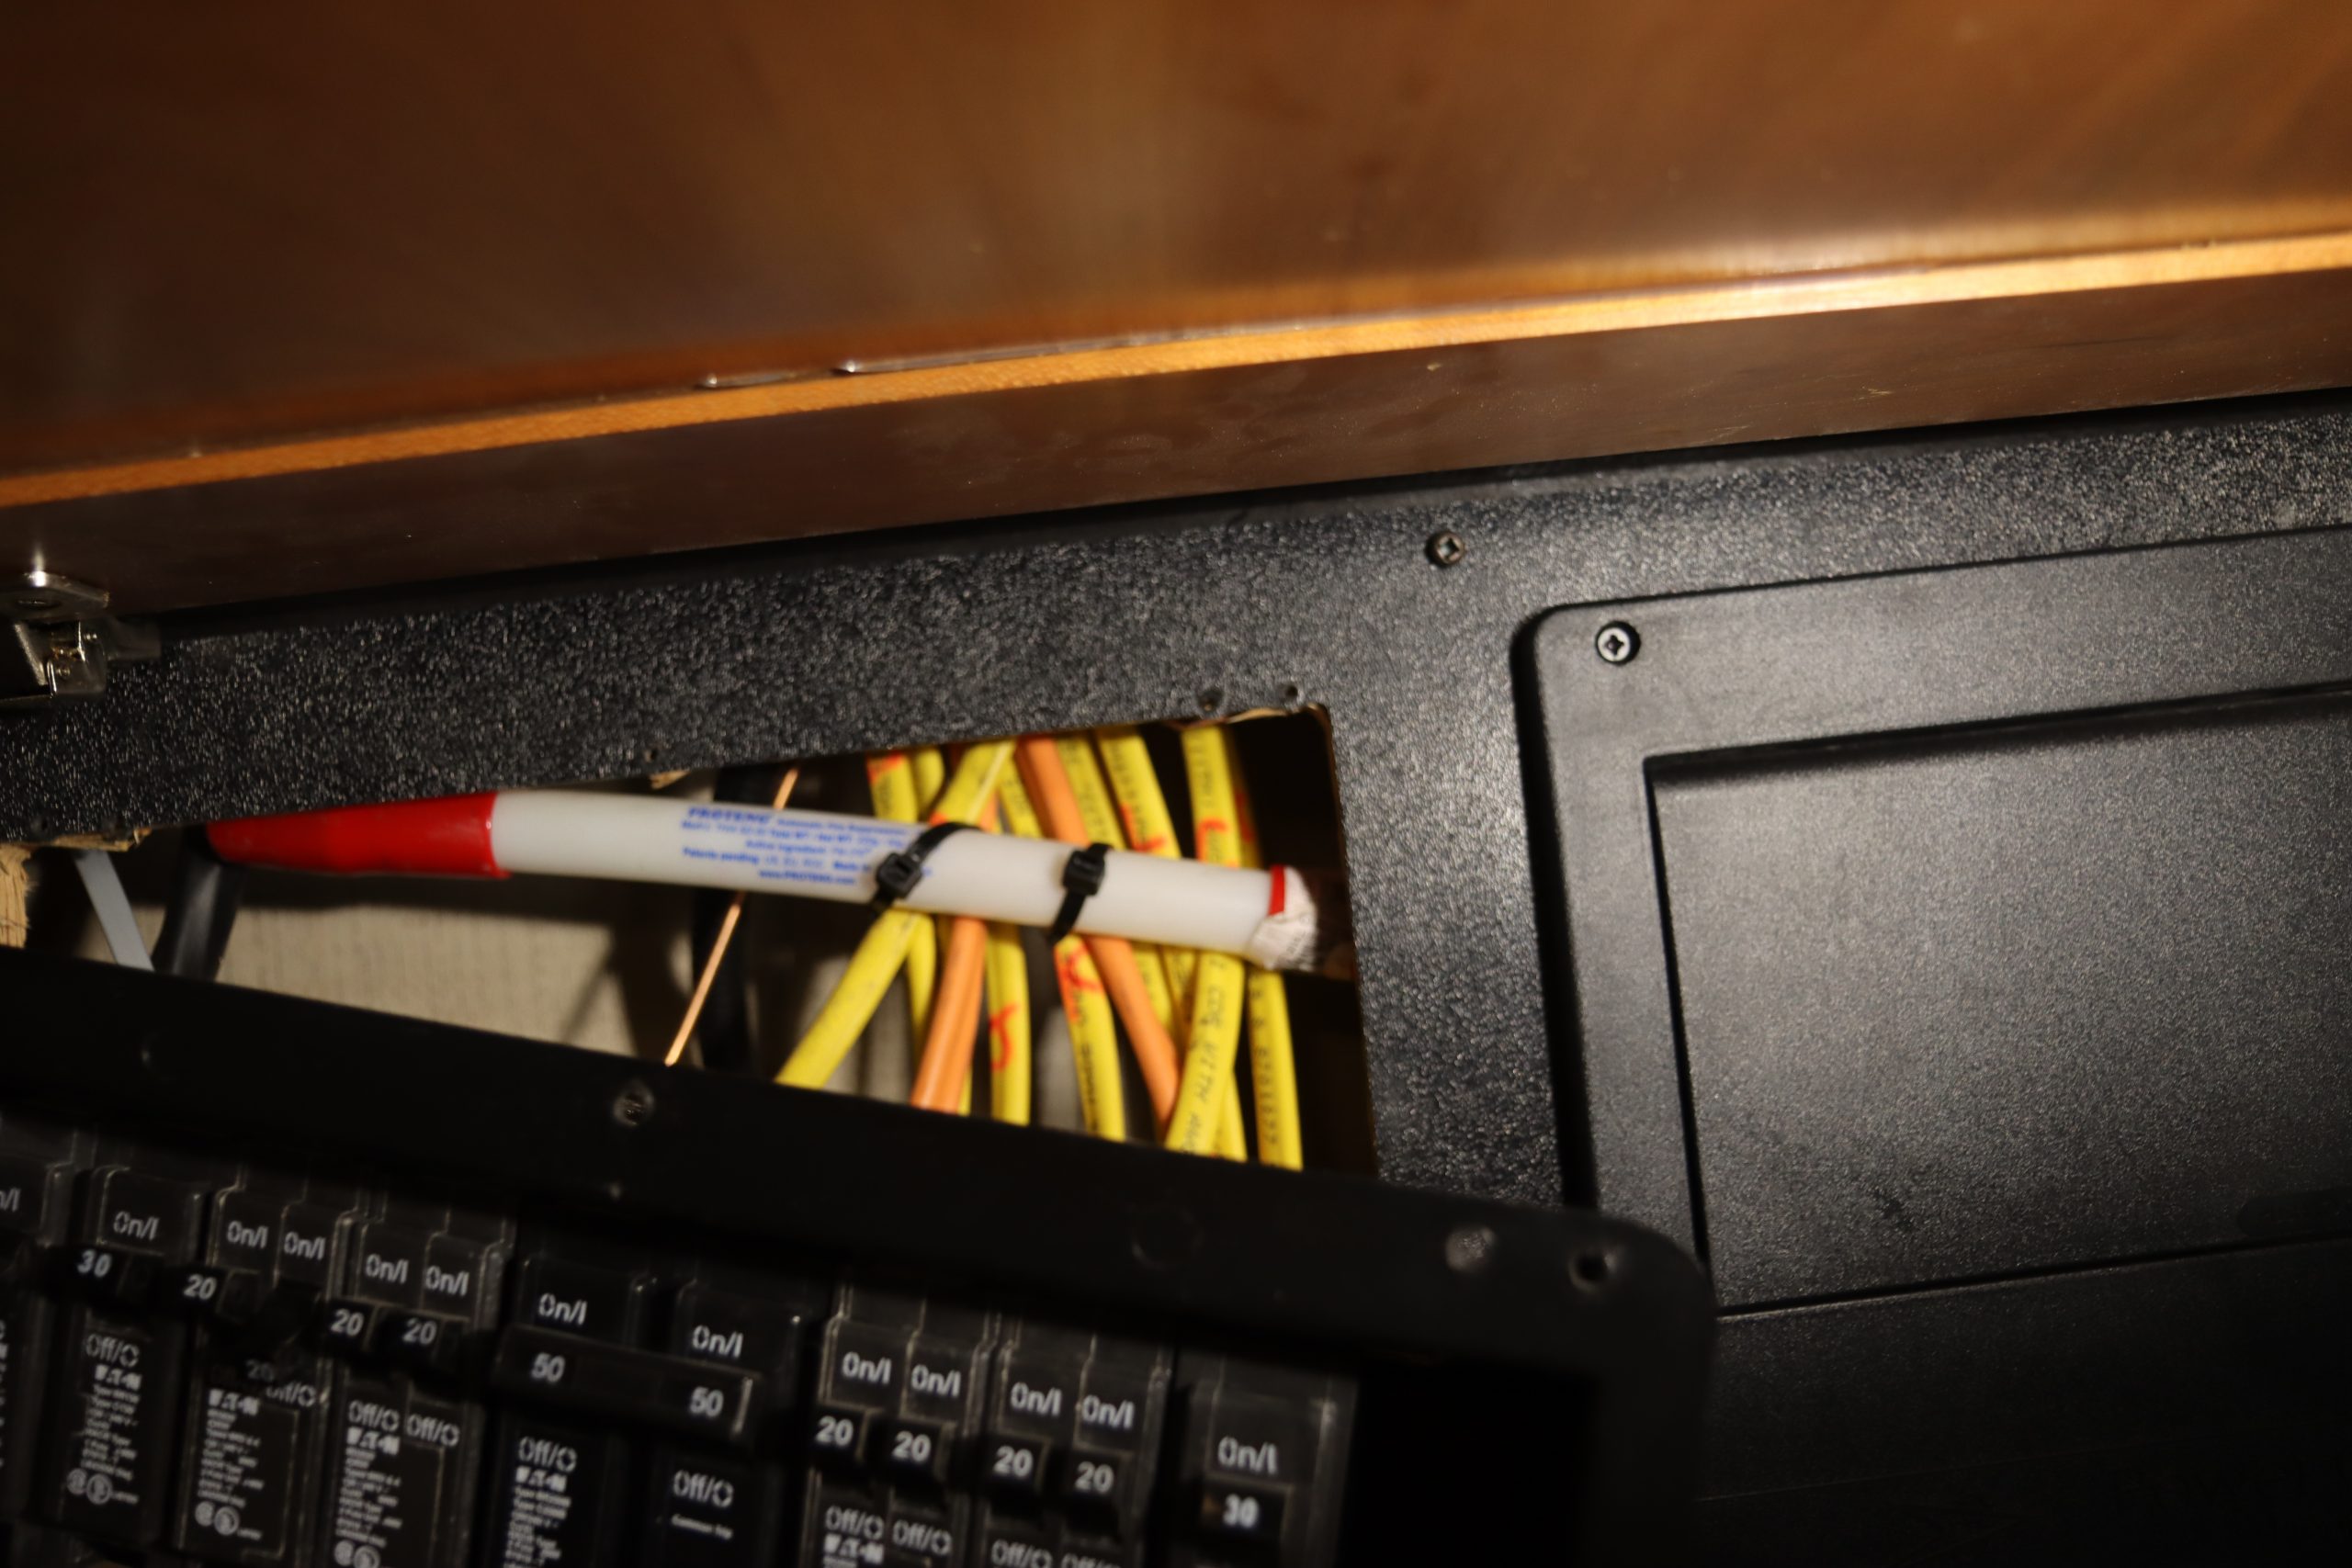
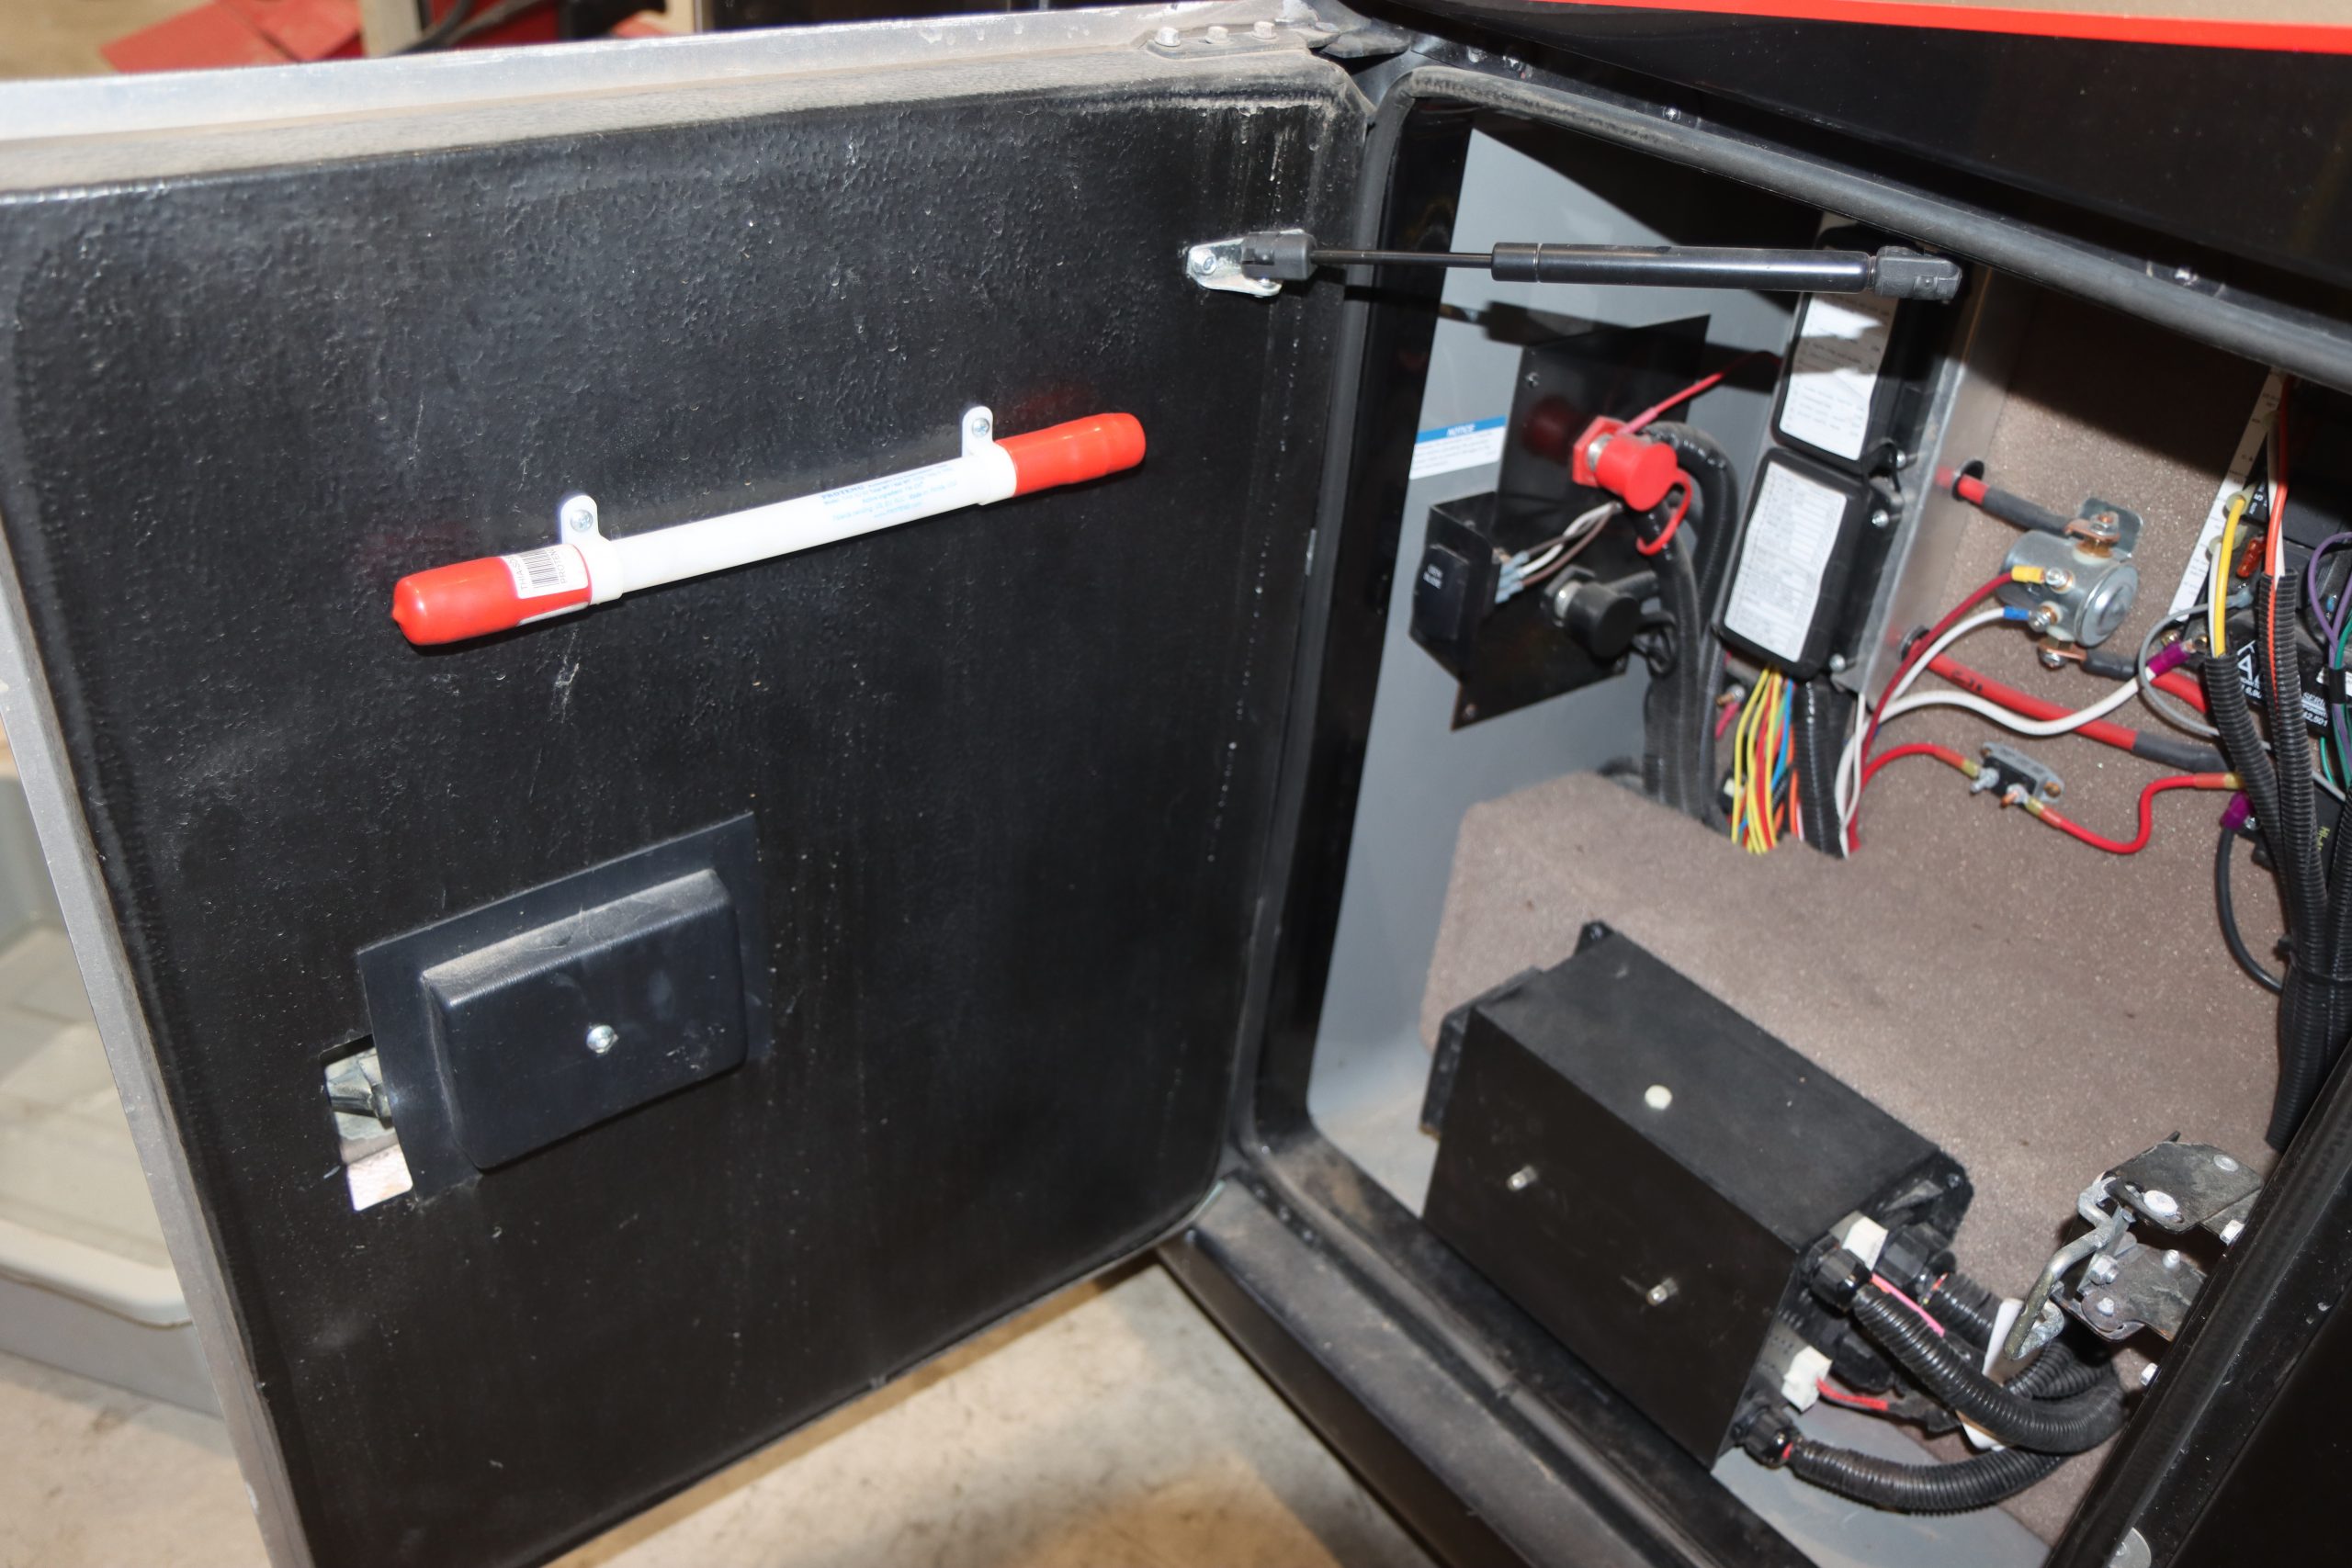
A THIA-50 was installed behind the electrical breaker panels

THIA by Proteng Installation in the Entegra Cornerstone

We took our Entegra Cornerstone to NIRVC’s Lewisville, Texas facility just outside of Dallas for our installation. The installation began with a tech who checked over the RV to find any potential fire risks and measure for the correct THIA by Proteng device to handle that area. 15 minutes later, he returned with a cart full of various device assemblies and began the installation. His first step was to remove the two breaker panels in the overhead cabinet on the left side of the cockpit. A small THIA by Proteng device was placed behind the breaker panels and fastened to the Romex with high heat cable ties. 

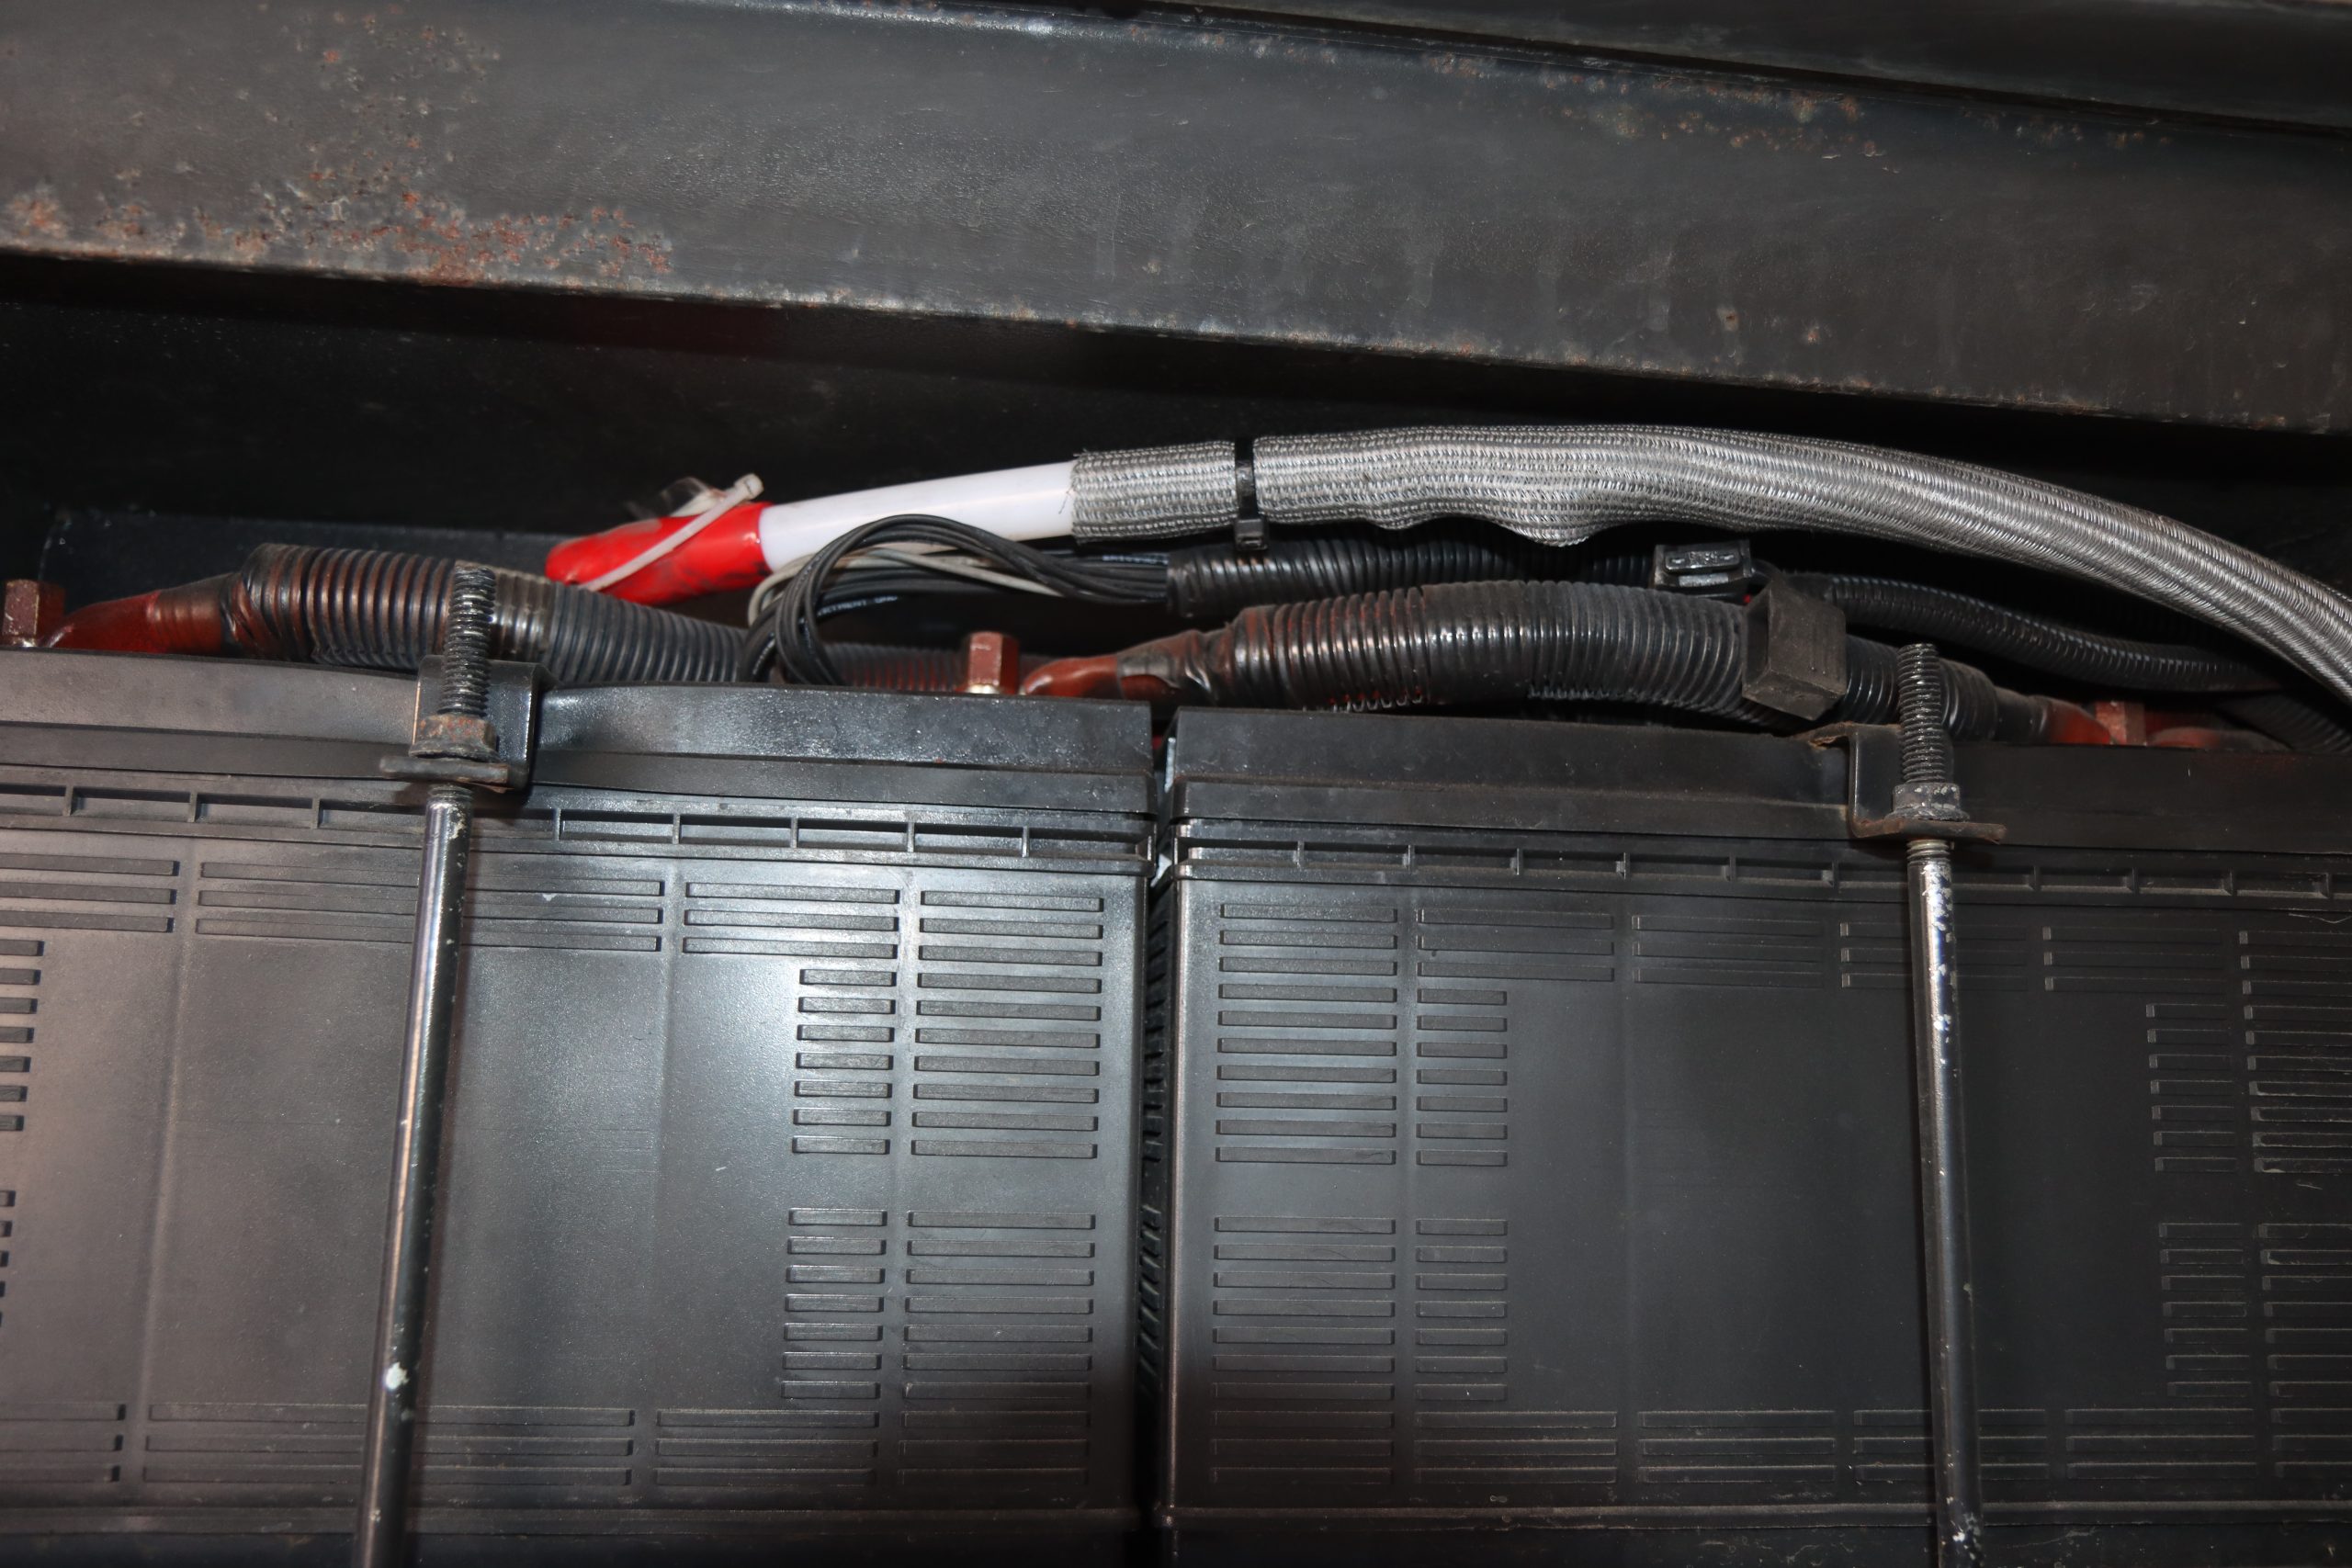
Next, we went to the engine compartment. The device chosen for this coach with its large 600 HP engine compartment was the heavy duty version and was 21’ long and began in the chassis battery area in the curbside compartment so that it could be used to extinguish any fires in that area as well.

Proteng THIA tube installed in RV

A small THIA by Proteng device was also placed in the driver-side front electrical compartment

From there, it passed the DEF tank and crossed the bell housing to the driver’s side before turning back to the rear of the coach. From there it passed back along the curbside of the engine to the starter motor. This large loop passed by every electrical component or potential fire risk. The long length provides a large enough supply of FM-200 to adequately extinguish even the largest fire in that area. One other advantage to the polyamide device is that it will rupture at the hottest point. Unlike a foam system with one or two sprinkler heads, this gives the device an unlimited location to dispense the FM-200 gas right where it is needed  rather than in a general location at the top of the compartment.

Proteng fire suppression

The 21′ HD device used in the engine compartment began at the side compartment by the chassis batteries to include their protection. HD device are covered in mesh protective wrap

Next, a small device was installed at the driver-side front-most compartment where a number of electrical components are located. Another device was fitted to the compartment that houses the eight house batteries.

Proteng THIA tube protecting chassis batteries on RV

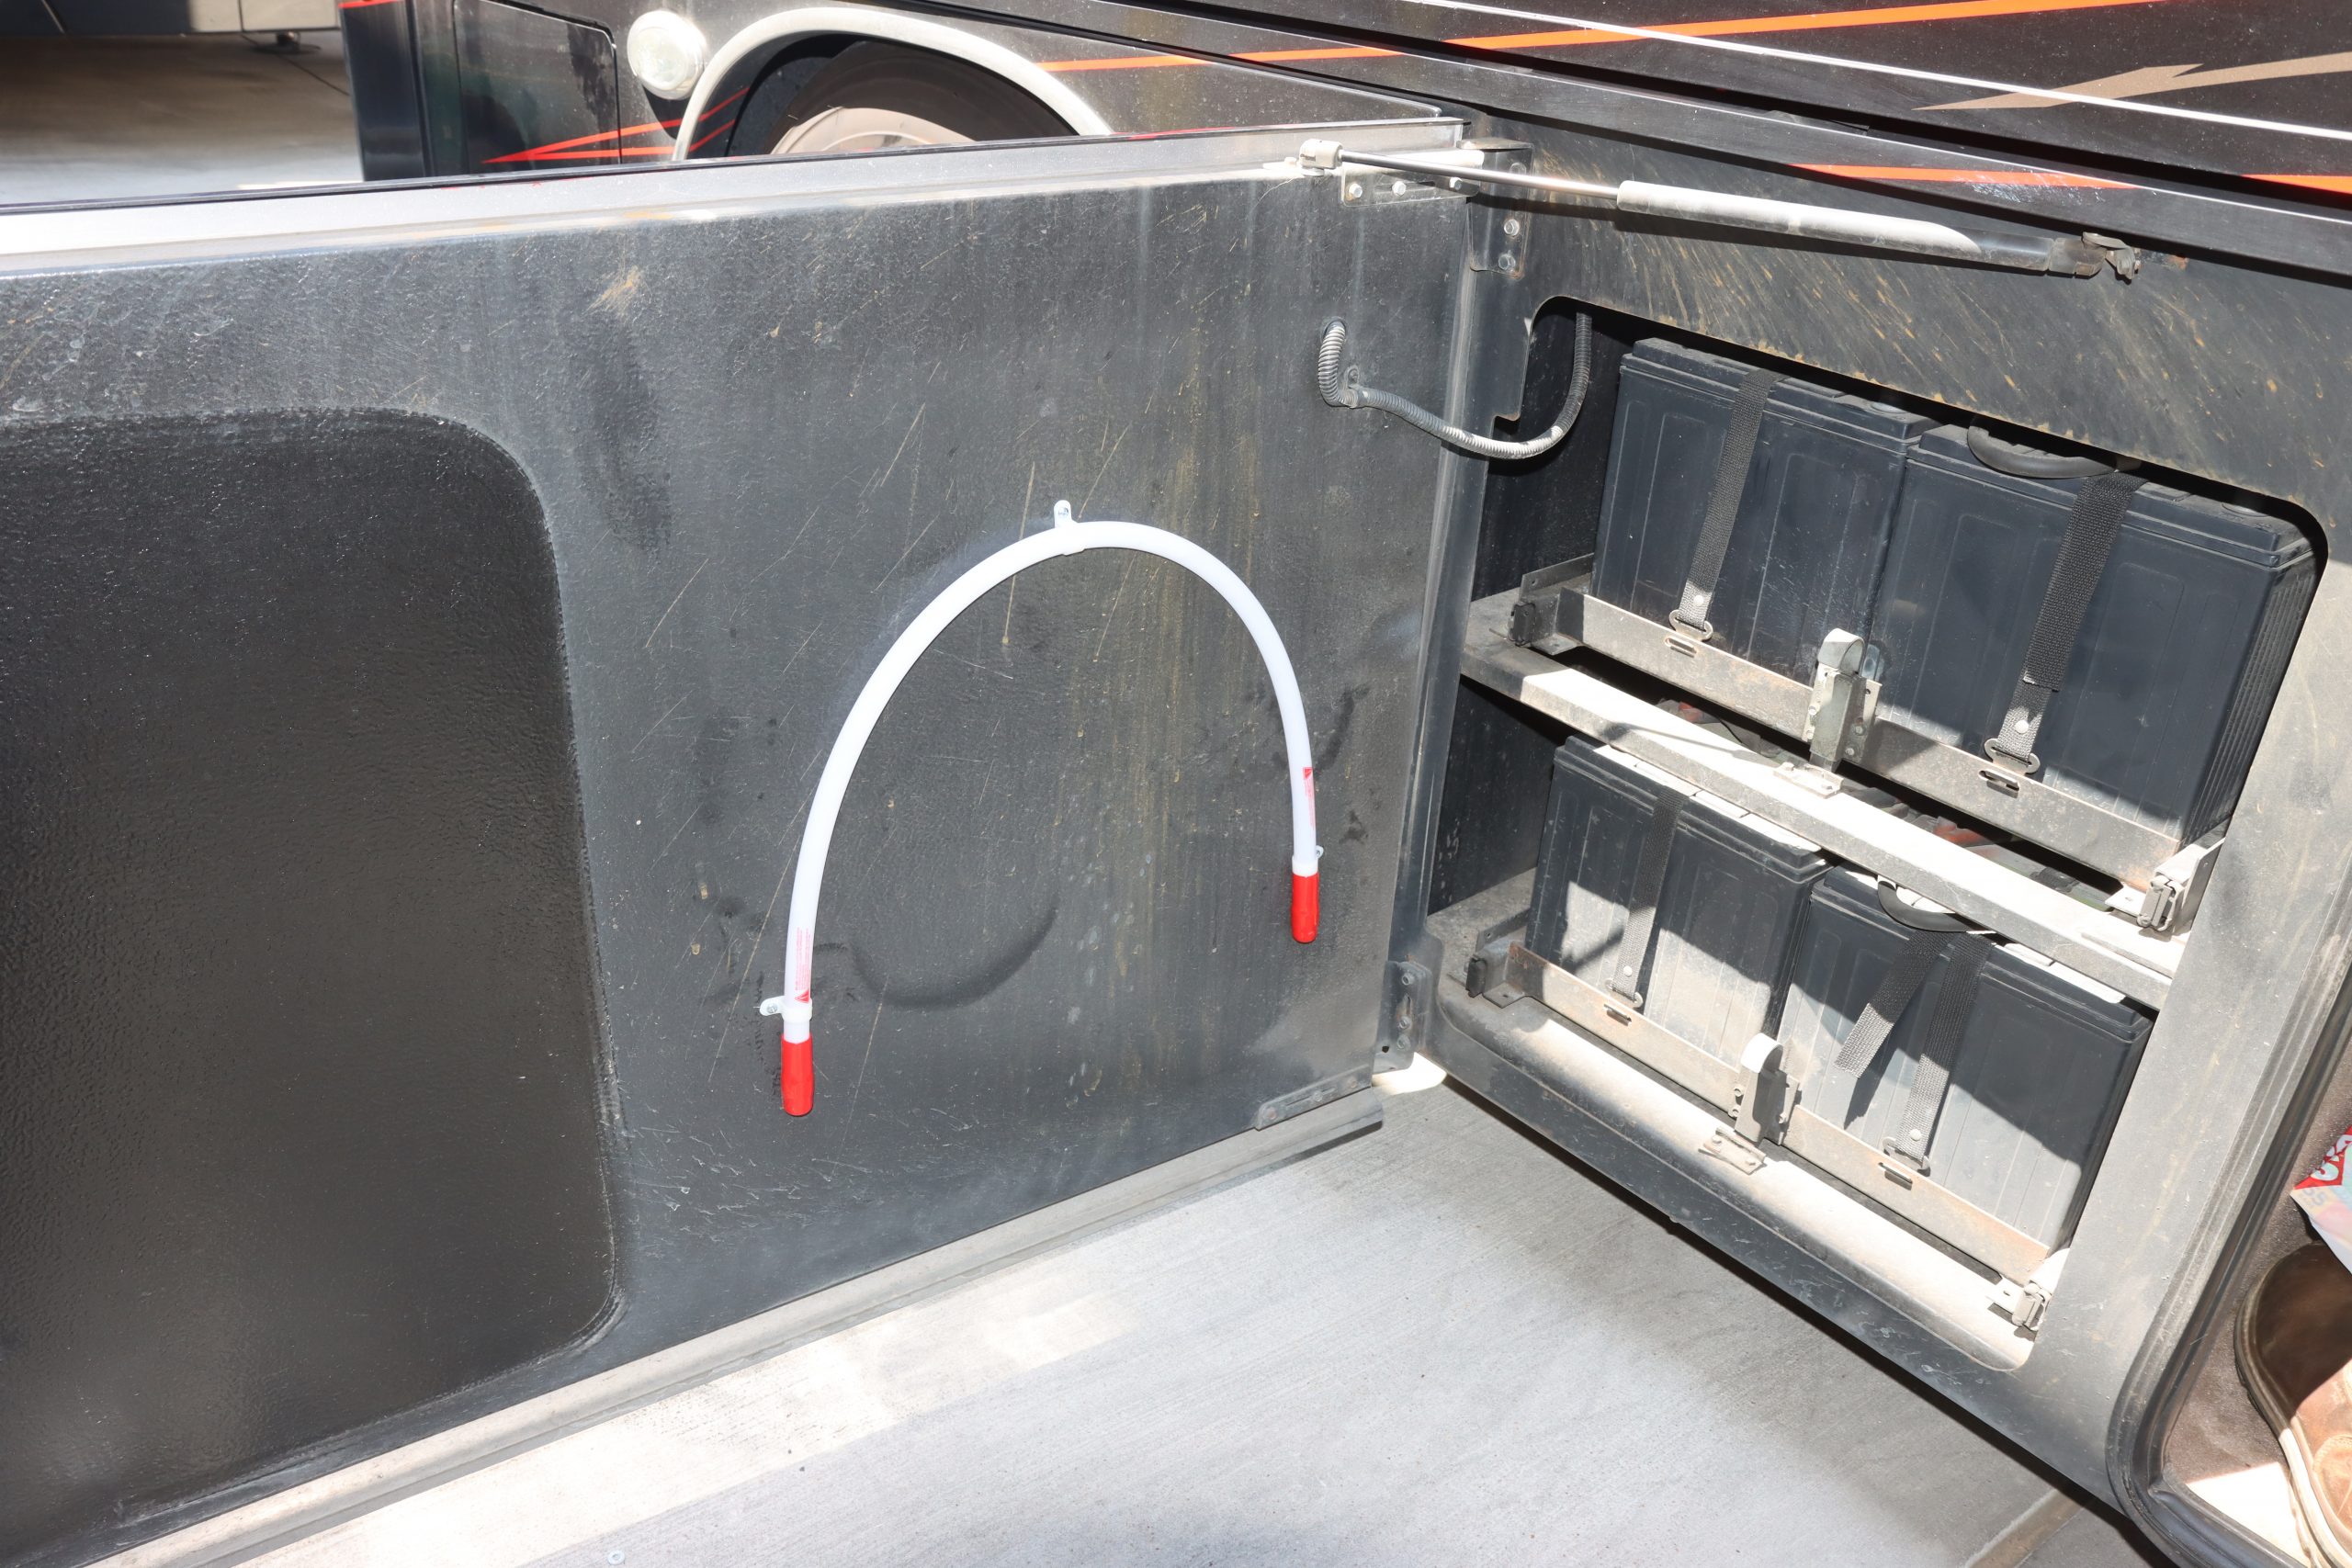
The eight chassis batteries are now protected by a 3′ long THIA by Proteng device

Normally, the device would be mounted above the batteries but this compartment has two stacks of four each and is pretty tight, so the device was mounted in a U-shape to the inside of the bay door to cover both layers of batteries. Another device was placed in the compartment where the electrical transfer switch is located. This was the same compartment where the Aqua-Hot is located, so a larger device was mounted to service this area.

Entegra used a pair of Magnum inverters and mounted them on a tray between the frame rails above the front pass-through storage bay so another device was inserted above the inverters to properly protect them. Lastly, the generator received a second heavy duty device that was inserted inside the generator’s enclosure. That completed the system on our coach.

Protend fire protection installation
Proteng tube in generator house

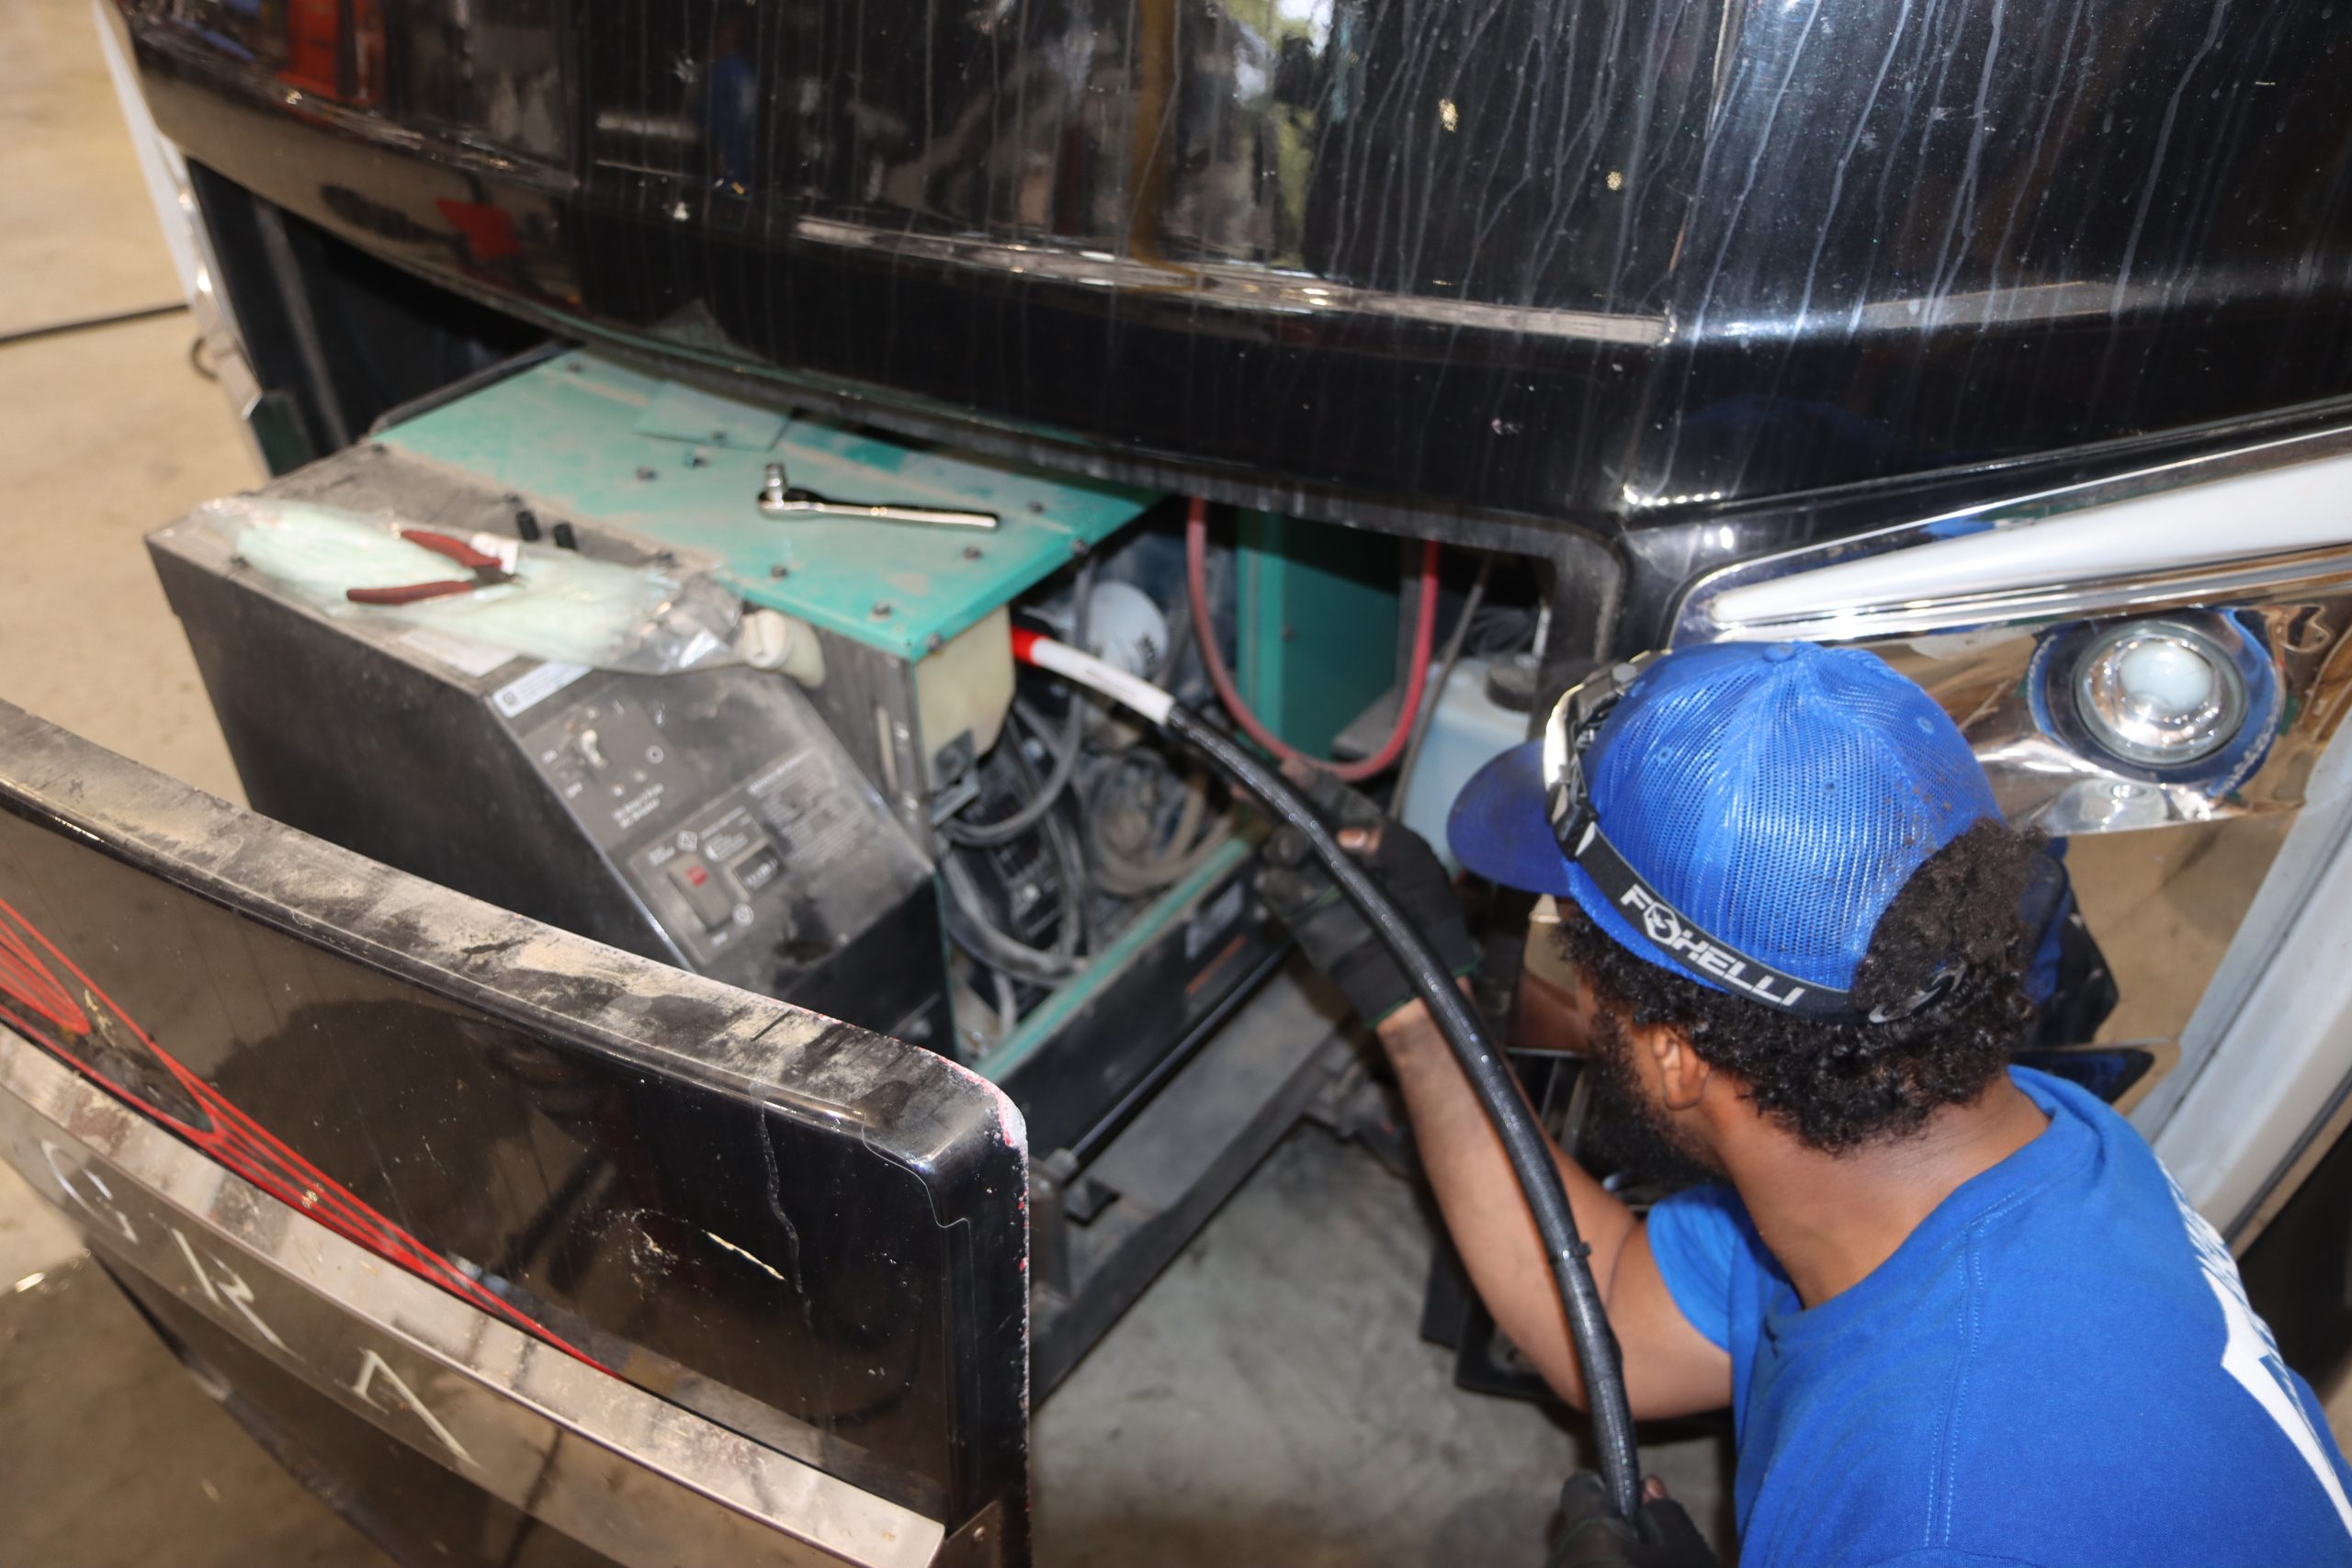
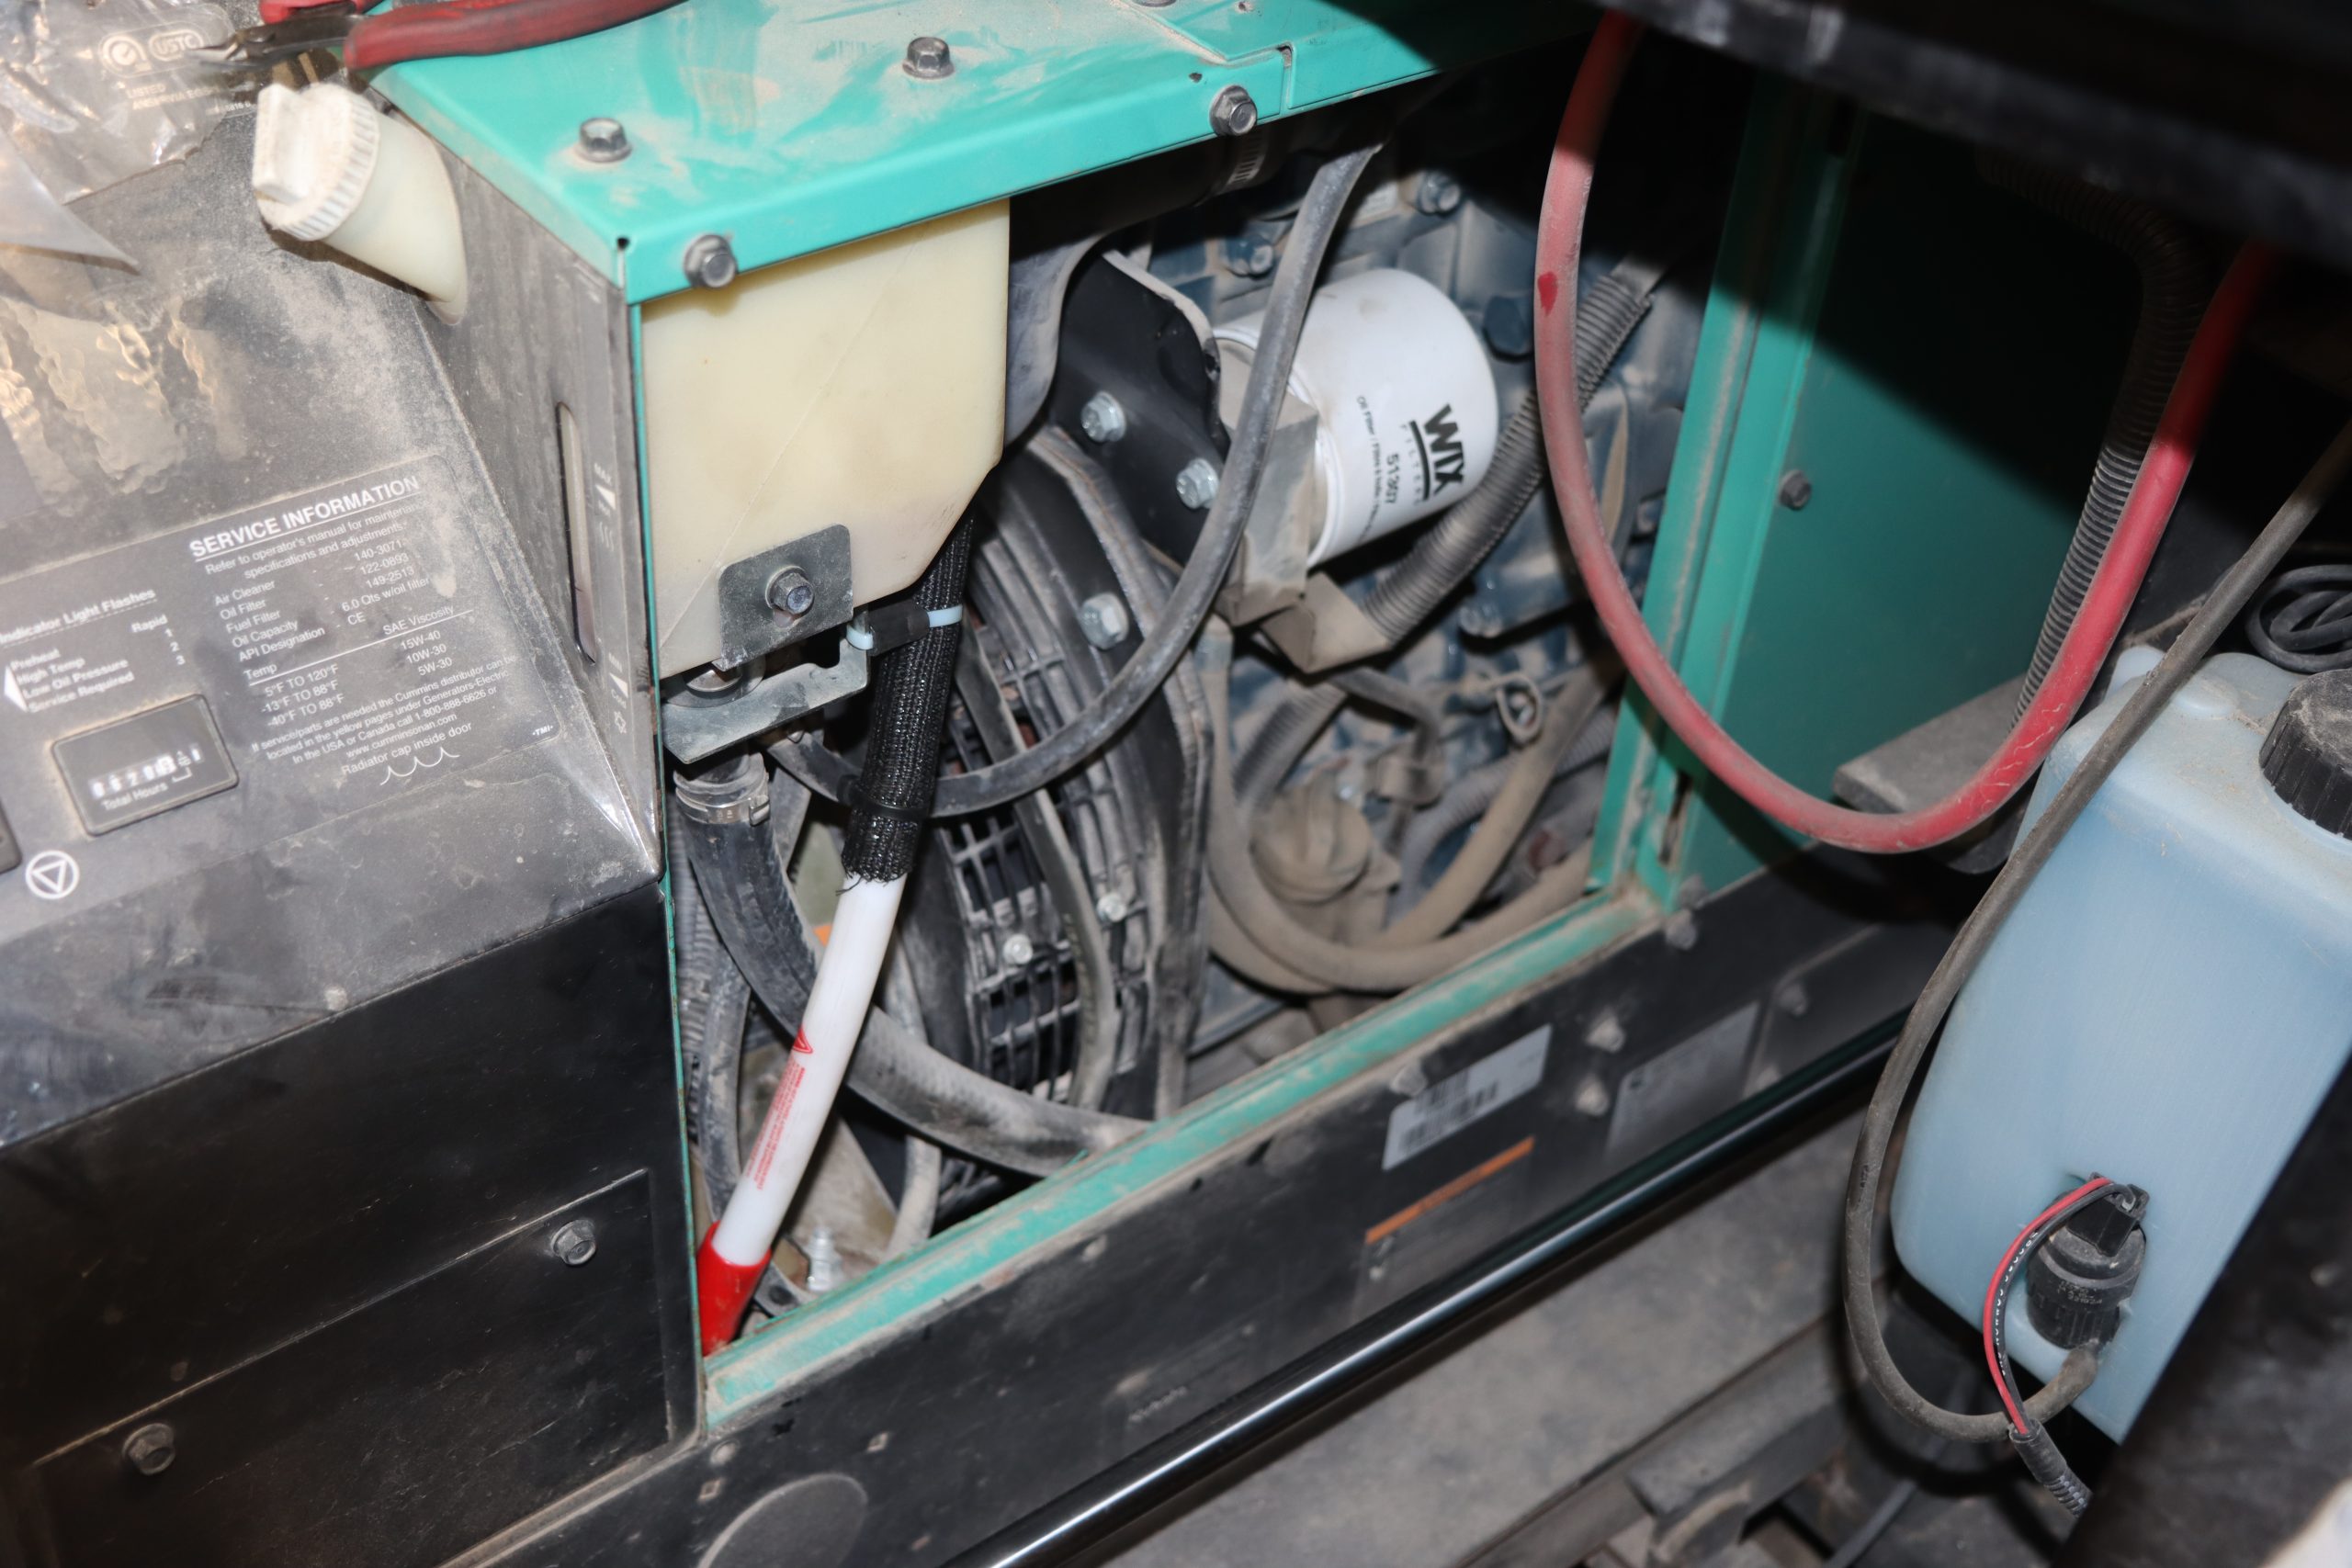
NIRVC tech installing 3′ device into the Onan 12.5 KW generator

THIA by Proteng device in the generator housing

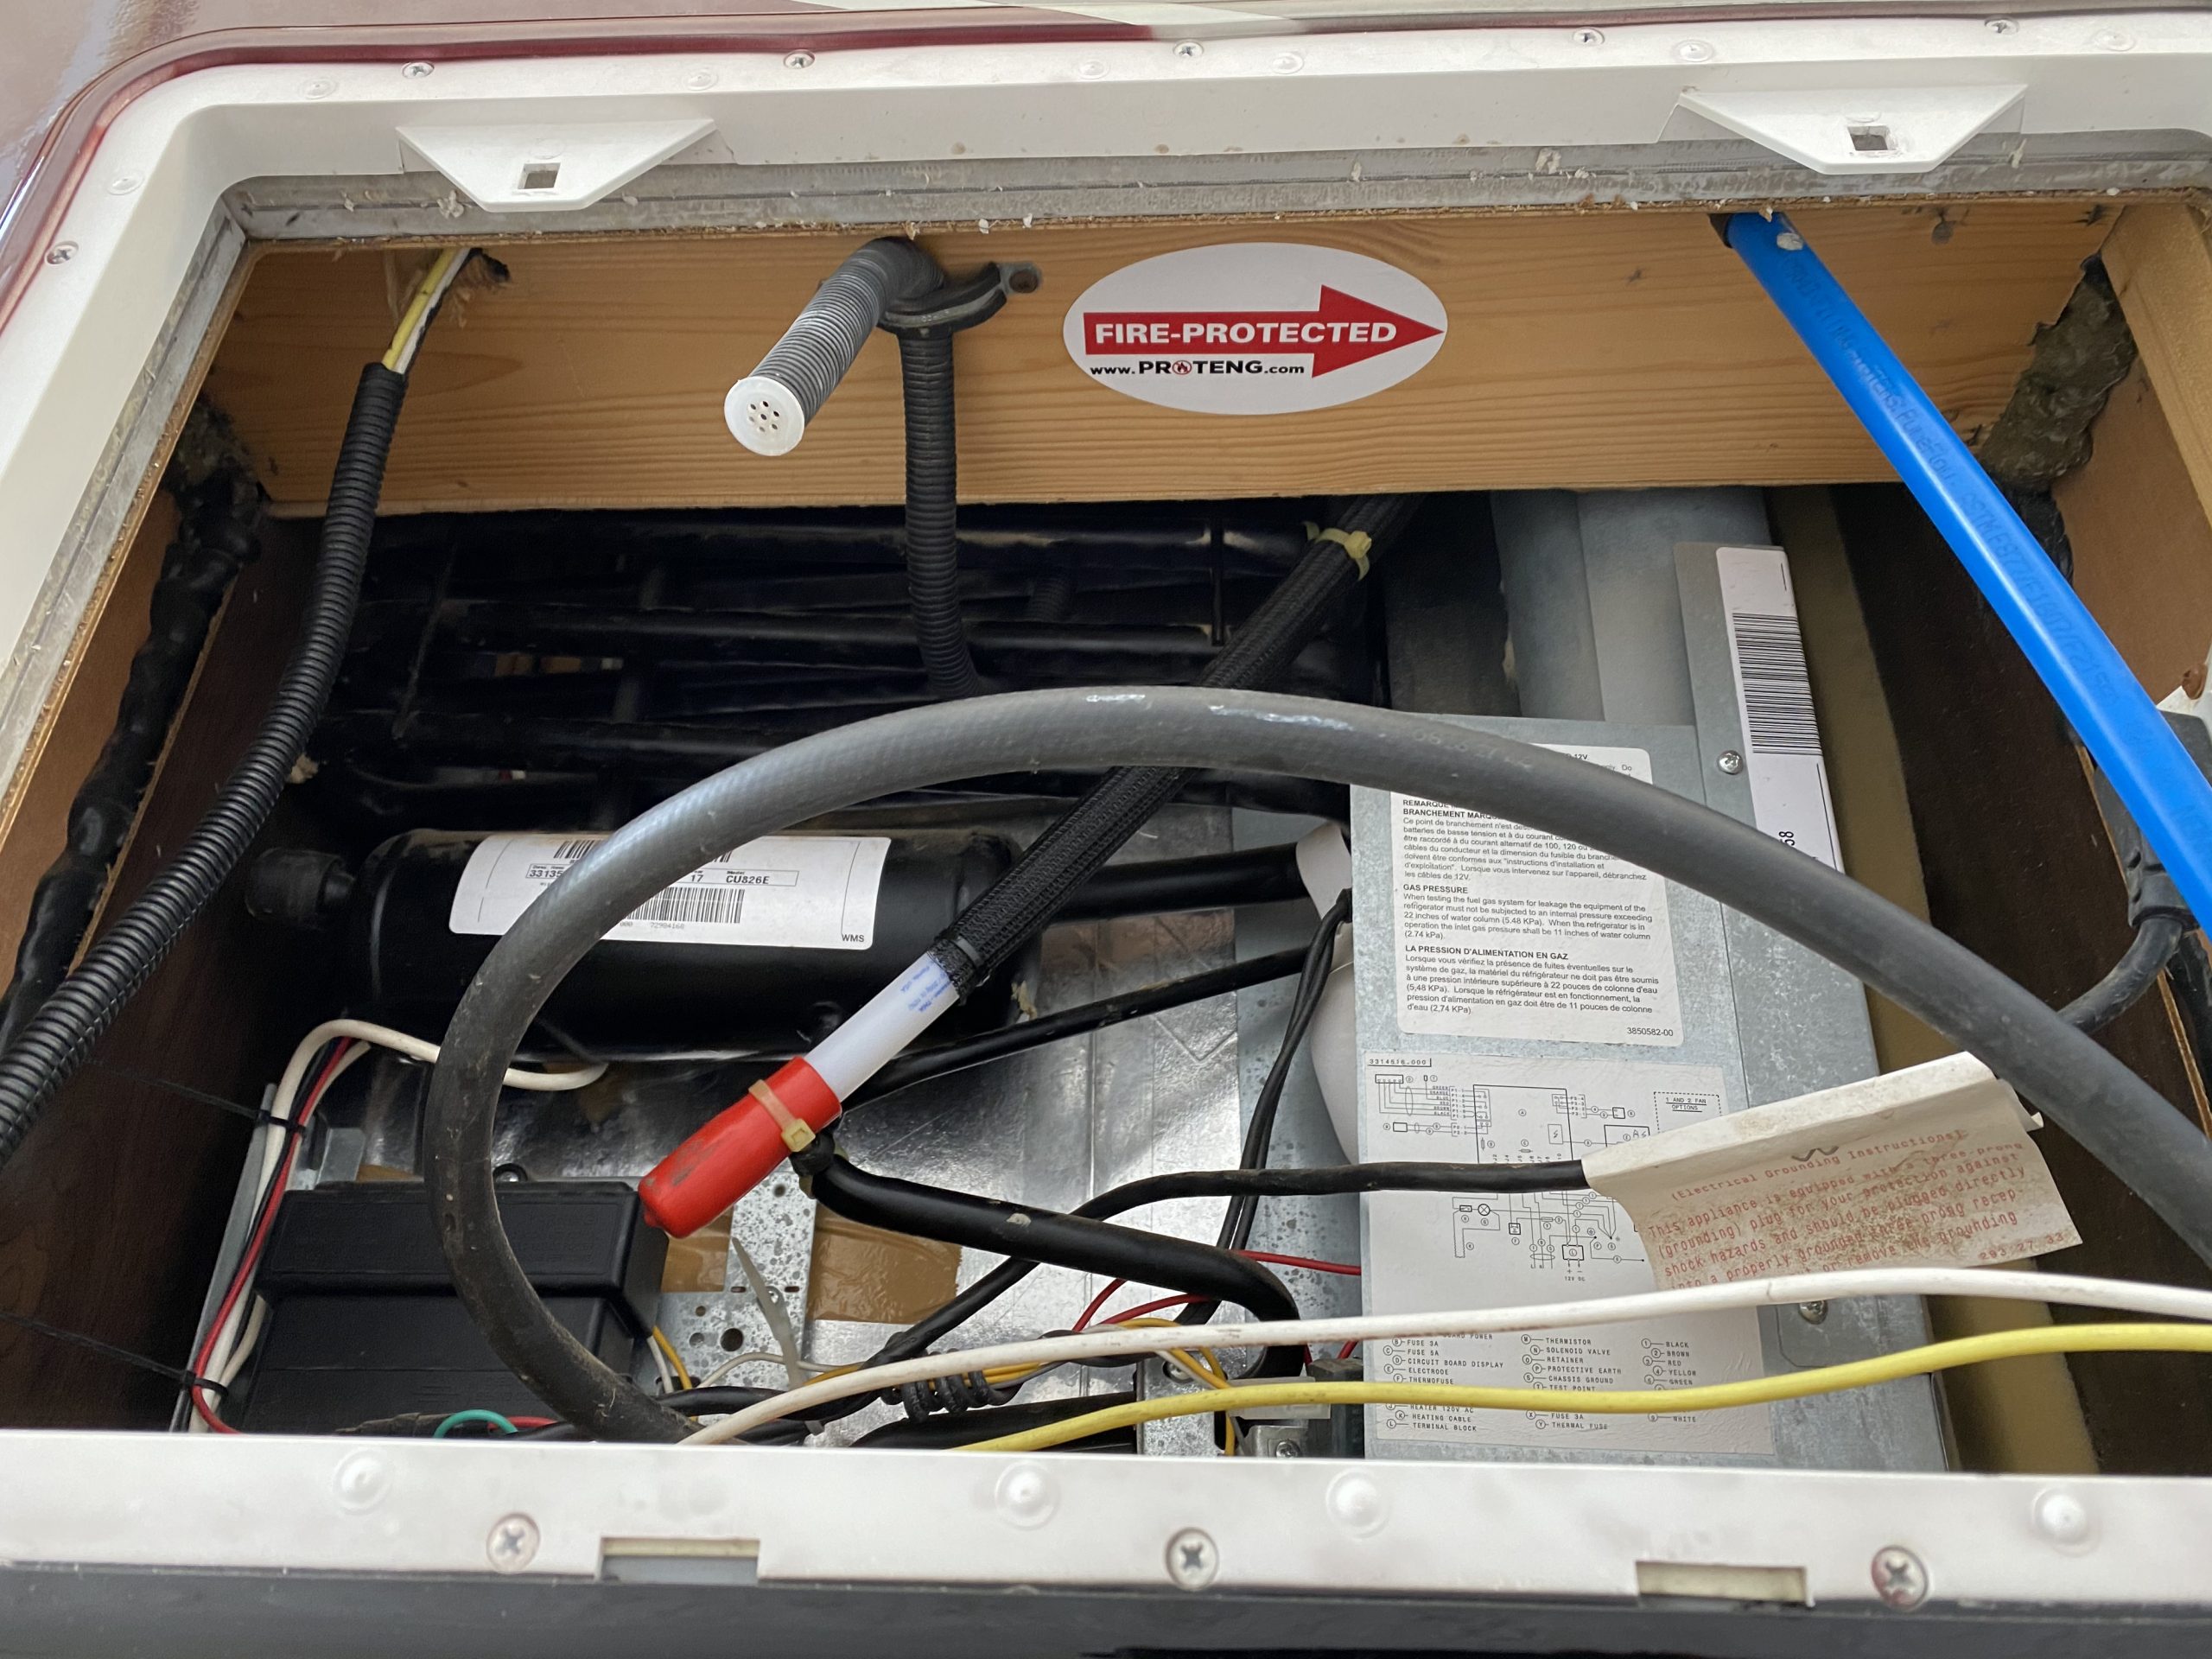
We have a residential refrigerator that is tucked into a cavity in the slideout, so we did not equip that with an extinguisher. However, if we had an absorption style RV refrigerator, we most certainly would have placed a device behind the fridge.

Proteng fire suppression system

THIA by Proteng systems are ideal for protecting absorption style RV refrigerators. This particular coach had a device installed the fridge.

Protect Your RV with THIA by Proteng

THIA by Proteng for RVs is sold exclusively through any of the National Indoor RV Centers. All of the devices are made in the USA, although the material isn’t available locally and has to be imported from Europe. The systems are backed with a 4-year warranty. Prices vary from $159 up to $1,399, depending on the length of the device. Every system is custom designed for each RV, so prices will vary accordingly.

Learn more RV fire safety tips here.

National Indoor RV Centers blogger Mark Quasius profile picture

Mark Quasius is the founder of RVtechMag.com, the past Midwest editor of RV Magazine, writes for numerous RV-related publications and a regular Contributor to FMCA’s Family RVing Magazine. Mark and his wife Leann travel in their 2016 Entegra Cornerstone.

Tools To Carry In An RV

Tools. We don’t always know precisely how to use them or sometimes, even what they’re for. But we’ve gotta have ‘em! Whether you’re a self-described “handyman” or don’t know a socket-wrench from a chisel, it’a a good idea to carry some essential tools in your RV for whatever bumps in the road you may encounter. With that, let’s take a look at some basic tools, what they’re for and how we might save ourselves a trip to the mechanic. 

Naturally, anything with “power” is best. Power tools are often preferred as they A.) get the job done more quickly and easily, and B.) make you look pretty cool using them. Cordless power tools are perfect for RV owners because they can be used anywhere as long as their batteries are charged (which of course they never seem to be when you need to use them). Cordless tools have come a long way over the years and there seems to be a wager amongst cordless tool manufacturers to constantly improve them with more power. 

Occasionally though, there are some tools that can be a real lifesaver, so it’s best to plan ahead. Most RVers have a socket set, wrenches, screwdrivers, a multimeter and other basic hand tools but there are those extra tools that can really make the difference. In some cases, it speeds the job and saves effort, while in other instances you just plain need it or you aren’t going to be able to get the job done. I can think of a number of tools that I own that fit that category. I’ve been using tools personally and professionally for over 50 years so obviously I’ve accumulated quite a few over time.

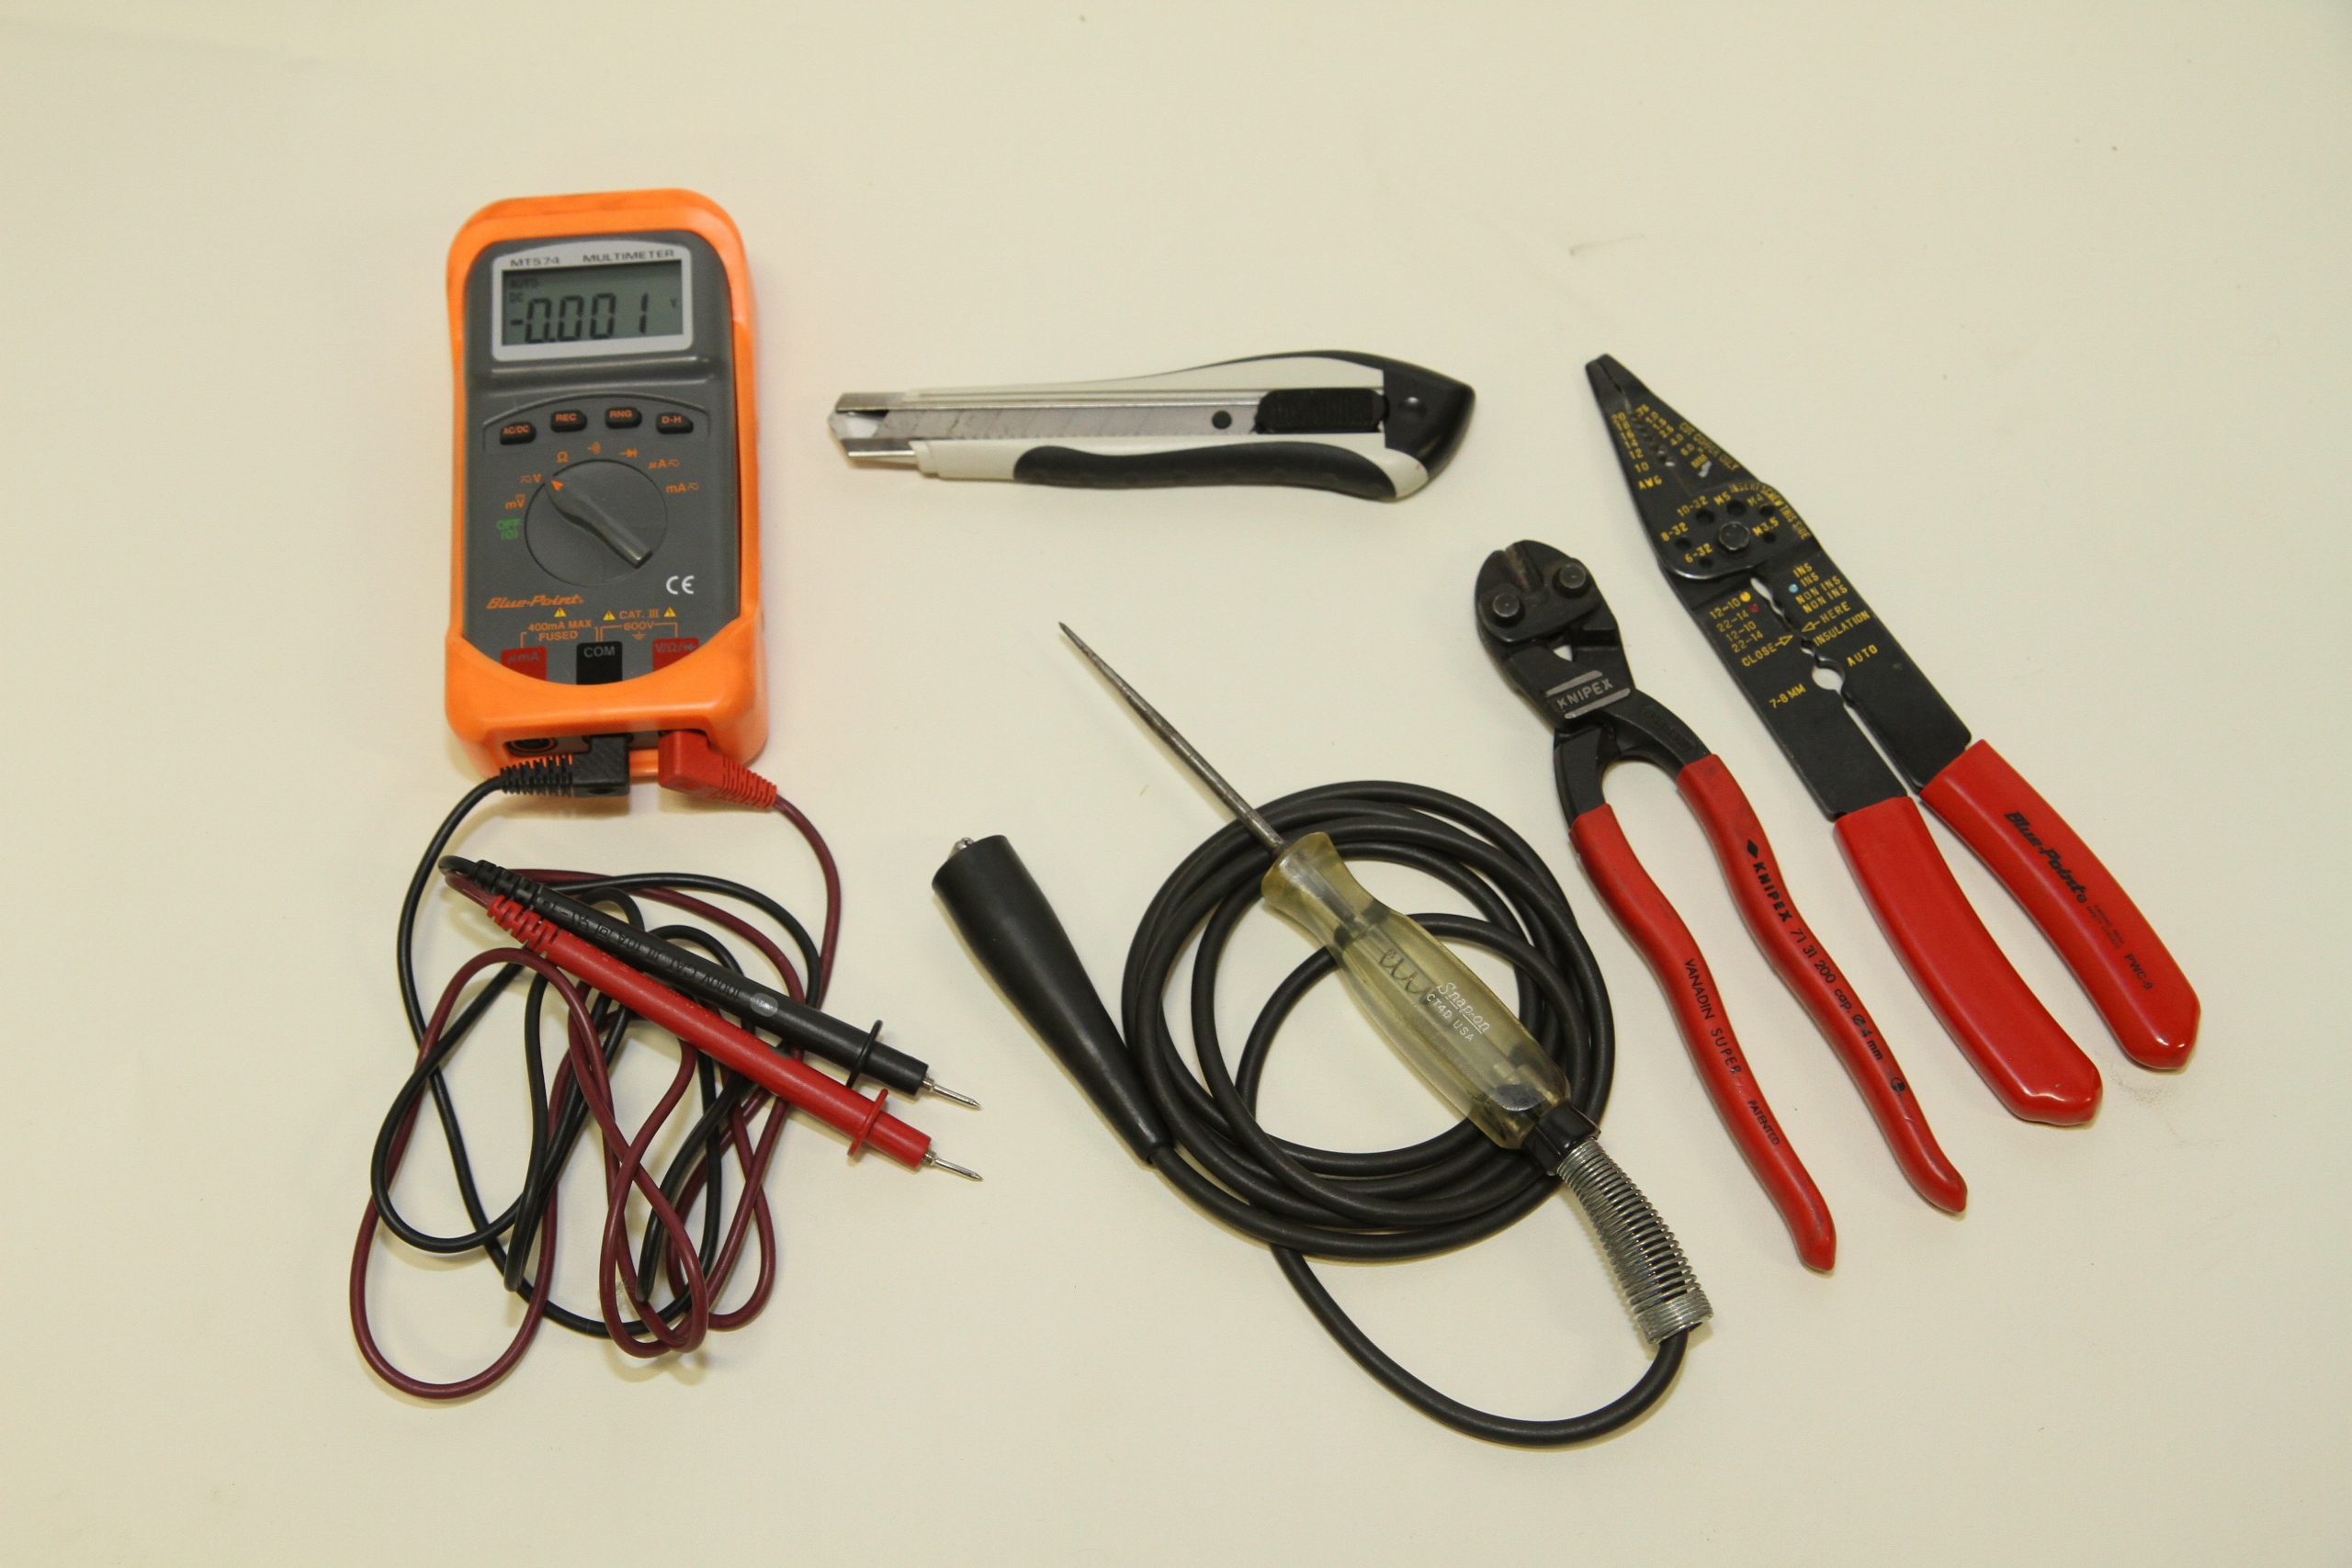
A multimeters can be accompanied by a few basic tools to handle electrical repairs.

You can’t carry every tool that you might ever need or else there won’t be any room for anything else in the coach. The key is to understand what issues are most likely to happen and prepare for those events. You also need to keep in mind what your mechanical abilities are. If certain repairs are beyond what you are capable or willing to do, then your best tools will be a credit card and good road-service plan. But there are a lot of minor issues that tend to happen in any RV and most anyone can take care of those small issues. You don’t want to have to call road-service just because a cabinet door fell off. A quick twist of a screwdriver and you are all set.. Therefore, I’ve broken down potential tool kits into three levels to help you decide what tools you will need to carry in your motorhome.

Level One – Basic Tools

This level is a basic level that I recommend for every RV owner. Simple and easy repairs can alleviate many annoying issues, some of which can even sideline your trip. An RV experiences more stress than a sticks-and-bricks home and the condition of many of our roads tends to vibrate all sorts of things loose. A quick repair with a screwdriver or wrench and what was about to fall off is now reattached and you are back in business. It may be a permanent fix or just a temporary repair that enables you to get back on the road until it can be properly repaired.

RV Maintenance DIY Tools

First off, no one should ever leave home without a big hammer. I don’t mean a 16 oz claw or ball peen hammer. When I got my first job as a diesel mechanic my service manager saw me looking at hammers at a local hardware store and handed me a 4 lb. sledgehammer with a 16” handle. He told me that was the one I wanted and to forget about the smaller ball peen hammers. You can always hit lightly with a big hammer but you can’t hit hard with a light hammer. That was good advice and I now have a number of “war clubs” close at hand wherever I am.

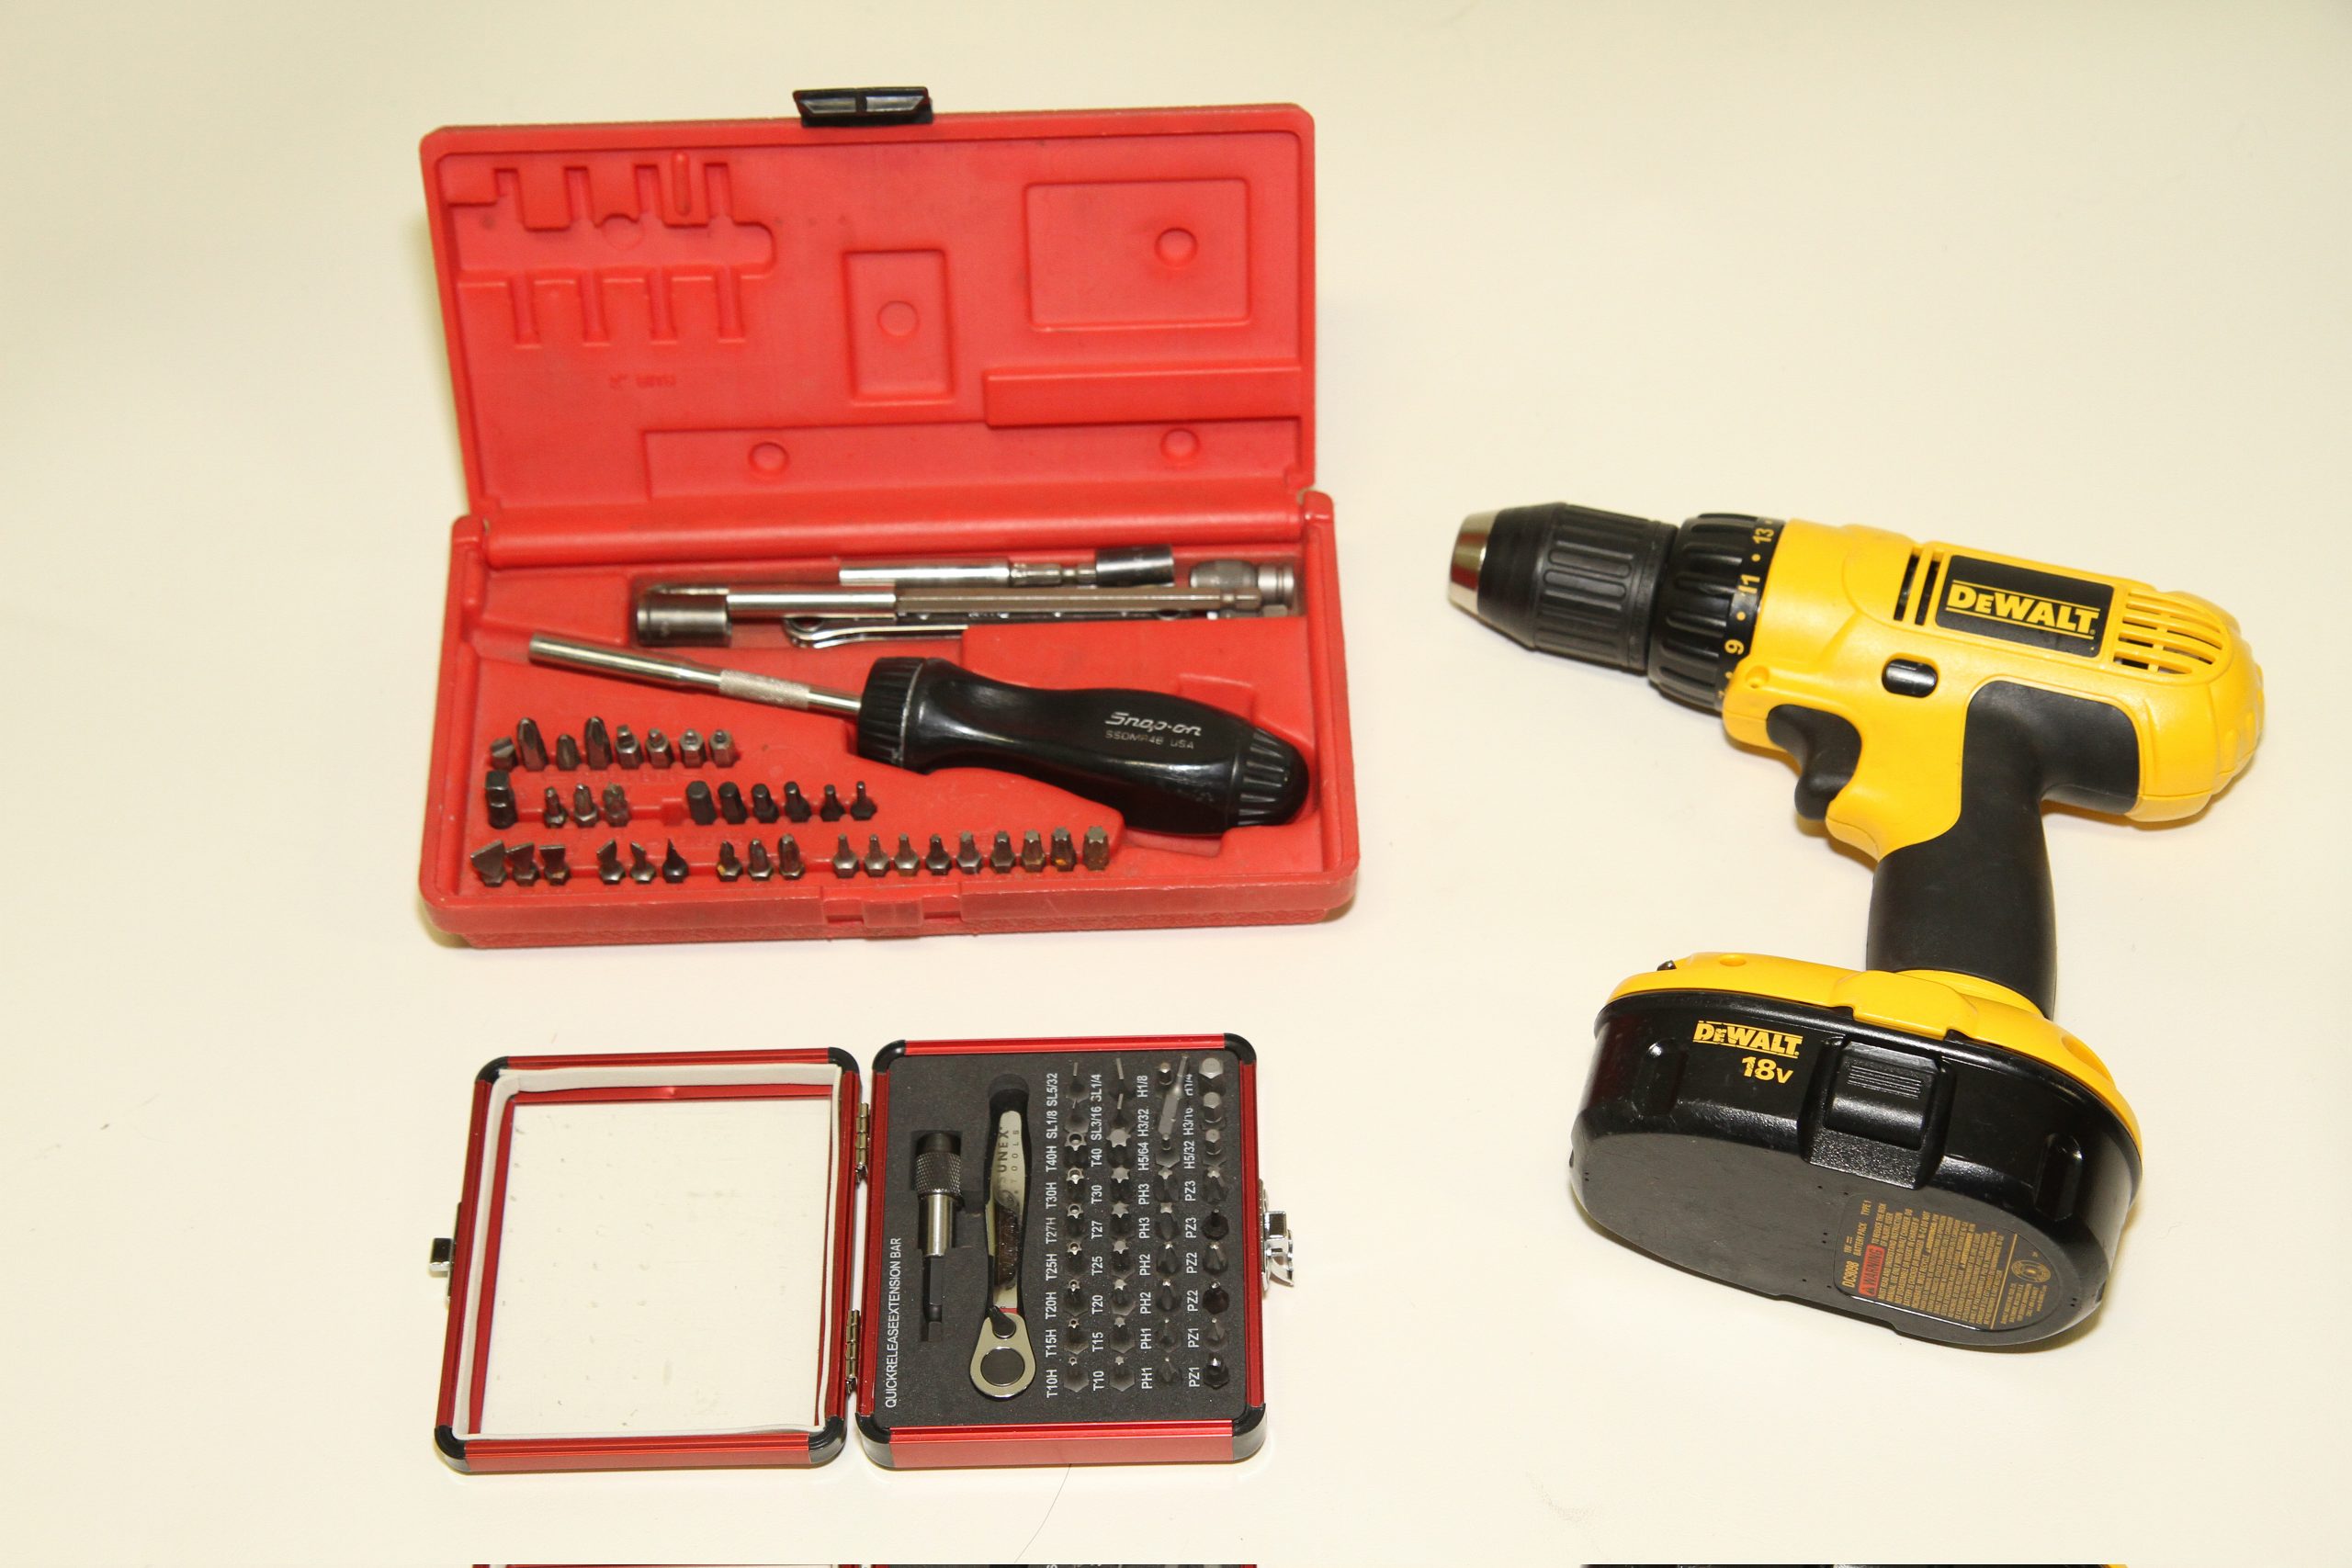
Perhaps the most common tool is a screwdriver, but there are a wide variety of screw head styles. You may have slotted, Phillips, Torx, socket head or Roberts (square drive) screws. Rather than carry a number of screwdrivers to cover this range, I recommend a screwdriver with replaceable bit tips that are inserted into a magnetic holder, which helps to prevent the screw from falling off the tip. They often come in a case that holds the driver as well as a wide selection of ¼” hex bit tips. Many of these drivers are available as ratcheting screwdrivers which makes it easier and more comfortable to use. The case usually has room to add extra bits, sockets and adaptors that didn’t come with the kit as needed. A drill chuck adaptor allows you to use your bits with a cordless drill or impact driver, which makes the job easier and quicker. While you can’t use it to pry things like you can with a regular screwdriver, it does offer a minimalist approach rather than having to invest in a large assortment of screwdrivers. Personally, I carry a set like this which is my go-to tool for many repairs. But I also have a few regular screwdrivers in case I need to open paint cans or pry something.

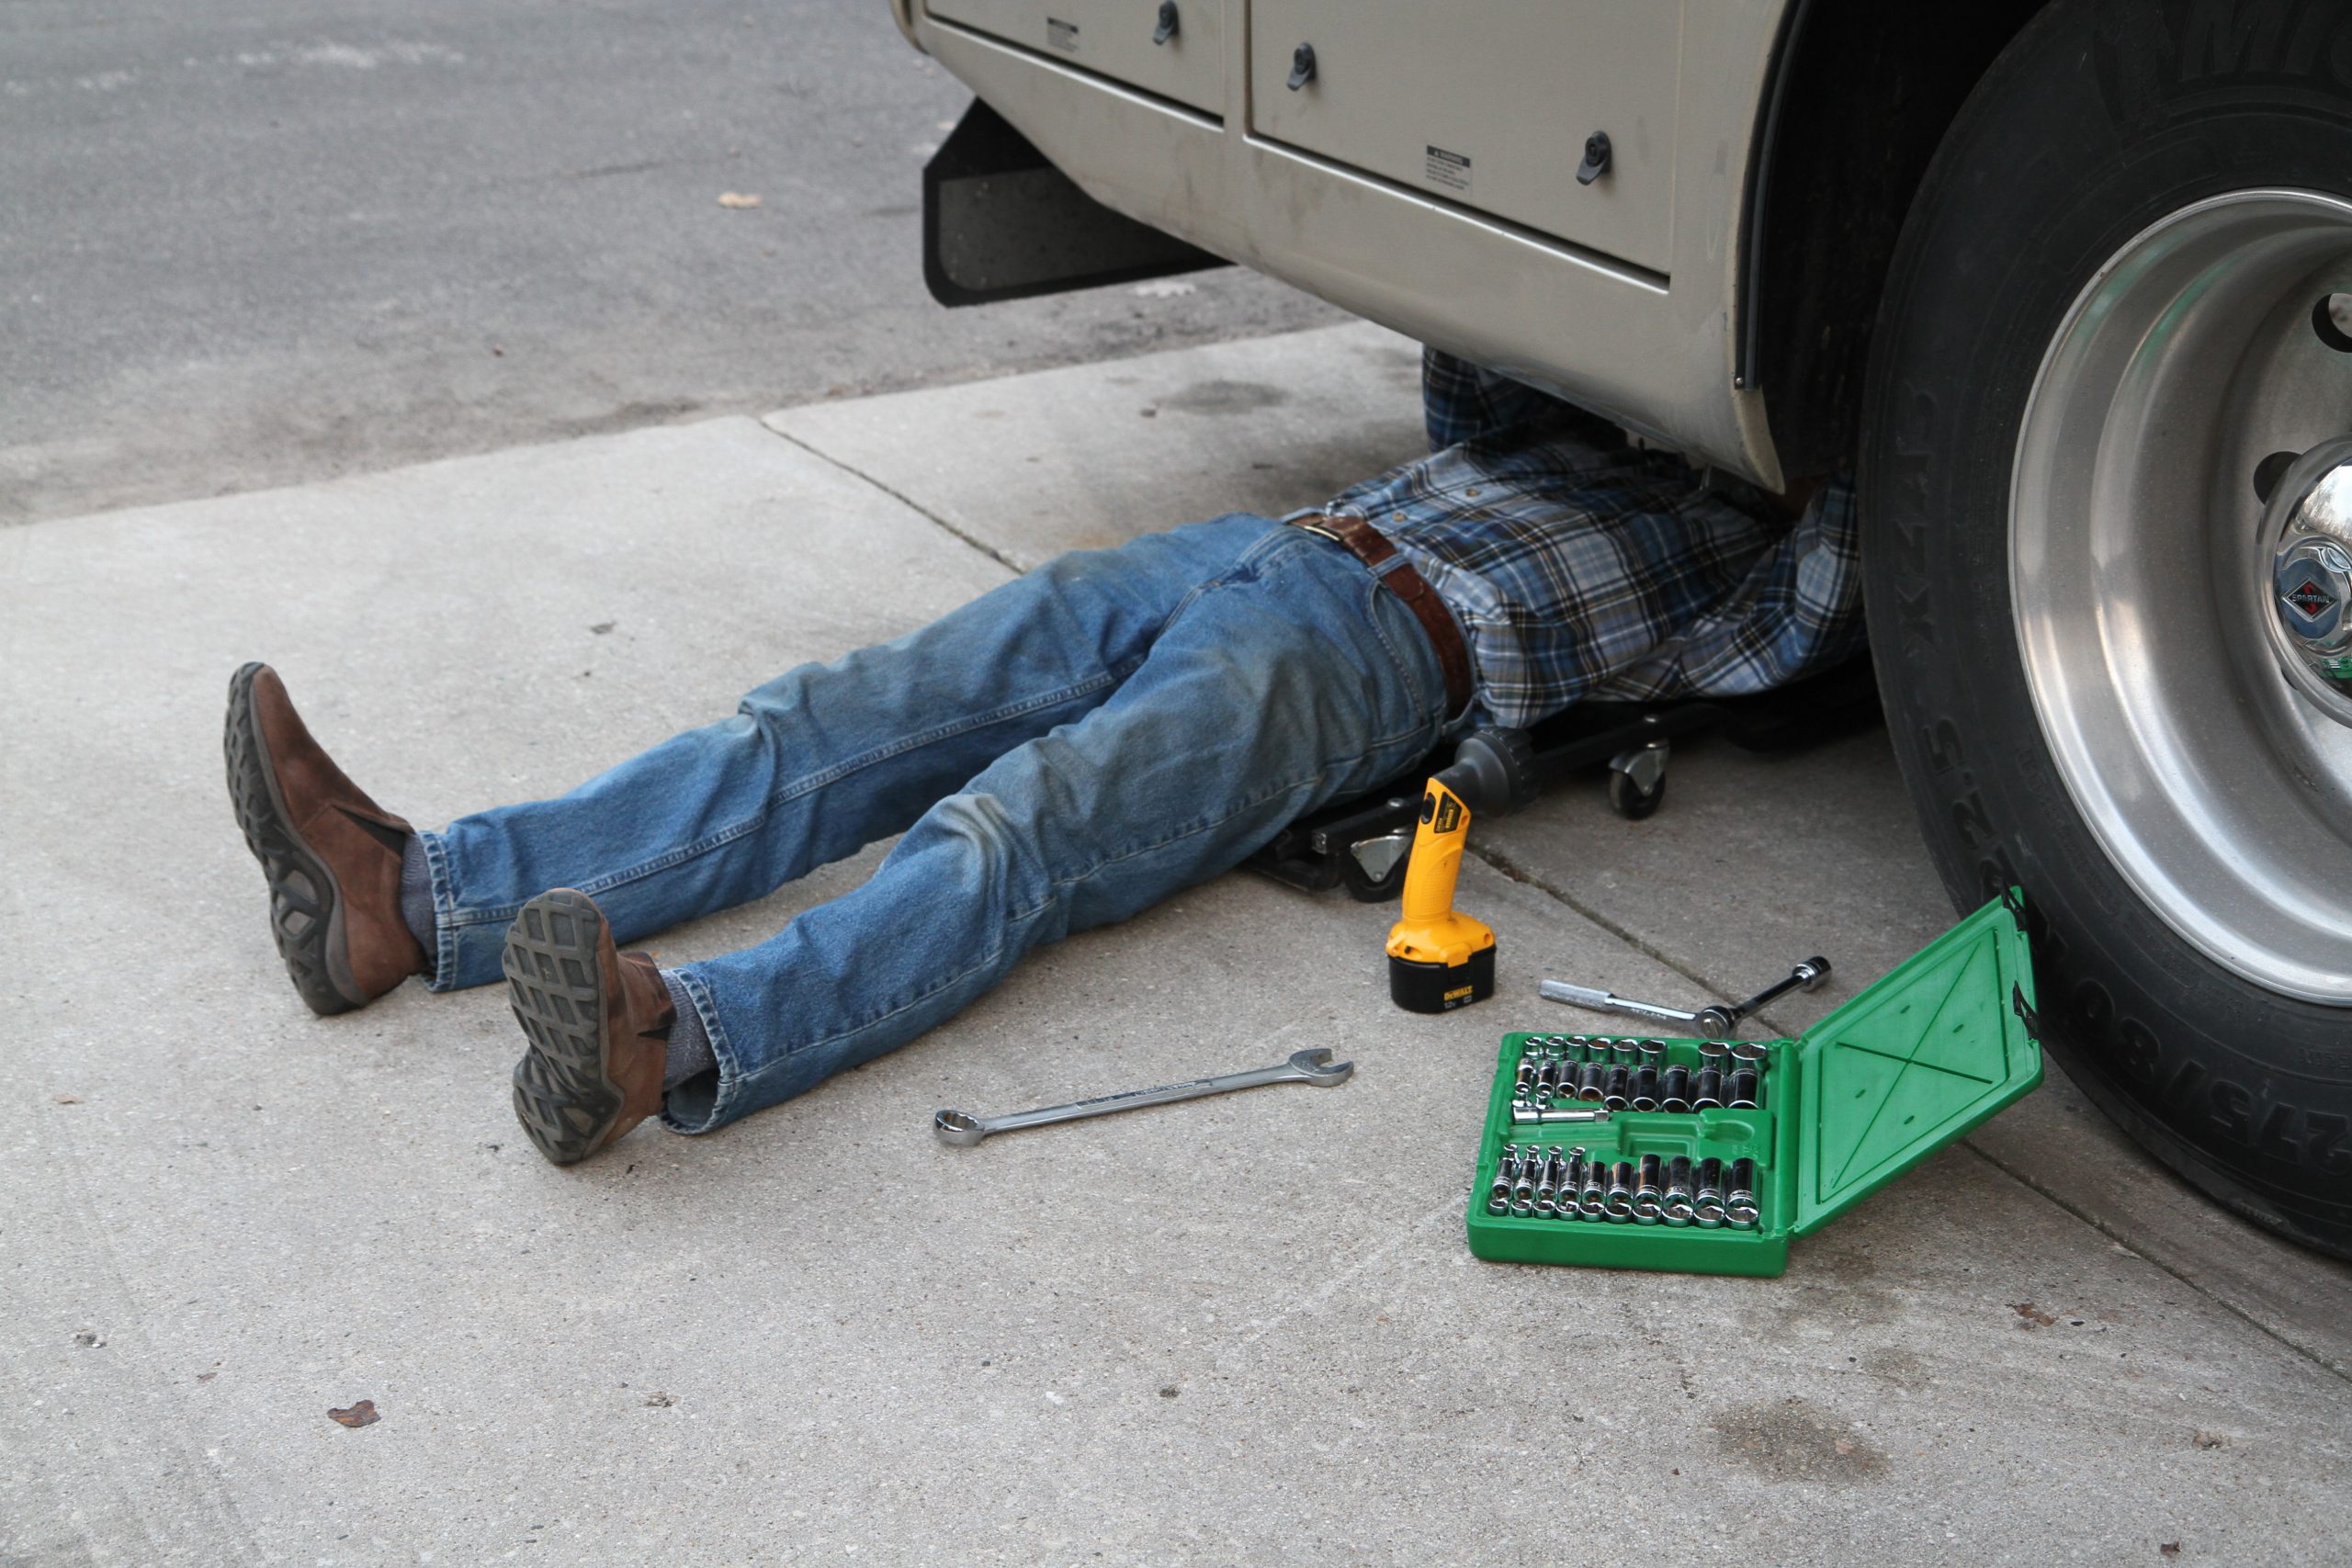
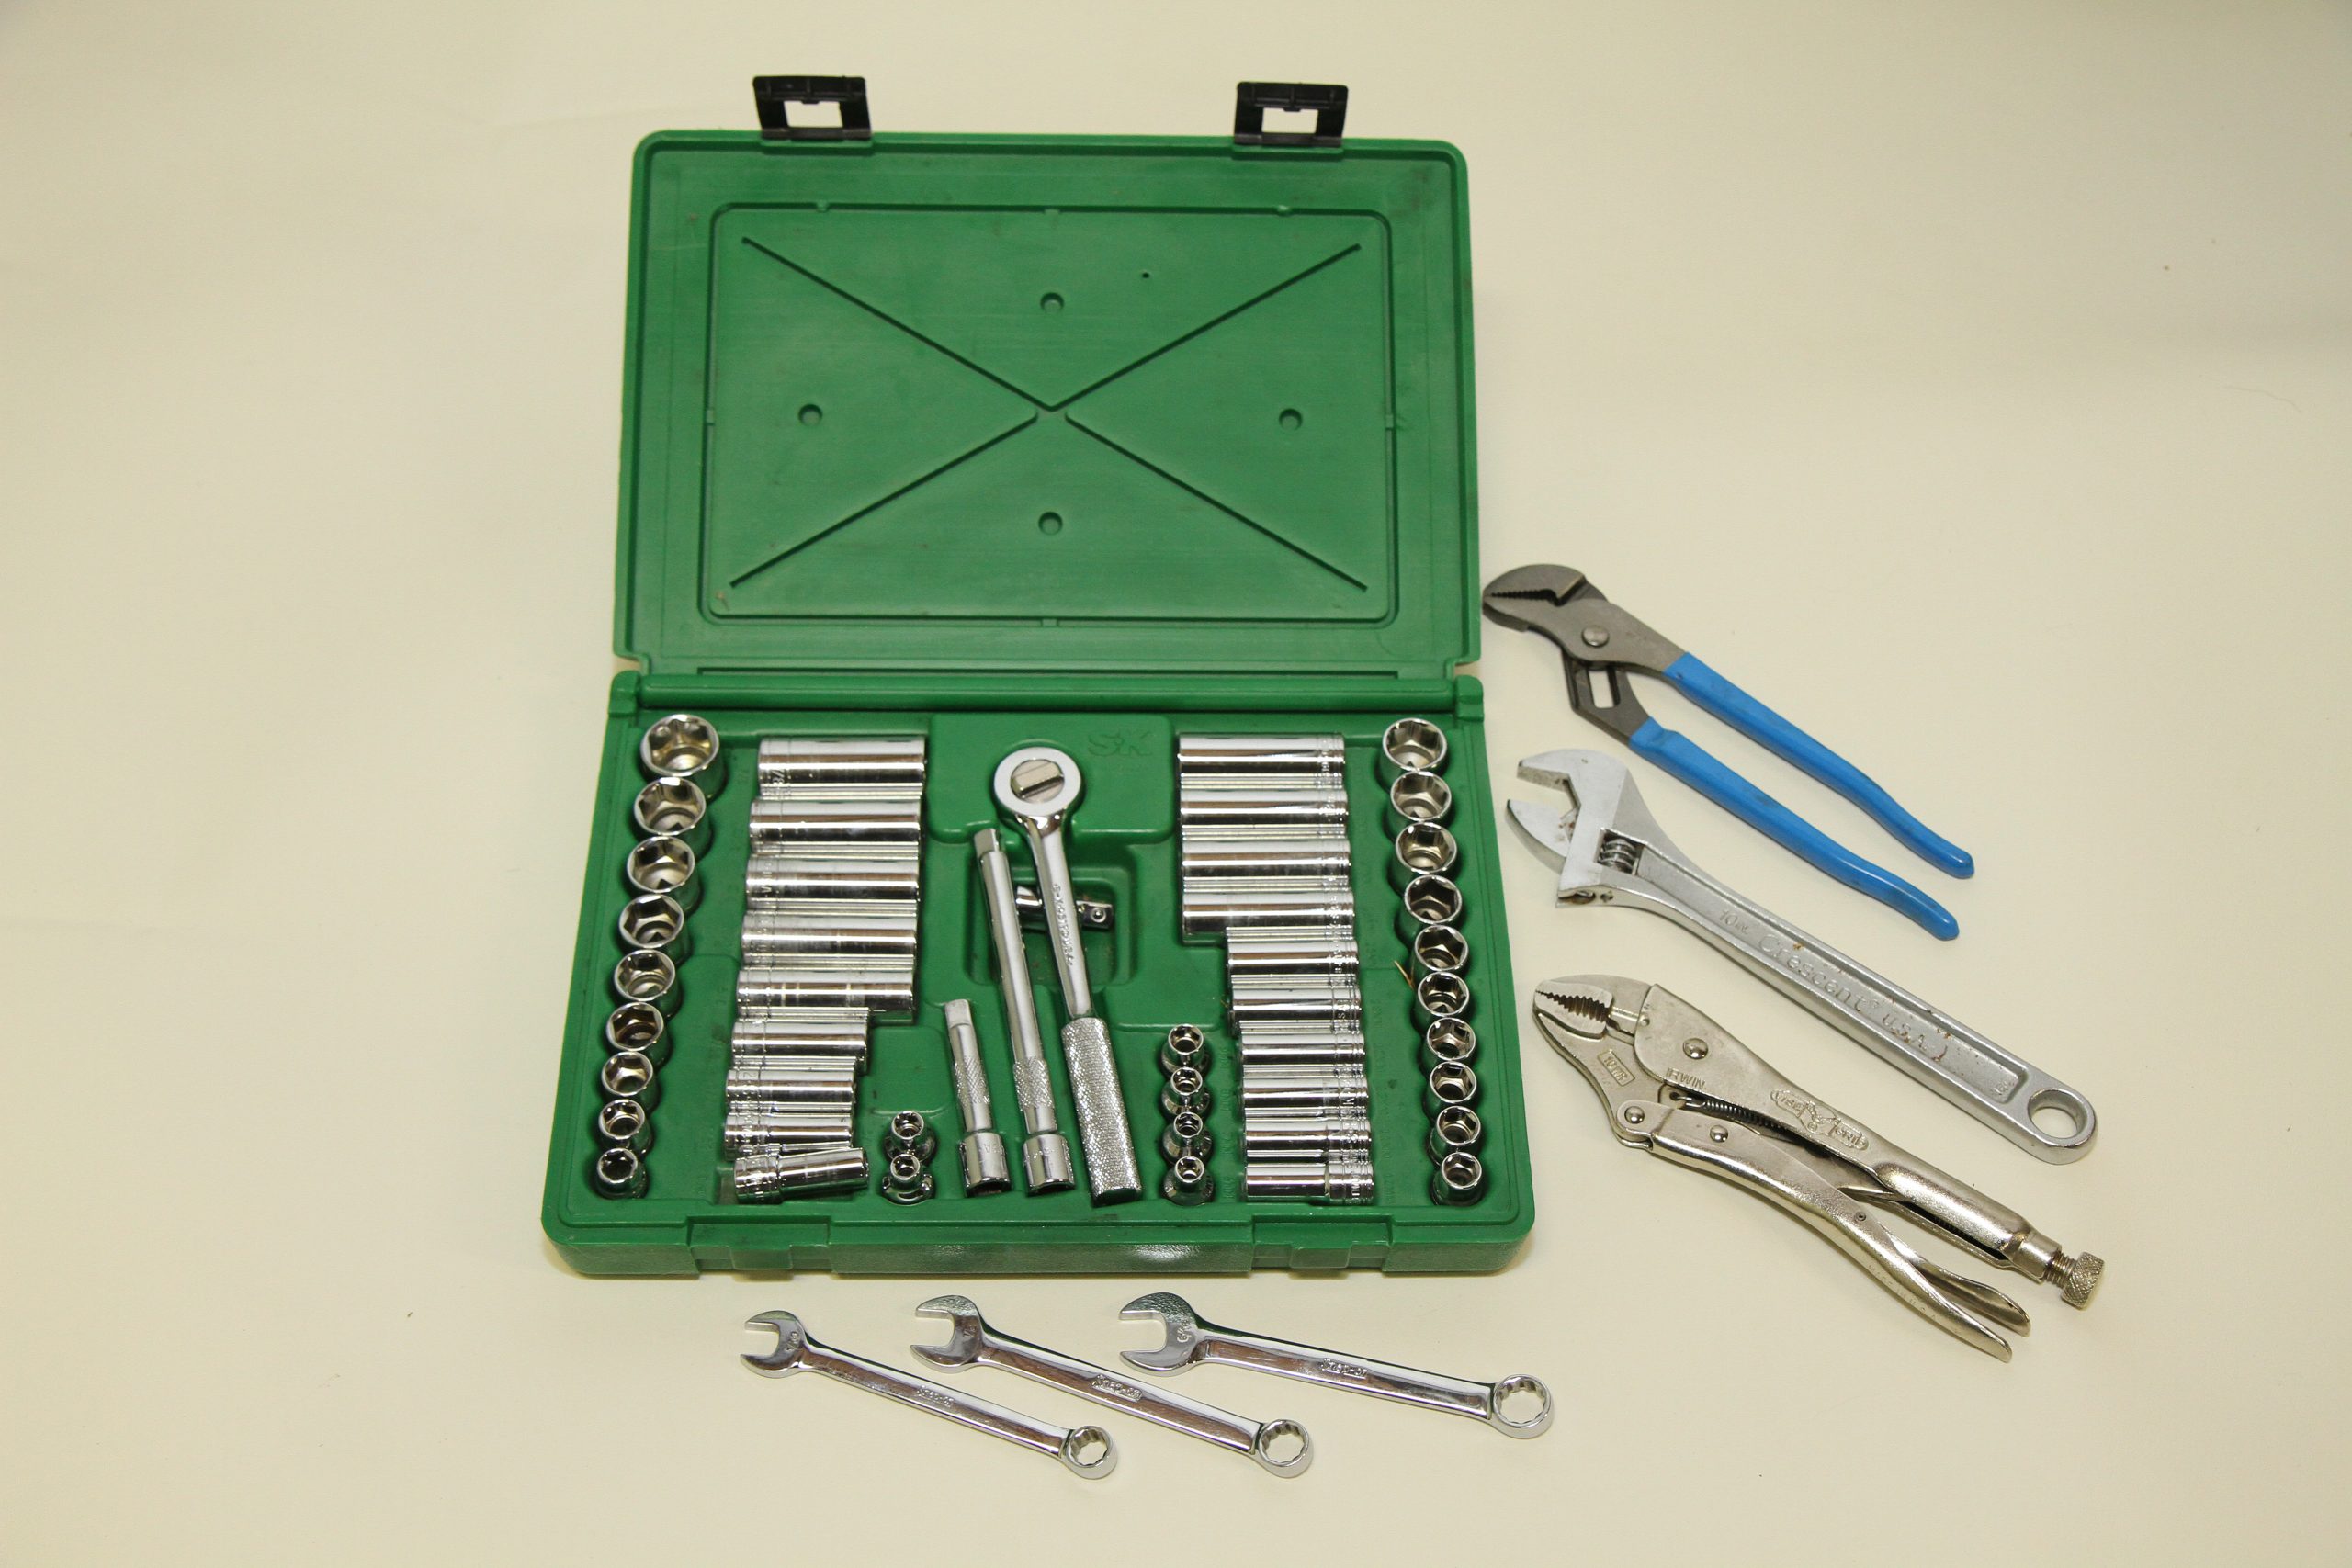
A socket set with both SAE and metric sockets in 3/8” drive will handle most needs.

Screwdriver kits with replaceable bit tips can greatly help to conserve precious cargo space over a complete set of dedicated screwdrivers. The various bit tips can be used in right angle ratchets or power tools as well as the normal ratcheting screwdriver handle.

Another handy item I’ve acquired is a Sunnex 38-piece mini ratchet and bit set which features a super compact ratchet that holds the same ¼” hex screwdriver bits that fit my interchangeable bit screwdriver set. It has gotten me in and out of tight spots that even a stubby screwdriver is just too tall for. The selection includes hex key and Torx bits as well as every other bit that you could imagine. With this, plus my Snap-On interchangeable bit ratcheting screwdriver, I’m virtually unstoppable. If those two tools can’t get the screws out there’s always that four pound hammer and a chisel.

Wrenches are always a mandatory item. Combination wrenches with both open and box ends give you the ability to use either end on a bolt head or hose fitting. You don’t need to buy the largest set because most repairs will be in the ¾” or less sizes. Adding a 12” adjustable wrench fills in for odd or larger sizes, or when needing a second wrench of the same size. Socket sets are another must have item. For a basic set, a 3/8” drive combination set that includes both metric and fractional sockets in both standard and deep well sizes will cover 80% of your needs.

Pliers are another area, although they often are misused where wrenches should be employed. A good vise grip pliers can grab a bolt with a rounded-off head, turn a pipe fitting or be used to bend a metal tab. Large channel lock pliers can be used on seized garden hose fittings or other larger items that need some grip. A needle nose pliers can be used to grip small objects and a diagonal cutter will cut wire or nylon cable ties with ease.

Now that you have that large hammer, it would be a good idea to accompany it with a few related items. A chisel will allow you to snap off bolts that just won’t turn loose while a crowbar can be used to pry things that are too large for a screwdriver – such as a frozen wheel rim. Throw in a nice utility knife with replaceable blades and your tool kit is starting to come together.

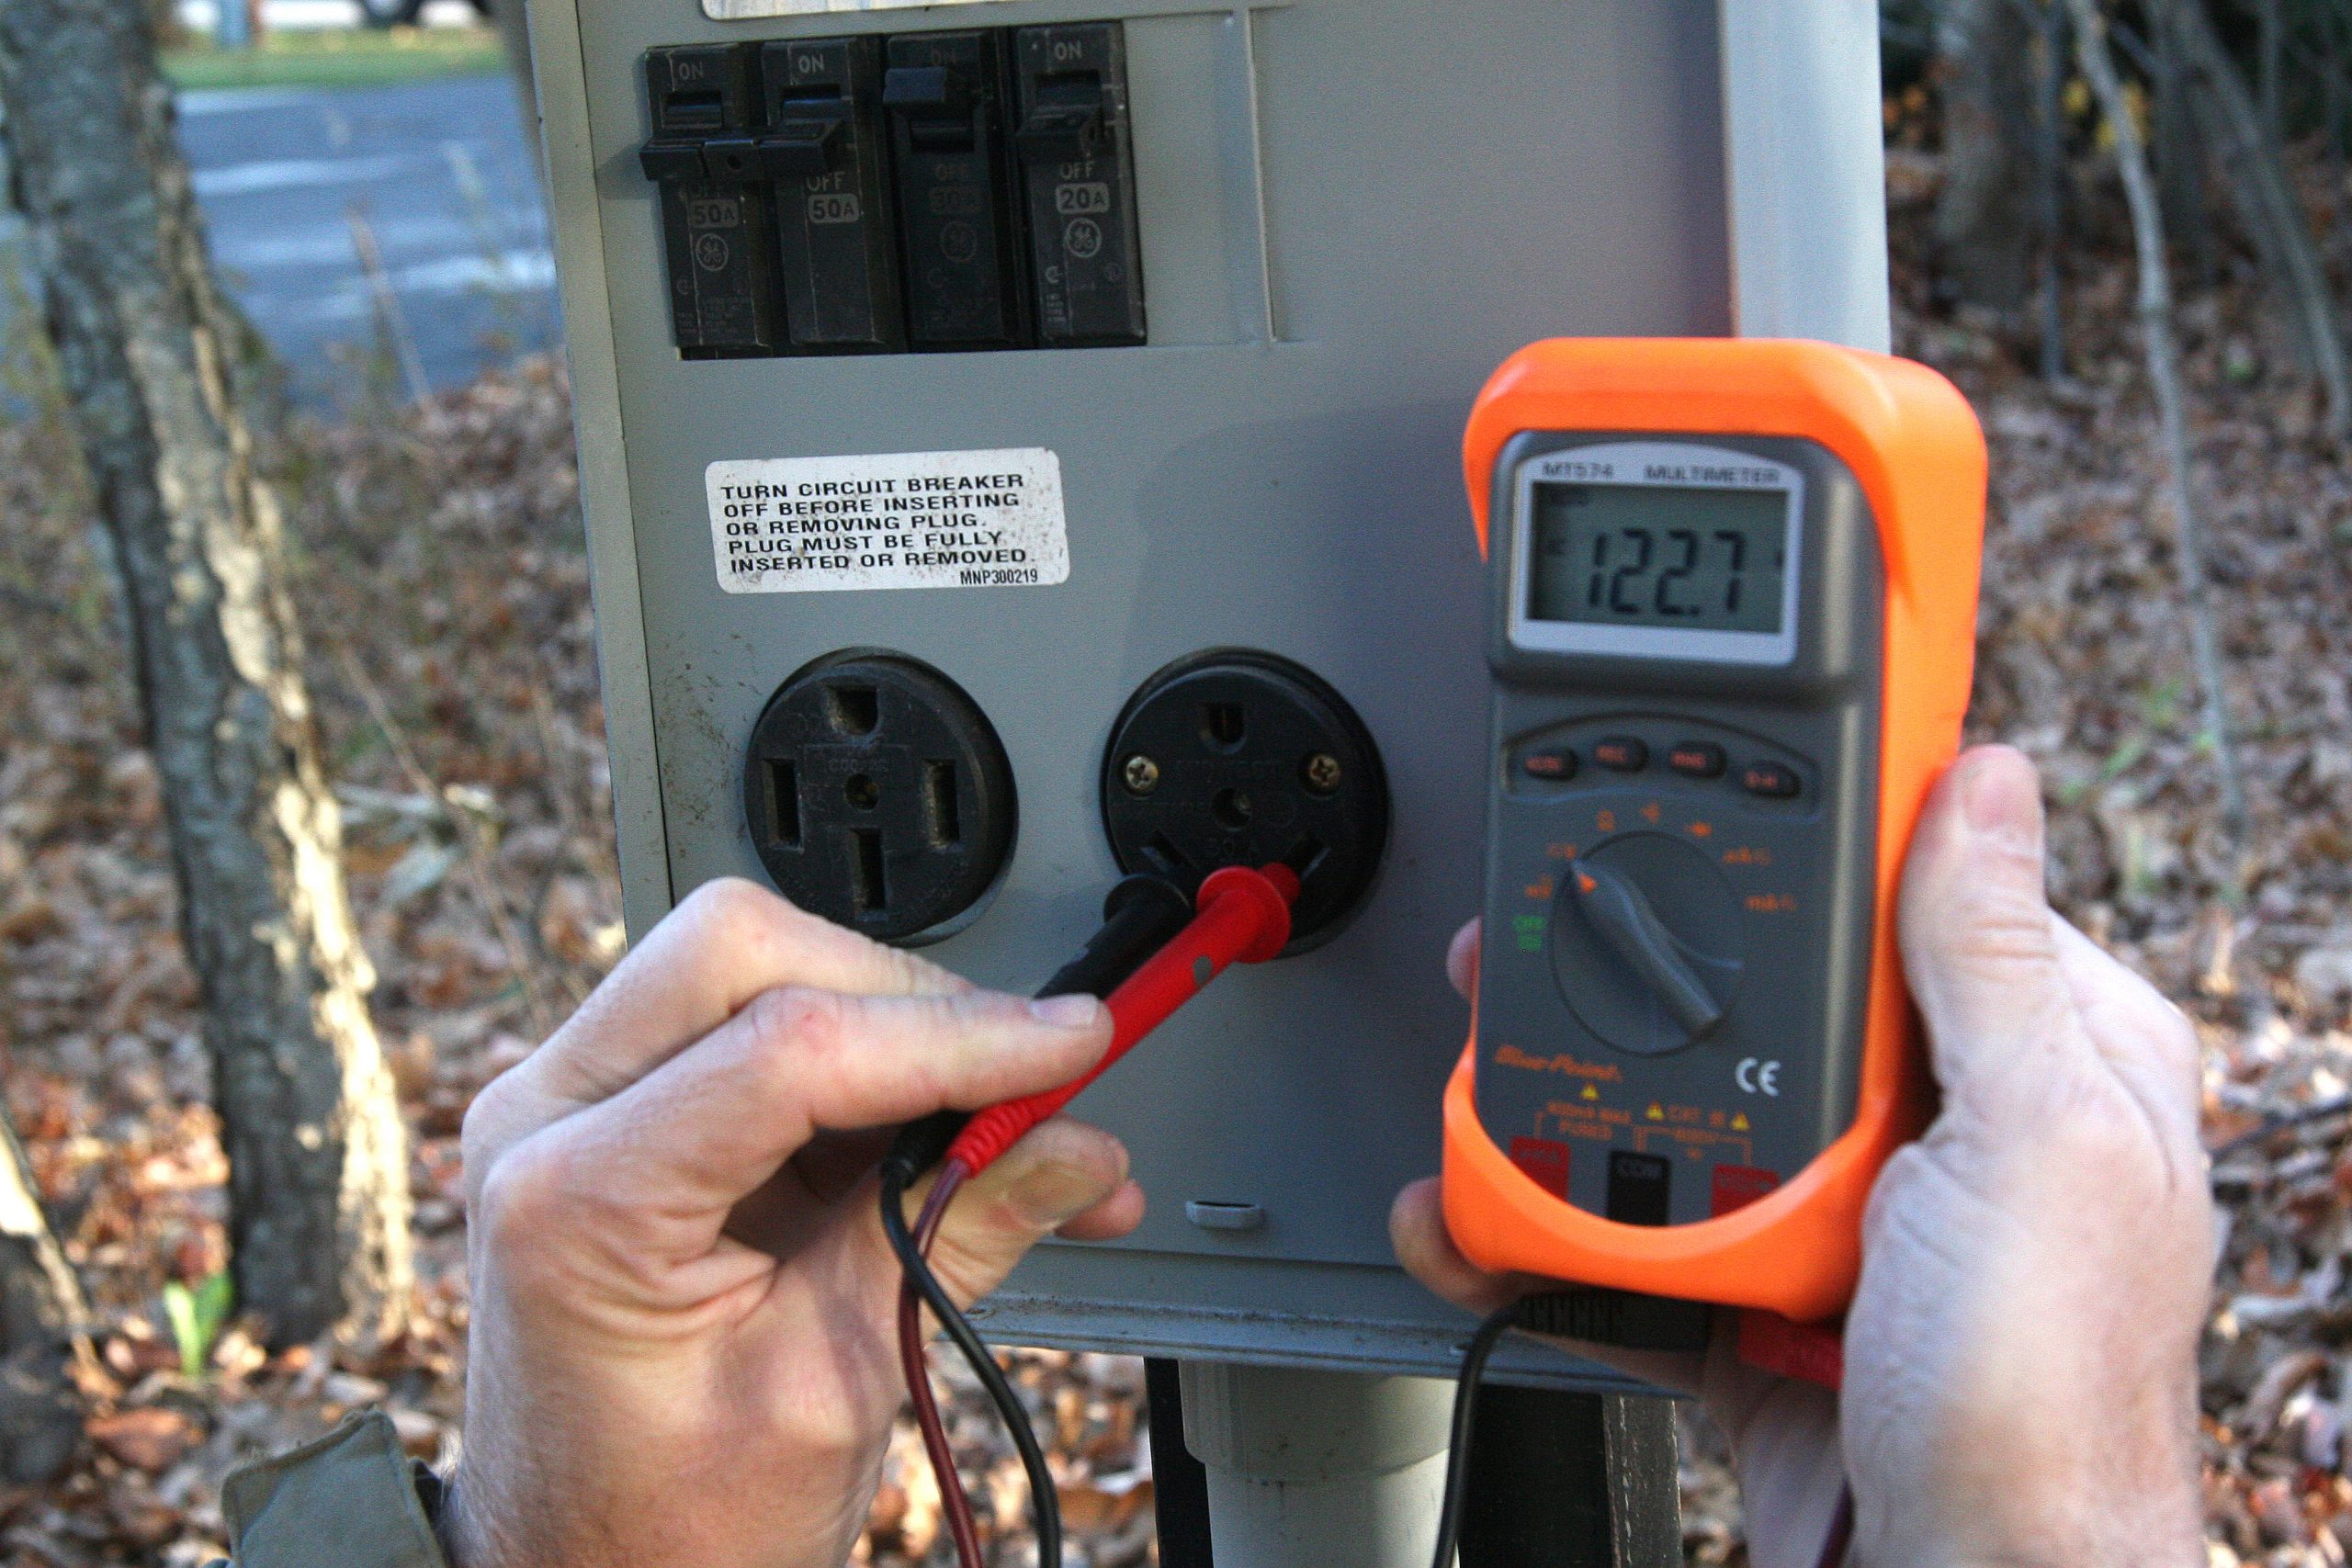
Keep in mind that the majority of issues in an RV are electrical. You can’t tell what’s wrong unless you do some diagnostics, so a simple multimeter should be in every RV owner’s toolbox. You can use it to check for AC voltage at the campground pedestal or test for dead electrical circuits in the RV. They can also be used to test DC circuits so you can tell if you have power at any switch or fixture, check your battery voltage, etc. The third most used feature on a multimeter is testing resistance. You can measure how many ohms an item such as an electric heating element has to determine if it has failed or is fine. It can be used to test fuses or for continuity in light fixtures or any other electrical device. Then, to correct any faulty wiring, be sure to carry a handful of crimp style wire connectors and a multipurpose wiring tool that can be used to correct the problem.

(For a detailed guide to RV electrical systems, see our 3-part Owner’s Guide to RV Electrical Systems)

Multimeters can be especially useful when testing power pedestal voltage.

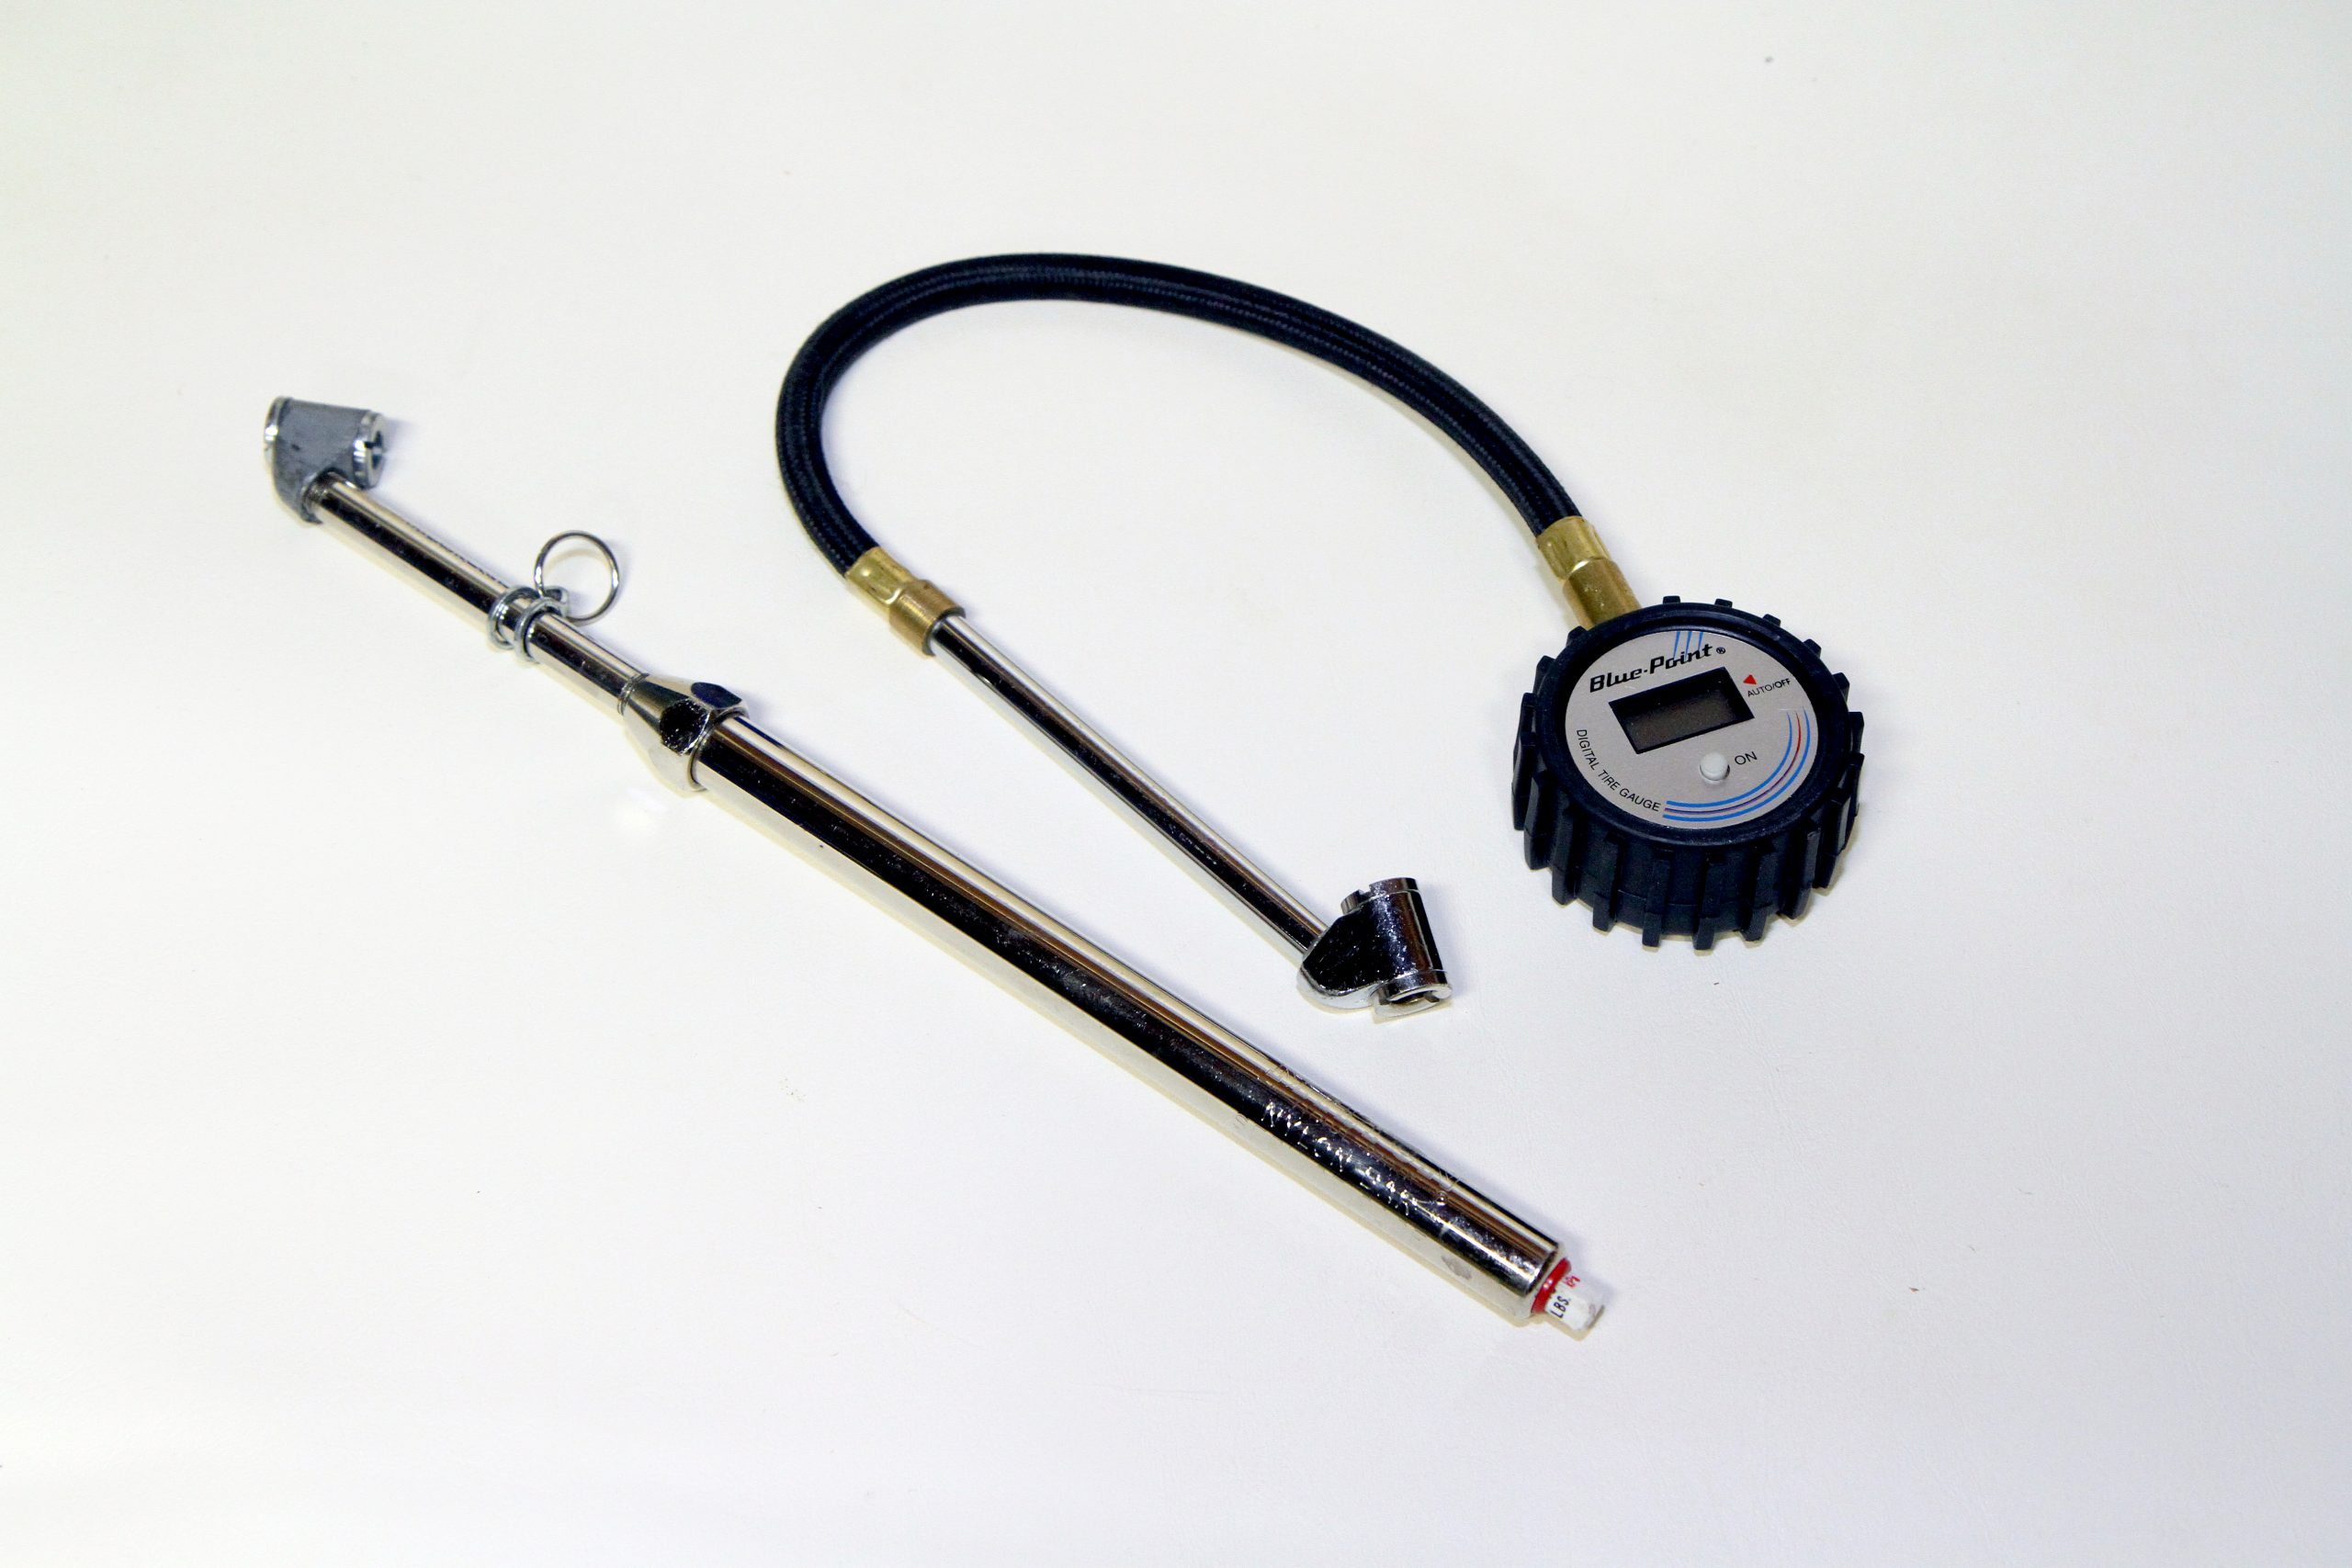
Lastly, a few mandatory items in any basic tool kit are a tire pressure gauge and filter wrench. Checking tire pressures is one of the most important tasks to perform on an RV and needs to be performed frequently, so invest in a good quality unit. Mechanical units with the trucker’s foot to reach inner duals are fairly reliable and accurate digital units with a flexible hose are now available at reasonable prices.

Tire pressure gauges come in digital and mechanical versions and should be found in every motorhome owner’s tool kit.

You are probably not going to be changing your own oil when traveling, but if you drive a diesel motorhome you run the chance of picking up a batch of bad fuel that has water in it. If that occurs, you may need to change your fuel filter. It’s always a wise choice to carry a spare fuel filter along with you but you will also need to carry a filter wrench so that you can replace the filter, should you need to. Filter wrenches come in various sizes so be sure to buy the correct one that will fit your filter.

A beginner’s tool kit like this won’t break the bank and won’t require a large toolbox. Many of these items will come in small blow-molded plastic cases that can be stuffed anywhere without seriously impacting your storage space. Flat wrenches and pliers can be stored in a roll-up pouch or a small toolbox.


Level Two – Intermediate

This level is for anyone with a bit more of a DIY attitude who wants to do more than a quick repair to get going. Some more detailed permanent repairs will require a few more tools than in the previous selection.

You can start out with more sockets. The basic 3/8” drive set mentioned earlier is a good start but if you want to handle smaller nuts, you’ll need a small compact  ¼” drive set. If you plan on working on your chassis, you’ll want to consider a large ½” drive set. You’ll also want to add more combination wrenches. Sizes such as 15/16” and 1-1/8” are common sizes for the larger bolts. A large 12” or 15” adjustable wrench can be used for any other sizes. Keep in mind that you may need duplicates in the common sizes, such as 7/16”, 1/2”, 9/16”, and 3/4” so that you can remove hose fittings or hold a bolt with the same size nut. You may even want to get those in ratcheting box combination wrenches to speed things up.

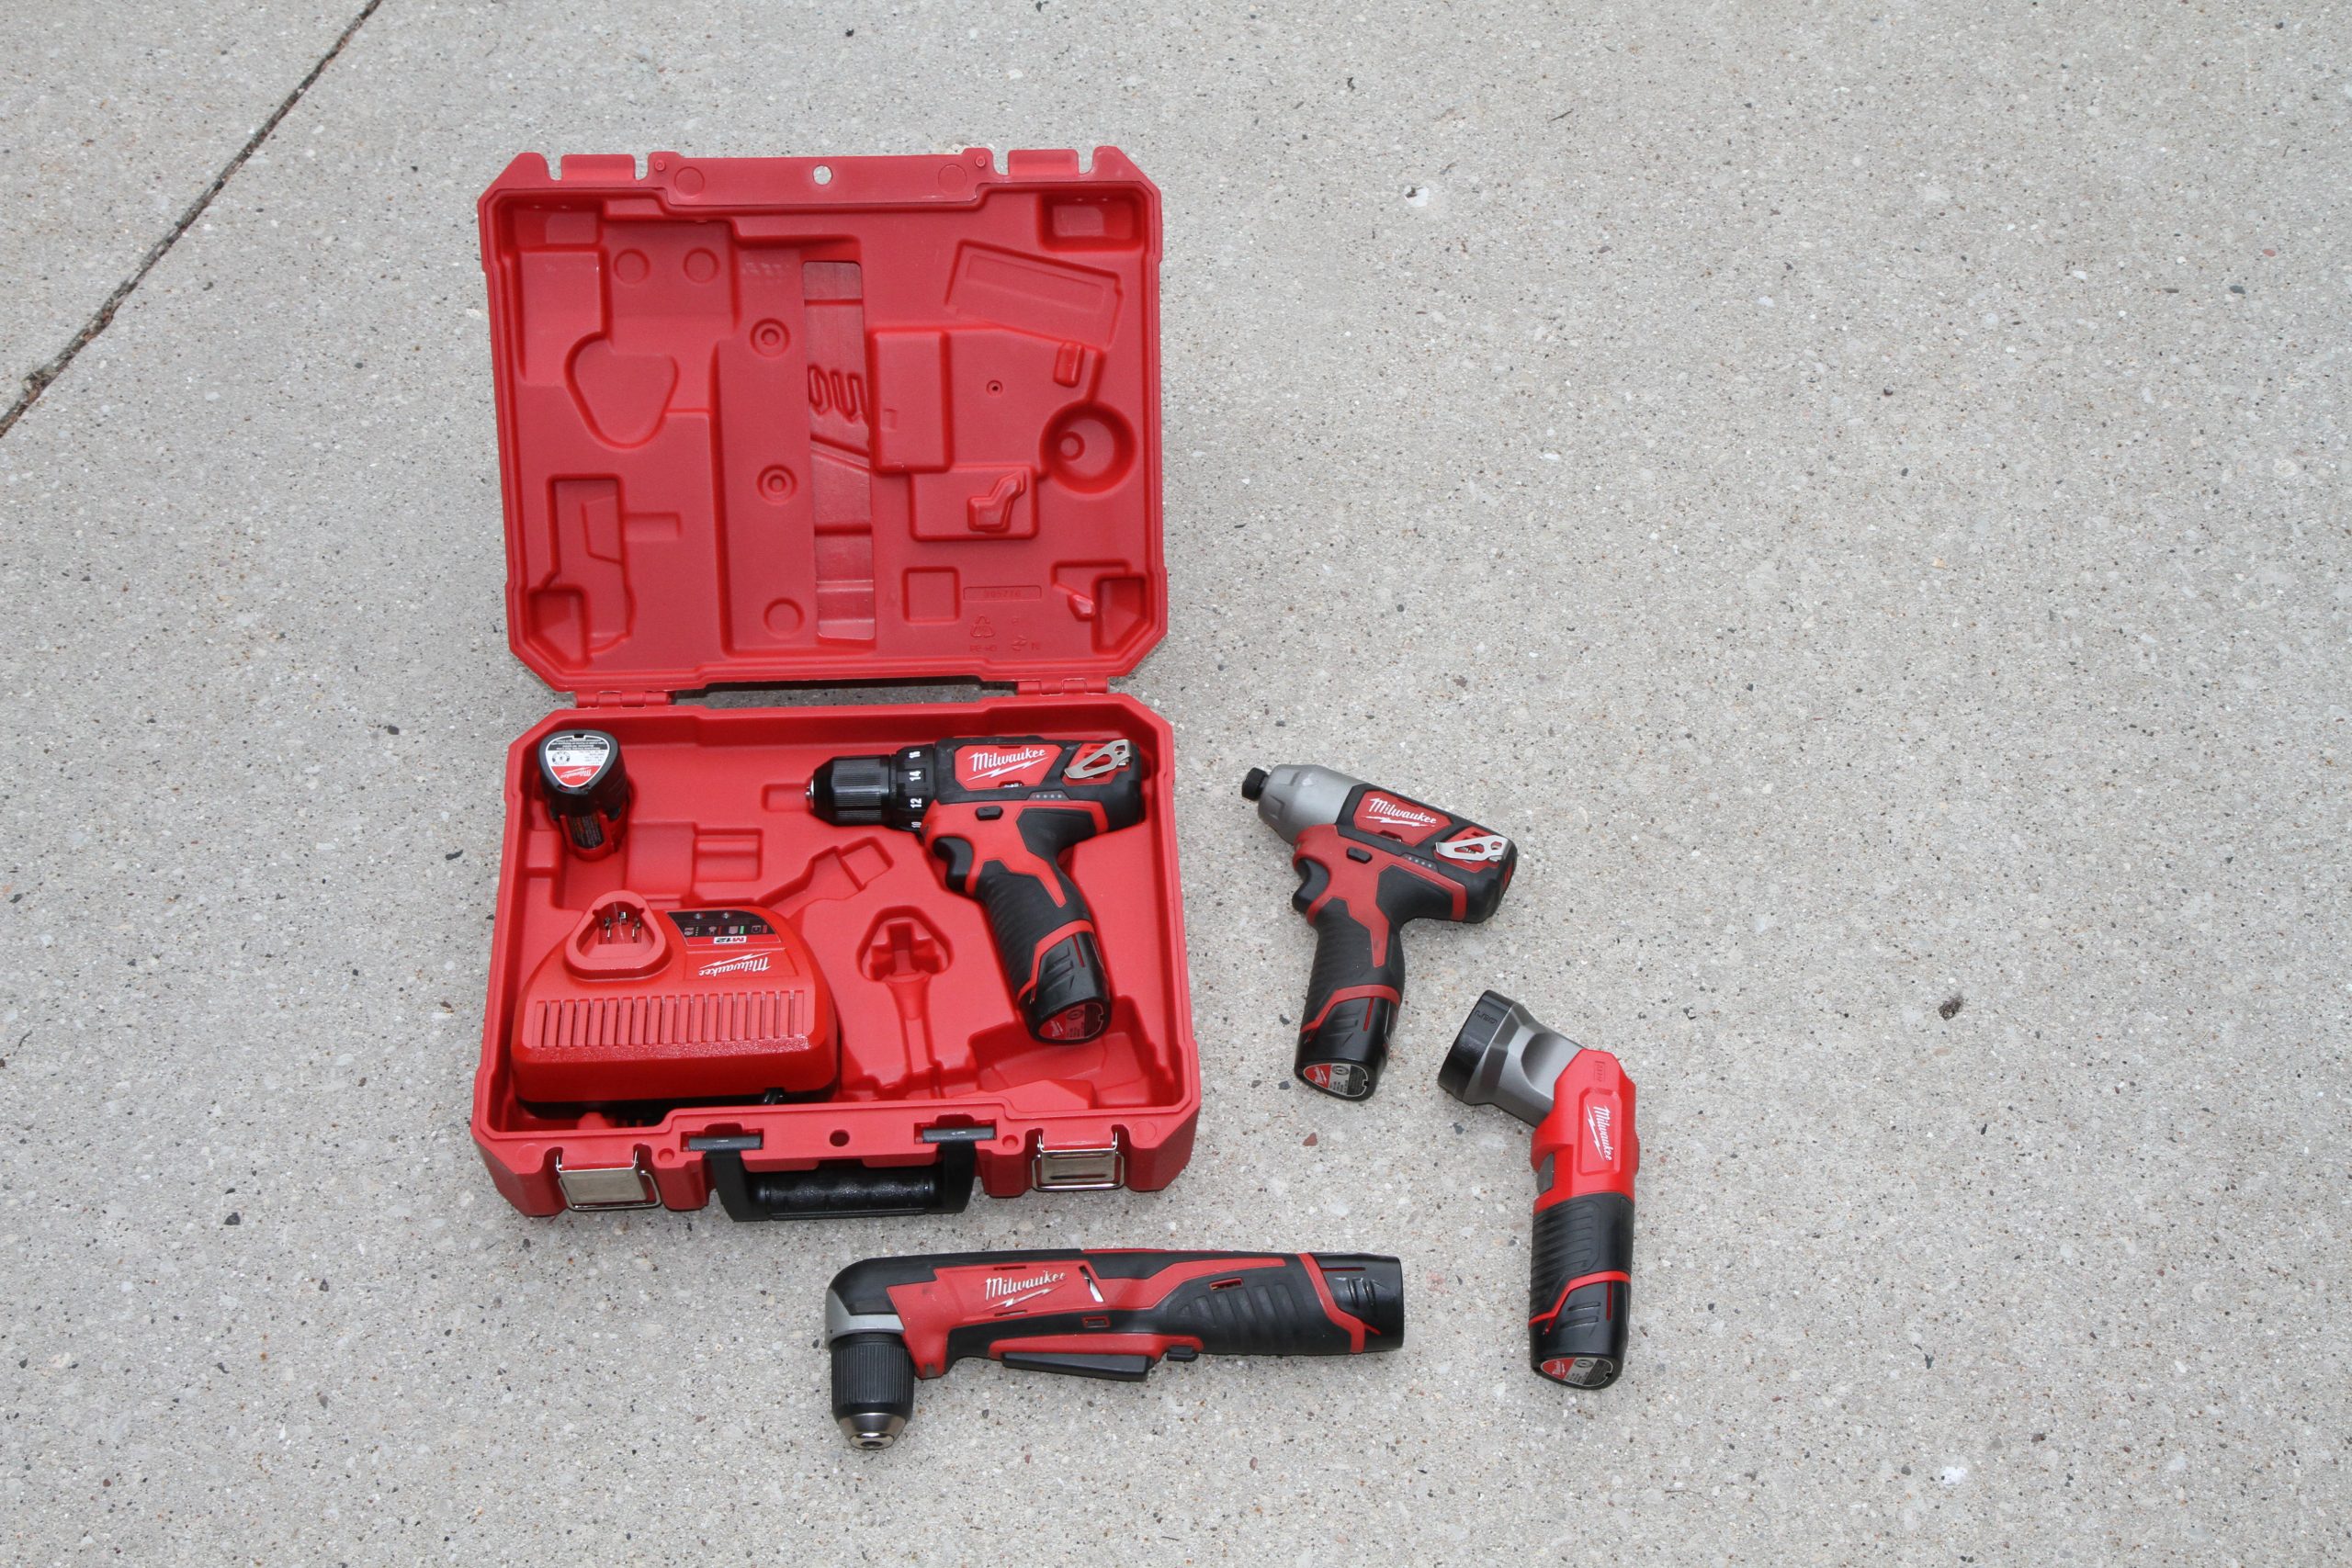
This is also the time to start adding power tools. After all, who doesn’ like power?! A cordless drill and drill bit set are a must and can also be used to drive your screwdriver bits or small sockets. Cordless tools are also part of a system so you can add an LED work light and cordless screwdriver or impact driver from the same family and share batteries and chargers. Cordless impact wrenches are also nice, but keep in mind that they won’t have the kind of power it will take to remove tires on a class A motorhome. 

Cordless tool systems can use a single charger and multiple batteries to power a wide array of tools. This Milwaukee M12 system is compact, yet powerful and my personal choice for carrying in the RV. It includes a drill, impact driver, right angle drill and LED work light.

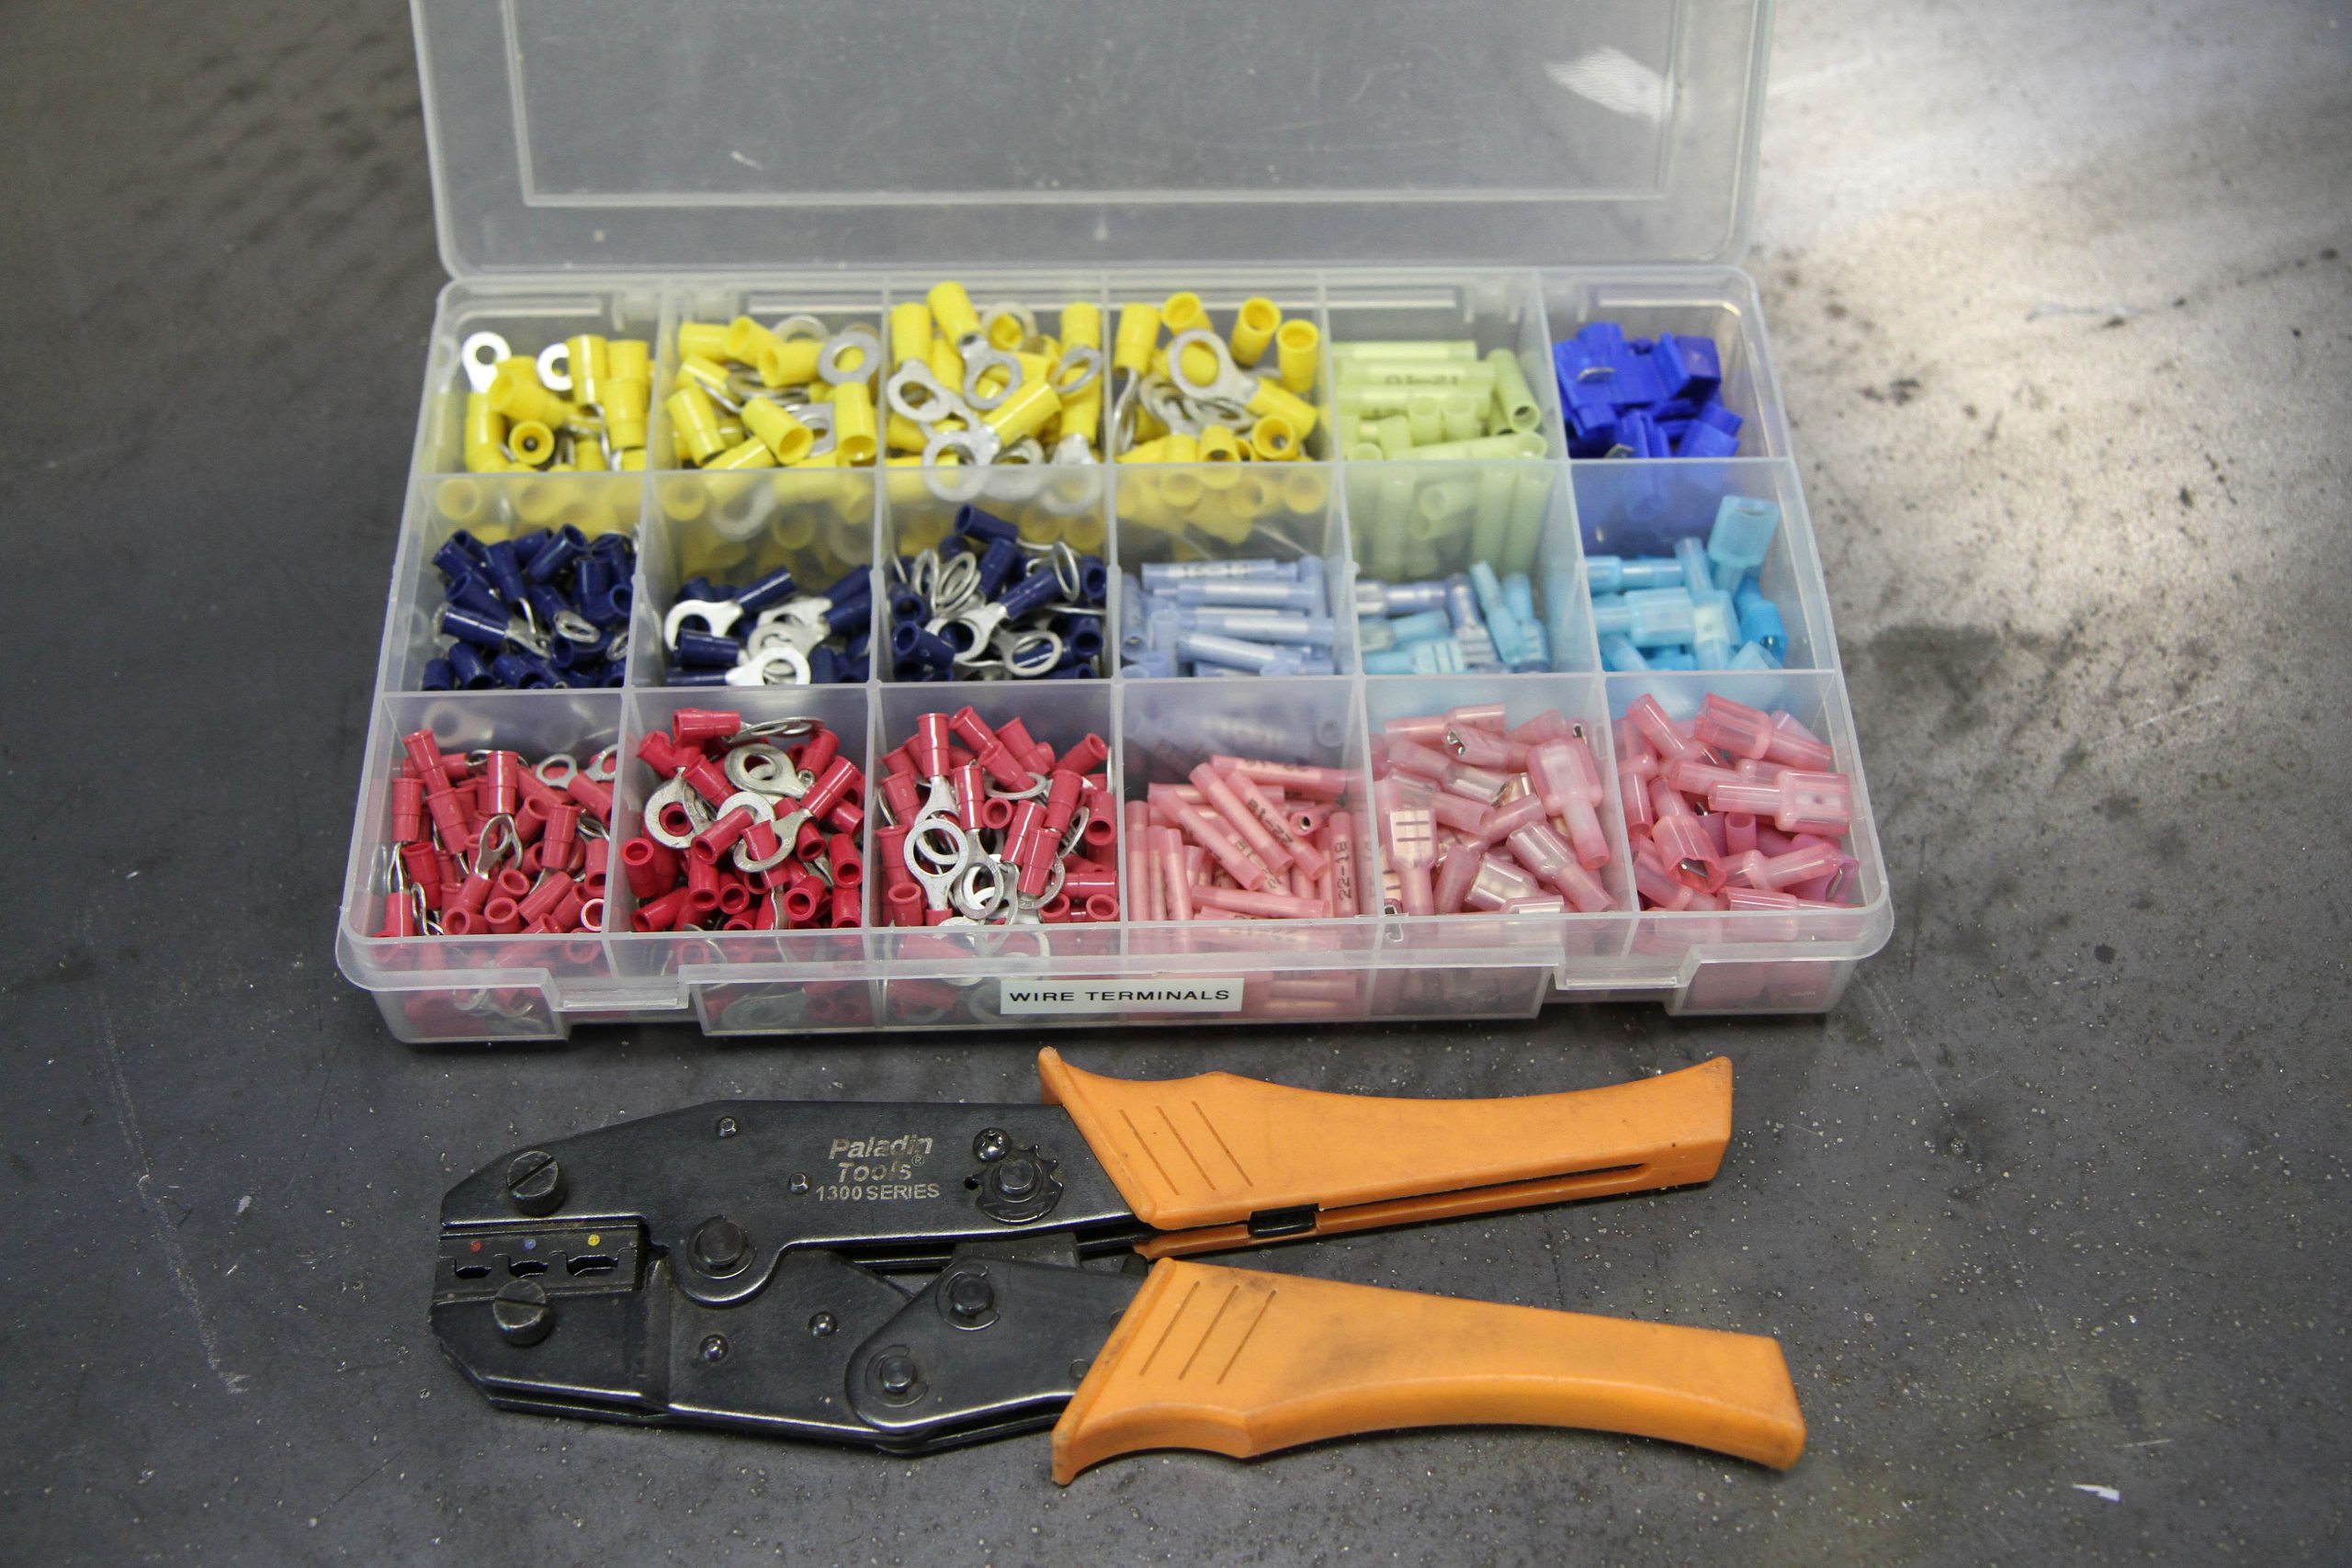
A selection of wiring terminals, along with a good quality barrel crimping tool will allow you to make good connections that are secure and will not fail and come apart.

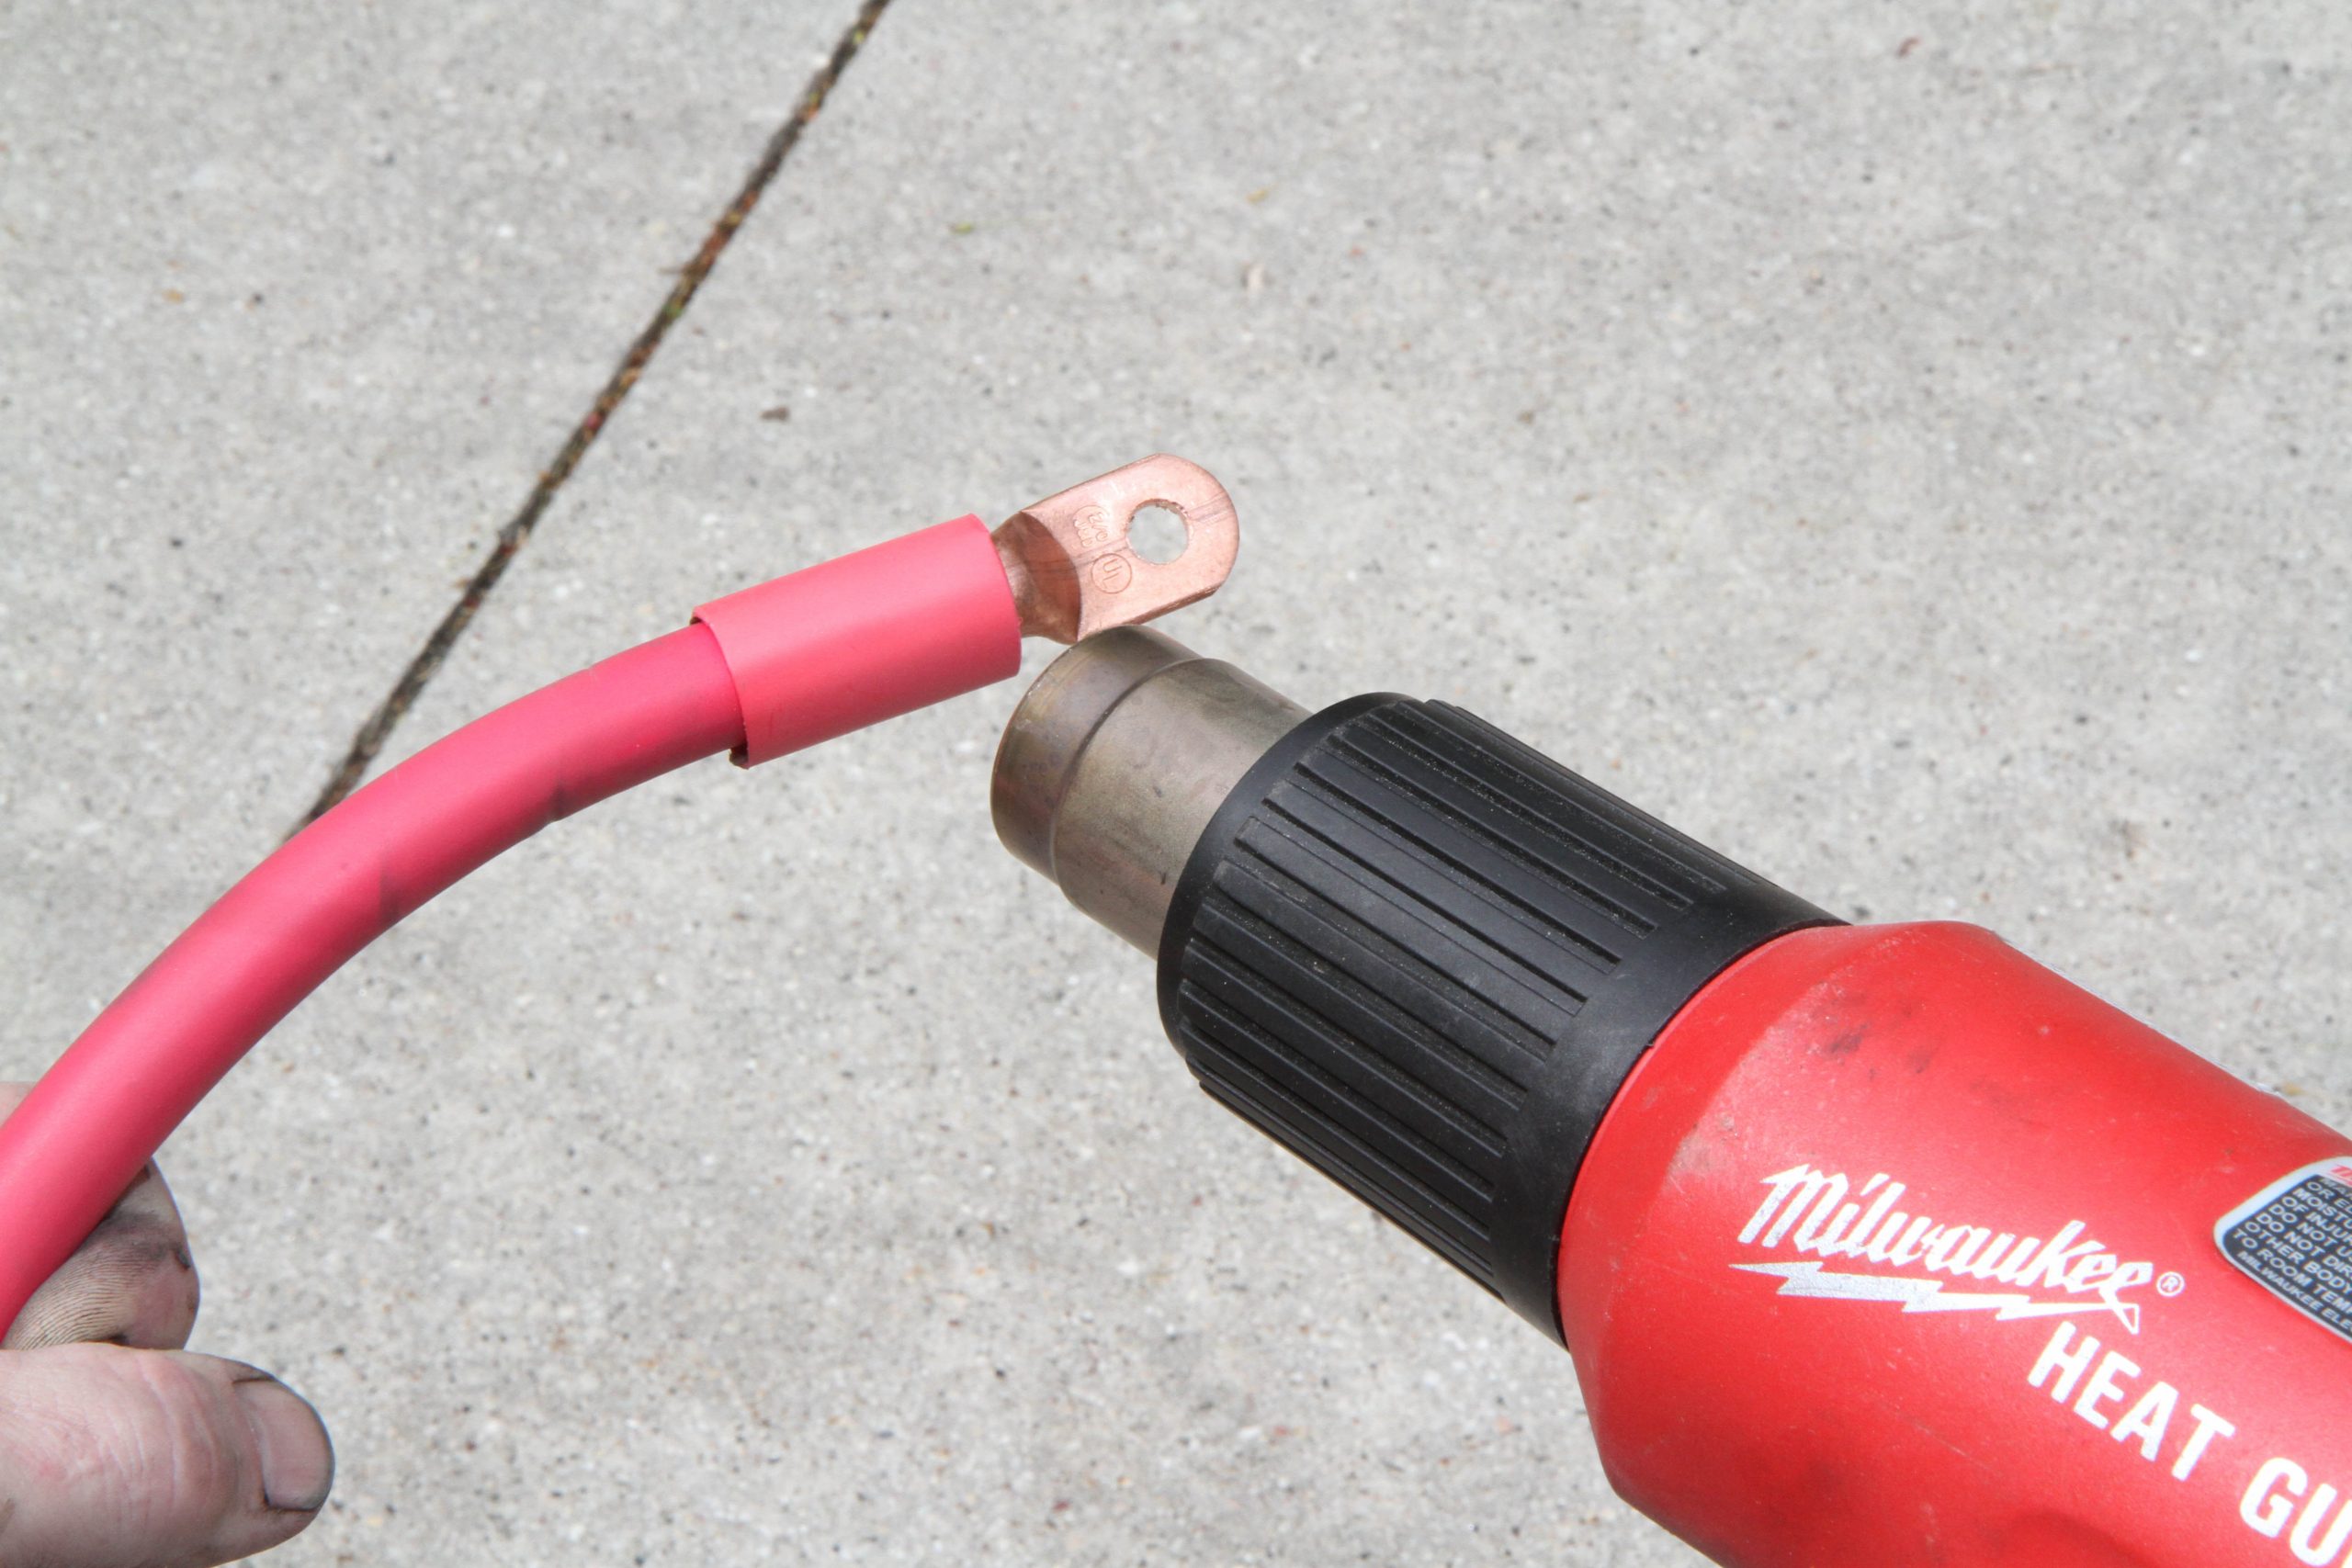
You can also make your life easier with better wiring tools. After all, electrical issues are generally the biggest gremlins that occur in an RV. It may be faster and easier to just grab a 12-volt test light to test a fuse or circuit rather than bring out the multimeter. Carrying a small kit with an assortment of wire terminals is a plus. While the basic multipurpose wiring tool can cut and crimp terminals in a pinch (pun intended), replacing the multipurpose crimper/stripper/cutter with a quality barrel crimper, diagonal cutters and wire stripper will make for better quality repairs and less hassle when making them. For connections that need to be sealed against the elements, heat shrink tubing and a heat gun will prevent those connections from corroding.

An electric heat gun is handy to heat up polyolefin shrink tubing or thaw out frozen water lines.

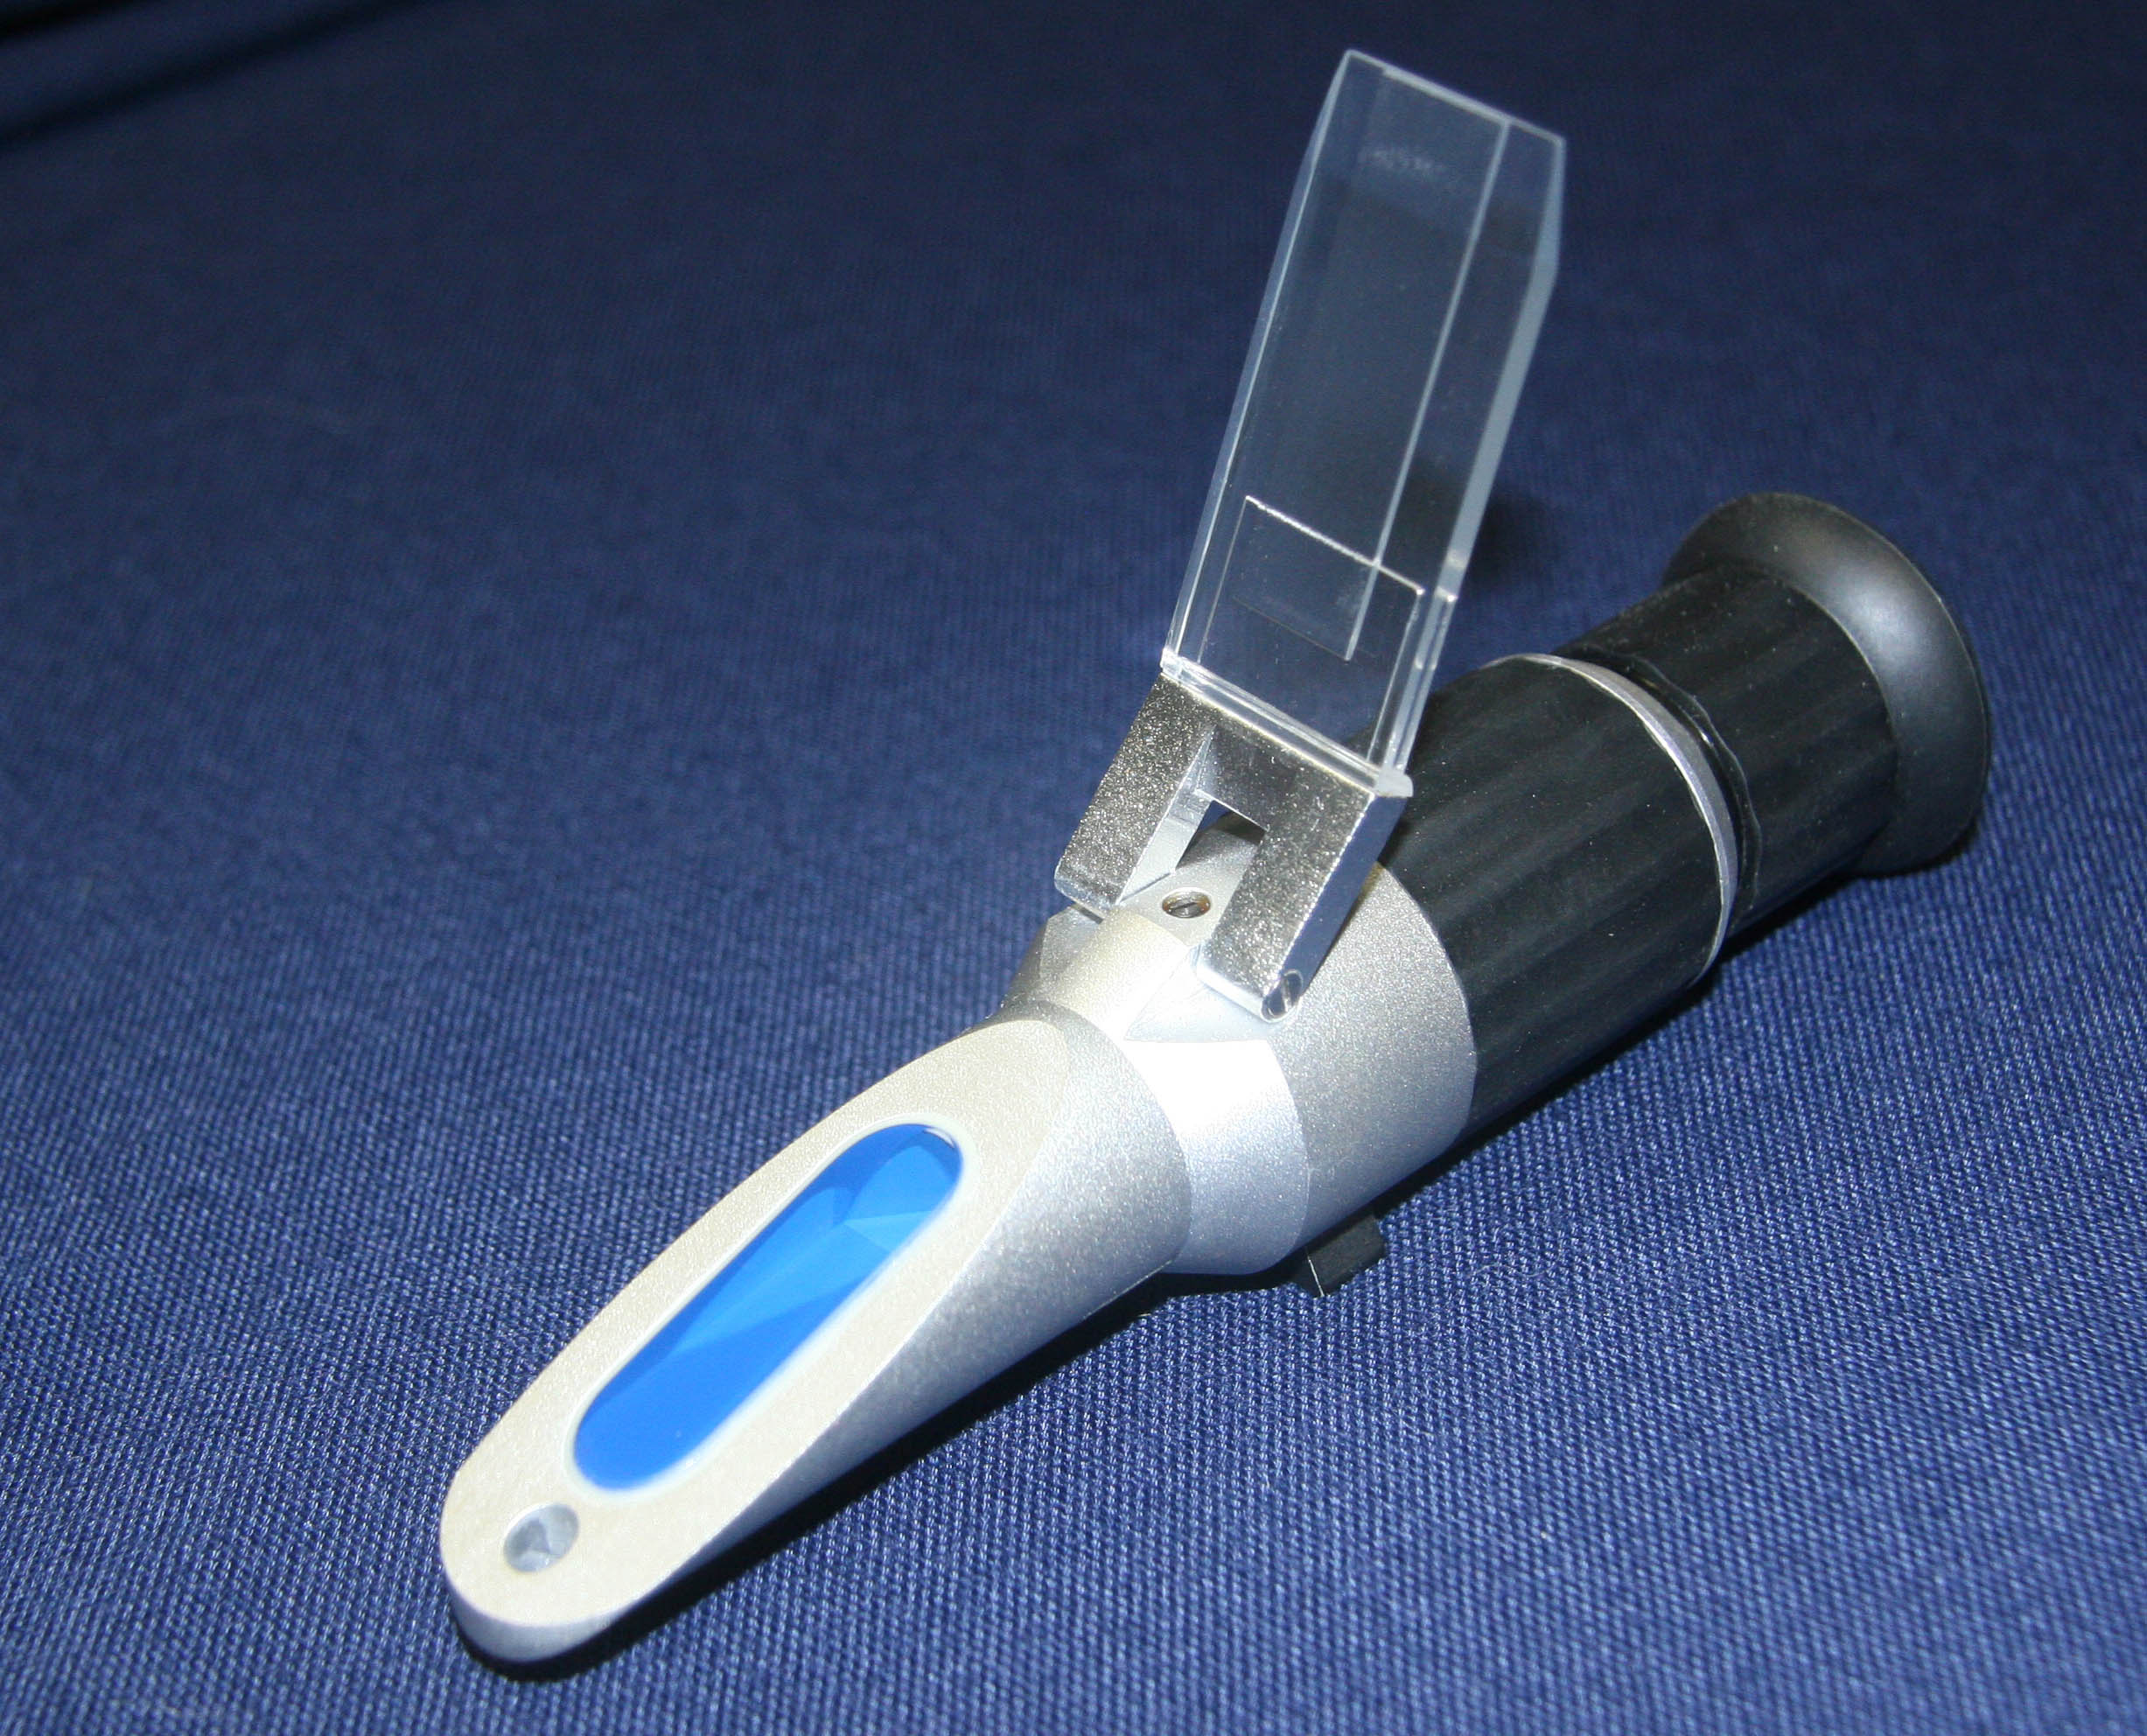
Radiator coolant needs to be checked for freeze protection level and if you have flooded batteries, you may need to check each cell’s specific gravity. You can buy a pair of hydrometers to accomplish this but they are bulky and can break easily. Rather than carry two hydrometers, I suggest buying a refractometer instead. A refractometer is compact and super accurate because it doesn’t require temperature compensation. It’s also less apt to break and one refractometer can handle both battery electrolyte levels as well as coolant freeze levels. Besides, you look pretty slick using it, so you always want to bring it out when you have an audience for the best effect.

A refractometer does double duty in that it can check your battery electrolyte charge level as well as the freeze level of your engine’s coolant. It’s much smaller and more accurate than a hydrometer and less prone to breakage.

Finally, a caulking gun and some tubes of silicone and self-leveling caulk are a wise choice to carry. If a leak appears, you can reseal it correctly rather than reaching for the duct tape. Best to include a scraper to remove the old sealant as well. Still, don’t forget the duct tape or Eterna bond which can be a miracle worker in some situations to get you out of a bind. If at all possible, take a look at a cordless caulking gun which will eliminate all of the squeezing that your hand needs to do when operating the gun. The end result is that you get a more consistent bead and your hand doesn’t feel like it’s ready for carpal tunnel surgery when you’re done. I use a Milwaukee M12 series cordless gun that interchanges batteries and chargers with my drill, screw-gun and LED light.

Level Three – Advanced

If you really enjoy getting your hands dirty (better add some good waterless hand soap to the list!), you’ll need even more tools. At this point, the law of diminishing returns comes into play. The tools are going to cost more and you are going to use them less often than your basic tools. But if you want to do whatever task they are designed to do, you’ll need them. Even if you don’t use them, it’s cool to be able to say you own them.

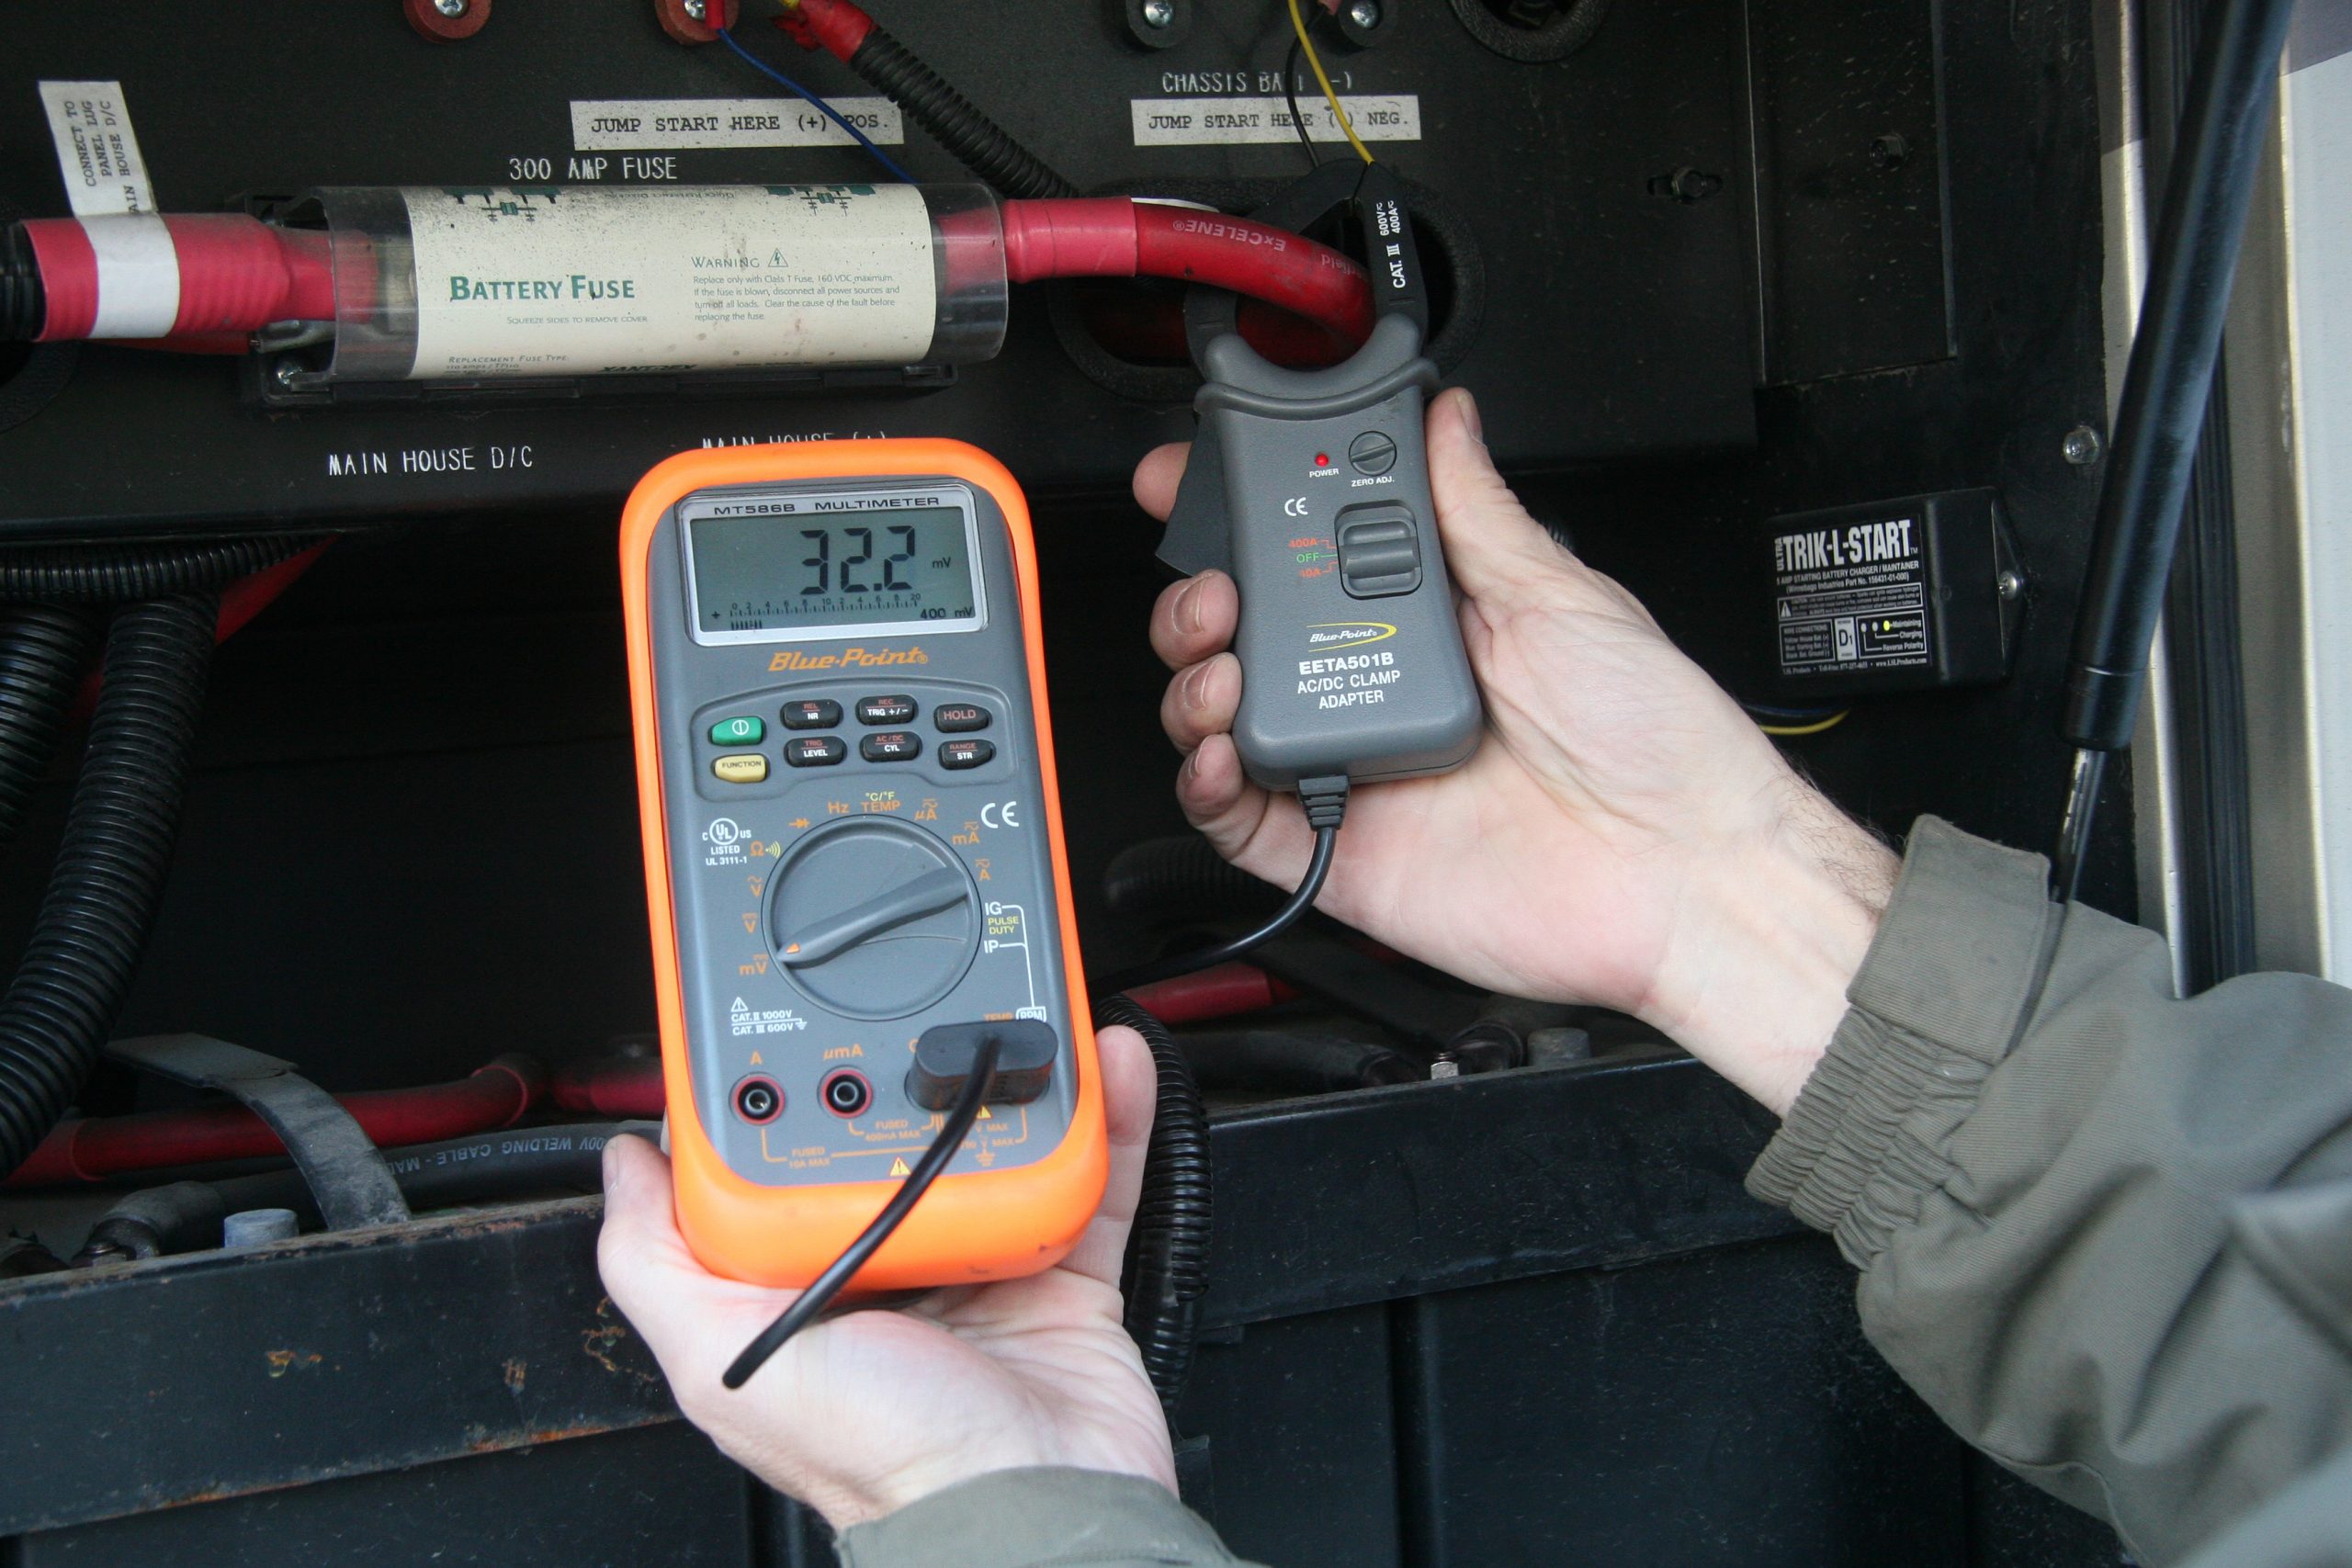
A clamp-on ammeter will increase the functionality of your multimeter, although dedicated units are also available that are much easier to use and don’t require zeroing like the multimeter accessory clamps do. You can use them to check DC circuits, including battery cables, as well as AC circuits. For 120-volt AC circuits you’ll also need a breakout adaptor that you can plug into a receptacle so that you can clamp individual wires of a power cord. This will tell you how many amps are passing through a given electrical circuit by clamping the probes around the conductor. My ammeter was available with a standard 20 amp adaptor but I also made a pigtail with a pair of 50 amp plug and socket connectors so that I could check how many amps were coming from a campground pedestal.

A clamp-on ammeter allows you to measure current flow in electrical circuits or battery cables.

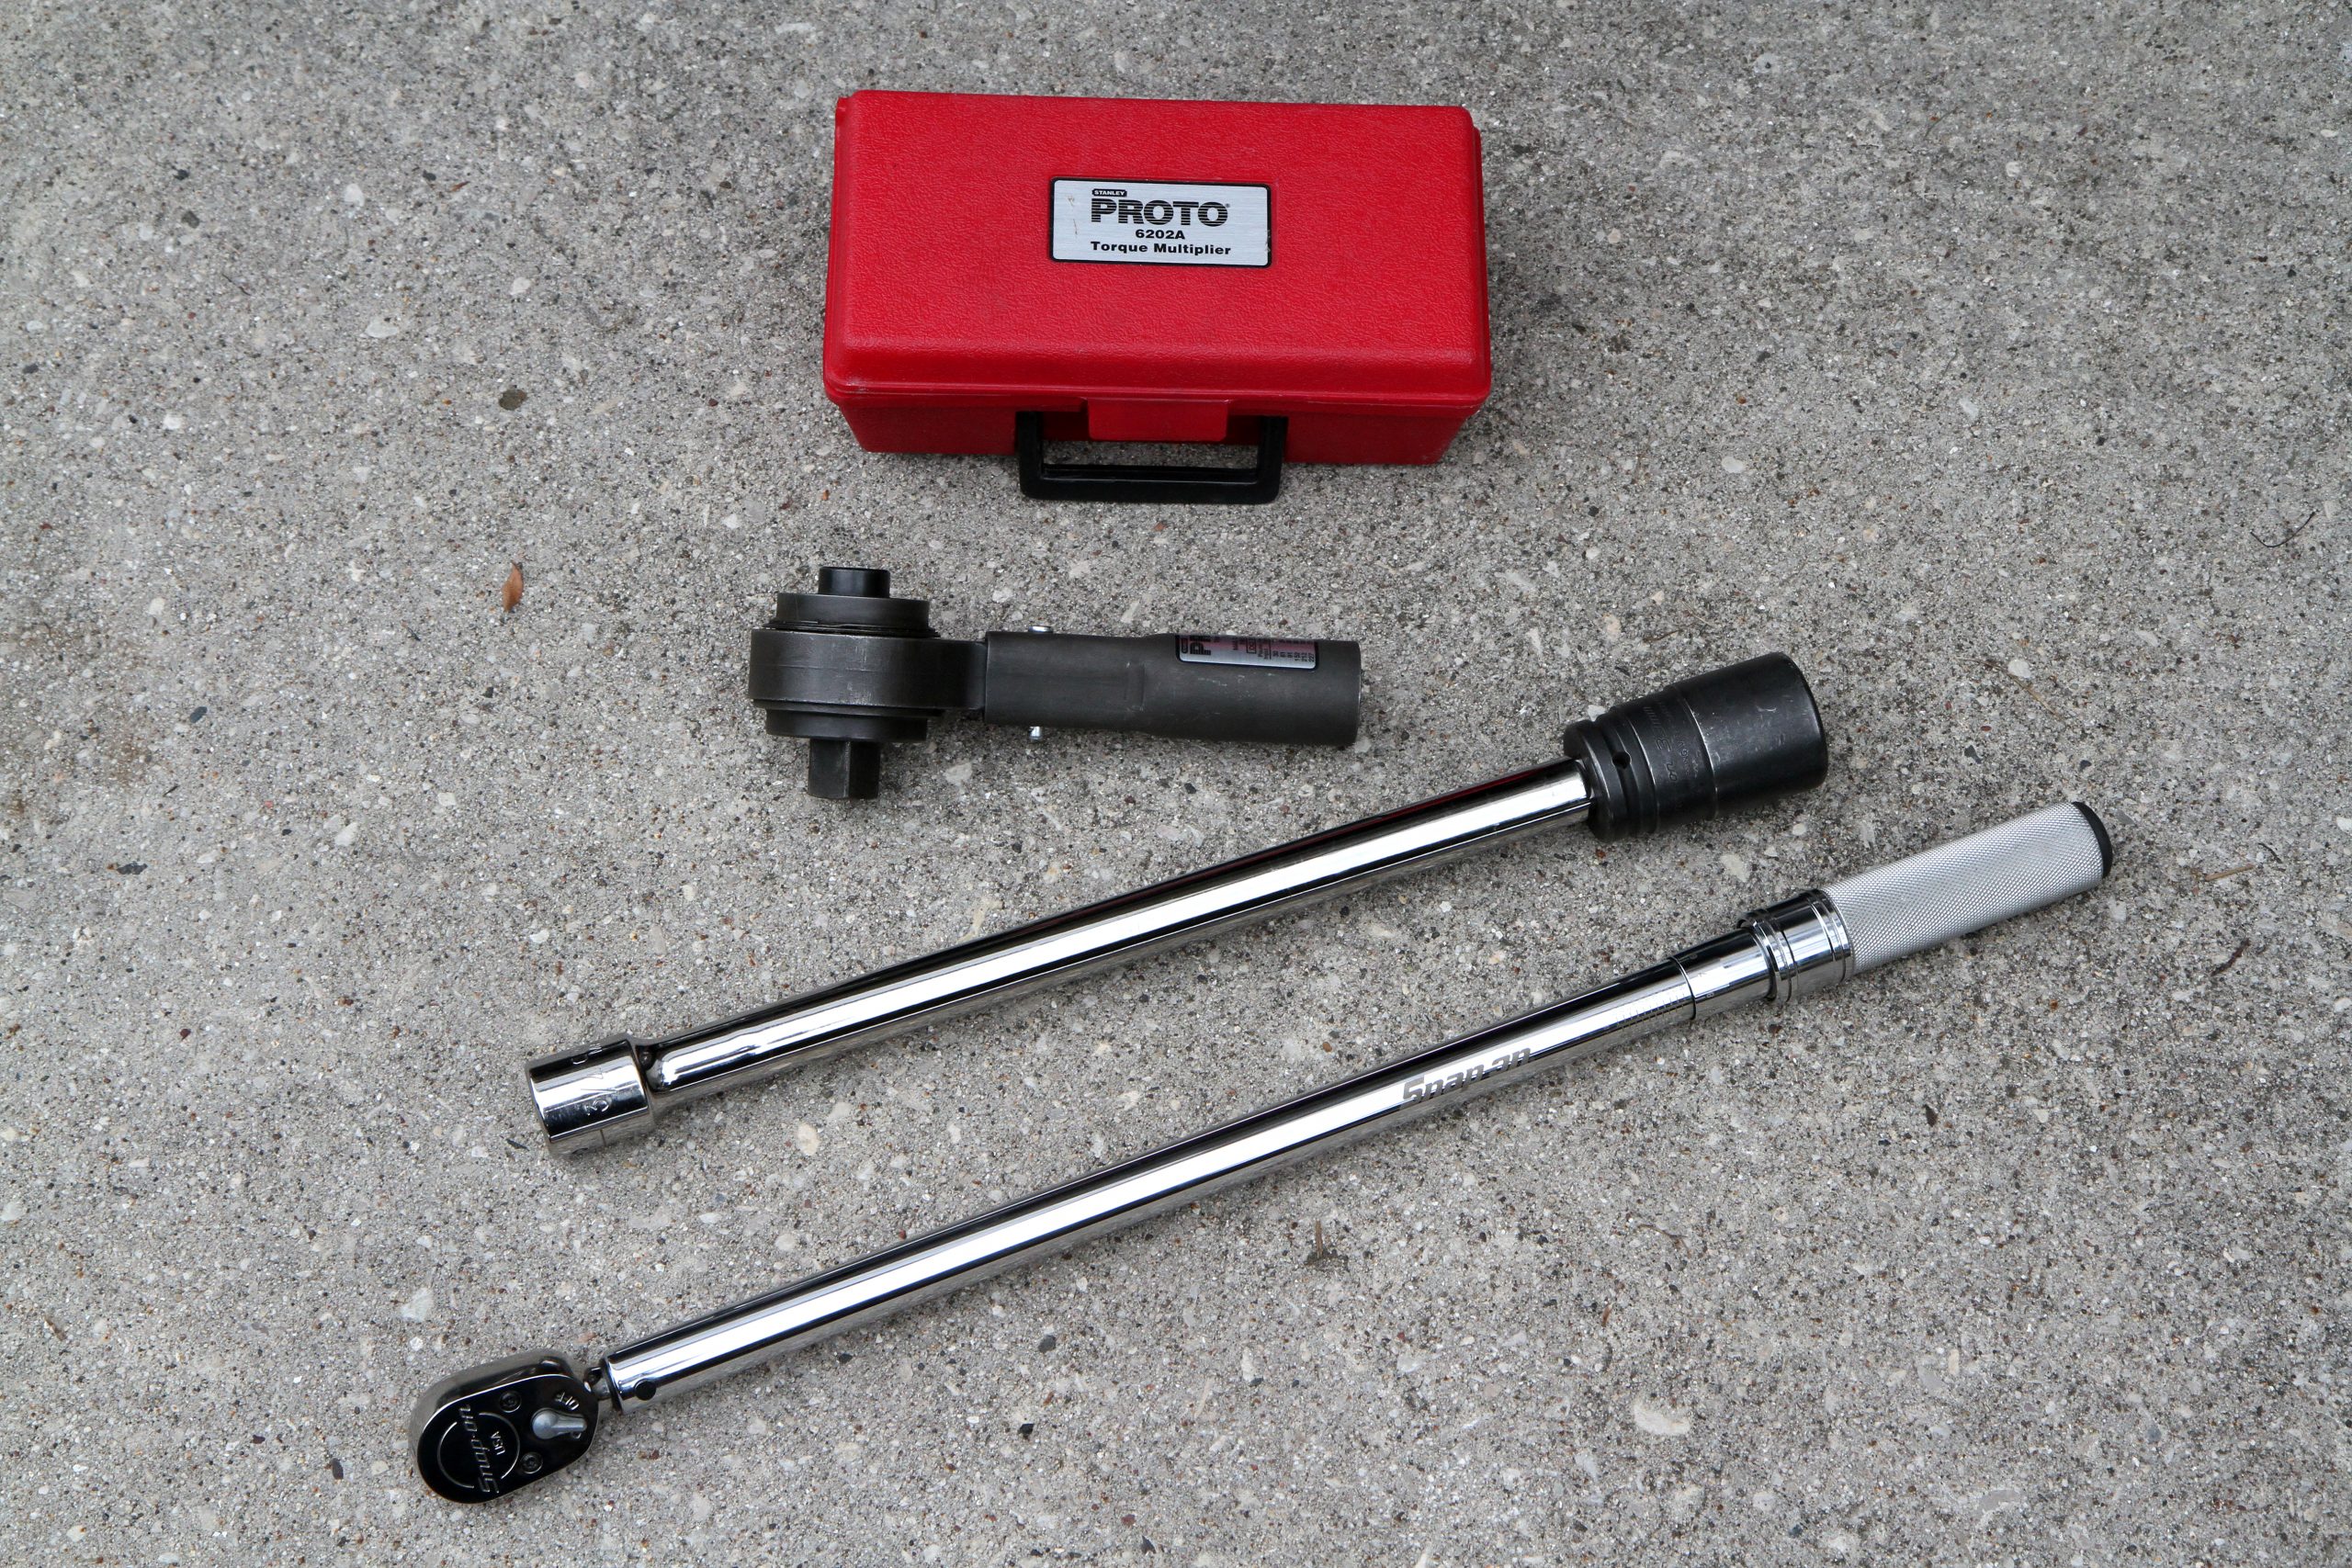
Another great item is a good torque multiplier. The lug nuts on a typical diesel pusher are torqued to 475 ft-lbs and it takes more than that to break them free once they’ve been on for a while. Applying all of my weight to a socket with a 5’ long bar only results in my feet coming up off the ground. With a 6:1 torque multiplier I can easily remove them with my ½” drive breaker bar. It also lets me use my ½” drive torque wrench to comfortably torque them back up to 475 ft-lbs.

A torque multiplier makes it much easier to remove and replace lug nuts with minimal effort. The torque wrench ensures that the lugs are torqued to the correct torque specification.

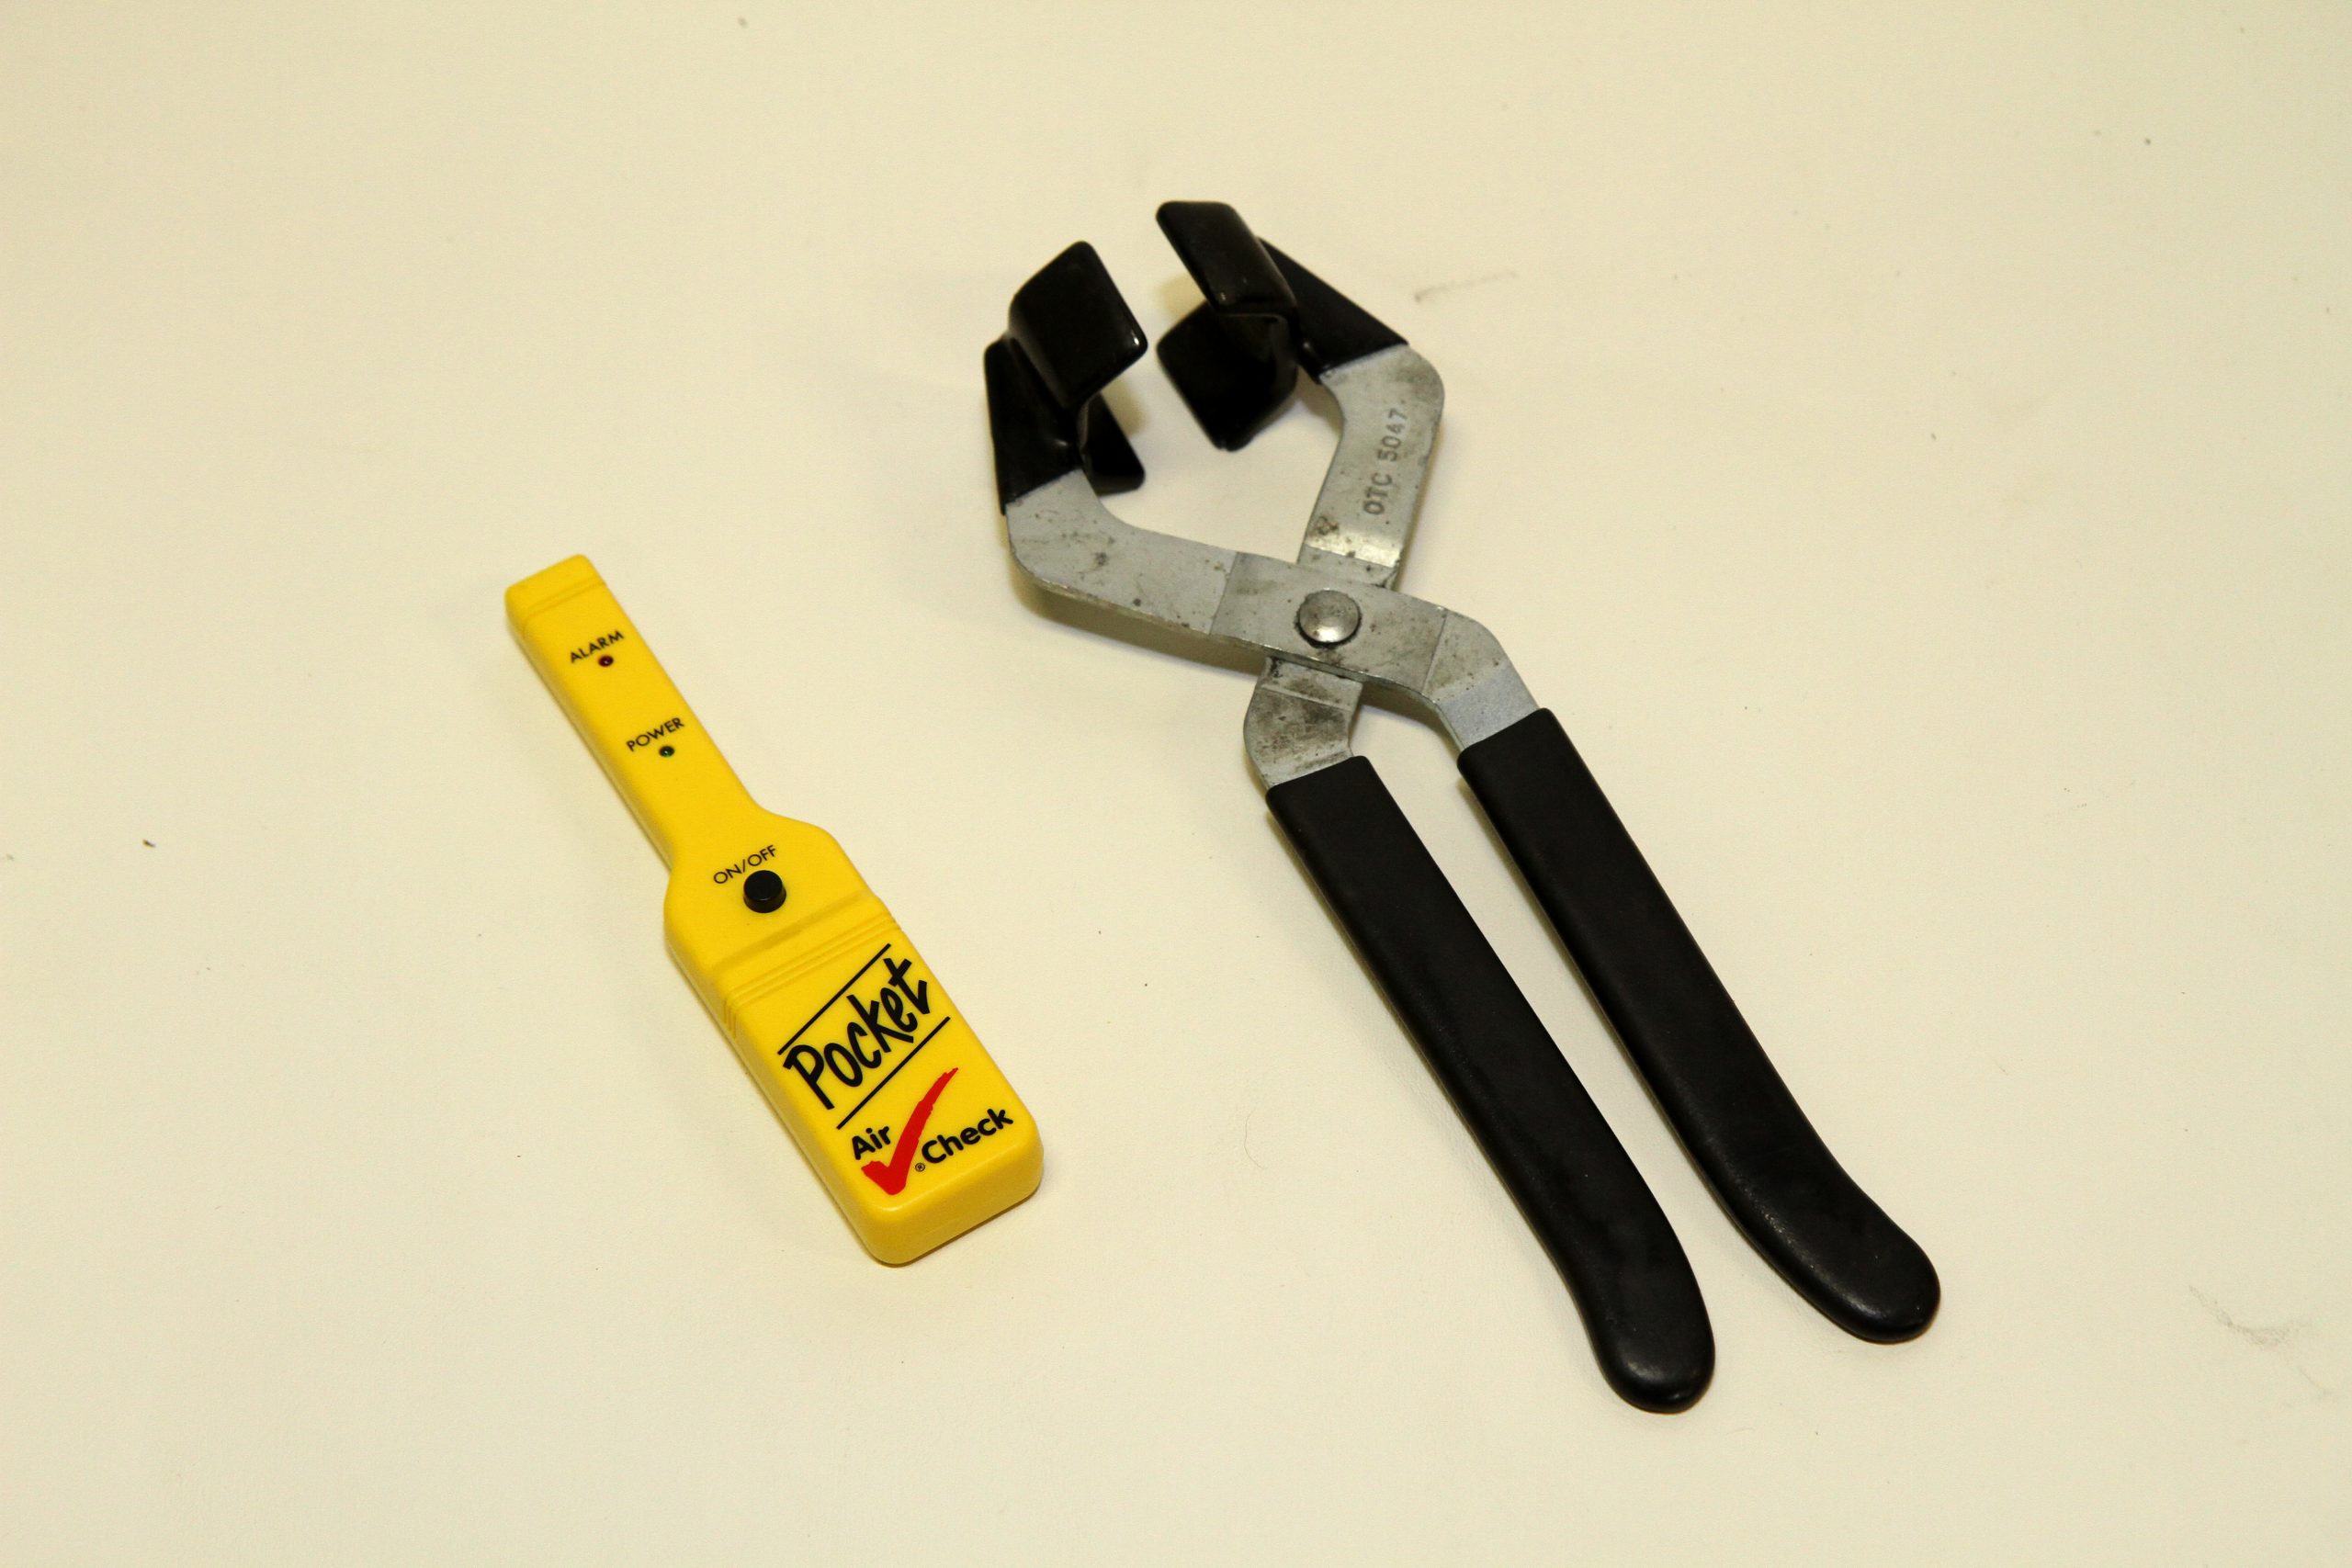
Never use an impact wrench on a torque multiplier or you will damage the gears! I will break them loose with the torque multiplier and then set that tool aside while I spin them off with my cordless impact wrench. When reinstalling, I use my cordless impact to get them snug, then transfer over to the torque multiplier plus my ½” drive torque wrench to tighten them to the final torque specification. If you are going to do any tire or wheel work, pick up a wrench designed to remove the hubcap trim nut as well as a pliers with rubber grips that are designed to remove the plastic chrome acorn caps over the lug nuts.

A rubber gripped pliers that is designed to remove the chrome plastic acorn nut covers will make the job go much easier without scratching the chrome covers.

The key is to match the tools to your ability to handle repairs and your desire to do it yourself. Eventually it’s time to call the professionals and let them do the task, but that point varies with each individual as well as the severity of the needed repair. And last, but not least: You’ll need to look the part. Wearing a ball cap with a Snap-On Tools logo will identify you as a serious professional.

And last, but certainly not least, the fourth class of tools are those designed to take preventative measures, saving you from the hassle and dangers during specific but all too common situations. For example, installing a tire safety system like RettroBand® Wheel Enhancement can protect you and your RV during tire blowouts. Likewise, a fire suppression system such as THIA by Proteng can extinguish a fire before it ever has a chance to spread, saving lives, possessions and costly repairs. To learn more about these and other game-changing products, contact NIRVC today.

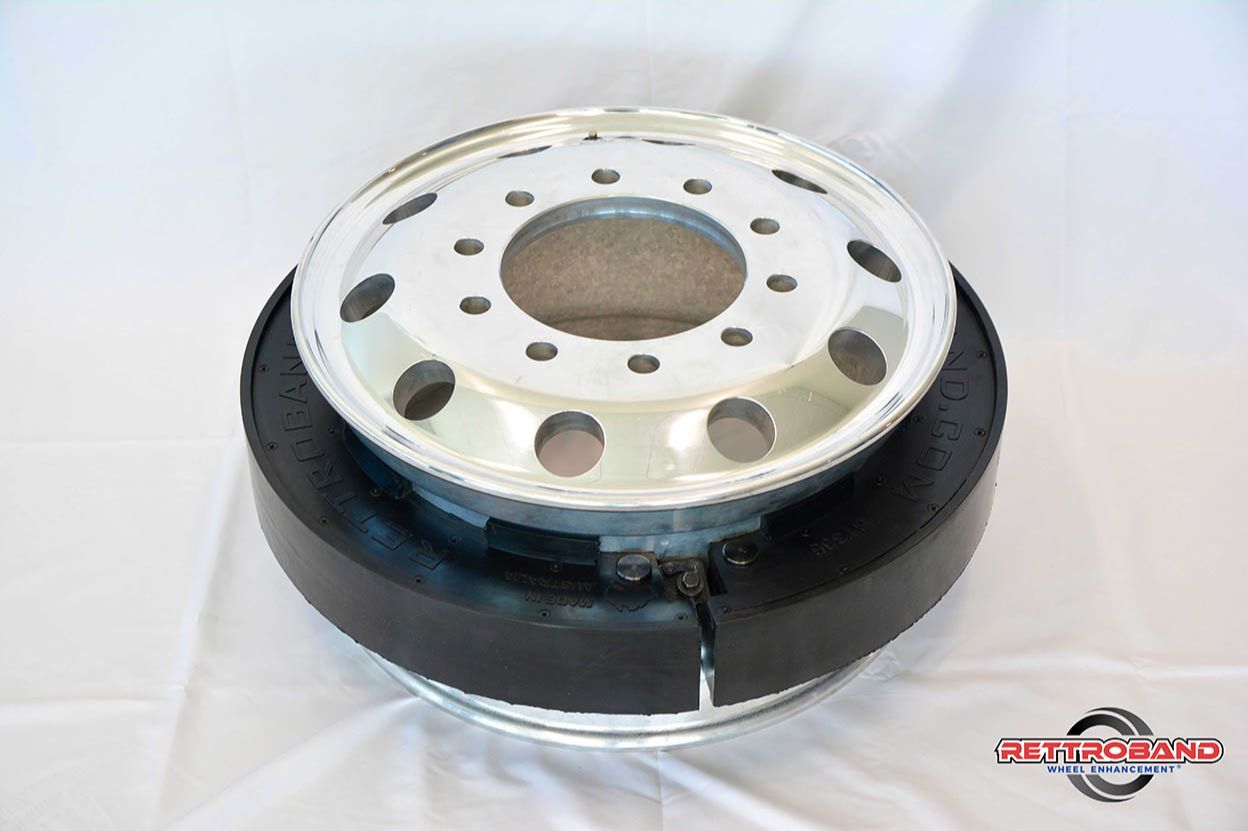
Rettrobrand Wheel Enhancement
PROTENG Fire Suppression

RettroBand offers a built-in spare that is engineered to withstand being driven on for short distances.

Completely self-contained and heat-activated, Proteng® is a fire suppression system minimizes fire damage by eliminating heat at the source, effectively extinguishing fire before it begins.

National Indoor RV Centers blogger Mark Quasius profile picture

Mark Quasius is the founder of RVtechMag.com, the past Midwest editor of RV Magazine, writes for numerous RV-related publications and a regular Contributor to FMCA’s Family RVing Magazine. Mark and his wife Leann travel in their 2016 Entegra Cornerstone.

2023 Winnebago View / Navion

2023 Winnebago View / 2023 Winnebago Navion

The all new 2023 Winnebago View is a luxurious Class C RV loaded into a practical and easy-driving dream machine.

Difference Between Winnebago View and Navion

Take note that the View and Navion – both by Winnebago – are the same coach but with different badging.

Winnebago View Floor Plans

The video below offers a tour of the View’s 24D floor plan, which offers a plush U-shaped dinette with footrests, sofa seating that easily converts to a comfortable Murphy bed and spacious rear bath. 

Winnebago View RV

At 25½ feet long, the Winnebago View is highly manageable yet broadly accommodating, its sensible elegance unmatched by rivals. With a 3.0 L, 6-cylinder, 188-hp turbo-diesel engine atop the ever dependable Mercedes-Benz® Sprinter Chassis and industry leading amenities, this home-on-wheels is perfect for weekend getaways and epic adventures alike. 

RV & Pet Safety 101: Tips & Tricks

RVs and Pet Safety: Here’s What You Need to Know

Keep Your Furry Friends Safe With Our RV Pet Safety Guide! 

Whether your adventuring companion is a dog, cat, ferret, snake or tank full of rare fish, there’s a lot of fun to be had in bringing pets along on an RV trip. If you’re one of the many RVers who believe that going on a family trip means bringing the WHOLE family, then you’re not alone. A 2018 study from the RV Industry Association (RIVA) found that more than 65% of RVers bring a pet with them on excursions, with dogs being the most common type (at a whopping 93%!). 

While most pets can comfortably adapt to traveling in a motorhome, it’s worth noting that RV travel will likely come with a flood of experiences that are outside the comfortable confines of their usual routine. Simply put, traveling in an RV means dealing with a lot of new experiences for pets – especially during their first few rides. 

With that in mind, here are our safe travel tips for traveling with pets so you can make the most of your RV adventures.

Make Sure That Your Route (or Destination) Is Pet-Friendly.

One of the most important considerations for traveling with a pet starts before you even begin packing your RV. There are few things more stressful than pulling up to your campsite and finding out that it doesn’t allow for pets. Not all RVing activities allow for pets either. In fact, there are plenty of state and national parks where they’re simply not allowed. 

Most pets are okay with staying in an RV alone for a little while. After all, it’s unlikely that you’re with your pet 24/7 at home, so a normally well-behaved animal will be able to manage for a bit while you’re gone. It’s worth noting that the stress of an unfamiliar environment can quicken the pace at which being alone goes from “relaxing” to “stressful,” especially if it’s your pet’s first trip. 

To that end, you can make the most of your adventures with your furry friends by keeping an eye out for pet-friendly destinations along your route. This can include pet-friendly restaurants, pet-friendly hikes and parks. 

Remember that there’s no shame in hiring a pet sitter if you can’t quite make the trip work. Your dog might miss you, but they’re going to be much happier missing you at home instead of in the back of your RV.


Have a Designated Place for Pets to Travel (and Sleep).

Make sure that you have a designated location for your pet to ride before you begin loading your RV. In the event that you’re towing a trailer or fifth wheel, it’s worth remembering that your animal MUST ride with you. 

A pet’s exact needs can vary greatly, so there’s a huge benefit in being flexible. Some pets will prefer to stretch out while others might be anxious enough that they prefer to travel in a crate. Others might fare best when they have enough space to patrol the backseat. When you first take your pet on a trip, try to be as attentive as possible to their needs so that you can figure out the travel conditions that work best for them. 

This is the case for sleeping conditions too. If you have the room for it, try bringing a couple of different sleeping surfaces so that you can see which one your pet responds best to on the road. Additionally, have a pre-established space for them to sleep to ensure that they can enjoy the same consistency and comfort that they’re used to at home.


Remember That Your Pets Need a Break, Too.

If you find yourself feeling cramped and restless after a long day on the road, then think about how your pet must feel! After all, a single seven-hour drive is more than two whole days in dog hours! If your animal is used to daily walks or exercise, then try to fit in as much of it as possible, even when you’re on the road. 

Remember that your pet doesn’t know that they’re on vacation, and their ability to switch between “normal mode” and “vacation mode” looks very different from that of a human. As a result, they’ll still be expecting some semblance of their normal schedule, even if they’re hundreds of miles away from home.

Don’t view these pet breaks as a chore, view them as a chance to stretch your legs and get some rest in for yourself. After all, it can be difficult to see the value of a good walk while you’re racing to reach a campsite, but your legs will thank you!


Treat Your Pets Like Children–and Pack Extra for Them 

Pets can be like children in many ways, especially when you consider what packing for them looks like ahead of an RV trip. Remember to bring plenty of food and designated water for your pet, along with way more toys than you think you might need. 

It’s especially important to pack several days MORE food than the intended length of your trip. In the event that you experience a breakdown, you can’t always count on being able to find a replacement brand that your pet likes–especially if you’re somewhere remote. 

The importance of bringing enough toys for your pet cannot be overstated. It’s a running joke among RVers that your pet WILL get bored of whatever you bring, and having additional toys to occupy them prevents them from getting too restless on long trips. If nothing else, remember that packing additional toys minimizes the chances that your driving will be soundtracked by your dog’s nervous barking, and that’s never a fun thing to deal with. 

Traveling with a pet is a great way to enjoy some quality bonding time while also making sure that you’ve got some companionship for those lazy campground afternoons and introspective overnight drives. It doesn’t matter whether you’re cruising through the Arizona desert or winding up the New England coastline–any adventure worth having is an adventure worth sharing. By giving your pets the same care, consideration and respect that you’d give to a human passenger, you can ensure that your RV trip is more “Travels With Charlie” and less “Cujo”!

Check out our current inventory to find a motorhome that can accomodate you and your furry friends! 

Happy travels!

2023 Newmar Dutch Star RV Tour with Angie Morell

The Dutch Star, a popular diesel motor coach, is all new for 2023.  It features redesigned front and rear caps, a dash with a completely new look.  As in all cases that Newmar life cycles its products, there are a host of new and exciting changes, including new standard features and options, as well as many new interior design elements summarized under “interior features”. 

2023 Newmar Dutch Star RV Floor Plans

The Dutch Star 3709, 3717, 3736, 4081, 4310, 4311, 4326, 4328, and 4369 floor plans have been retained for the 2023 model year as these are all very popular selling models.  The 4020 and 4363 floor plans are no longer available for 2023, as these patio side dinette offerings have been replaced with new models offering the same feature.

For the 4311 wheel chair accessible floor plan, the king bed with 48” X 36” shower is still the standard layout. There is, however, a change to the option for a queen bed which will offer a larger 57” shower for the 2023 model year.

The rear master bathroom on the DutchStar 4369 is modified in that it has been reversed side to side, so as to create more space around the foot of the bed when transitioning from the bedroom into the rear bath.

In addition, the half bath layout of the 4369 and 4363 have been modified.

There are 3 new floor plans offered for the 2023 model year:

Newmar Dutch Star 4071

  • The Dutch Star 4071 is a full wall slide bath and a half model with opposing sofas and a dinette that faces out at the patio.  It replaces the 4020 floor plan offered in 2022.
  • The standard euro-booth dinette is the only dining furniture available on this new floor plan.  This, along with the HWH slide, allows Newmar to offer full height baggage doors underneath the patio awning and allow for an optional exterior entertainment center to be located in the side wall of the slide room.
  • The front living area features an 87” side folding hide-a-bed sofa on the off-door side across from a 68” jackknife sofa on the door side.
  • Further back, a large and functional kitchen is located on the off-door side across from the standard euro-booth dinette.
  • The half bath is located mid-ship.
  • The bedroom provides a king bed, two shirt wardrobes and dresser with drawers, and TV across from the foot of the bed.
  • The rear master bathroom features a large vanity with plenty of counter space, cabinet that can house the optional washer and dryer, large wardrobe and a 40” X 30” glass enclosed shower.

Newmar Dutch Star 4325

  • The Dutch Star 4325 is a new full wall slide bath and a half model with a couple of unique features in the kitchen area.
  • The front living area features an 87” side folding hide-a-bed sofa on the off-door side across from a 68” jackknife sofa on the door side.
  • Rear of the off-door side sofa is the hide-a-leaf dinette, and a refrigerator with a large pantry on each side.  These two pantries have decorative “feet” that gives the appearance of a piece of furniture.
  • Across from the refrigerator sits the large and functional galley with a pull out cabinet for even more counter space.
  • Rear of the kitchen, is a stationary cabinet that extends the counter space even further and provides more storage below the counter and in the overhead cabinet above the counter.  This cabinet can accommodate an optional wine cooler and stemware cabinet overhead.
  • The bedroom provides a king bed, two shirt wardrobes and dresser with drawers, and TV across from the foot of the bed.

Newmar Dutch Star 4370

  • The Dutch Star 4370 is a full wall slide bath and a half model with opposing sofas and a dinette that faces out at the patio.  It replaces the 4363 floor plan offered in 2022
  • The standard euro-booth dinette is the only dining furniture available on this new floor plan.  This, along with the HWH slide, allows Newmar to offer full height baggage doors underneath the patio awning and allow for an optional exterior entertainment center to be located in the side wall of the slide room.
  • The front living area features an 87” side folding hide-a-bed sofa on the off-door side across from a 74” jackknife sofa on the door side.
  • Further back, a large and functional kitchen is located on the off-door side across from the standard euro-booth dinette.
  • The half bath is located mid-ship.
  • The bedroom provides a king bed, two shirt wardrobes and dresser with drawers, and TV across from the foot of the bed.
  • The rear master bathroom features a vanity with two sinks, cabinet that can house the optional washer and dryer, large wardrobe that spans the entire rear wall and a 50” X 34” glass enclosed shower.

Newmar Dutch Star 3736

Appliances And Accessories

  • Apple Car Play is a new feature on the standard dash radio.
  • For 2023, a change has been made to the standard HD back up camera on Dutch Star, which will feature static grid lines (like other Newmar diesel brands higher up the product line-up).
  • The 2023 Dutch Star features larger 9” dash radio and monitor.

Cabinets And Furniture

  • With the life cycle change of the Dutch Star for the 2023 model year, new cabinet and furniture designs include:
    • New furniture styling, including the front driver and passenger seats.
    • New slide out fascia designs.
    • A new feature ceiling.
    • New door and drawer hardware.
    • New headboard style.
    • New style of dinette chairs.
    • New styling of the pocket doors.
    • Decorative “feet” have been added to the night stands.
  • The driver seat will have vibration for the standard Mobile Eye lane tracking and departure warning system.
  • The rear bath cabinet layout has been changed on the Dutch Star 4071 and 4081 floor plans.
  • The appliance garage in the kitchen has been eliminated.
  • The medicine cabinets in the rear bathroom have been redesigned on the 4369 model.
  • The euro-booth dinette is standard on the 4071 and 4370 floor plans, and will be the only dining configuration available.  This change, in conjunction with the HWH slides used on Dutch Star, allowed Newmar to provide full height baggage doors on the door side, even with the dinette facing out under the patio.  This is the first time that Newmar has provided this feature combination.
  • The new Dutch Star 4325 model will feature “feet” on the pantry cabinets forward of and rearward of the refrigerator.

Chassis Features

  • The standard Freightliner and optional Spartan chassis will offer the Mobile Eye lane tracking and departure warning system as a standard feature.
  • The Comfort Drive comfort control has moved to the “favorites” button on the steering wheel on the Freightliner chassis.  Pressing the “favorites” button will bring up the Comfort Drive menu which can then be manipulated with the “up” and “down” arrows.
  • The Comfort Drive comfort control can now be adjusted by a toggle switch located behind the right side switch pod of the steering wheel on the Spartan chassis.  This allows the operator to control the efforts adjustment directly without searching through the menu on the glass dash.
  • The optional Spartan chassis features a new Valid digital dash.
  • A new nine function center switch pod has been added to the steering wheel on the Spartan chassis.
  • The front axle rating on the 43’ Spartan chassis has been changed from a Reyco brand to Meritor.  This new axle does save some weight, and has a shorter wheel cut.
  • The Optiview dash display programming is new and features new graphics on the FCCC chassis.
  • A new Auto on / off and “Intelligent” high / low beam system is standard on the FCCC and Spartan chassis for 2023.  On the FCCC chassis, this feature can only be disabled through the menu on the glass dash.

Electrical Features

  • The 2023 Dutch Star features a new app that connects to Bluetooth to allow the remote control of numerous features from a personal device.  The systems controlled include the following features:  Interior lights, HVAC, water pump and tank monitoring.
  • A new 10.1” central monitor panel will control the interior lighting and HVAC controls.  This new panel will be located in an exposed location near the middle of each floor plan.  The exact location will vary by floor plan.  This monitor will no longer be in an overhead cabinet.
  • The dash radio, cameras and monitors will power up from both the house and ignition systems.
  • New styles of wall sconces and vanity lights are featured in Dutch Star for 2023.

Exterior Features

  • For 2023, Newmar’s Dutch Star features a new front and rear cap, new exterior graphics and colors (4 to choose from).
  • In response to customer requests for brighter headlights, new Silverstar ultra headlight bulbs are featured for high and low beam lighting.

Interior Features

With the life cycle change of Essex for the 2023 model year, new interior designs include:

  • With the life cycle change of the Dutch Star for the 2023 model year, new interior designs include:
    • New flooring.
    • New backsplashes in the kitchen and bath areas.
    • New bedding style.
    • New countertop edging design.
    • Four new decors called “Alora”, “Bayshore”, “Camelot”, and “Dali” are available on the new 2023 Dutch Star.
  • Continuing with new interior designs on the 2023 Dutch Star:
    • New window treatments.
    • New shower inserts.
    • New art work.
    • New dash panel and skirt colors (see interior design specifications).
    • The interior door handles will have a brushed nickel finish instead of the chrome used previously.

Plumbing and Bath Features

  • New sinks styles are featured in the kitchen and half bath.
  • New plumbing fixtures and bath hardware.
  • New shower diverter finish – gun metal.
  • Shower doors will also have a brushed nickel finish in place of the chrome used last year.

Construction Features

  • New styling of the dash and trim in the driver and passenger areas.
  • New driver and passenger wall consoles.
  • New basement storage door seals replace the old seals, making it much easier to close exterior compartment doors.  NO MORE SLAMMING!!
  • New dash grab handle design near the entry step well.

Windows, Awnings, Vents and Doors

  • The power driver window has been upgraded to a bonded design similar to those used in Newmar’s luxury brands.
  • An egress window has been added to the off door side of the 4369 floor plan due to the secondary egress door in the rear bathroom switching sides.

Option Changes

  • A new option for all electric with a Lithium Ion Battery System is available on Dutch Star for 2023.  This option includes two (2) Lithionics brand 320 amp hour battery packs and surge guard transfer switch.  Installation requires an enclosed battery compartment and will have sufficient room and provision for the dealer to add and plug in a 3rd battery pack of the same model for 50% more power if desired.
  • Because of the change made to the 4071 and 4370 models to include a standard euro-booth dinette, these models will have an exterior entertainment option installed up in the sidewall (instead of down low in an exterior compartment).
  • A new convertible dinette with chairs that face the window or convert to fore and aft seating (traditional) is now an available option.  This new optional dinette includes two fixed and two folding dinette chairs.
  • A new Wi-Fi Ranger “Everest” system (option J347) with “Aspen” Wi-Fi router is the option for internet access for 2023.  This replaces the “Teton” system offered in 2022.
  • The option for 360 degree camera will allow for selectable views and available to view when in reverse.
  • There is a new option for a beverage center with wine cooler and stemware rack on the new 4325 model.
  • On the 4311 floor plan, the queen bed option will include a smaller (new size) 57’ roll in shower and provide more room at the forward side of the bed between the shower and the bed.
  • The option for a solid surface kitchen sink has been discontinued.
  • The Sable wood option has been replaces with a new gray tone wood option named “Driftwood”.
  • The option for queen bed (K030) has been discontinued for 2023.  This feature, however, can be ordered as a special request.
  • The option for 2nd Girard G2000 side awning has been discontinued due to low usage.  In order to get 2 side awnings, the option for 2 “Nova” awnings must be selected.

 Interested in getting on the VIP list for purchase?

2023 Newmar Bay Star RV Tour with Angie Morell

Life Cycle Change For 2023

The Newmar Bay Star, a popular gas coach, is all new for 2023.  It features redesigned front and rear caps, a dash with a completely new look, a taller 84” interior ceiling height, as well as many new interior design elements summarized under “interior features”. 

2023 Newmar Bay Star Motorhome Floor Plans

The Bay Star 3014, 3124, 3401, 3408, 3609, 3616, 3626 and 3811 floor plans have been retained for the 2023 model year.

The 3005, 3226 and 3416 models are no longer available this new model year.

There are 3 new floor plans for the 2023 model year:

Newmar Bay Star 3020

  • The Bay Star 3020 is the new Bay Star Sport 2920 introduced for this new model year with an 84” sofa, larger kitchen and pantry.
  • The front area provides an 84” sofa on the off-door side, with an L-shaped kitchen with countertop extension located on the door side.
  • A booth dinette and pantry is located rearward of the sofa on the off-door side and a large enclosed bathroom with vanity, linen, commode and 40” X 30” rectangular shower on the door side.
  • The master bedroom provides a king bed, larger shirt wardrobe with dresser drawers and TV.

Newmar Bay Star 3225

  • The Bay Star 3225 is the 3226 floor plan offered in 2022 with a full wall slide on the off-door side, making this a roomier floor plan in the bedroom area at the foot of the bed.
  • The front of this model offers a 74” sofa on the off door side, with a booth dinette and “Televator” in a slide out on the door side.
  • A large and functional kitchen with pantry is located mid-coach on the off-door side across from which is a pantry located on the bath wall.
  • The enclosed bathroom is located on the door side mid-coach, and provides a vanity, linen, commode and 40” X 30” rectangular shower.
  • The master bedroom provides a king bed, larger shirt wardrobe with dresser drawers and TV.

Newmar Bay Star 3629

  • The Bay Star 3629 is a new full wall slide, bath-and-a-half model with a patio side dinette.
  • The front of this model offers a 74” Visionary V2 tri-fold sleeper sofa on the off door side, with a booth dinette and “Televator” in a slide out on the door side.
  • A large and functional kitchen with pantry is located mid-coach on the off-door side across from which is a pantry located on the bath wall.
  • Across from the kitchen, there is a cabinet facing into the hallway that can house an optional washer and dryer.
  • In addition, an enclosed half bath is located on the door side mid-coach, and provides a vanity, large linen, and commode.
  • The master bedroom provides a king bed, larger shirt wardrobe with dresser drawers and TV.
  • Finally, at the far rear of this new floor plan is the master bathroom which offers a large vanity, commode, additional linen storage and large 40” X 30” rectangular shower.

Newmar Bay Star 3014

Appliances And Accessories

  • The option for 3 burner cook top with convection microwave oven (J062) is a standard feature for 2023.
  • A new Axxera touch screen dash radio with 10” monitor replaces the Sony radio and Voyager monitor used previously in Bay Star.  This radio allows the customer to display navigation from their smart device onto the monitor.  This feature includes Apple Carplay and is Siruis XM ready.  The Xite radio option (J339) and Sirius radio capability (J621) are no longer available.  This new Axxera dash radio is the standard and only in dash radio offered on the 2023 Bay Star.

Construction Features

  • The interior ceiling height of the 2023 Bay Star has been increased to 84”,
  • Included in the life cycle change, the Bay Star has a newly designed dash and cockpit trim, as well as passenger and driver wall consoles.
  • A swivel has been added to the drop down mechanism used for the front TV on the 3124 and 3811 models.

Cabinets And Furniture

  • With the increased ceiling height, the interior walls and cabinetry are also taller.
  • The 2023 Bay Star offers a new slide-out fascia design, new furniture styling, dinette chair as well as a new cabinet door style.
  • New drawer fronts matching the cabinet door style also provide a new look to the interior of the 2023 Bay Star.
  • Wood paneling has been added behind a newly designed headboard.
  • A manual footrest has been added to the passenger seat.

Chassis Features

  • The 3014 and 3124 models for the 2023 model year will be built on the 24,000 GVWR Ford chassis (instead of the 22,000 GVWR).
  • The 3401 and 3408 models will be built on the 26,000 GVWR Ford chassis (in lieu of the 24,000 GVWR version).
  • The wheelbase on the 2023 Bay Star 3014, 3124, 3401 and 3408 models have been revised to optimize weight distribution on these floor plans.

Electrical Features

  • Multiplex interior lighting controls have been added for 2023.
  • KIB holding tank monitor and sensors are used for 2023.  This KIB system will also include water pump switch and HVAC controls.
  • The dash radio, cameras and monitors will power up from both the house and ignition systems.
  • A new 10.1” central monitor panel will control the interior lighting and HVAC controls.  This new panel will be located in an exposed location near the middle of each floor plan.  The exact location will vary by floor plan.  This monitor will no longer be in an overhead cabinet.
  • In conjunction with this year’s life cycle change, the Bay Star features new wall sconces and vanity lights.
  • The cockpit area provides two wireless phone charging stations for 2023.

Exterior Features

  • For 2023, Newmar’s Bay Star features a new front and rear cap, new exterior graphics and colors (3 to choose from), and a one-piece fiberglass roof with molded radius wraps is a standard feature.
  • In response to customer requests for brighter headlights, new Silverstar ultra headlight bulbs are featured for high and low beam lighting.
  • With an increase in height of the Bay Star for 2023, a new (longer) rear ladder is now standard.

Interior Features

  • Three new décors called “Burma”, “Axis” and “Colusa” are available for 2023.
  • Other new interior designs include new flooring (vinyl tile), newly styled kitchen backsplash, new cabinet drawer and door hardware, new vanity lights, new bedding collection, new art work, new countertop edging and new window treatments.
  • A new 4” solid surface backsplash has also been added to the vanity of half baths and 8” to the vanity of a full bath.
  • The standard vinyl tile flooring will extend into the bedroom for 2023.
  • A new color of ceiling vinyl (Parma) and new dash panel colors are featured in Bay Star for 2023.

Plumbing and Bath Features

  • The 2023 Bay Star offers new kitchen, bath and shower plumbing fixtures, as well as new shower surround design.
  • The sinks in the main and half bathrooms are all new.
  • A new 36” radius shower surround will be used in the 3124 and 3401 floor plans.

Windows, Awnings, Vents and Doors

  • The height of some windows in the 2023 Bay Star has been increased as a result of the taller ceiling.
  • The driver and passenger seat windows have been enlarged to go 5” further back so as to provide better side visibility.

Option Changes

  • The optional cab over bunk (option K930) has been redesigned to extend all the way to the windshield.  This option now provides a larger mattress and the overhead cabinet hangs below the bunks. 
    • This option does not include a TV above the driver and passenger seats. 
    • This newly designed option is available on the Bay Star 3014, 3225, 3401, 3408, 3609, 3626, and 3629. 
    • It is not available on the 3020 and 3124 as it would eliminate the only TV in the living room on these models.
    • It is not available on the 3616 and 3811 as there are not enough seat belts for sleeping positions if added.
  • A new exterior entertainment center (option J405) is available on certain 2023 Bay Star floor plans, and replaces the option offered in 2022.  This option includes a TV, radio and speakers in the sidewall.  Floor plans eligible for this new option include: 3124, 3401, 3609, 3616, and 3626.     
  • A new Wi-Fi Ranger “Everest” system (option J347) with “Aspen” Wi-Fi router is the option for internet access for 2023.  This replaces the “Teton” system offered in 2022.
  • The options for Whirlpool 11 cu. ft. refrigerators with (J210) and without (J200) icemaker will include a 2000 watt pure sine wave inverter with six (6) batteries and includes the receptacles and access ports for C-PAP prep in the bedroom.
  • For 2023, a new wood option “Amaretto Glazed Maple” (Toffee glazed maple wrap equivalent) replaces the “Harbour Glazed Maple” offered in Bay Star previously.
  • A 2000 watt inverter with six (6) 6 volt batteries is a new option (L250).  This option includes receptacles and access ports for the C-PAP prep in the bedroom.                                                
  • New furniture for the 2023 Bay Star include:
    • 74” theater seating is available on select floor plan.
    • New incliner sofa in 74” and 84” lengths.  This new incliner will work on the 3225, 3401, 3408 and 3629 models.
  • The following options have been deleted from the Bay Star brand for 2023:
    • The option for Wi-Fi Ranger “Teton / Poplar” combo (J340) has been obsoleted.
    • The option for free standing dinette table w/ chairs (K779) has been eliminated.
    • The option for buffet dinette w/ free standing table (K802) has been discontinued.

 Interested in getting on the VIP list for purchase?

2023 Winnebago Era

The 2023 Winnebago Era is a versatile ride that transforms perceptions of what a Class B van can offer. While the Mercedes Sprinter chassis is the same reliable foundation as last year’s model, the 2023 is loaded with features and details, large and small, to maximize efficiency and bring convenience to every step of your adventure.

From the MBUX® Touchscreen Multimedia Infotainment Center with navigation, interactive voice interface, Wi-Fi hotspot and rear camera to safely guide you to your destination, to the 24″ HDTV with swivels for outdoor viewing for when you’re there, no expense has been spared to bring you the ultimate in Class B travel experience.

By removing the rear sofa in the 70A, the two twin beds are easily converted into a huge sleeping surface, complete with Froli Sleep System, offering a superior night’s sleep. Storage is abundant throughout the Era, so you won’t have to worry about cutting items from your packing checklist. Throw in a flip-up countertop extension, microwave oven, dual-burner range, Norcold refrigerator/freezer combo and stainless steel sink with folding faucet and you’ve got the ultimate Class B companion to take you to your dreams and beyond – in superior comfort and style.

Learn more about upfitting and custom ad-ons to Class B vans HERE. And have a look at our current inventory of Winnebago Class B RVs.

2023 Winnebago Travato

Discover the diverse capabilities of the all new 2023 Winnebago Travato. This year’s model comes in four floor plans: the 59G and 59GL, and the 59K and 59KL.

Both the 59G and 59GL offer similar layouts, complete with independent lounge and bedroom areas and large Murphy+ bed. The 59GL further distinguishes itself with the Pure3 Energy Management System. This powerful lithium energy system offers clean, comfortable and most importantly, quiet energy to the vehicle. This means you could be cooking dinner and watching TV with the A/C running and nobody outside will be able to tell you’re inside living your dream!

The major differences in the 59K and 59KL models are the placement of the bathroom, kitchen and two twin beds that replace the Murphy+ bed. Like the 59GL, the 59KL offers the same powerful Pure3 Energy Management System.

Like many Class B vans, the Travato is perfect as an everyday vehicle and for extended off-grid excursions alike. Built atop the Ram ProMaster® chassis, the Travato is driven by a 280-hp, 3.6L V6 gas engine with 9-speed automatic 62TE transmission. In addition to its ample power and fuel-efficient systems, this rough n’ ready rider features a ton of cab conveniences, safety features and top-drawer tech. 

Learn more about upfitting and custom ad-ons to Class B vans HERE. And have a look at our current inventory of Winnebago Class B RVs.

RV Tire Safety

Are Your RV Tires Safe? Here Are Five Ways to Identify Tire Health

Here’s an understatement: the health of your RV’s tires is essential. A single flat tire can utterly derail an RV trip. And that’s BEFORE you get into the dangers and hassles of dealing with a tire blowout on a crowded highway.

While there’s always the slight risk of a freak accident, tire health is an area where a little mindfulness goes a long way. By taking a few basic steps to check your tires before leaving for a trip, you can avoid dealing with any unwanted surprises along the way. 


Let’s Start With the Basics: Check Your Tire Pressure

It’s a good idea to check the pressure on ALL of your RV’s tires at least once a month. At the very least, you’ll want to do a quick pressure check the day before you leave on any new trip. 

Different RVs can come with varying recommendations for tire pressure, so it’s a good idea to confirm beforehand. This information is usually written inside your motorhome’s owner’s manual or doorjamb. As a note, the heavy-duty pressure gauge you’ll need to check RV tire pressure is different from the ones commonly used for regular cars. 


Check Your Tire’s Age

Every RV tire manufactured after the year 2000 will have an identification number you can use to check its age. To determine the age of your tires, keep an eye out for a small illuminated stamp near the outside rim. The last four digits will be the tire’s issue date. 

For example, if the number on your ties ends with 3517, you know they were made on the 35th week of 2017

While there are no standard guidelines for when you should replace tires, knowing their age helps you make informed decisions when you prepare for your next adventure. Old age on its own isn’t a warning sign, but it can make other ones significantly spookier. 


Take a Look at the Tread Bars

Tread bars are a series of small ridges inside your vehicle’s tires that can be used to measure their health. Each one is set inside a tire’s deepest grooves, and giving it a quick glance can tell you valuable information about your tires’ remaining lifespan. 

If the tread bar on a tire is worn down completely, it’s a good idea to replace that tire as soon as possible. Additionally, uneven wear on these bars can indicate a car’s alignment is off, and the tires are making uneven contact with the road. 


Use the Penny Test

If you need a more hands-on approach in checking your tire health, consider giving your tires the penny test. Simply hold a penny upside down and gently press it into the tire treads. If your tires are healthy, the top half of Abraham Lincoln’s head should be covered.

Seeing the entirety of Lincoln’s head is a reliable sign your tires have worn down and should be replaced soon.


When in Doubt, Visit the Pros

Any uncertainty about your tire health can always be directed to the professionals. It can be challenging to tell the difference between a worn-down and worn-out tire, and it’s an area where you really don’t want any unpleasant surprises on the road. 

Thanks to RettroBand® Wheel Enhancement, you can drive your motorhome with peace of mind knowing you have protection should a tire blowout occur. Check out this blog post to see the RettroBand product in action.